Yesterday I was trying to figure out what I was going to do with a lot of leftover rope, so I decided to try to make a nautical rope wreath. I had six packs of 9.5′ nautical rope from Dollar Tree, so I tried to figure out how I could make them into a wreath. I tried wrapping them around a small 10″ styrofoam wreath form, but I didn’t like the look. There have been some braided rope wreaths on Pinterest, so I decided to give it a go in my own way.

I braided three of the packages together in one rope, but I didn’t like the look. It looked cheap. My plan was to use wire forms that I had somewhere in my craft room, but they were no where to be found. I saw a few braided wreaths that were glued onto a flat wood form. I thought I’d try to make one of my own and it worked out! Today I am sharing my tutorial with you, and following that I will have a devotion on “seas-ing the day.”
To make a nautical rope wreath you need (everything can be bought from Dollar Tree unless noted):
Disclosure: I am a participant in the Amazon Services LLC Associates Program and the Dollar Tree Affiliate Program, affiliate programs that allow me to link to the products that you can use to make this project quickly and easily. If you purchase any of these products I may receive a very small commission at no cost to you! That commission helps me continue to bring these great decor DIYs, free printables, and all of the other goodies on this site to you. Thanks so much for your support!
- 6 packs of nautical rope- This roll of 100′ sisal rope will be more than enough.
- foam board or cardboard
- bowl or circle as large as you want your wreath to be (you will trace it on the foam board)
- hot glue gun and glue sticks
- regular glue stick or liquid glue
- scissors
- clear tape
- cardstock (DT does have them now!)- I used navy and white.
- craft knife
- seashells (optional)
- twine
- anchor wood shape or other nautical shape (or you can use your Cricut [Maker 3 or Explore 3] to cut one, or a stencil)
- letter stencils or letter stickers
- update- someone asked about adding real items to the wreath. That’s perfectly ok too. You might like these resin starfish to add.)

Prep the Ropes
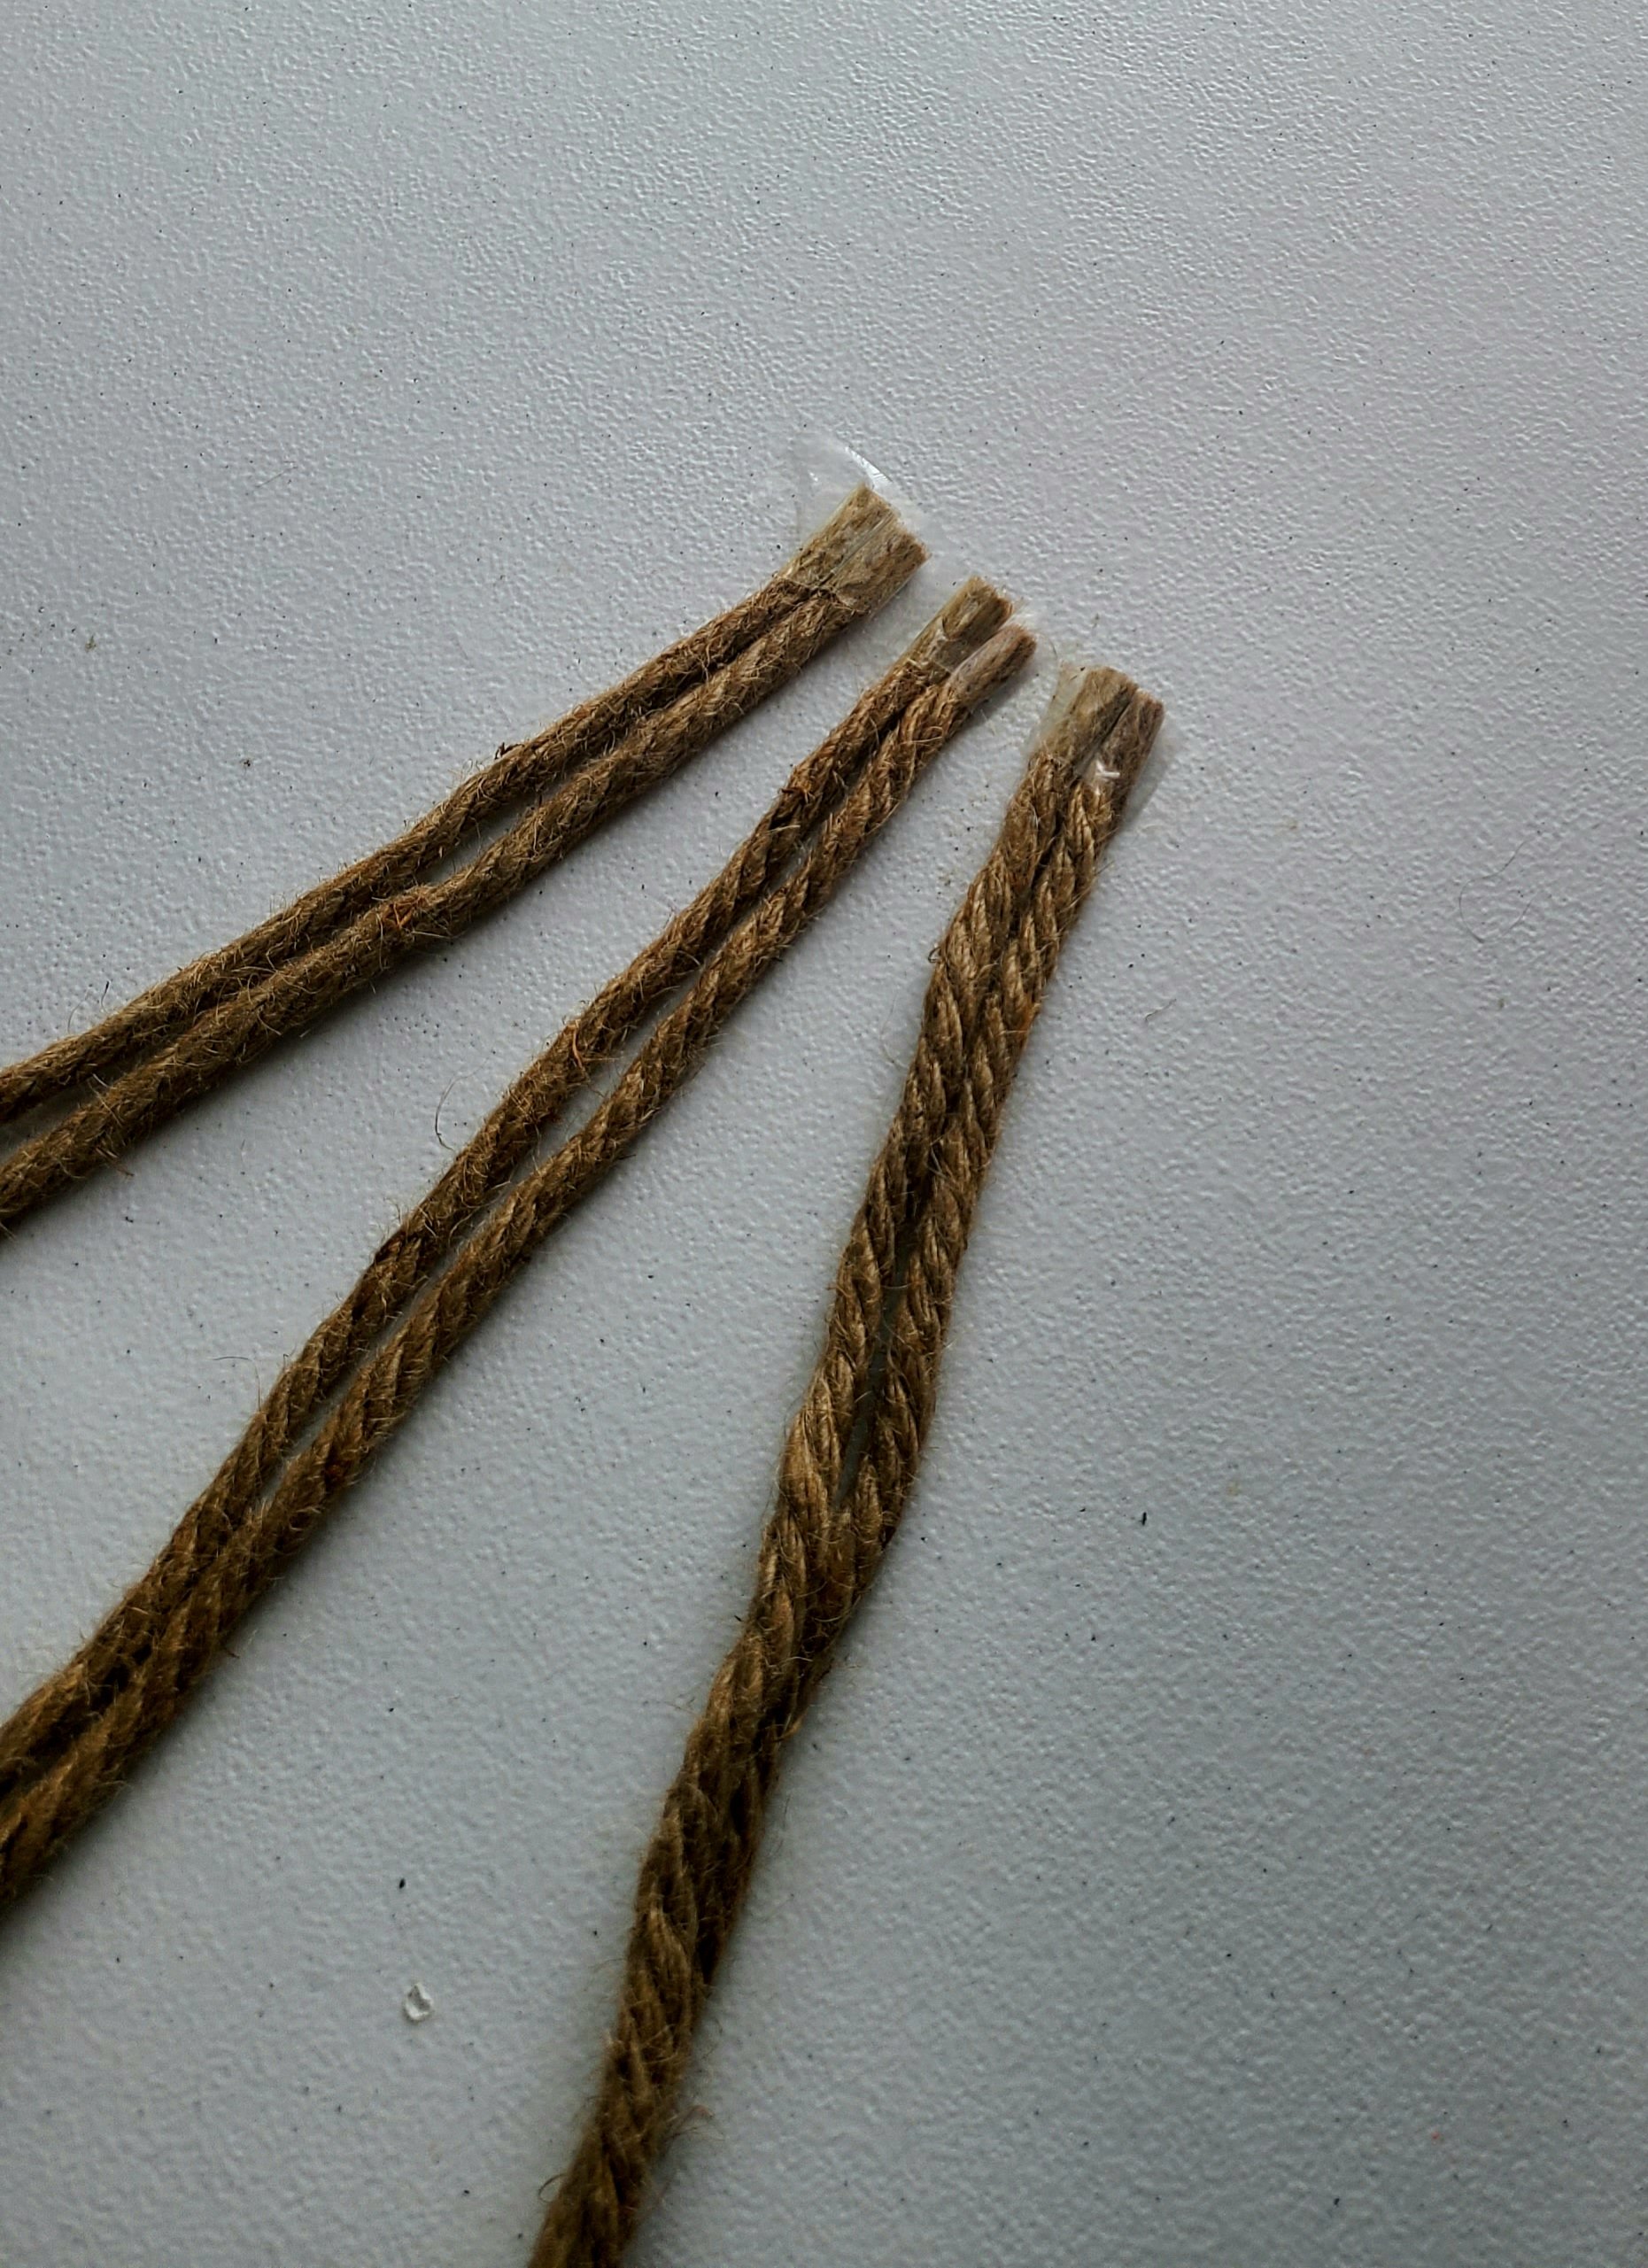
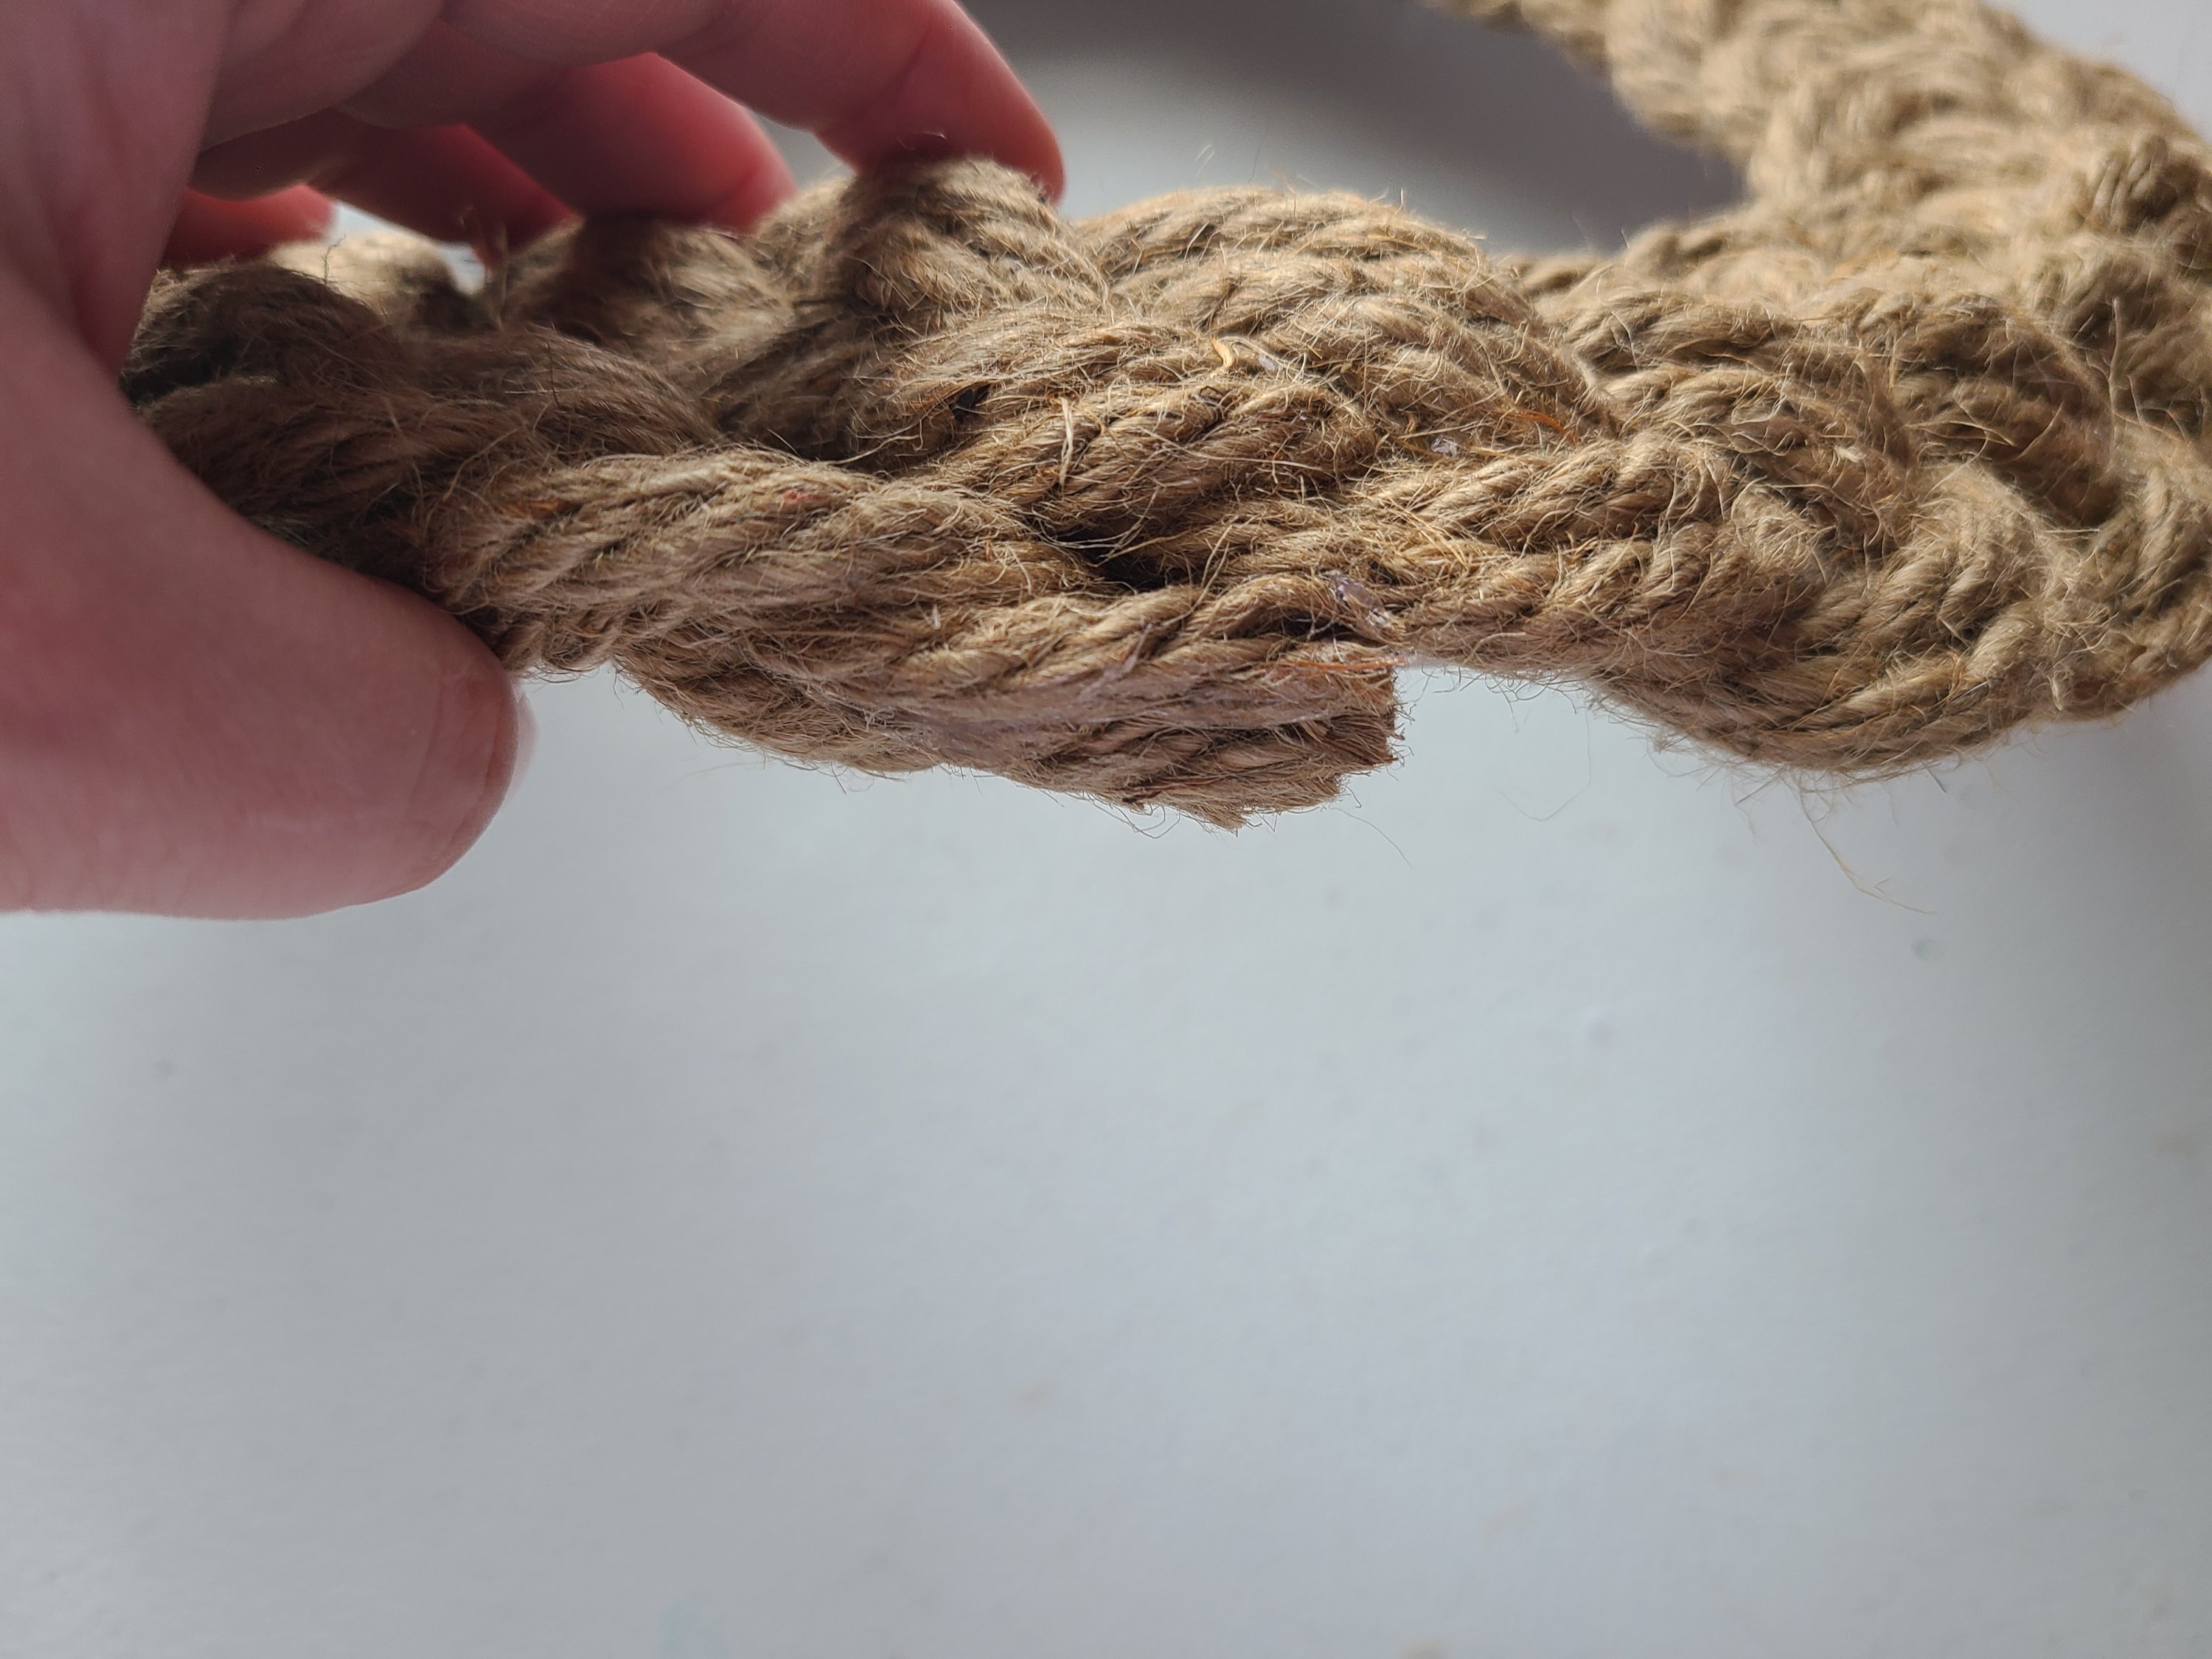
You’re going to use two ropes for each of the three lines. Unpackage and uncoil the ropes. Lay two ropes on your table or desk and tape the top of them to the table touching each other. Take two more and tape them just an inch or so away from the first. Next lay out the last two and tape them right next to the others.

Begin Braiding Rope for the Wreath
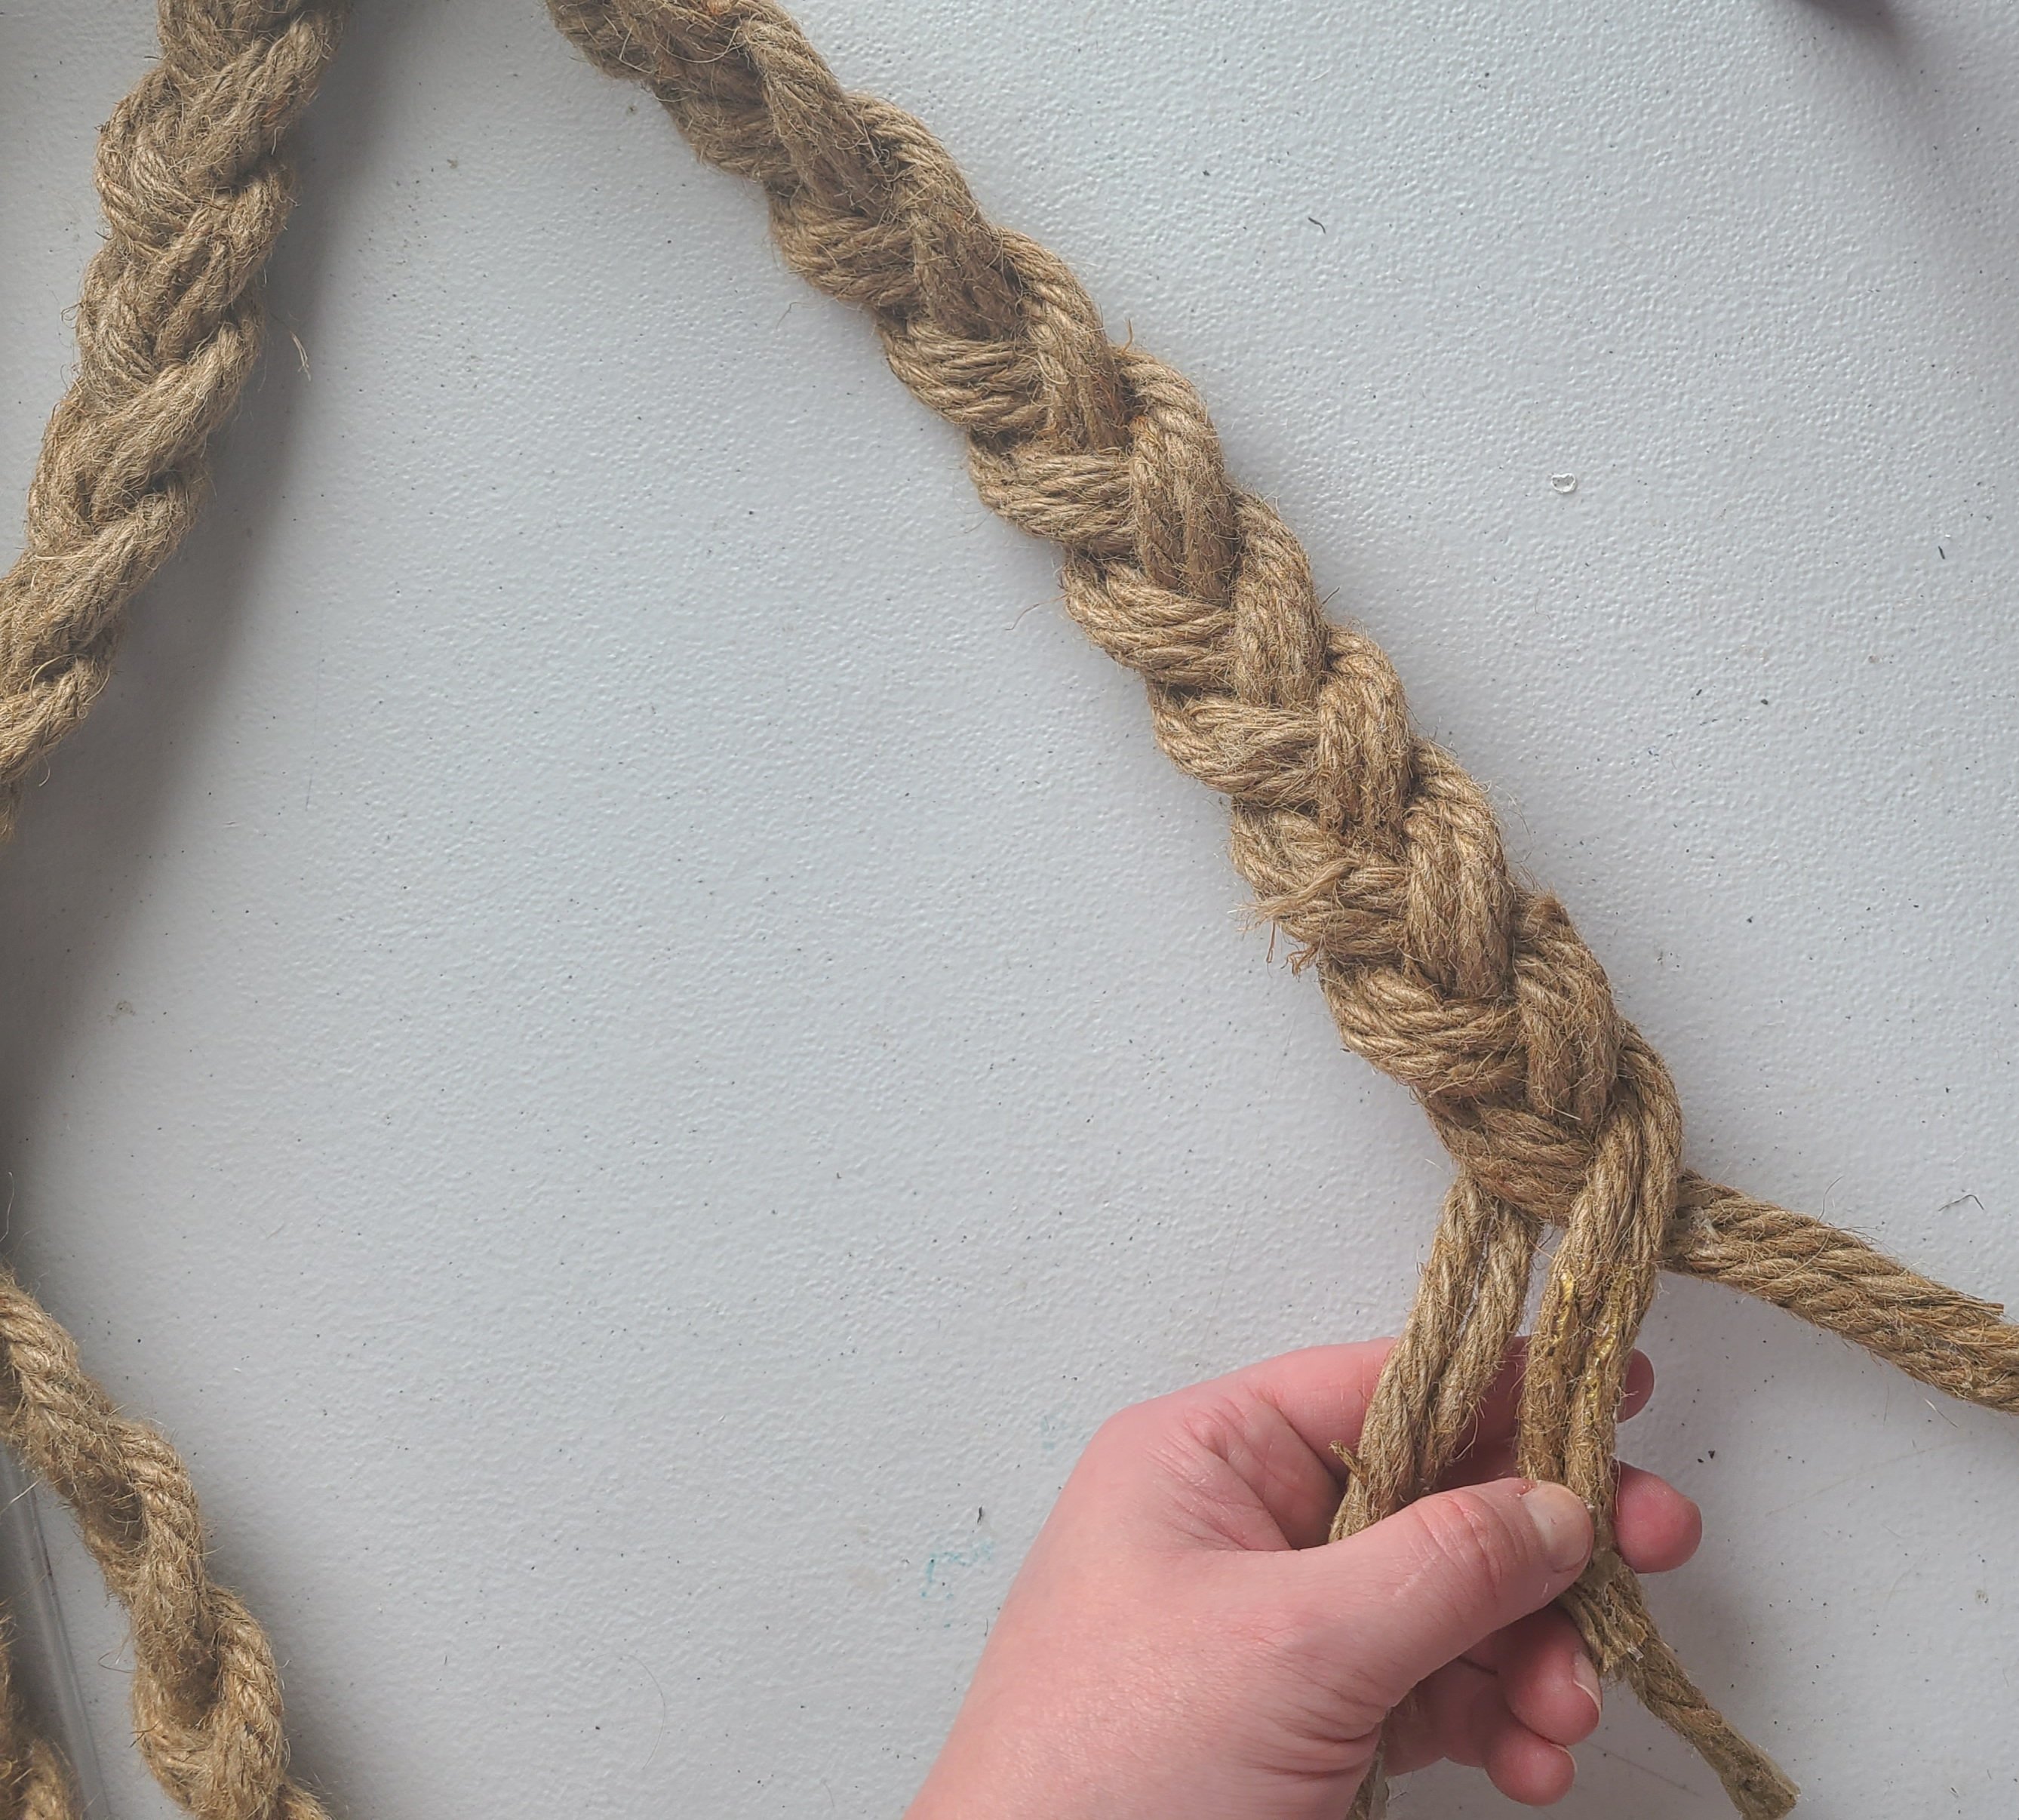
Now braid the rope just like you would your hair. Take the two ropes on the left and lay them over the middle two. Next take the two on the right and lay them over the middle ones. Continue this all the way to the end of the ropes. As you are braiding, make sure that you do not let the ends tangle as you go. When you place one over the other, move the entire ropes so they don’t knot up at the ends. Be sure to make the braid tight so that the coastal rope wreath looks neat.


As you get close to the end of the ropes, place hot glue in between each of the groups of two ropes. Hold them together for a moment to let the glue dry. Glue the left two together, then the middle two to each other, then the right two to one another. Don’t glue all together yet.

As you make the last few passes over the ropes, you will add hot glue to the top of the ropes that another two will lay on top of. For example, if your last three moves are left over middle, place a line of hot glue on the middle two ropes then press the left ones over it. Then place hot glue on top of what is now the middle two ropes and pass the right over the middle and press them down on the hot glue. Finally add hot glue on the middle two and pass the left over it and down on to the glue. Now the end of the braid should be all glued together.


Now cut off any extra, uneven ropes that are left.

Add clear tape (like gift wrapping tape) to the ends of the ropes to keep it from unraveling.
Cut a Wreath Base
You can use cardboard or a piece of foam board to make a base for your wreath. If you have an old box laying around, that would be perfect. I had a box, but when I laid it out flat, it wasn’t big enough for the wreath I had planned. I had a piece of foam board laying around for the next time I wanted to make a farmhouse sign. It was perfect for a base.
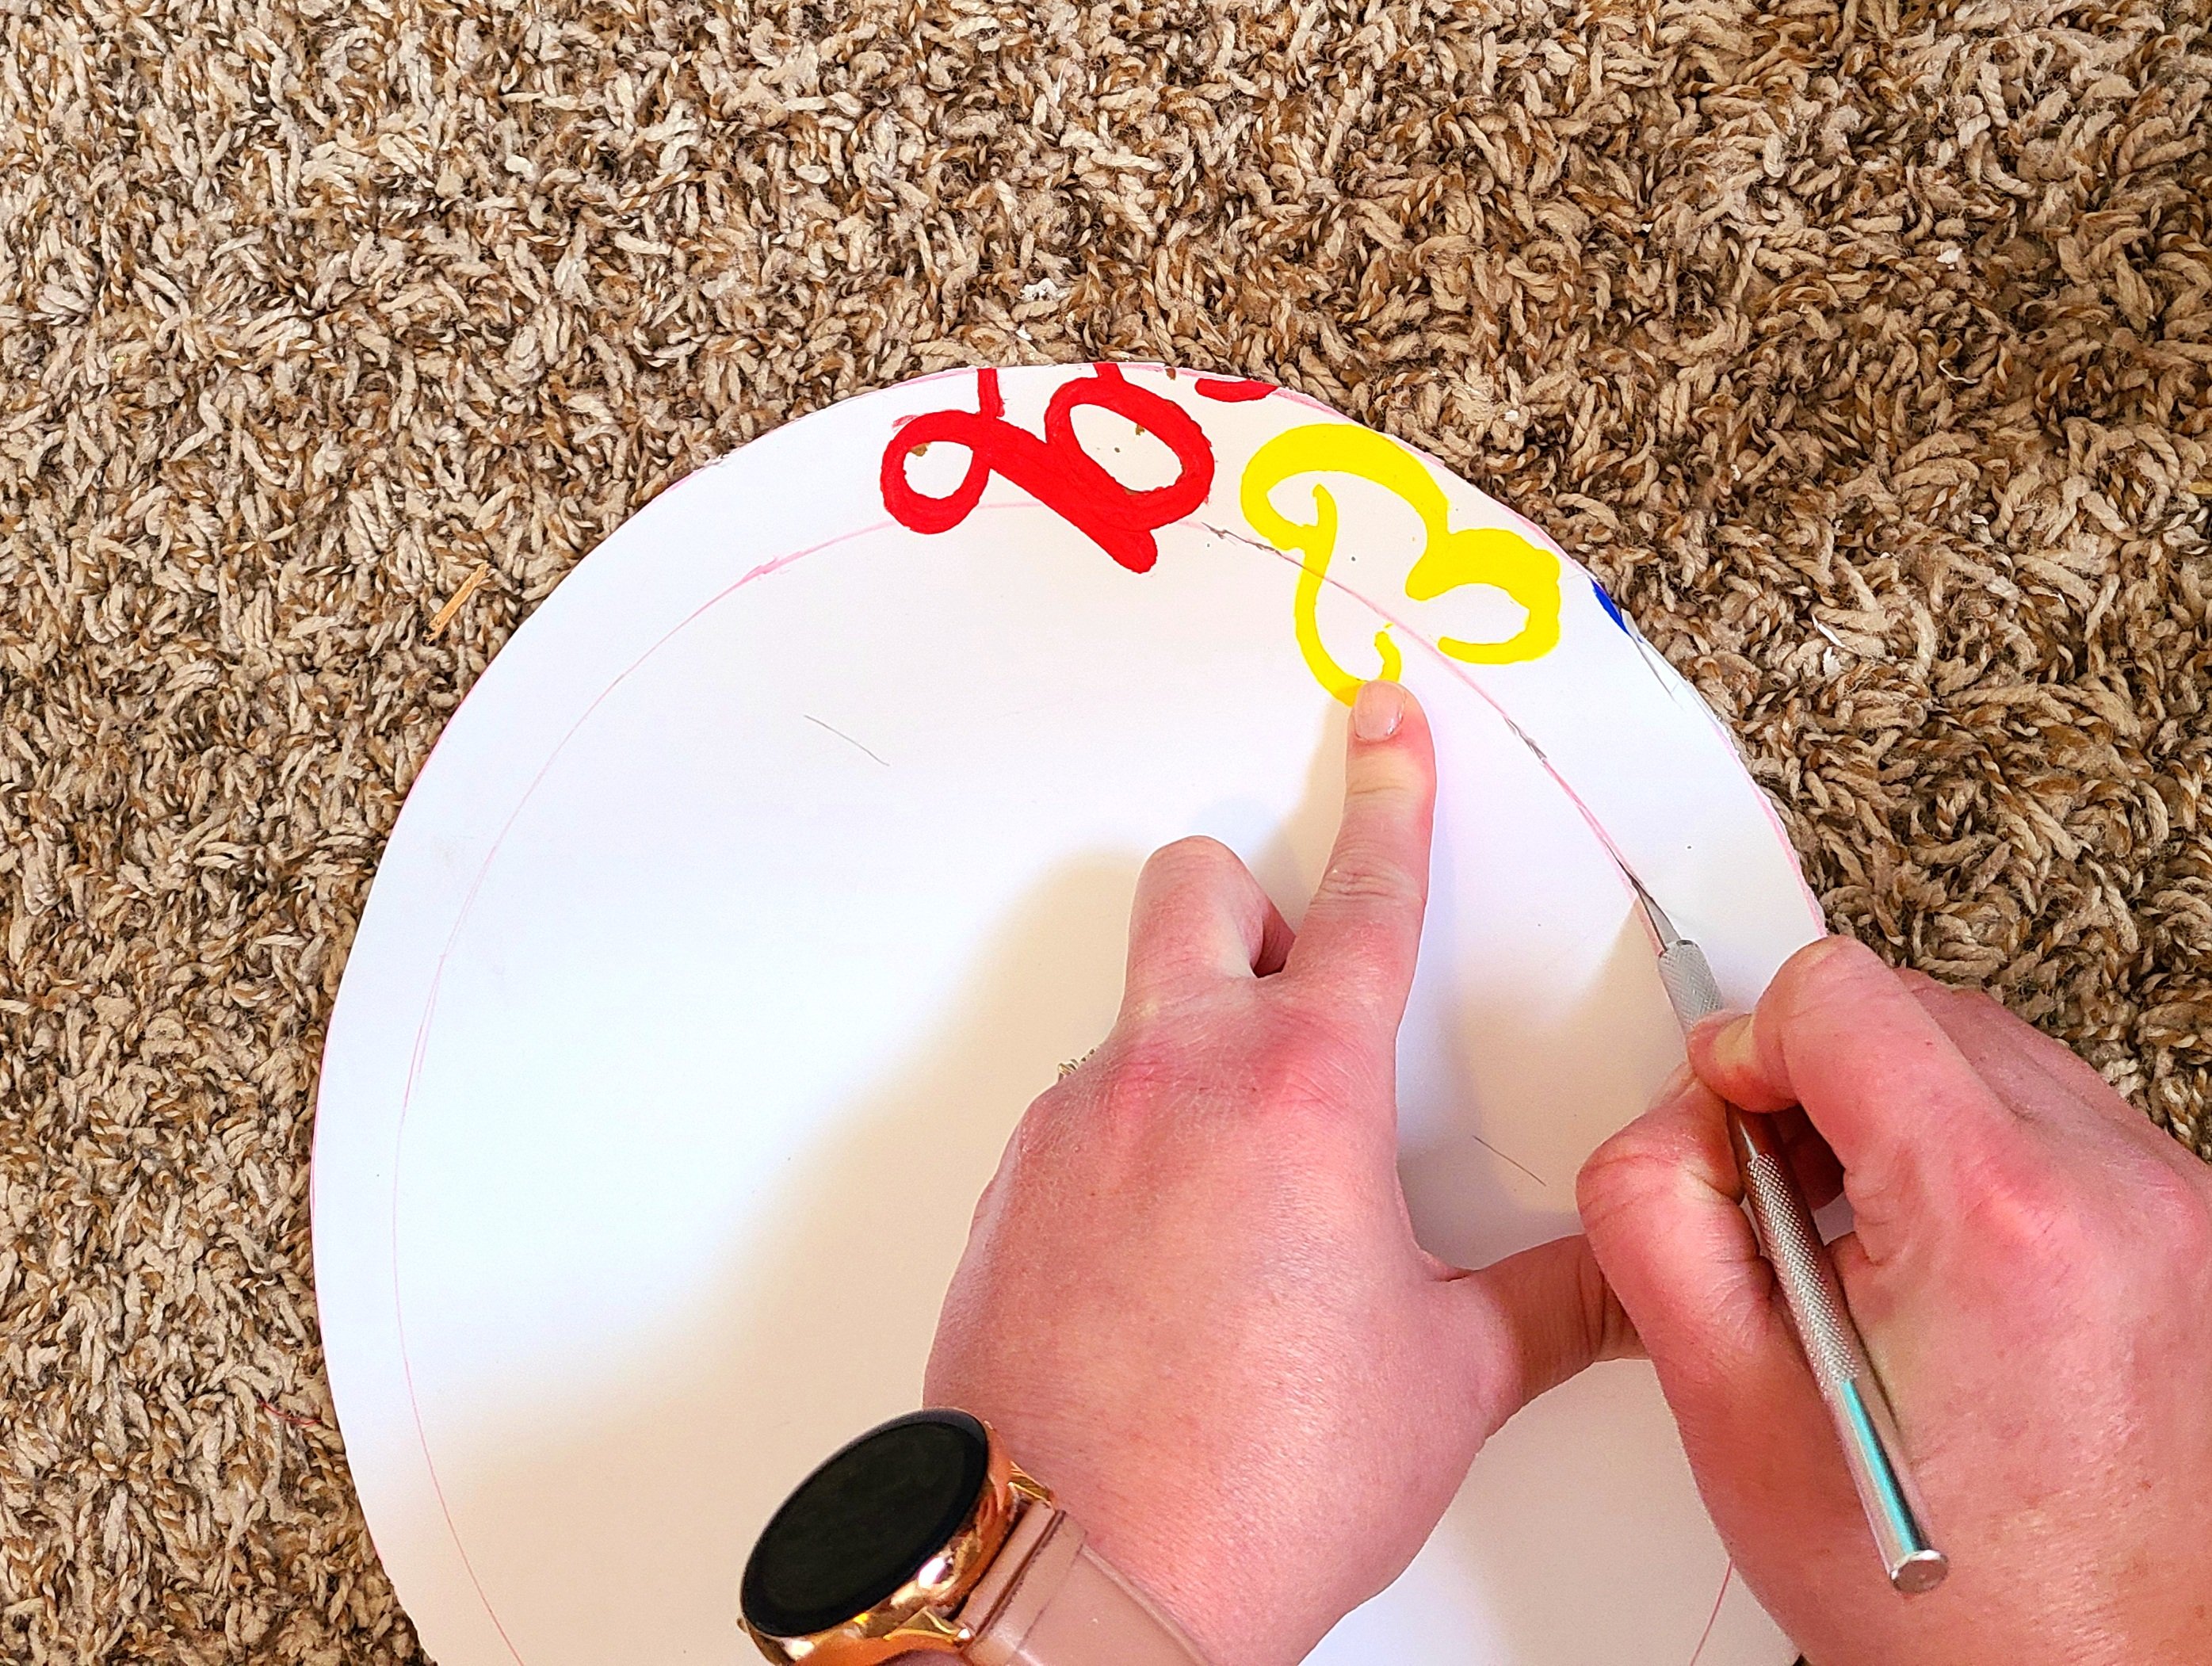
I got a large mixing bowl that was 12″ across. Find something round that is as wide as you’d like your wreath to be. Your wreath will extend about an inch and a half beyond the base. Place your bowl upside down on the board and trace a circle around it. Measure about 2″ inside that circle, and trace another one inside of it.

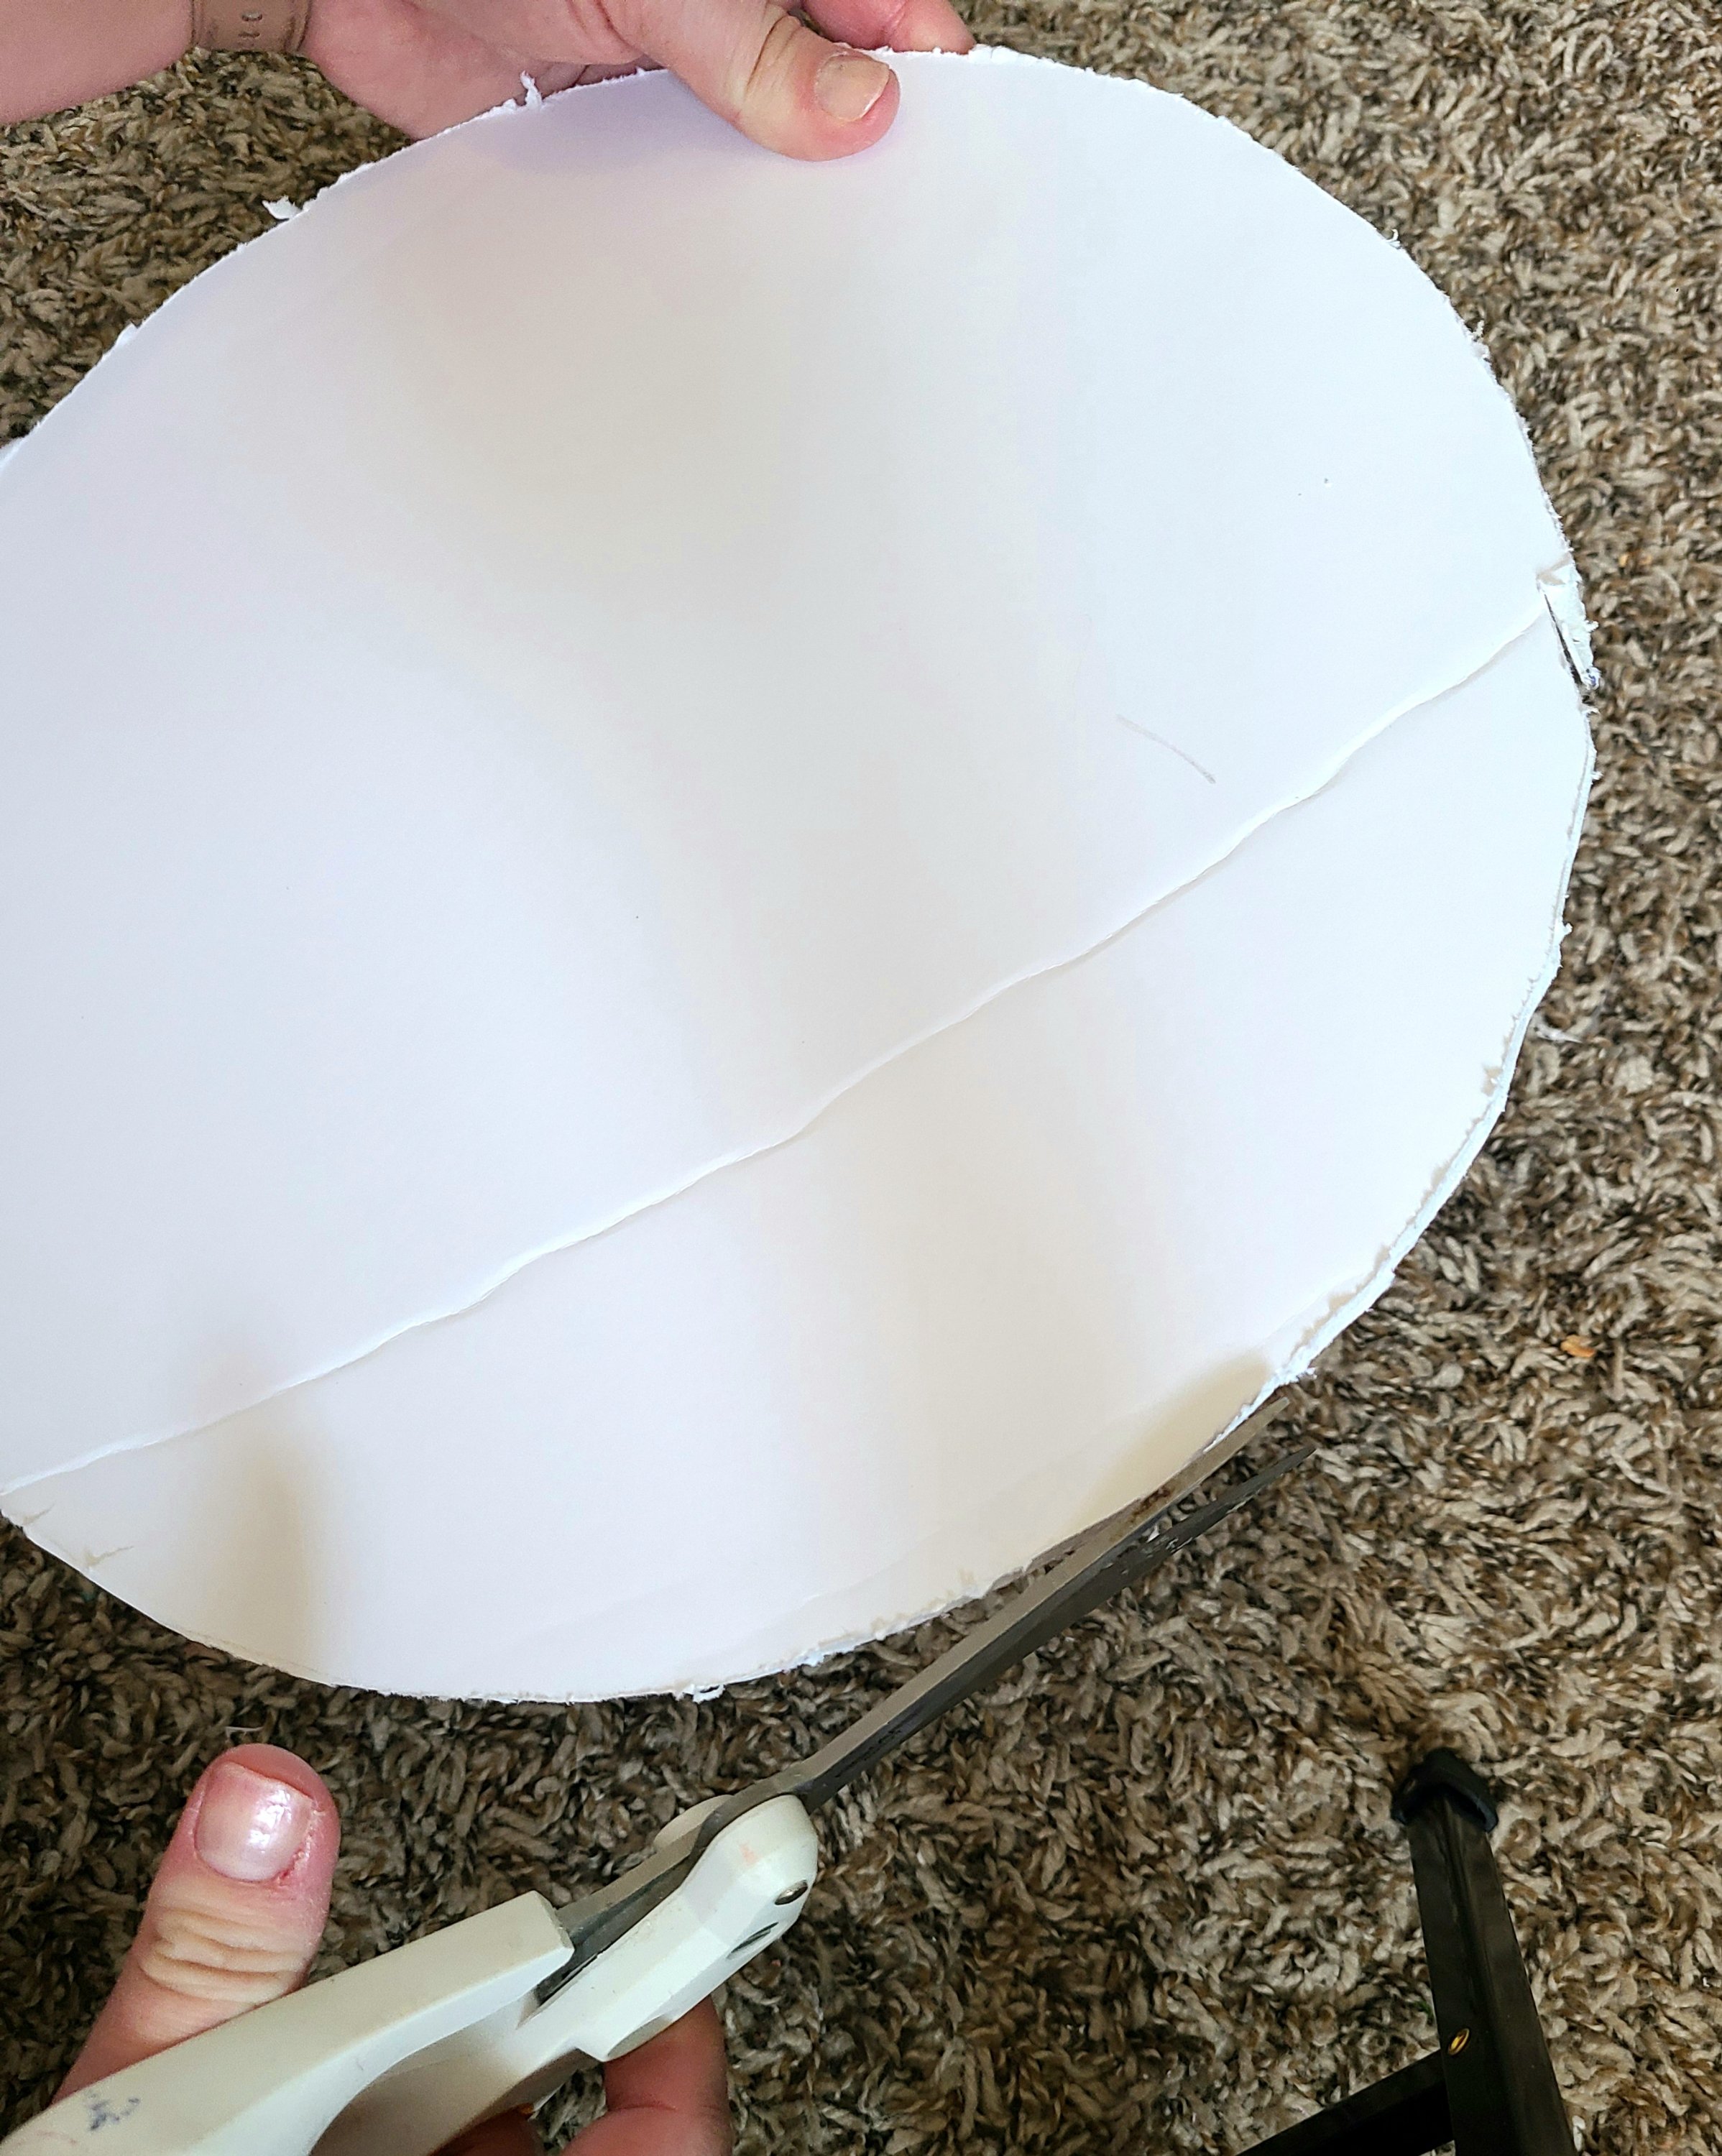
Use a craft knife (an Exacto knife) and cut along the line. When you have cut the circle out, you may want to smooth out any rough, uneven edges using scissors.
Now use the craft knife again, and cut the inner circle out. This will leave you with about a 2″ wide open circle.

Wind the Braids around the Rope Wreath Form
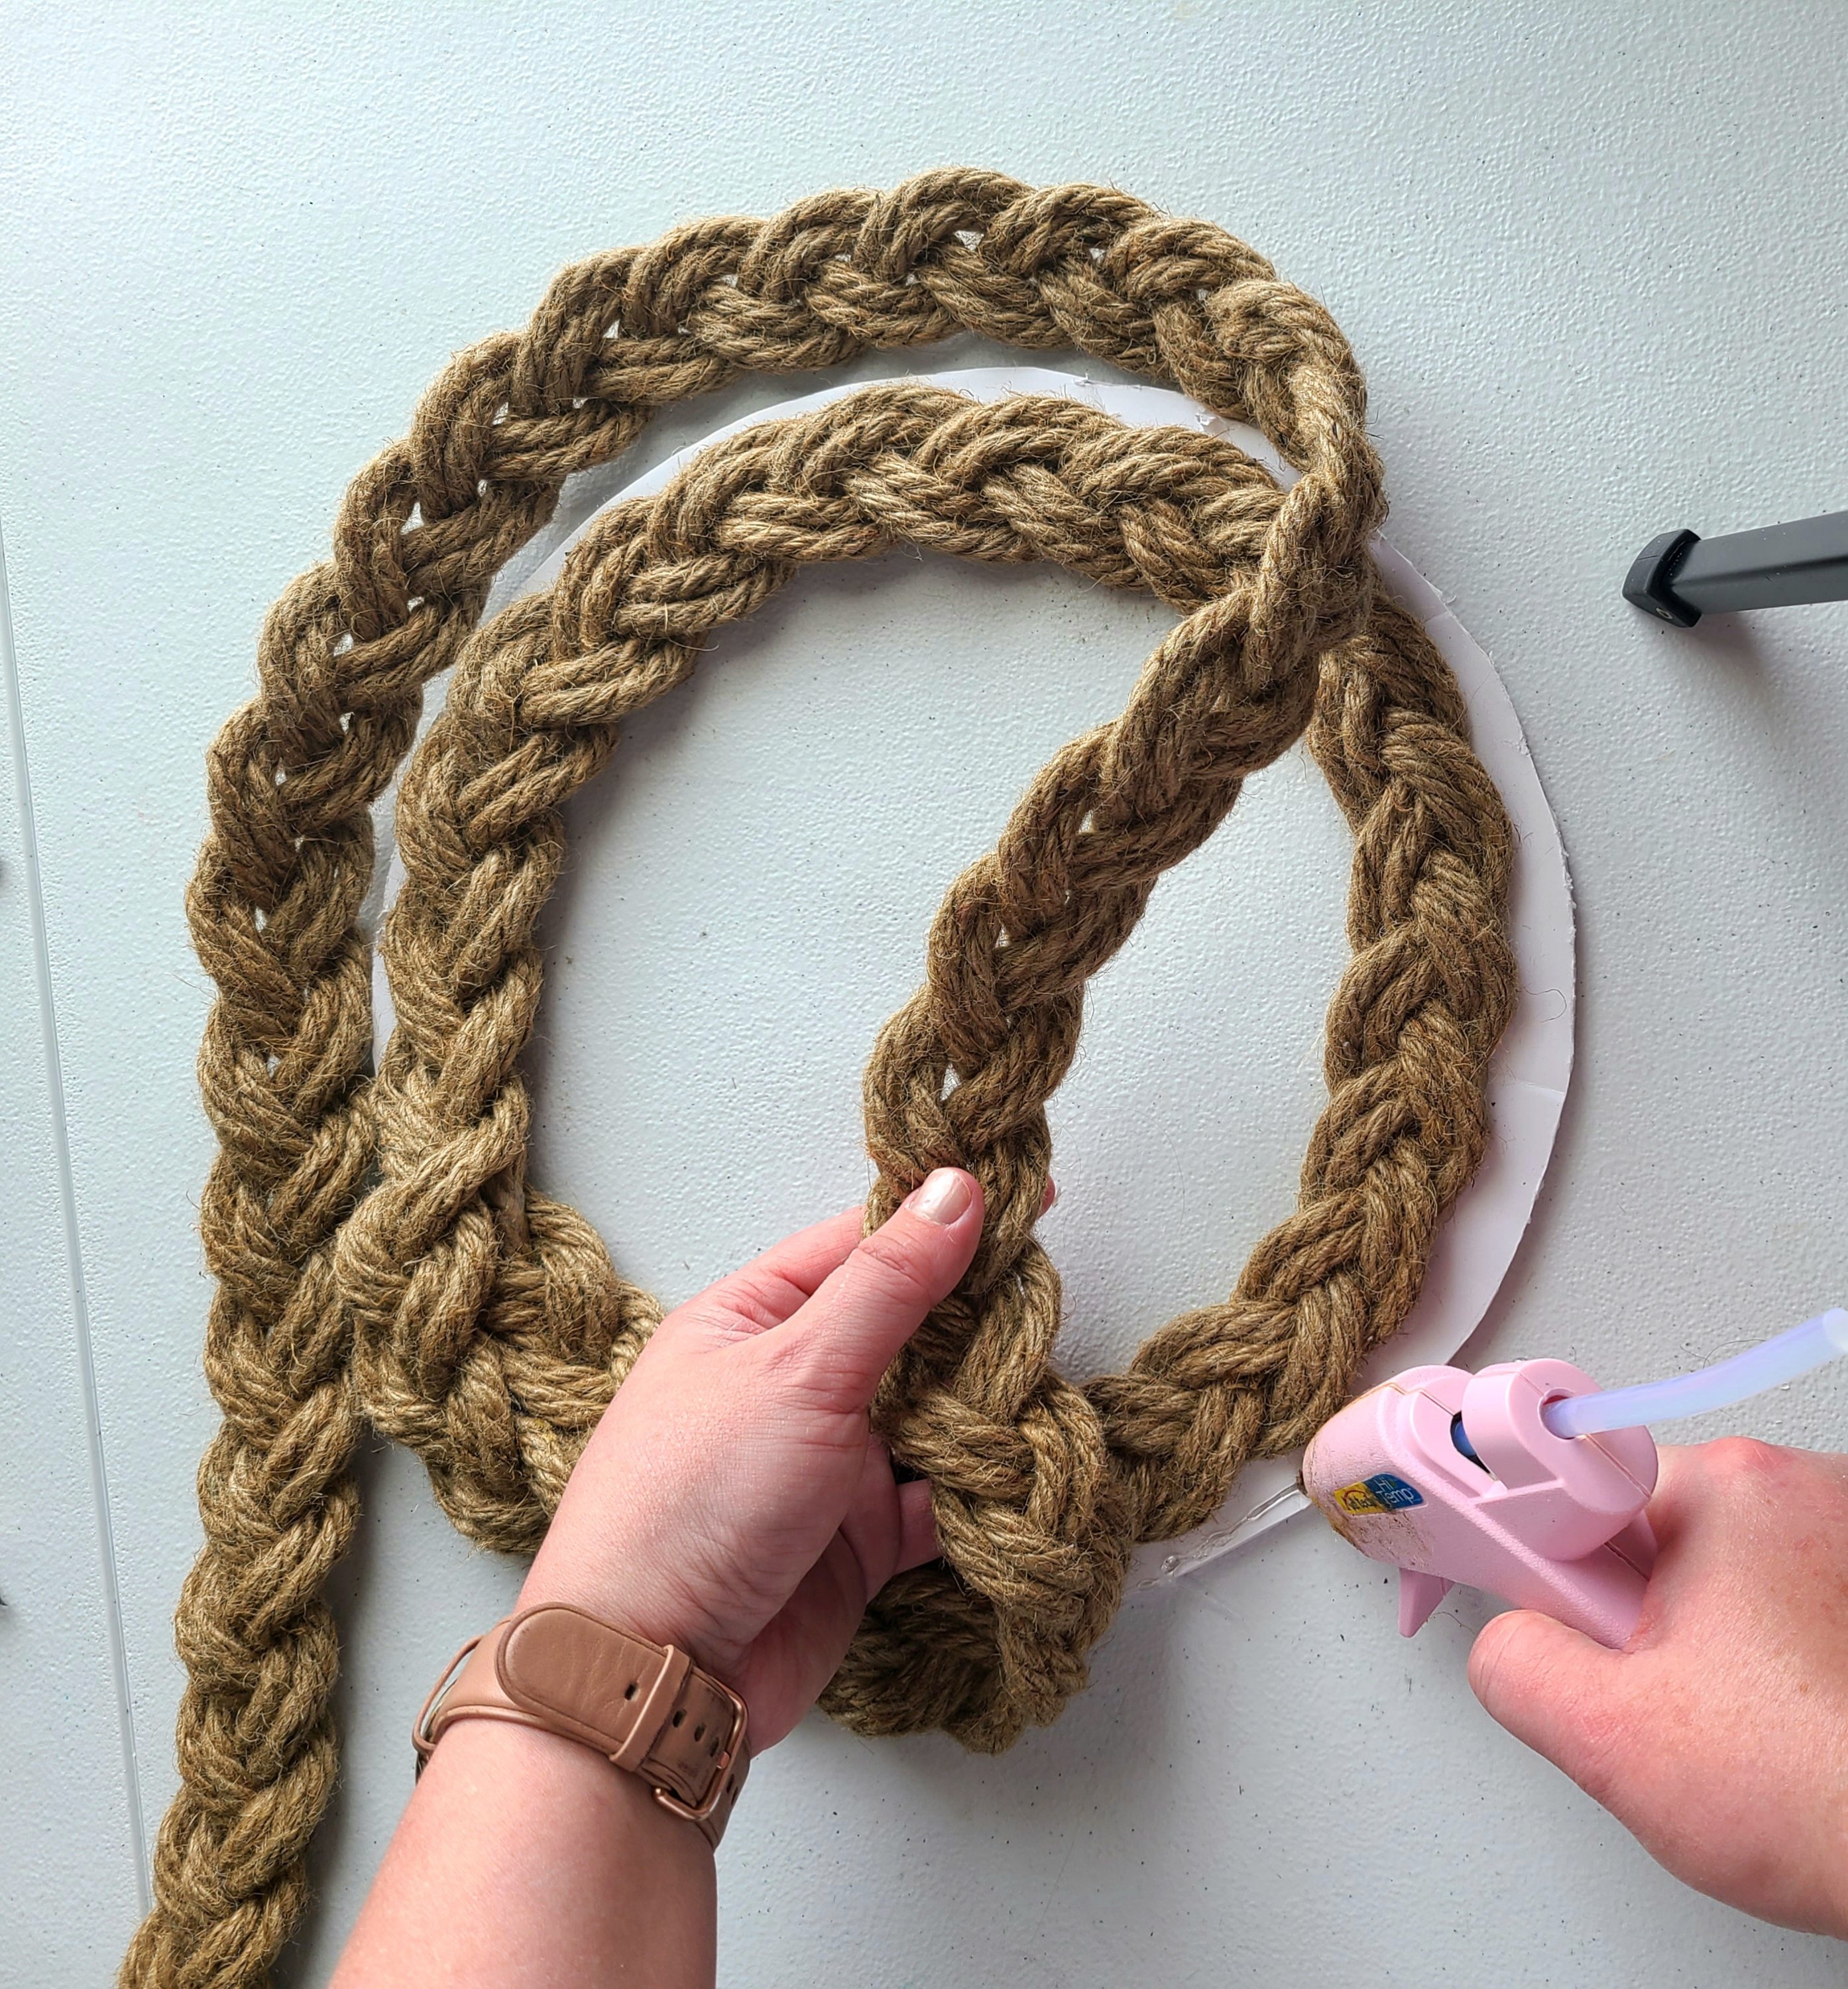
Lay your braid on the edge of the form to start the rope wreath. You want a little piece of the form left open to lay the next layer on. My form was uneven, but if you made yours exactly two inches, glue the first section on about an inch, leaving an inch open. It won’t matter if it’s uneven. The first part of the wreath will hold up the entire thing.
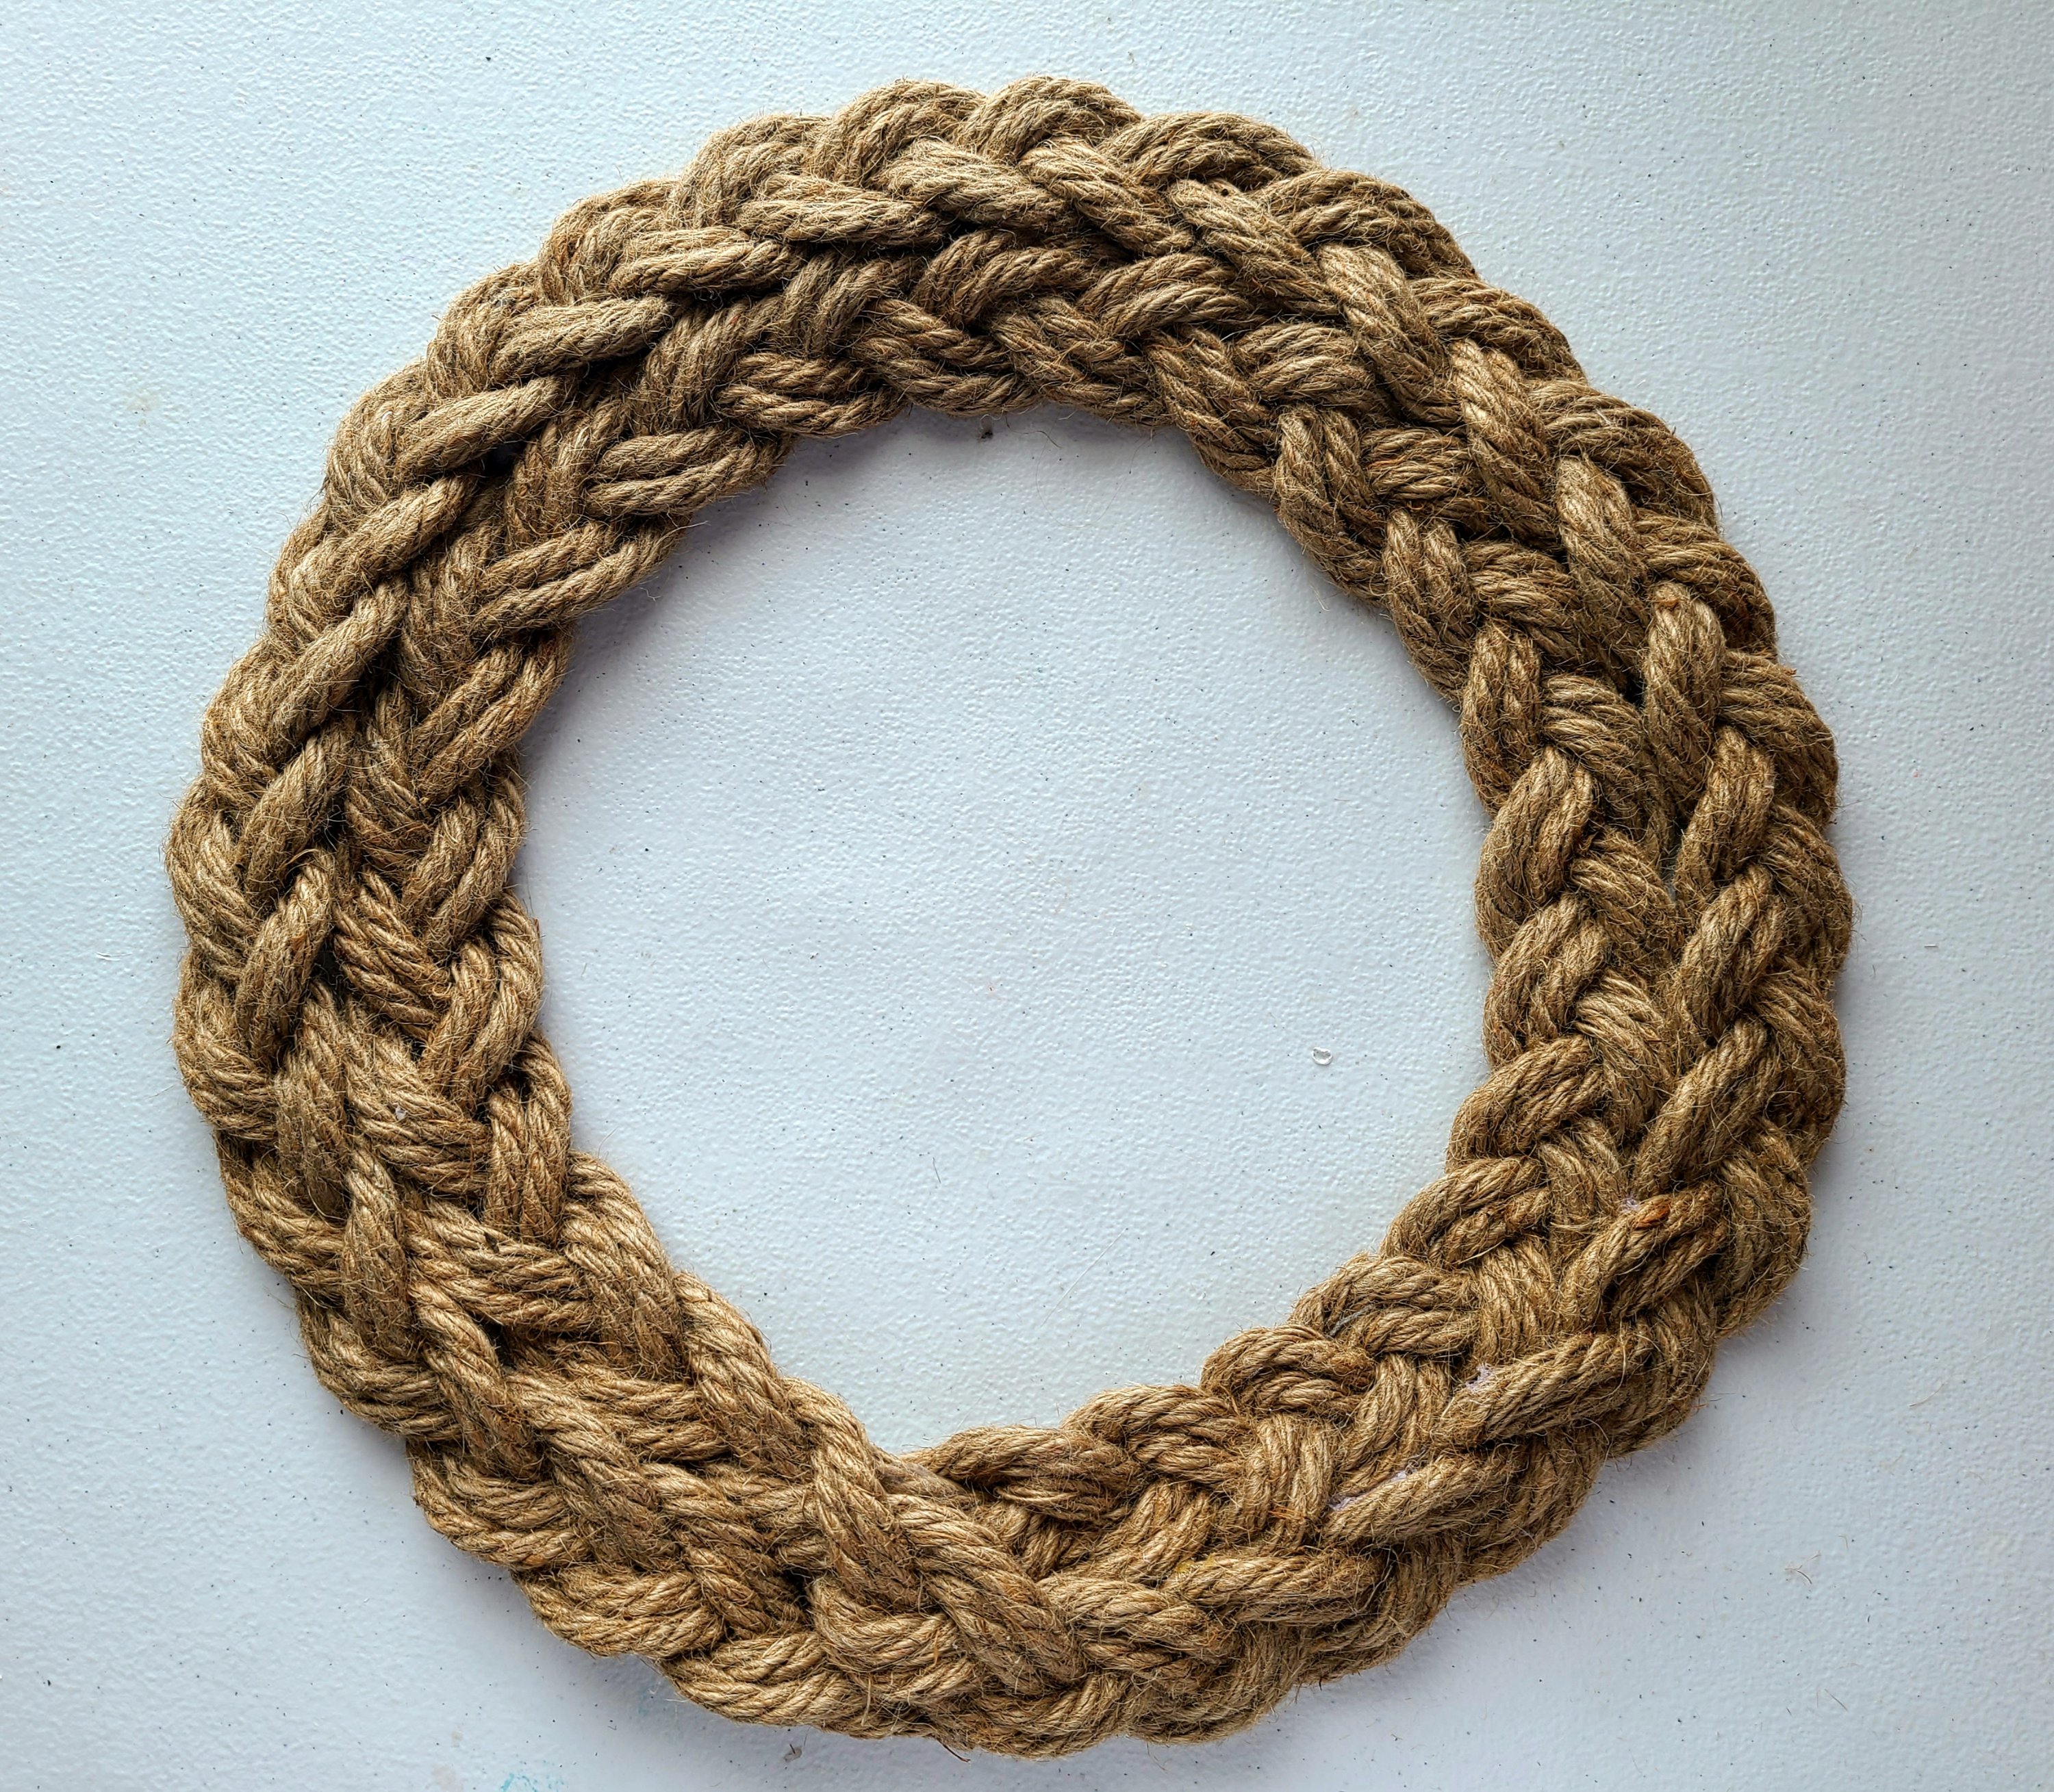
Squeeze hot glue along the form a few inches at a time, and lay the braided rope on top of it. Continue this way until you have a full circle on the form.


Add hot glue on the part of the form left over. Put the rope on top start of the first section of the wreath so you can no longer see that part. Then start adding the rope as a second layer. Where parts of the form are skinnier, you may want to add hot glue to the first layer of the rope. You want the second section of the rope, to overlap the first layer about half inch to an inch.

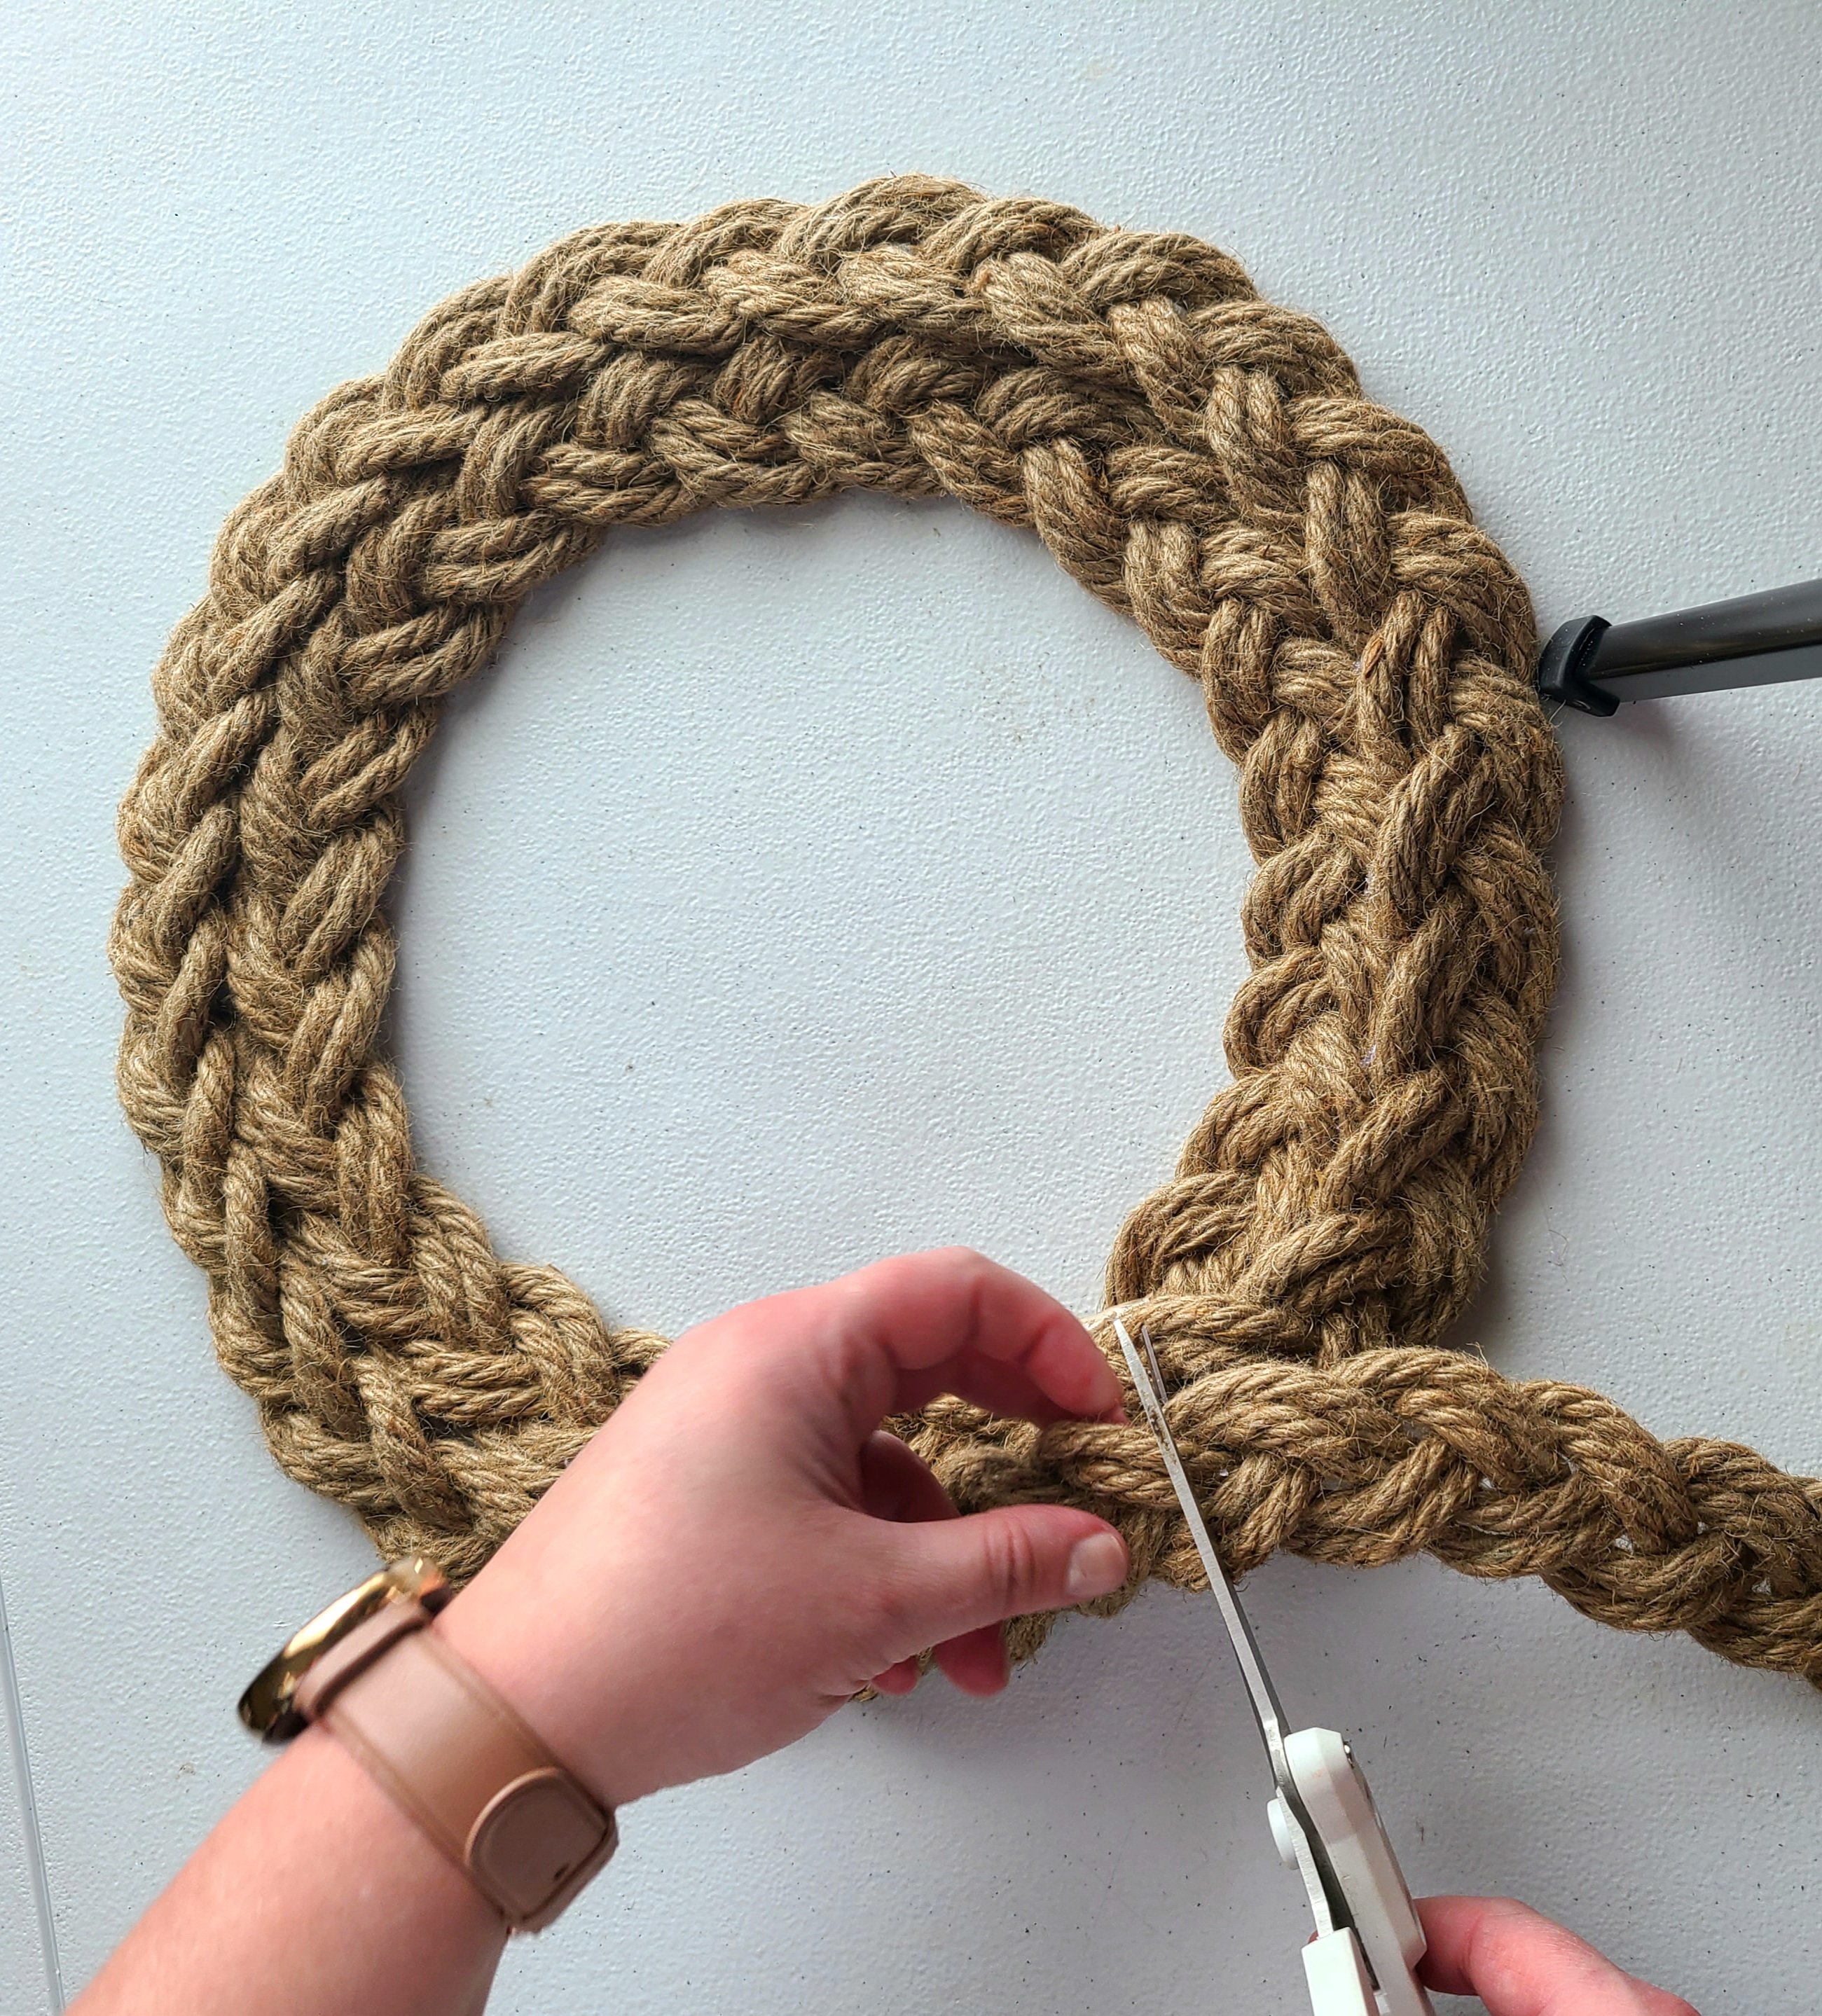
When you get back to where you started on the nautical rope wreath, cut the braid off with about 2″ of it going past the beginning. Put hot glue into the six ropes just as you did when you ended the braid at the beginning.


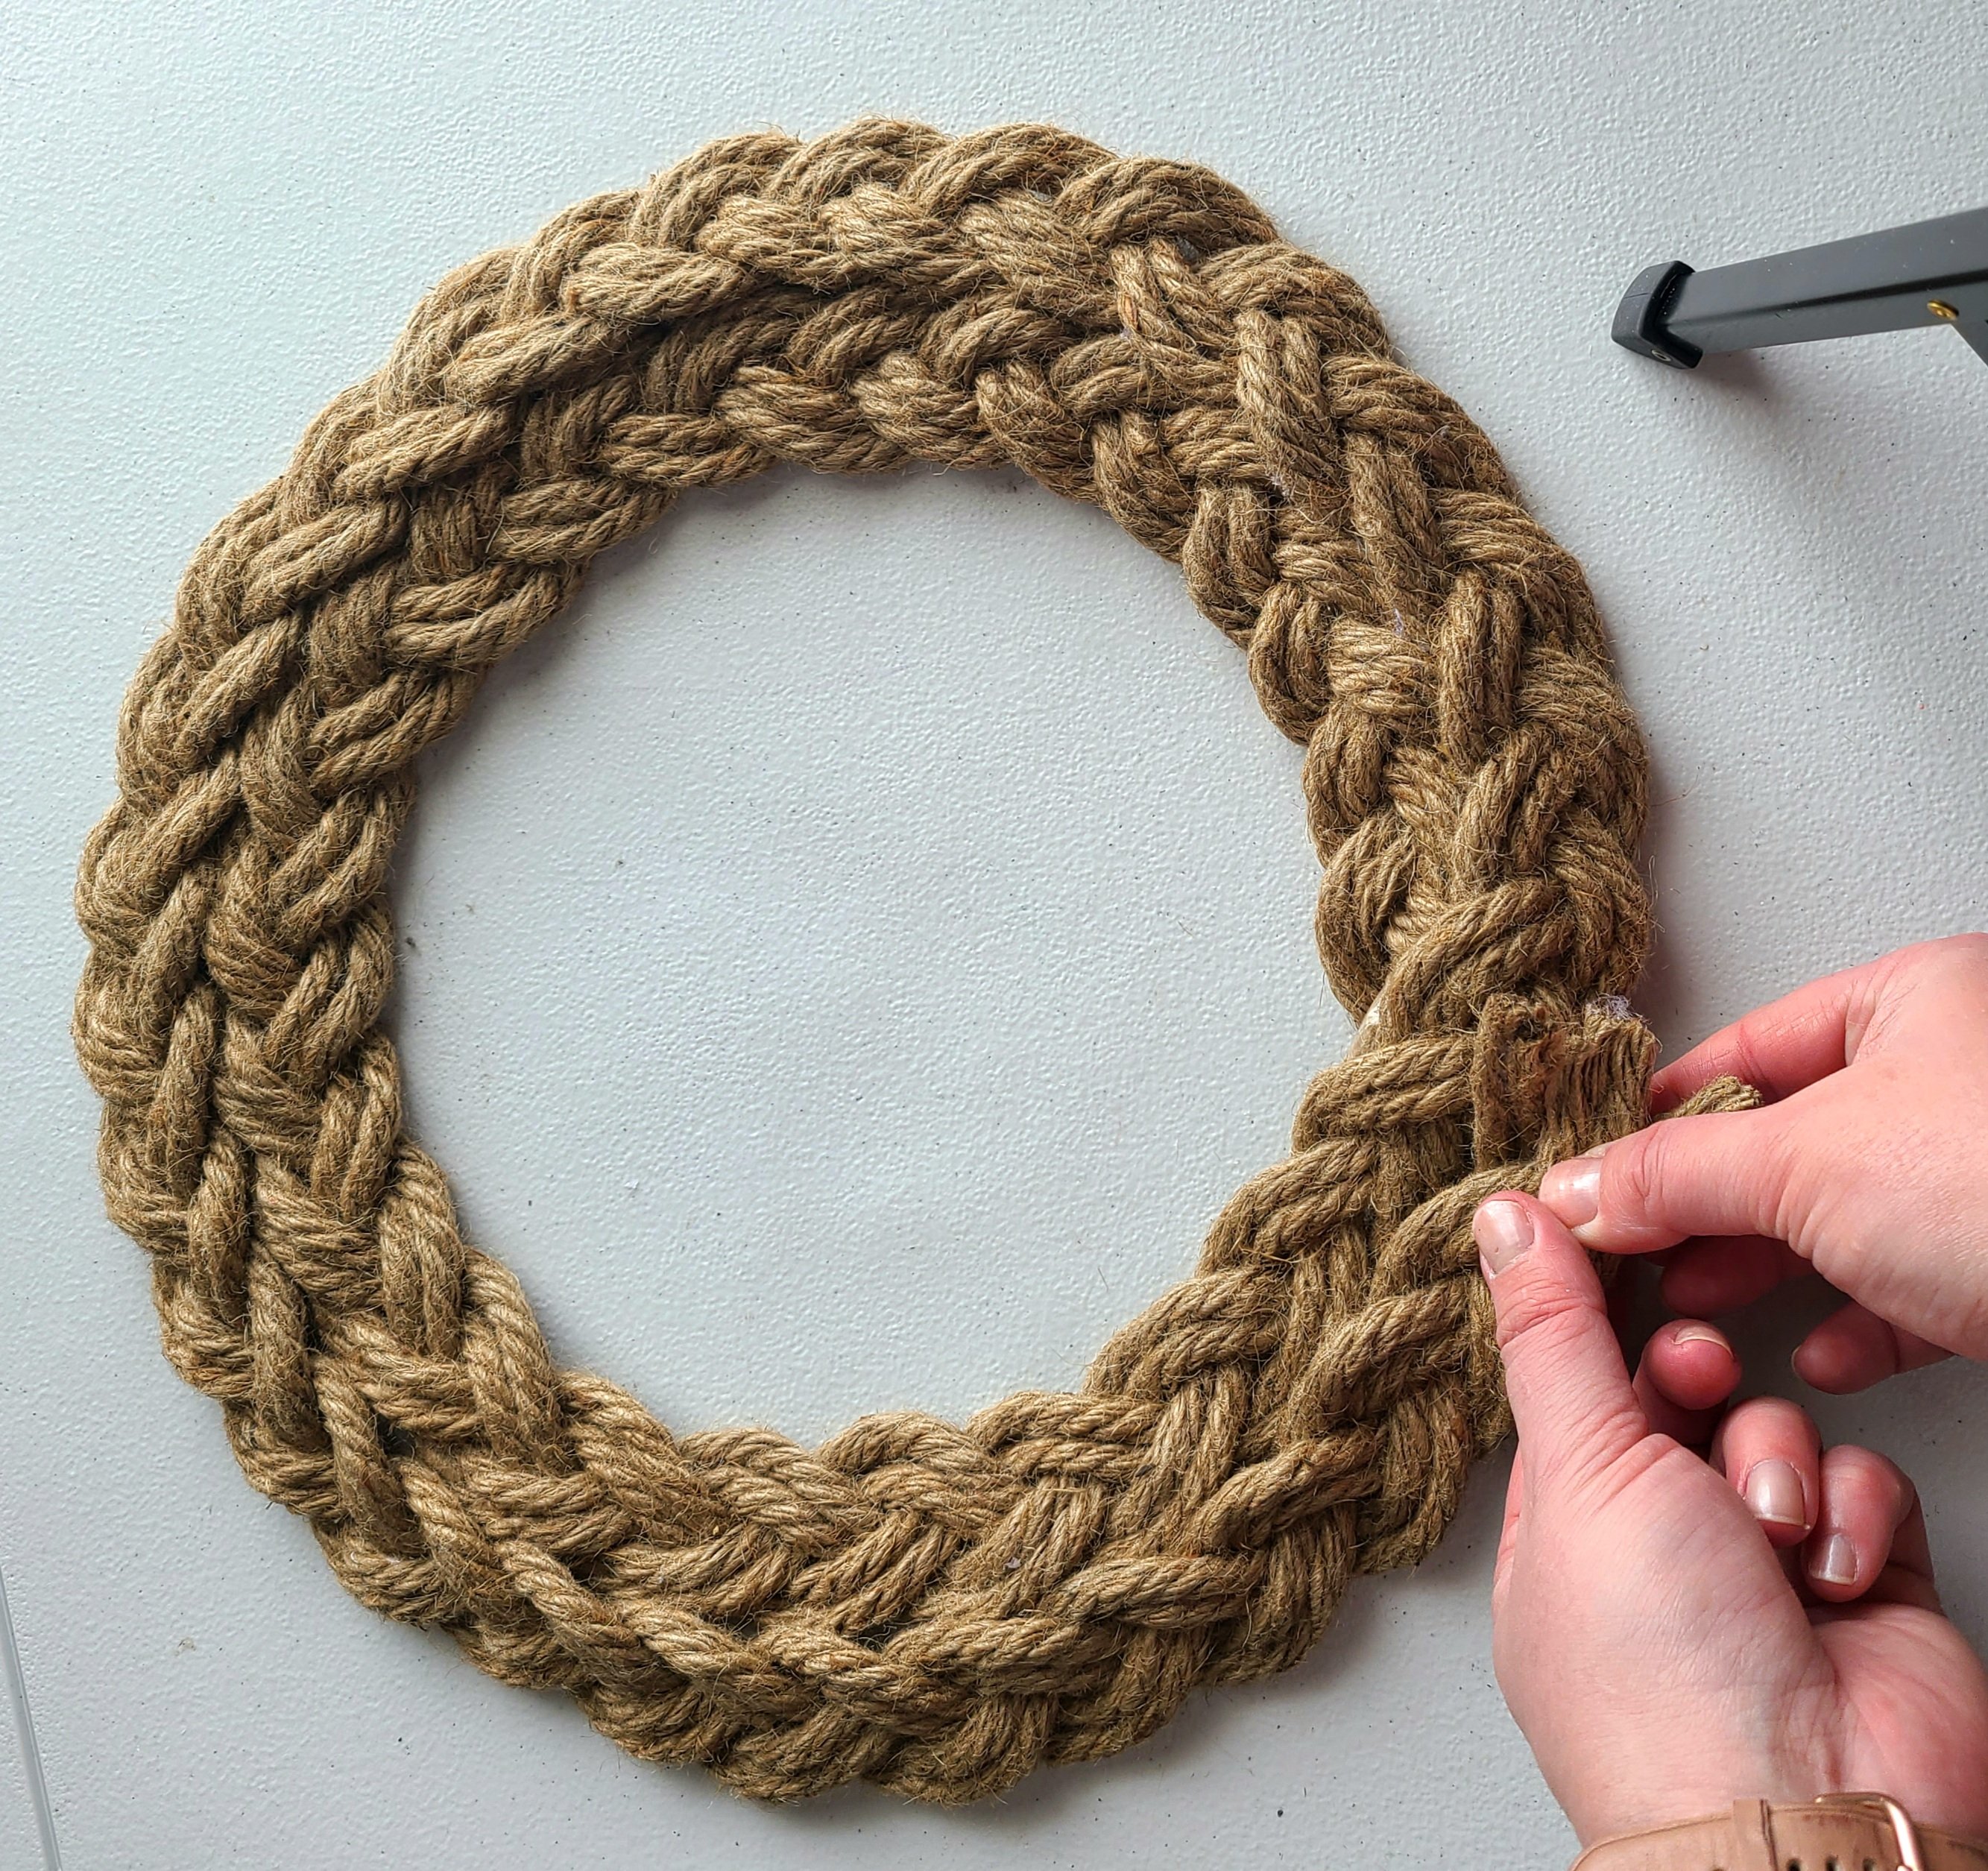
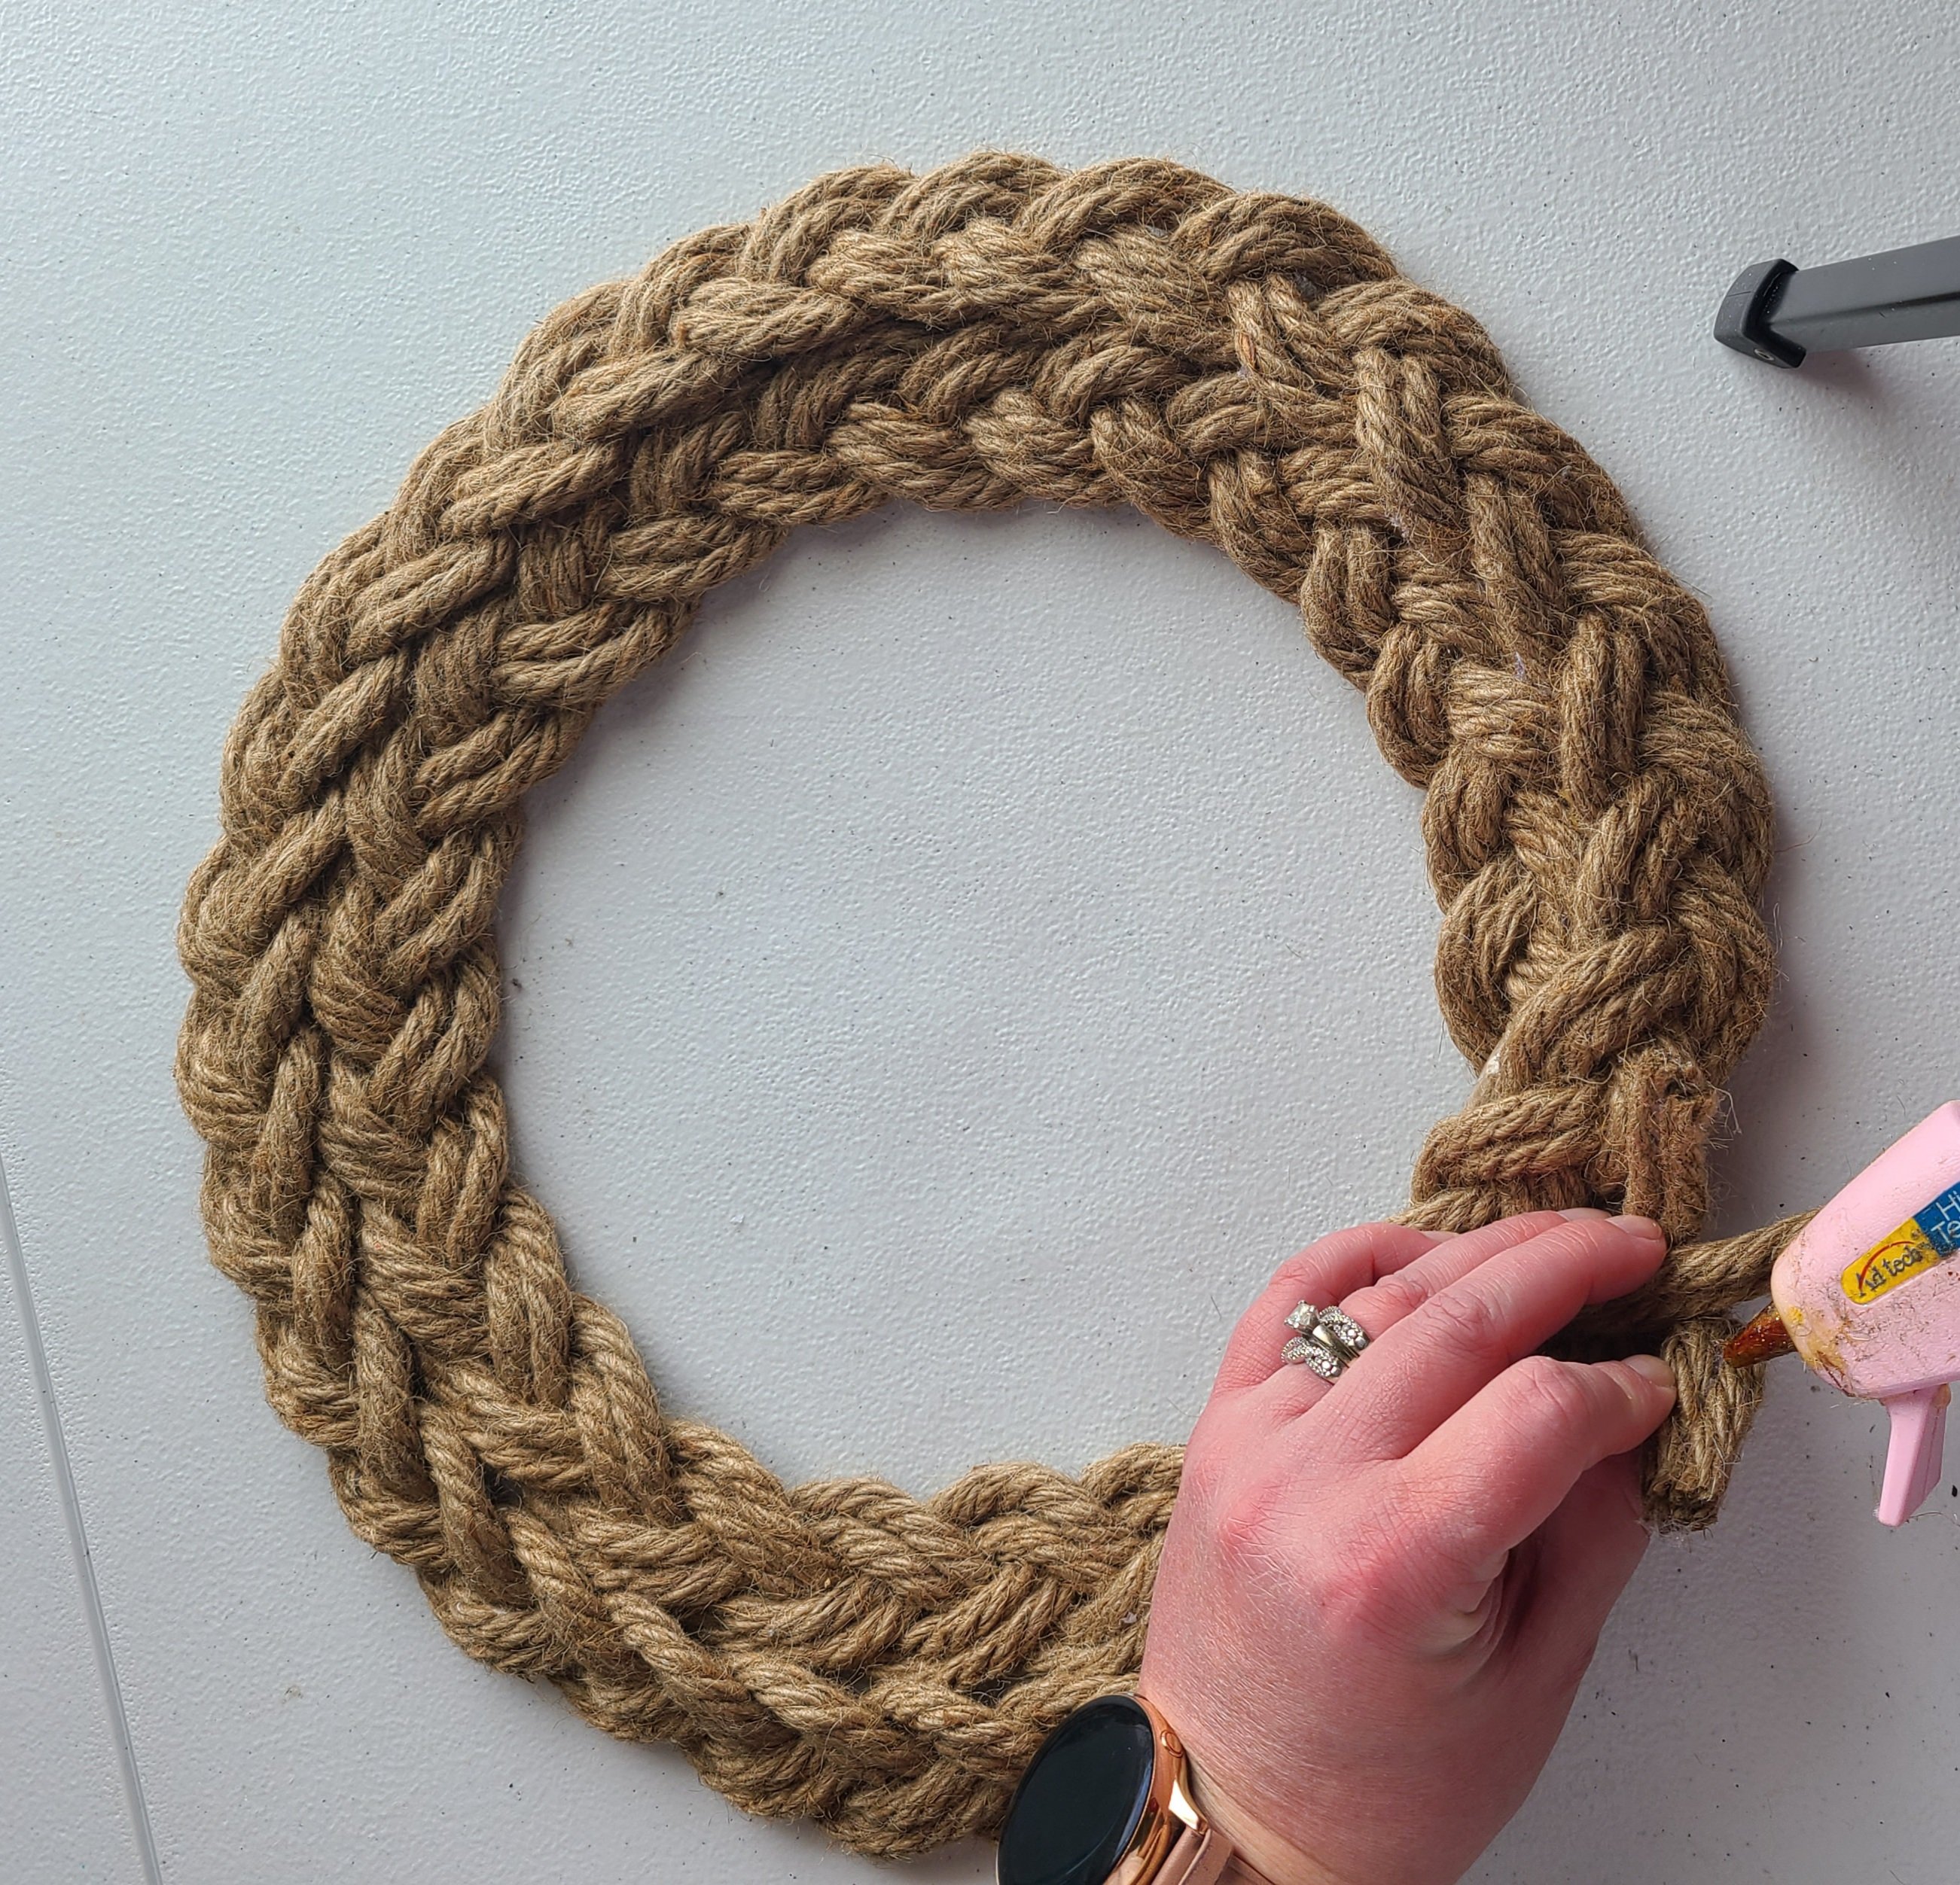
Once it is glued together, slip the ends of the rope under the second part of the wreath so that it is hidden.
Embellishments on the Nautical Rope Wreath
The easiest way to further decorate your wreath is to use seashells and wood shapes from the Dollar Tree or craft stores. Dollar Tree has an anchor shape like the one that I used on my rope wreath. Paint it navy or another beachy color. Glue it at 5 o’clock on the wreath.
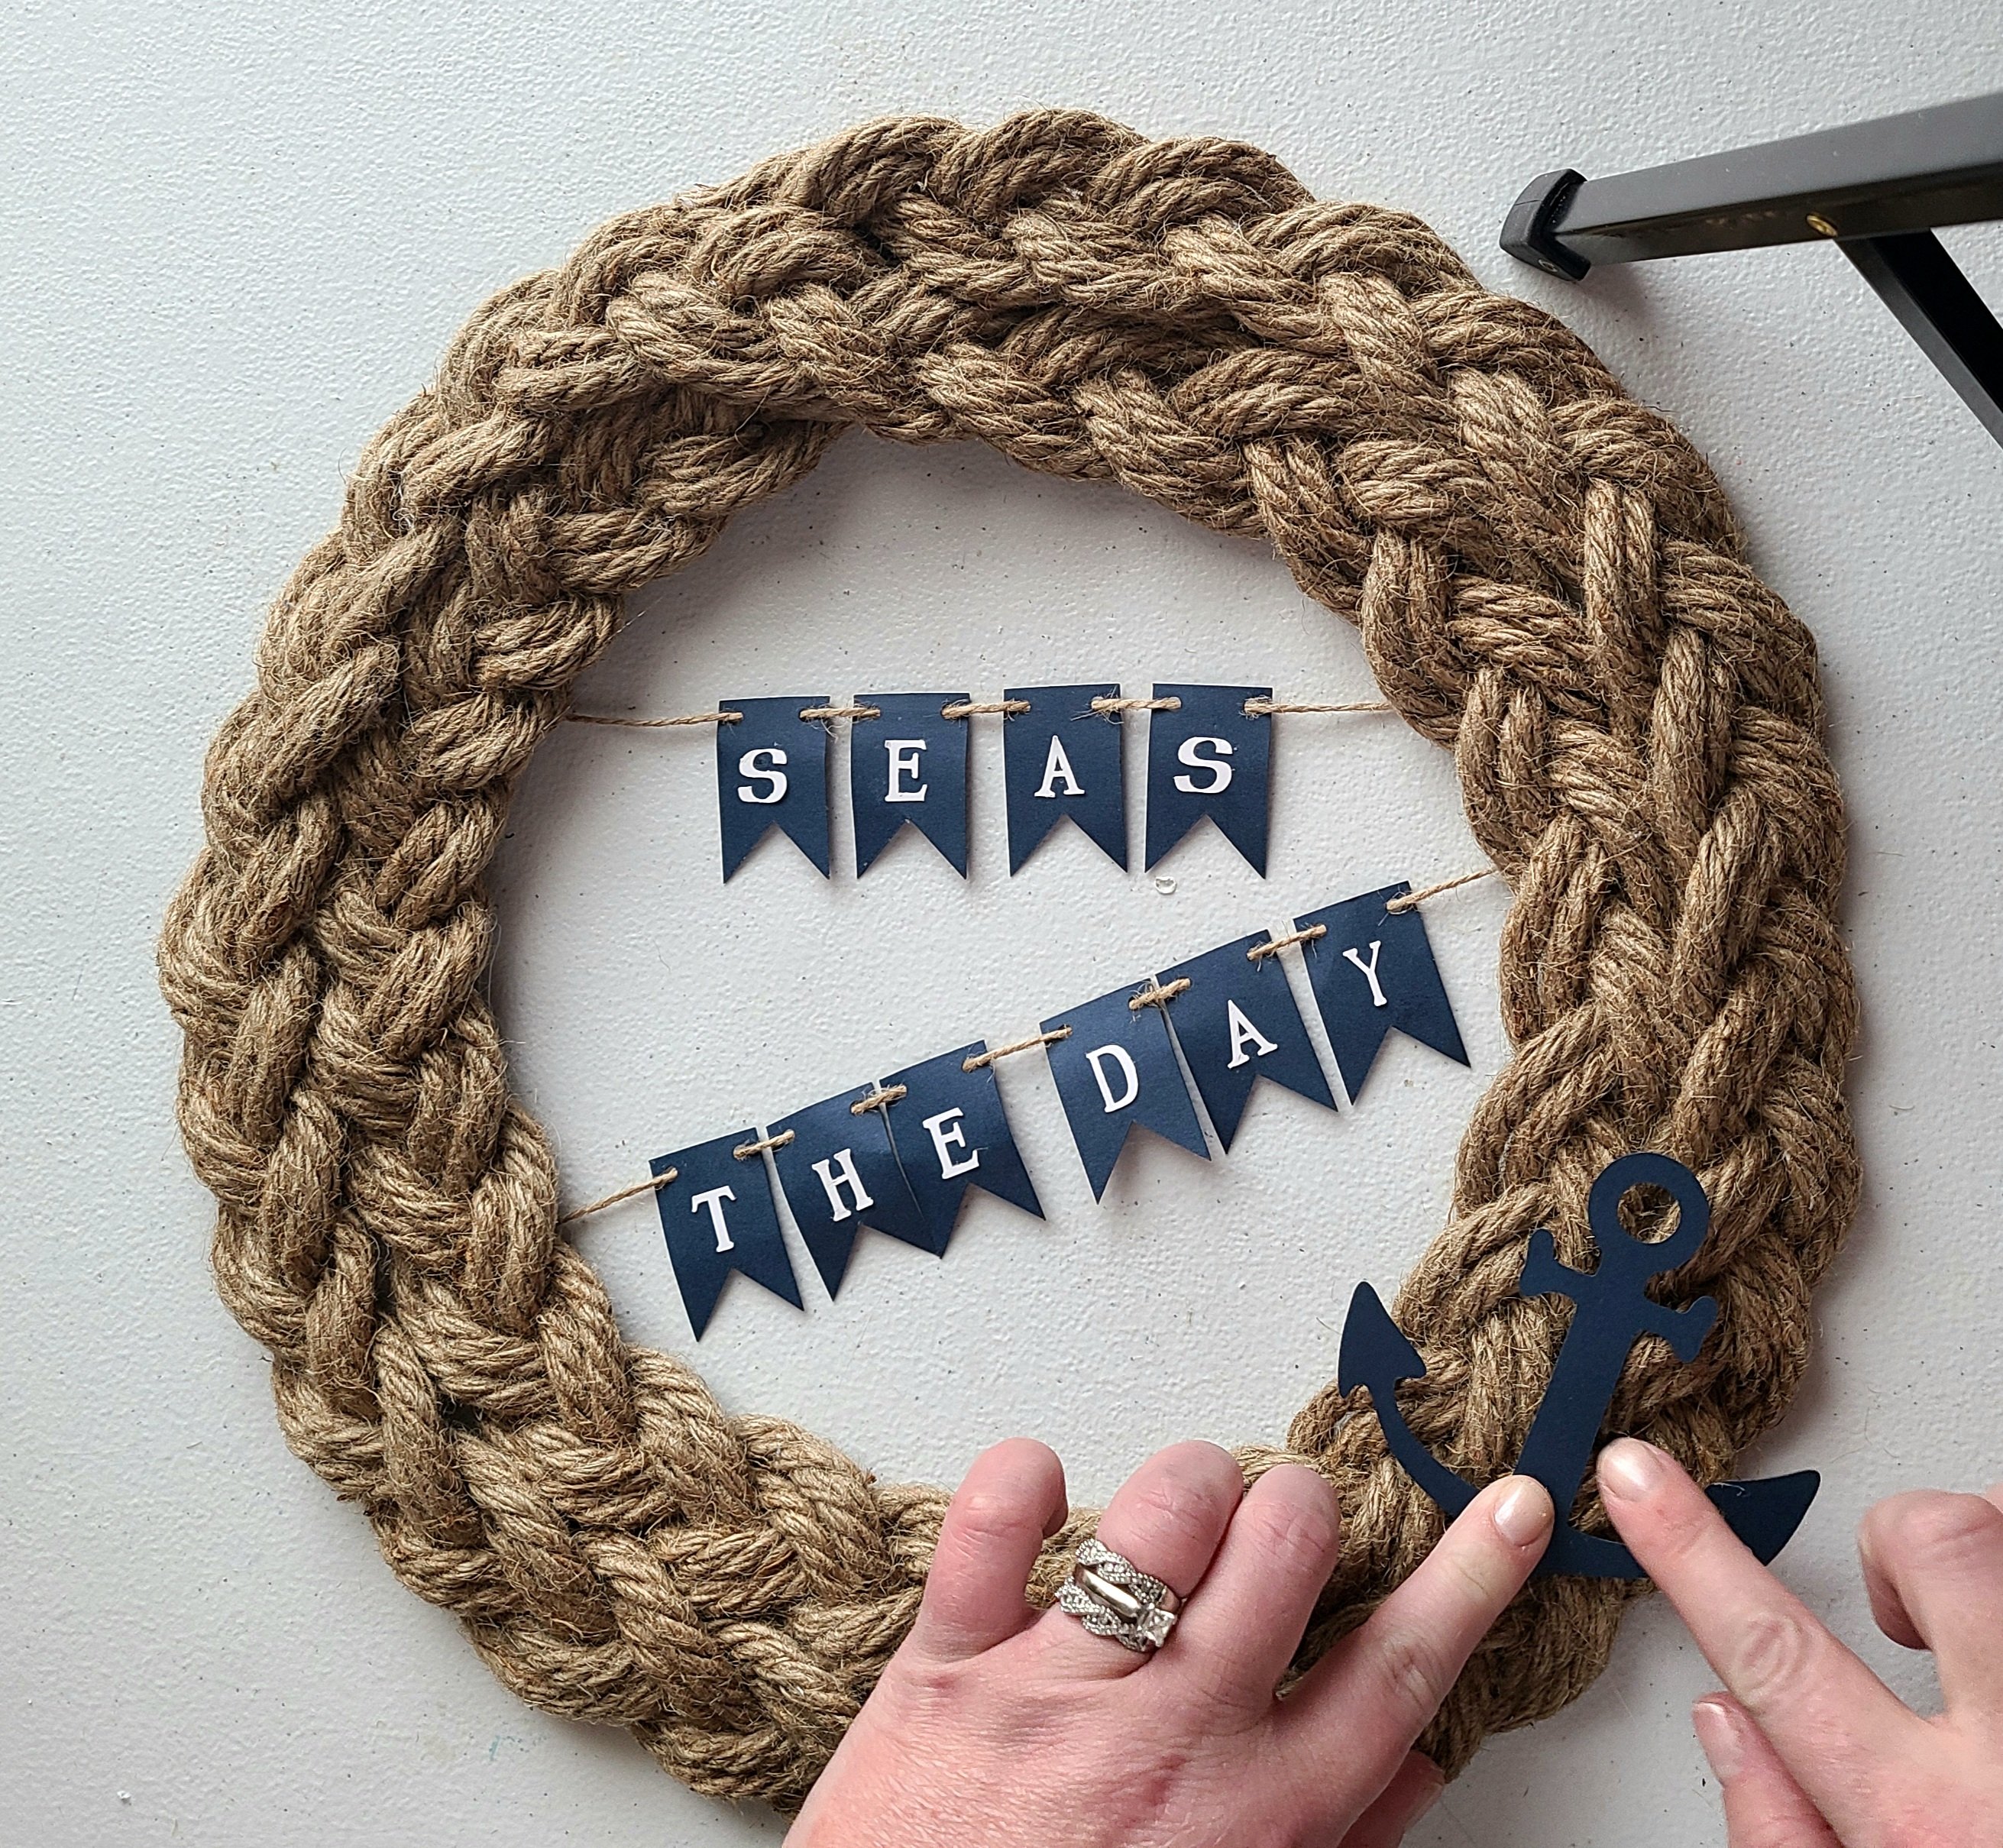
I used a Cricut to cut my anchor and word banners. I cut an anchor, using my Cricut Access Pass, in navy blue cardstock 3.5″ tall. Then I cut ten banner shapes that already cut two holes at the top on each side. If you don’t have a Cricut you can easily hand cut them. Cut ten rectangles 1.75″ tall by 1″ wide. Then cut an upside down V at the bottom. You will use those for the saying strung in the middle of the rope wreath.

Next you will either cut your letters or stencil them on the banners. I chose the words “seas the day.” Get it? Seas/Seize? I know you do. I used the font A Child’s Year. It’s included in the Cricut Access Pass, but you can use any font you’d like.
Cut two pieces of twine. To measure, stretch the twine a bit diagonally across the back of the rope wreath, then cut with a little extra just in case. String the twine through each of the holes on the banners, four banners on the first, then six on the second.


Add glue to the back of the letters, then glues “seas” to the twine with the four banners. Then glue “the day” to the second twine strung banners. Use your hot glue to glue the banners to the back of the nautical rope wreath. I glued mine slightly diagonally. I liked the look better than when they were straight.


Lastly, you can glue on seashells on the rope wreath if you’d like. I just glued one at the top of the wreath which is where I positioned the overlapping of the ropes.

That’s it! You’re nautical rope wreath is complete!
I just love this wreath! I haven’t decided exactly where I’m going to hang it, or if I’ll set it on a shelf if the bookcase. It might just be my favorite wreath that I’ve ever made. It looks great with all of my other coastal decor. If you make one, I’d love for you to tag me on social media (@LifeasaLEOWife). I can’t wait until I’ve seen the different ways that you embellish yours! Keep reading to the end for the devotional.

Remember to pin the image below or share this post with the buttons on the left side of the page so you can find it when you’re ready to start your project! Also, follow me on Pinterest for new ideas added weekly! Be sure that you never miss a great tutorial for decor like wreaths, signs and other home decor, free printables, crafts, and other fun posts! Enter your email address below to be notified of new posts! Use the buttons below to follow me on social media for other great content.

Don’t go yet! There’s more to see!
There’s plenty more to see here on the blog! If you’re looking for something specific, use the search box in the sidebar to look it up. If not, you might enjoy these ideas. Don’t have time to read them all now? That’s ok, just click over to the posts using the pictures and pin them for later. You can also add Life as a LEO Wife to your favorites and check back for new ideas and free printables and SVGs every Wednesday, as well as link parties with tons of shared ideas on Sundays!
You might like these rope and/or summer wreaths.


If you’re decorating with a coastal theme, you might want to pin these ideas:


Don’t miss great wreath & home decor tutorials! Get an email when new posts & free printables are added!
Devotional
Today I’d like to talk about “seas-ing the day.” As Christians we are commanded to do that. Seize each day. To go out into the world and witness for Jesus Christ. But today I want to talk about starting at home.
This world has absolutely gone crazy. Evil is so prevalent, and most of the time it’s seen as good. We can see that very clearly. It’s another thing that points out to us that we are living in the last days. The world is so quick to snatch our children, and it happens more easily than we think it will. I learned the hard way that by the time our kids are teenagers, the world has already warped their minds if we aren’t careful.
We Christians have to stand up right now and be like Joshua. In Joshua 24:15 he says, “And if it is evil in your eyes to serve the Lord, choose this day whom you will serve, whether the gods your fathers served in the region beyond the River, or the gods of the Amorites in whose land you dwell. But as for me and my house, we will serve the Lord.”
Each day we must seize and claim it for Jesus. Pray in the morning and go over a scripture or two before heading to school and work for the day. Eat dinner together, have a devotional after. Before bed read the Bible with your children and discuss what it means, then pray with them. When your husband and you go to bed, read a quick devotion together from an app like the YouVersion app. I love the devotions in it and that I can pull up the Bible and read it whenever I have the time. You don’t have to squeeze all of those things in, but try for one or two. “Seas” the day and choose you whom you will serve. Make it Jesus!
Thanks for joining me!
I am so happy that you’ve stopped by today! I am glad to be getting back to our Designing Devotions. In April I couldn’t do them with the A to Z Challenge for bloggers, but things are starting to get back to normal finally! I am considering making this weekly post a link party for Christian topics as well as home decor, crafts, and DIYs. Let me know if you’d like to link up to a party like that.
Enter your email in the sidebar or at the bottom of the screen so that you get an email when I upload a new post so you won’t miss a thing! Follow me on social media using the buttons on the sidebar as well. I would love for you to share this post using the buttons at the bottom of the post. Make sure you pin this tutorial so you can come back to it when you’re ready to make it!
If you’re a blogger make sure you share your posts on my link parties Happiness is Homemade, You’re the Star Blog Hop, and Traffic Jam Weekend. Make sure you check out all of the awesome posts shared on those link parties whether you’re a blogger or not! Stick around and check out my other decor posts like those below!


Love it, how pretty! Thanks so much for linking up with me at the Unlimited Link Party 26. Pinned!
Thank you Dee!
Visiting again to say thanks so much for linking up with me at A Themed Linkup 56 for Crafts and DIY. Pinned again!
This looks amazing! You did a fantastic job on it. I’m going to feature this at our Party in Your PJs link party tomorrow night on my Grandma Ideas site. Thanks so much for sharing this wonderful idea!
Thank you! I appreciate you hosting your weekly party!
This is absolutely adorable!! Great idea!!
Thanks so much for sharing!! Pinned!
Stay safe, healthy and happy!!
Hugs,
Debbie
Thank you Debbie!
You do nice work.Thank you for sharing on the Classy Flamingos blog hop. You’ve been PINKED! poinsettiadr.com
Thank you Linda! Love the flamingo feature button! Adding it now!
Excellent idea! thank you for sharing the tutorial <3
Thank you!
CONGRATS! Your post is FEATURED at my Unlimited Link Party 27!
Thanks Dee! I so enjoy sharing with you!
That is an awesome wreath! I love the rope for a cool nautical feel!
Shelbee
http://www.shelbeeontheedge.com
Thank you Shelbee!