Welcome friends! Summer is just about in full swing down here on the Gulf Coast. It’s hot, sunny, and the kids only have four days of school left. That means it’s time for us to deck our homes in our summer decor! During the summer I use a coastal farmhouse theme. Since I live only a mile from the beach, I mean, it makes sense! Today I’ve got a beautiful DIY coastal farmhouse lantern tutorial for you to bring the serenity of the beach into your home no matter where you live. Oh, and did I mention that the base will cost you less than $5 to make? Yea, let’s get started!

It’s time for our Creative Craft Hop hosted by Sara of Birdz of a Feather, which I mentioned to you yesterday. On the third Thursday of every month I join a talented group of ladies to bring you a new DIY project that you’re sure to love! If you’re coming over from Terrie at Decorate and More with Tip, welcome! Wasn’t her patriotic door hanger great?! Stick around after the post where I’ll send you on to the next stop on the hop.
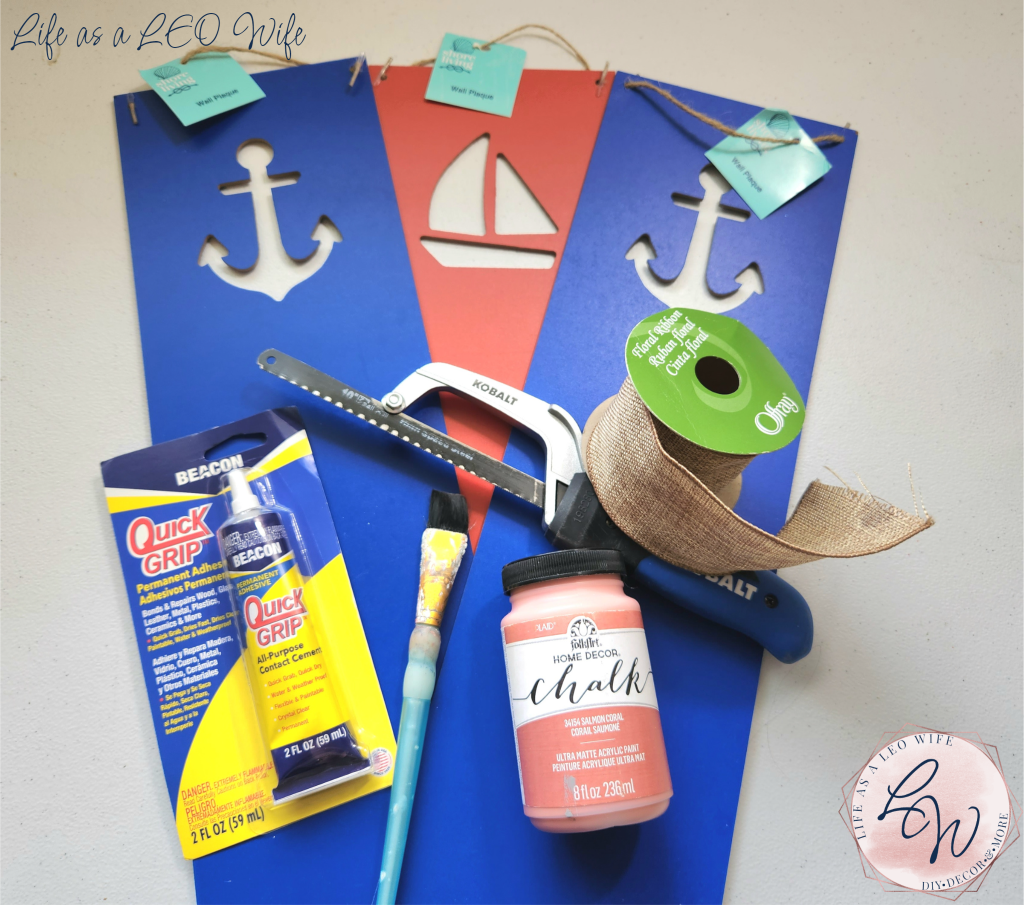
DIY Coastal Farmhouse Lantern Supplies:
- 3 2′ panel signs with a coastal cutout from Dollar Tree (If you can’t find a DT near you with these panels in stock, you can use these basswood panels from Amazon. They’re very easy to cut. Then you can add these nautical cutouts, also from Amazon.)
- hot glue gun & glue
- Beacon Quick Grip– I get mine at Walmart for a few bucks.
- white chalk paint
- paint brush
- sandpaper
- utility knife– The supplies picture a small hacksaw, but I found that a utility knife works much easier.
- 2.5″ khaki linen ribbon
Disclosure: I am a participant in the Amazon Services LLC Associates Program and the Dollar Tree Affiliate Program, affiliate programs that allow me to link to the products that you can use to make this project quickly and easily. If you purchase any of these products I may receive a very small commission at no cost to you! That commission helps me continue to bring these great decor DIYs, free printables, and all of the other goodies on this site to you. Thanks so much for your support!
A few notes about the Dollar Tree panels before we get started:
You need three of the blank 2′ panels from Dollar Tree. They have several in their summer coastal collection with cutouts like a sailboat, seashell, and an anchor. They only had one white seashell cutout at the stores that I went to, so I had to go with the anchor shape which was blue and one sailboat shape which was red. You can use three with the same cutout, they just didn’t have three anchors, and the shape won’t be shown in the third one, so you can use any that they have.
Dollar Tree wood or signs are notoriously bad for being slightly off size, so you’ll need to make four cuts for each of the sides instead of only two. Normally you’d be able to have two pieces of wood that are both exactly 2′ long and only have to make one cut one and have four 12″ pieces. Not so with Dollar Tree wood lol. It’s a little annoying, but it’s not horrible.
Remove the twine hangers from the panel signs & spackle the holes with spackle.
I used lightweight spackle from Dollar Tree to fill both of the holes left from the twine hanger. Allow it to dry, then sand it smooth.


First measure and cut the 2′ Dollar Tree panels to create the sides of the coastal farmhouse lantern.
Use a ruler or tape measure to mark one of the panels at 12.” I like to measure and mark each side, then draw a line connecting the two marks with a ruler. That way I have a straight line to cut along.


Use a utility knife to cut along the line. I mark both sides of the panel and cut from each side if I’m having a problem getting the utility knife through. Just slice several times, then you’ll be able to rock the board back and forth and it will snap right off.


Next, place the smallest of the two pieces (because without fail, one will be smaller because the boards are always just short of 24″) on top of the longer one. Mark the smaller with a pencil line and then cut it with the utility knife. Optionally, you can just slide the utility knife along the bottom of the smaller board with it on top of the other, which I did in the video. Sometimes the board keeps sliding and I have to recenter it over and over, so drawing the line with the pencil will nix that from the start. Once you get a cut going, rock the board and remove the extra 1/2″ or so.


Sand all of the ends smooth.

Place the small piece on the other 2′ panel and cut it the same as before. This will create the four sides of the DIY coastal farmhouse lantern.
Paint the sides and top of the lantern with chalk paint.
I used Waverly chalk paint in white.

It took me about eight coats to cover the blue sides of my coastal farmhouse lantern. For some reason a red hue shown through after painting them with chalk paint which was really hard to cover. You can see it in the picture below. This was after five coats. Y’all, if you find the white seashell panels at Dollar Tree, grab them and run!!

When you get a few coats of paint on, chalk paint can be hard to keep smooth. Brush some water on the surface, and then add paint. That will help immensely.
Paint the inner back panel of a square sign with a coordinating color.
I used a Dollar Tree sign that had a wood bead handle from fall to top my sign after the panel top. I left the frame color the same since it was a good neutral color that goes with the neutral coastal farmhouse color scheme, and it worked for the cohesive look of my DIY lantern.
Turn the sign over and paint the inner panel after removing the wood bead handle. It only took about three coats, thank God!


Assemble the DIY coastal farmhouse lantern.
I made a fall farmhouse lantern with the pumpkin panels back in September attempting to use E6000. Y’all, I’m honestly not sure which time was more stressful! This time I worked on it for 15 hours (including writing this post), and it’s 2am at the moment. This time it was the paint thing and my lovely husband getting my ribbon for me. I’ll let you know more about that in a bit. Actually, I think the more stressful lantern was the last one because it kept falling apart lol! Do not try to use E6000 for this. It. will. not. work. If you need to, you can use a staple gun like I did in that lantern if you must.
So- I lived and learned! Use Beacon Quick Grip! It’s literally that. It grips almost immediately. Squeeze glue along the edge of one of the sides of the DIY lantern that you cut, then place another side on it. Pull the pieces away from each other a few times as this will accelerate the adhesion process. I did find that it was easier for the pieces to stay together once you sit them up so do that now if you can.


Next, squeeze more glue along the edge of a third piece and place it on the other two DIY lantern pieces.

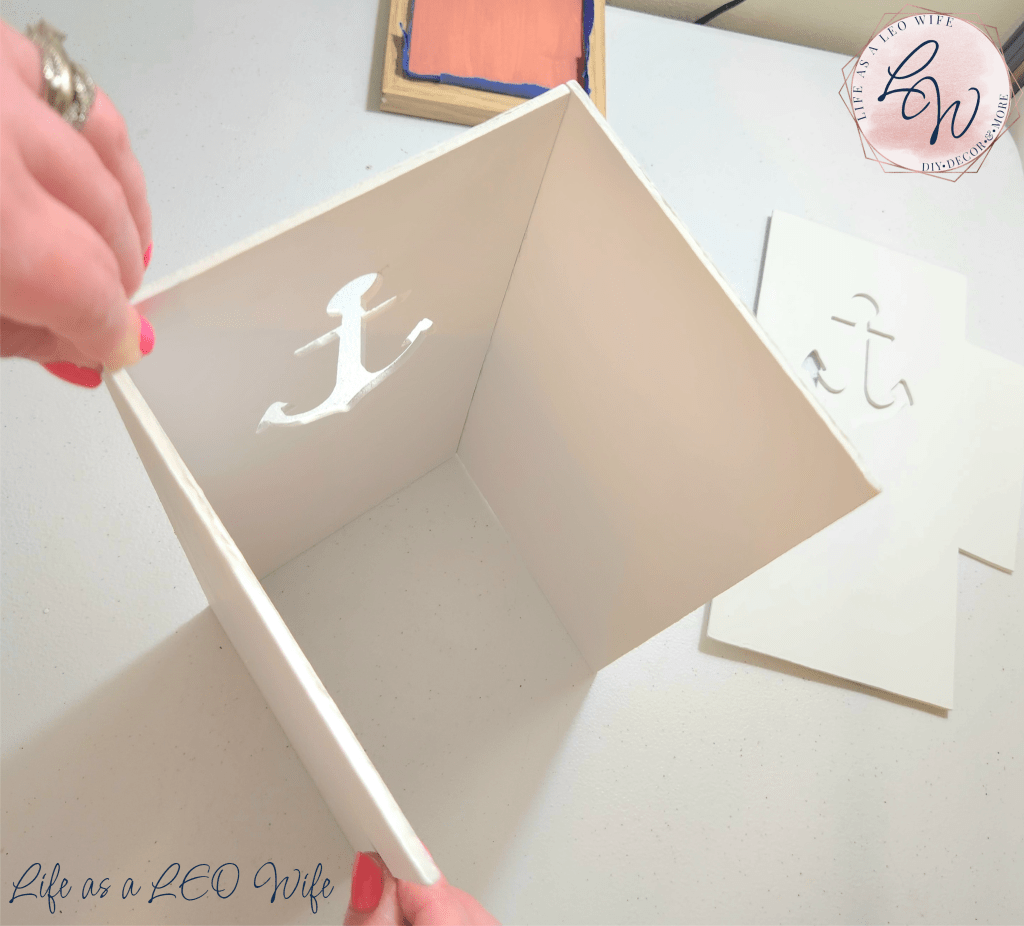
Finally, add glue to both sides of the lantern that you’ve already glued on or on both sides of the coastal cutout piece that’s left to add. Then place that piece on.


Create a top for the lantern with your third panel.
Place the DIY lantern upside down on top of the that last 2′ panel and use a pencil to mark where you need to cut. Do not place the bottom on it because, as we’ve established Dollar Tree wood is not the same size everywhere! The bottom will be slightly different than the top.

Cut the panel with the utility knife and break it along the cut.

Add glue to the top of your farmhouse lantern and place the top onto it. Don’t worry about painting it yet because we won’t have to cover it all.


Now you just have to paint the edge of the top with your white chalk paint.

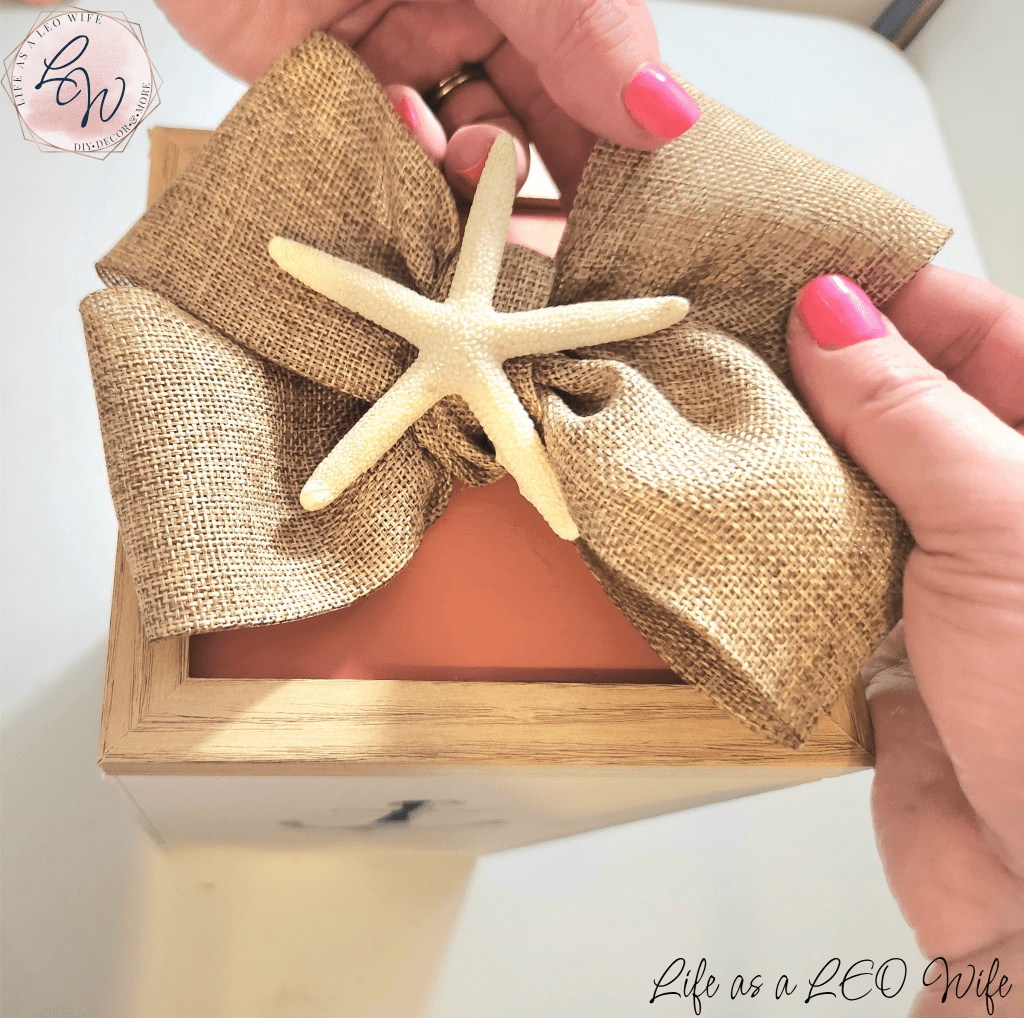
Attach the square sign to the top and add a cute little bow!
Add some Quick Grip to the front of the square sign you painted earlier (like 9 hours earlier for me lol!). Place it on top of the assembled coastal farmhouse lantern. Why did we need the little piece we just added? Because this sign is just a smidge smaller than the top so you need to have a cover.


I absolutely love how my coastal farmhouse lantern turned out, but, man, it has been a rough day! I had my husband grab me wired linen ribbon from Walmart this morning. Well, yesterday morning at this point. Told him where it was, sent a pic, and said make sure it’s wired and should probably have the green label and not the white. He brought it home and it looked fine. Until 11:30pm when I unrolled it….
It was not wired! Oh my goodness. I had almost enough, almost, to make a bow with the wired ribbon I had left. I took it apart a million times trying to stretch it and make it work but it would not work. So, I spent the next hour and a half trying to get this non-wired ribbon to fluff up. It was a whole process that almost melted my brain. Long story short, don’t use non-wired ribbon. It’s the devil and it should be burned. I’m kidding, it has its place. Kinda.
Now you know, don’t judge my sad bow lol. I’ll be replacing it as soon as I get a new roll, I promise! Make a simple four loop bow, then add a cute coastal addition to the middle. I used a starfish, but Dollar Tree has some cute resin sand dollars this year.

I will add the video tutorial later today after I get some sleep my friends! It’s looking like a 4am night!
Enjoy your DIY coastal farmhouse lantern! I know now that mine is complete it will be bringing me all of the serenity it didn’t while in process!
Ha! Hopefully I’ve gone through all of the rough patches for you, and you have zero problems putting yours together! I know that you have learned from my growing pains. I will take some more photos when the sun is up because I really want it on my sofa table but there was just no light in there. First world problems y’all, I know. Remember this is a blog hop so keep reading so I can send you to the next stop!

Remember to pin the image below or share this post with the buttons on the left side of the page so you can find it when you’re ready to start your project! Also, follow me on Pinterest for new ideas added weekly! Be sure that you never miss a great tutorial for decor like wreaths, signs and other home decor, free printables, crafts, and other fun posts! Enter your email address below to be notified of new posts! Use the buttons below to follow me on social media for other great content.

Creative Craft Hop

Next up on our Creative Craft Hop is Allyson at Southern Sunflowers. She has a fabulous Dollar Tree stencil sign on canvas that I know you’re going to love! She is so creative. After you visit her, I hope that you will continue on to the other ladies because they’ve all got some great ideas to share this month!
DIY Patriotic Star Door Hanger
Seaside Serenity: Crafting Your Own Coastal Farmhouse Lantern!
Dollar Tree Stencil Craft on Canvas
Blah to Blue-tiful Birdie Upcycle for the Garden
How to Make a DIY Patriotic Pillow


Oh gosh Niki – hopefully this project is like childbirth and you’ll soon forget the pain lol. I think it turned about fabulous and I do hope it brings you all serenity that was missing in the making!
By the way, I’m laughing about your husband’s run to Walmart; there’s always a last minute crafting panic in our household too.
It felt like childbirth lol! I loved it as soon as it was over!! Yea, I thought he got the right ribbon from 11 am all the way up to midnight!
This turned out really cute Niki, you are such a good carpenter! Thanks for the info on Quick Grip, I’m going to get some asap, sounds like great stuff!
Thank you! Ha! I wish! I need a real saw lol.
I never would have thought to use those panels to make a lantern, Niki. Very clever – and your bow looks great – love the starfish!
Thank you! I need another way to use them with 6 left over!
This is a great way to use those Dollar Tree signs. I love the lantern. Thanks for sharing.
Thank you! I have yet to think of something else to use them for, but I need to because I have more lol!
Niki, this is such a fun idea and what a lovely lantern! Blessings, Cecilia @My Thrift Store Addiction
Thank you!
Very cute and great tutorial.
Thank you Cindy!
What a cool project, Niki! And it turned out perfect despite all of your hiccups, lol! I hope you were able to get some rest. I have never been a fan of E6000 and I just don’t see why everyone raves about it! I have always used any of the quick grip glues but I love RapidFuse by DAP!
Thank you! I’ll be sure to check out RapidFuse. I have an entire tube of E6000 that I have no use for. I guess it’s ok if you’re gluing something heavy that’s only going to be horizontal, but otherwise it’s useless lol!
I love this. What a clever idea. I will definitely be making some of these.
Thank you! Love how it turned out.
I love how this turned out Niki. I have never worked with Dollar Tree wood, but you are making me want to see what I can come up with. I keep looking at coastal pieces for our entryway to go with our octopus rug, lol! Thank you for sharing your inspiration.
Thank you! I’m updating a lot of my coastal pieces to match my new washable rug which is mostly coral/peach. Before 2 years ago I had never used coastal decor, which is crazy because we live in a beach town lol! An octopus rug sounds perfect for coastal decor!
What an ingenious idea, Niki. Very cute and resourceful project.
Thank you! I’m so happy with the way it turned out!
Your coastal lantern turned out awesome despite all the stress making it. It looks great! We know our husbands really love us when they have to get involved with our crafting ~ lol.
Thank you! Yes, he’s always making sure I don’t need anything before he gets home. God love him, after he got the wrong ribbon he spent his entire lunch break searching for a similar one at other stores!
How pretty, I really like it!! Thanks so much for linking up at the #25andDoneLinkParty 28. Shared to Fb, Pin, and Tw.
Thank you!
This looks amazing- very expensive! Thanks for sharing at #WowOnWednesday
Thanks Gail!
This is beautiful Niki, it’ll be a feature at Handmade Monday this week 🙂
Thank you Julie!
This is lovely! I enjoy crafting with Dollar Tree items. I have a question though. I’ve never heard of Beacon Quick Grip, is it better than hot glue or E6000? I’ve been searching for something sturdier than hot glue for certain projects. It works well for some things and not others.
Thanks bunches for sharing this tutorial with Sweet Tea & Friends this month.
Thank you, Paula! Quick Grip is AMAZING. I tried this project with E6000 in the fall and it was a complete no go. To me, it’s absolutely horrible. Unless what you’re gluing is going to sit perfectly still at a 90° angle for hours. Quick Grip grabs it immediately and dries. I found it at Walmart one day and have loved it ever since! If you can add hot glue at the same time (if the surface is wide enough) it’s an even faster grip.
I’m going to grab some Quick Grip the next time I go to Walmart.
Niki, CONGRATS! Your post is FEATURED at the #25andDoneLinkParty 29!
I’m honored! Thank you!