Welcome friends! Today I’ve got a great craft to share with all of my fellow book lovers: DIY bookmarks made from Dollar Tree cutting mats! These are so quick and easy to make, and you can make twenty or more with one package of cutting mats. Wow, right?!

These DIY bookmarks are perfect little gifts to give to friends, family, and teachers. It’s the end of the school year, and these would be great to add to an end of the year gift basket for teachers or your kids. It’s important for children to keep reading during the summer to maintain their reading levels and prevent learning loss. A cute, personalized bookmark would be a good way to keep them reading! Also, since you can make so many for cheap, you could make and sell them with a big profit margin!
Let’s get started!
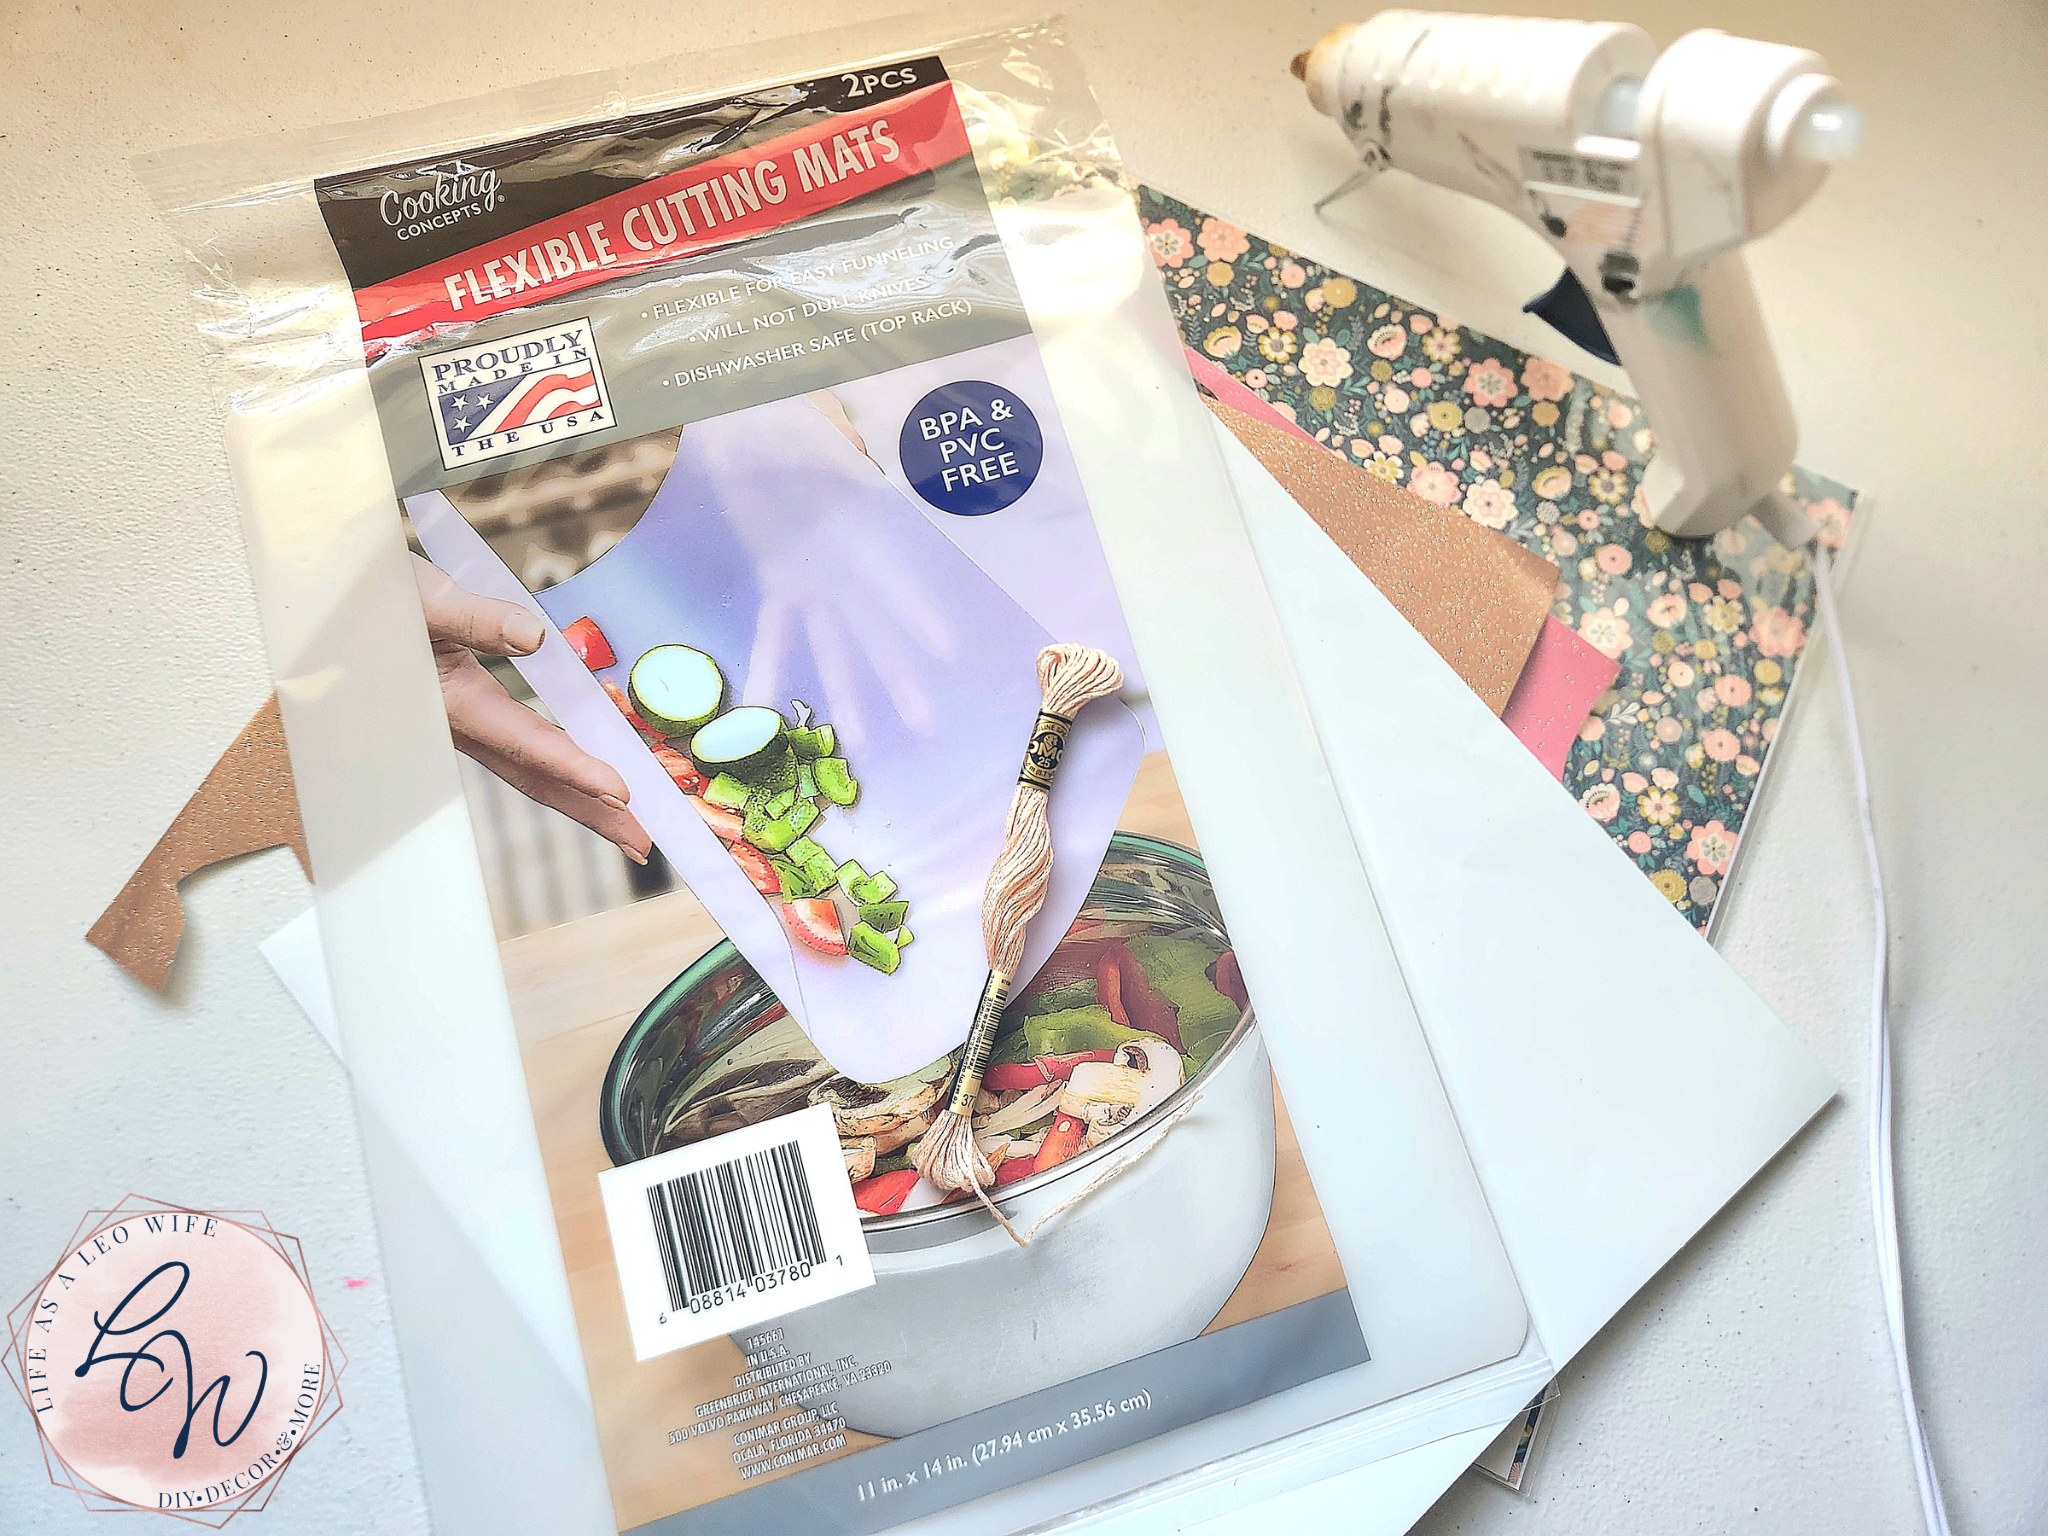
Dollar Tree DIY Bookmark Supplies;
- Dollar Tree cutting mats- They come in a pack of two in a plastic sleeve in the kitchen section.
- vinyl- Dollar Tree has lots of options now. I used patterned and glitter vinyl (not from DT).
- embroidery yarn or yarn
- scissors
- Cricut (Or you can print my templates and trace and cut your own.)
Creative Cut Files and Designs for Stunning DIY Bookmarks: Free Downloads
For personal use only. All of my free printables & cut files are copyrighted material. Feel free to download these free designs and print them or use on your Cricut projects for your own use at home. They are not for commercial use, not to be placed on items for sale. That helps me keep these printables, SVGs, and PNGs coming to you for free! Another note: you will not my logo overlay on your downloaded design. It is there to keep people from downloading the images straight from Google, or others from stealing them to use on their site. Thanks for understanding! Feel free to share this post for your friends and family to make their own projects with this design!
I created several designs last night that you can use for your DIY bookmark. This was a quick, last-minute project for me, but I plan to create some more designs and words for you to download, so check back later.
Here are three bookmark shapes that you can use. One already has a hole for the tassel, but on the other two you will need to add a circle in Cricut Design Space if you want to add a tassel. Place a circle a few cm from the top and use the slice tool so that your machine will cut a hole in your bookmark.
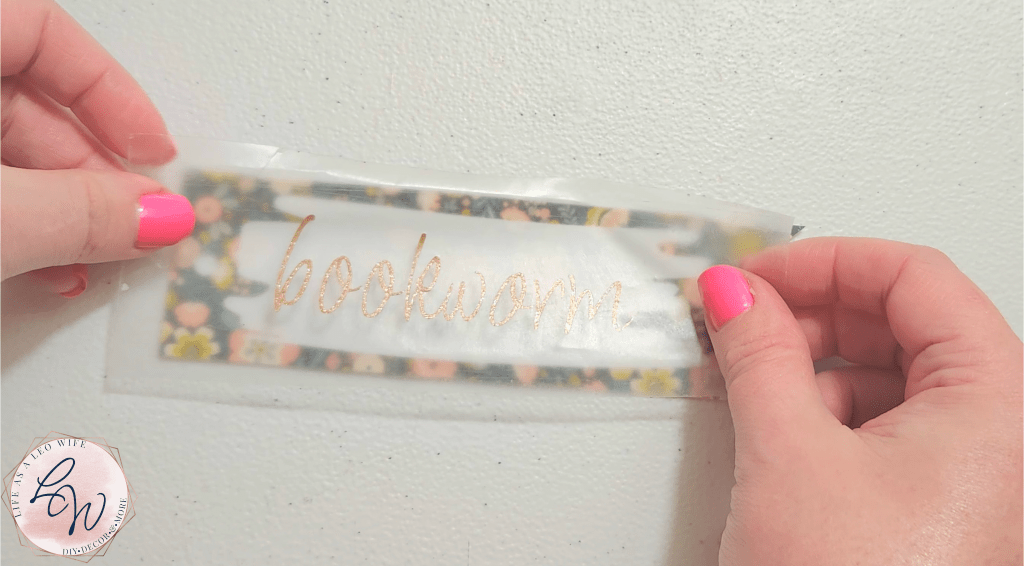
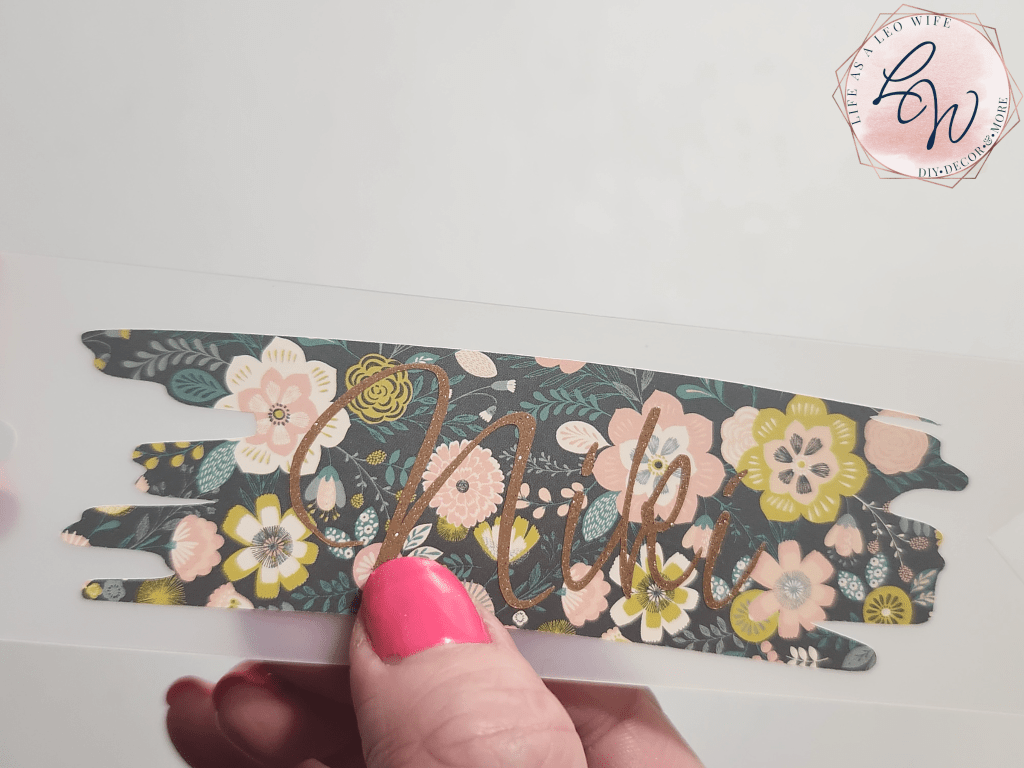
Next, I created a word and a few shapes for you to use on your bookmarks. I cut my name for one of my bookmarks, but I wanted to give you at least one word that you could use, so I went with “bookworm.” I’ll be adding some quotes soon, so be sure to follow me on social media and via email so you don’t miss them! (If you like this font and would like to make a personalized bookmark for yourself or for a gift, message me or leave a comment and I’ll try to send you a cut file of your name for free.)
Upload the files to Design Space and cut your bookmarks.
Once you’ve downloaded the files you like and uploaded them to Design Space, you can start to set them up the way you like them.
You can make the bookmark shapes as long and wide as you’d like by turning off the lock. That way you can set the width and length separately. I made mine 6″ long and 1.75″ wide. Remember to use the slice tool to cut a circle in the bookmark shapes that don’t have a hole.
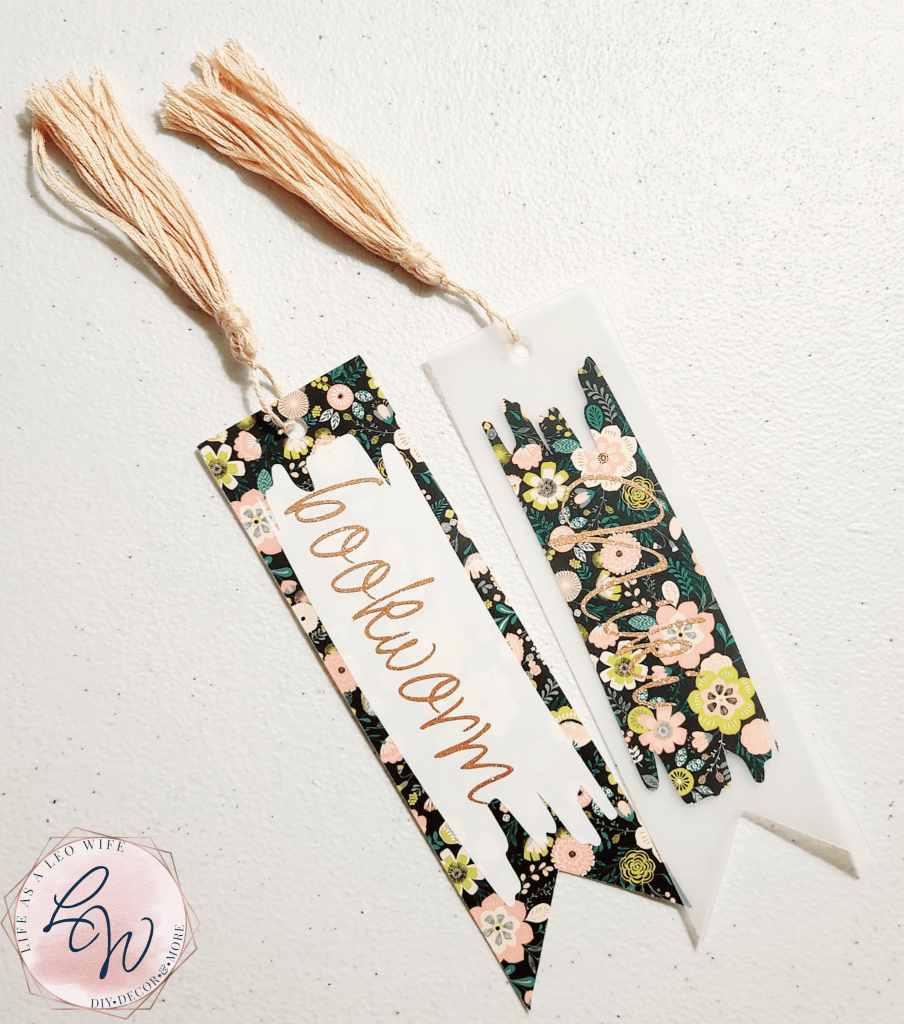
The bookmark shape with the flowers can be cut on vinyl and them placed on a cutting mat bookmark in the same shape. That way the flowers show the bookmark and the vinyl covers the rest of the bookmark. You can save the reverse weeding of the flowers to place on another bookmark, or just cut the flowers to place alone.
I chose to combine the brush stroke shape with words on both of my DIY bookmarks. On one I used them alone, and on the other I added vinyl the same size as my bookmark, the brush stroke, and the word “bookworm.”
When you have the design you like, click “make it.” Place your Dollar Tree cutting mat on a strong grip Cricut cutting mat. If you don’t have one, use tape on a regular grip mat for extra security so that it stays in place.
Turn the Cricut dial to “custom,” and click “browse materials” so that you can choose a material that will cause the blade to cut deep enough to cut the Dollar Tree cutting mat. There is no “cutting mat” material, but after much trial and error, I found that “chipboard 0.37mm” works very well. Don’t choose “cutting mat protector” as it won’t work.
Load your mat, click the flashing “c,” and your Cricut will cut the Dollar Tree cutting mat into your DIY bookmark!

Remember to turn the dial to “vinyl” before loading the vinyl on a standard grip cutting mat into the machine and cutting it.

Repeat for as many layers of vinyl as you need.
Assemble your Dollar Tree DIY bookmarks.
Now it’s time to put your adorable bookmark together! Cut a piece of transfer tape the size of your largest piece of vinyl. To save money, I used contact paper from Dollar Tree and the same piece for both of my bookmark projects.
Place the transfer tape over the first piece of vinyl (the bottom piece if you’re using layers).


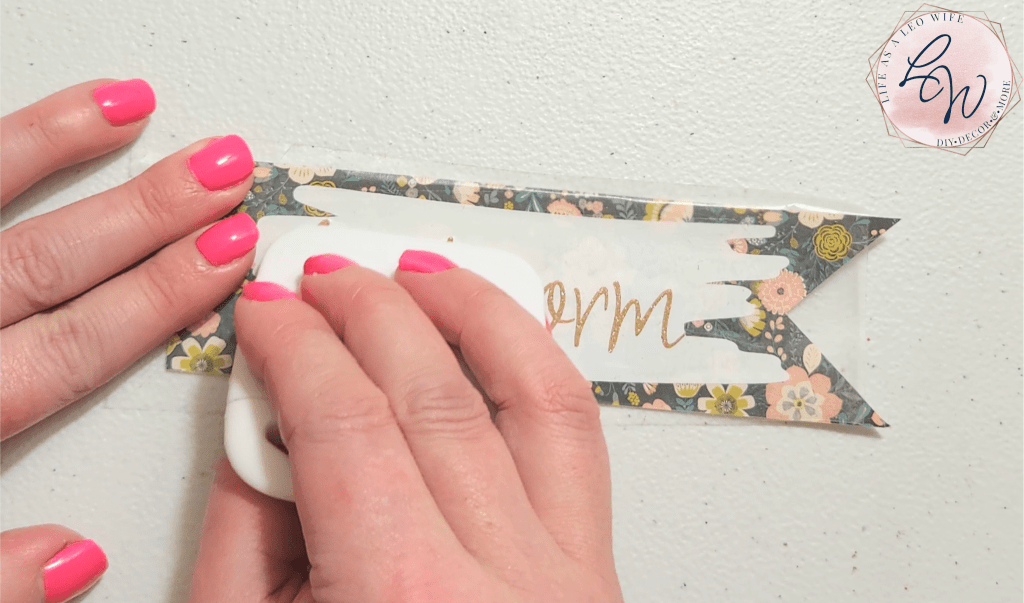
Now center the vinyl design over the Dollar Tree cutting mat bookmark. If you’re placing vinyl that’s the same shape as the bookmark like I did with my “bookworm” version, I found that it’s easiest to lay the vinyl down, sticky side up, and line up the bookmark on top of it, starting at the top. When it’s placed correctly turn it over and use a scraper or credit card to adhere it to the bookmark and remove bubbles. Remove the transfer tape once the vinyl is on the bookmark.


Next, add the other layers of vinyl, one by one, in the same manner.


Finally, add a tassel to your personalized bookmark.
The easiest way to make a tassel with embroidery thread is to use a new pack, and you’ll get two tassels out of it. You can leave the paper on the thread or take it off, but leave it rolled the way it is. Cut four 6″ pieces of yarn (two pieces of you only need one tassel).

Place a piece of the thread through the end of the skein where the loop is and tie a knot around it.


Tie a second piece just a little bit below the loop, about ¼-½” or so from the top, and wrap it around the thread. If you have a needle with a large eye, you can thread it through it and pull the end behind the wrap you just made around the tassel. I didn’t have a needle with a large eye, so I used a tiny amount of hot glue to glue the end in place. You can’t see the glue on mine.


If you’re making two tassels, repeat on the other end. After, cut the yarn in the center to create two tassels (or one and just put the other end of the thread away).


Now it’s time to finish your masterpiece! Place the piece of thread at the end of your tassel and place it through the hole on the bookmark and tie it in a knot about ½” or so from the bookmark.

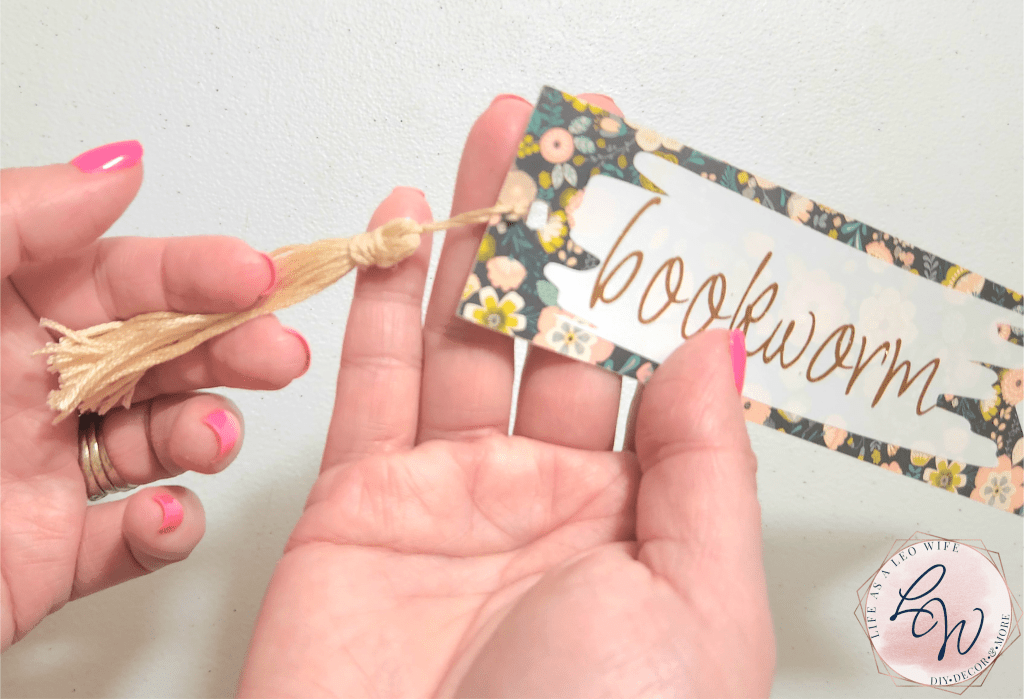
That’s it! Your adorable DIY bookmark is complete, and no one will guess it was once a Dollar Tree cutting mat!
Isn’t this just too cute? There are so many ways that you can customize your own bookmarks. I plan on making one that says, “Who can sleep when there are so many books?” or something like that. Millions of ideas are running through my mind, so I’m sure I’ll be adding new designs to this post soon!

Remember to pin the image below or share this post with the buttons on the left side of the page so you can find it when you’re ready to start your project! Also, follow me on Pinterest for new ideas added weekly! Be sure that you never miss a great tutorial for decor like wreaths, signs and other home decor, free printables, crafts, and other fun posts! Enter your email address below to be notified of new posts! Use the buttons below to follow me on social media for other great content.

Don’t go yet! There’s more to see!
There’s plenty more to see here on the blog! If you’re looking for something specific, use the search box in the sidebar to look it up. If not, you might enjoy these ideas. Don’t have time to read them all now? That’s ok, just click over to the posts using the pictures and pin them for later. You can also add Life as a LEO Wife to your favorites and check back for new ideas and free printables and SVGs every Wednesday, as well as link parties with tons of shared ideas on Sundays!


What a great idea! I’m always amazed at all the things that can be created from Dollar Tree items!
Thank you! I know, I love Dollar Tree!
Niki, this is perfect! Pinned 📌
Thank you so much for sharing this tutorial with Sweet Tea & Friends this month. I can’t wait to try this.
Thank you!