Saturday I shared a tutorial for Halloween gifts using my free printable sign and gift tags. I didn’t have any gift bags on hand, and I remembered seeing some sewn felt gift bags a few months back. Since I couldn’t find a bag, I decided now is as good a time as any to try my hand at making a no sew felt gift bag. These gift bags are perfect for teachers’ gifts, Christmas, birthdays, showers, Mother’s Day, you get the picture. You can use these for any occasion, just change up the colors!
With today’s economy it’s important to save money wherever you can and making bags like these are a great way to save money. You can get a pack of felt that could make several bags at Dollar Tree for $1.25. If you want specific colors, you can get sheets at Walmart or craft stores for $.25 to $.33! Not only will you save money on gift bags or wrapping paper, but you will also have bags that you can reuse all over the home. Can we say reduce, reuse, and recycle?! Yes, yes, and yes!!
Looking for a great gift to place in your felt gift bag? You can place your child’s drawings or handwriting on items with this easy-to-follow tutorial. There are so many gifts that you can use this technique on like tumblers, mugs, license plates, vinyl decals, canvas wall art, keychains, and so much more!
To make a no sew felt gift bag you need:
- 3 sheets of felt – I used 9×12’s. I used two different colors for each no sew gift bag.
- hot glue gun
- ribbon – I used 5/8″ for 2 and 1/8″ for 1.
- scissors

Create a Triangle Flap
You can use the same color for each bag, or you can use one color for the bag and one for the flap. I chose the latter. Line up your secondary color (for the flap) on top of the bottom piece of felt. You want about 1″ of the flap across the top of the bottom piece. From here on out I’ll refer to the colors I’m using instead of top and bottom and flap, and blah blah blah.

Lift up one side and squeeze a strip of hot glue across the very top of the white sheet.

Press the edge of the orange sheet on the hot glue.

Next lay the second piece of white felt on top of the bottom sheet and the orange sheet. Line it up with the bottom piece. Fold the orange sheet down over the top white piece. To cut a straight line on the flap, you’ll need a ruler or other straight-edge. I have a grid cutting mat, so I lined up the bottom of the felt evenly across a line on the mat. Then I laid the ruler across the no sew gift bag, with each side of it laying along the same line. My flap is about 3″ tall, so the ruler is 3″ from the top of the bag.
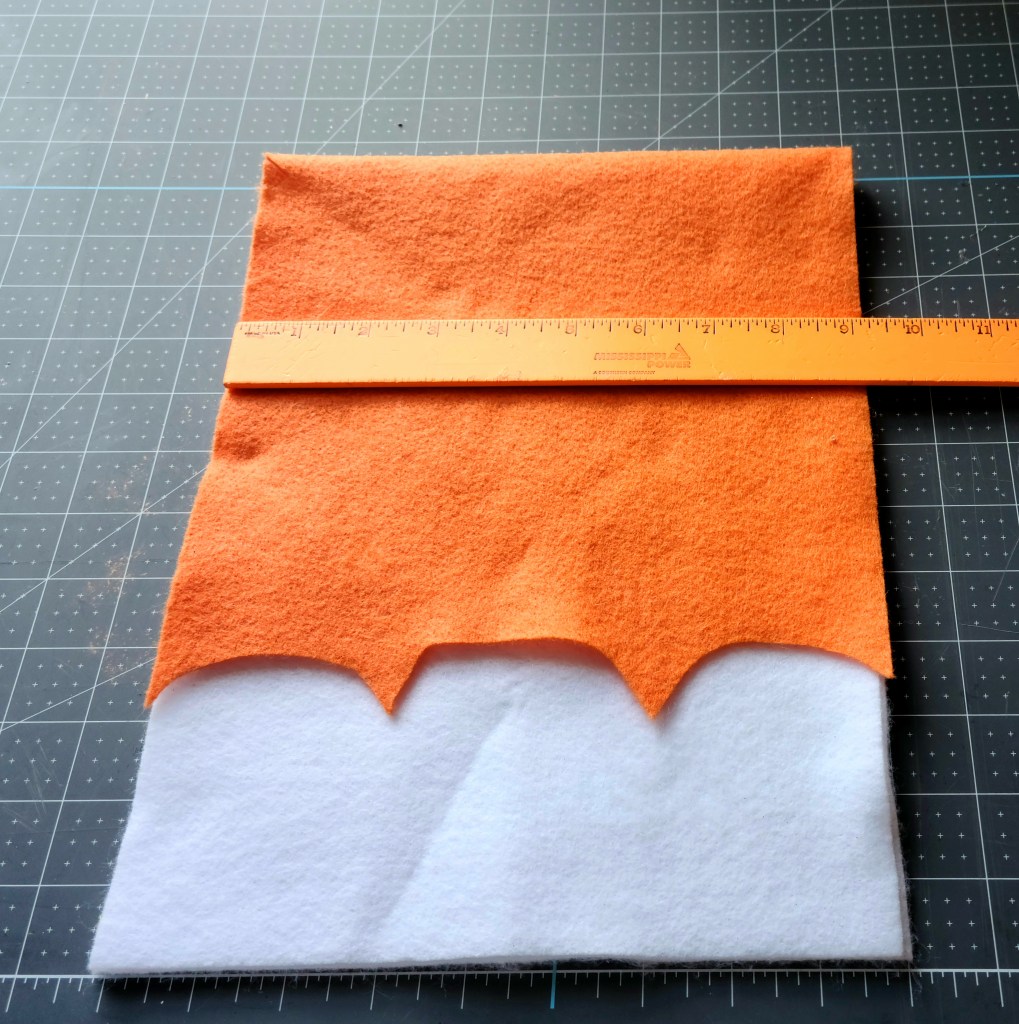
Start at the top corner (right or left, it doesn’t matter), and cut at an angle down to the ruler. Then do the same on the other side.

Use a pencil or marker and draw a straight line where the ruler is.

Cut along the line to finish the flap.

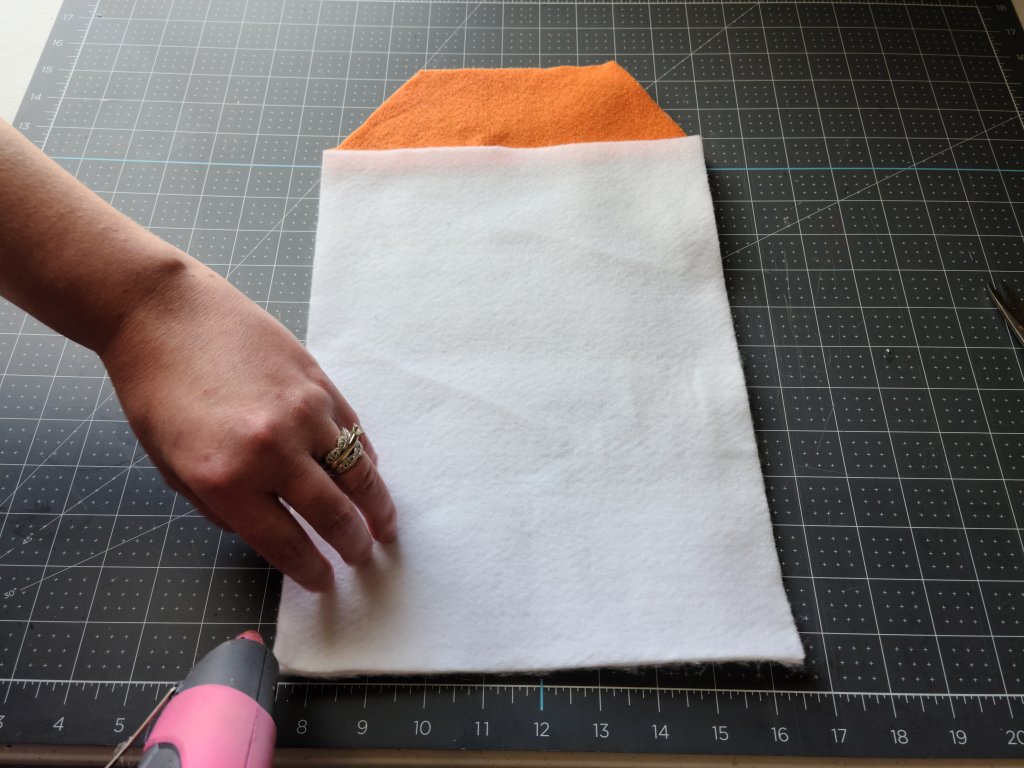
Create the Body of the No Sew Gift Bag
Make sure that the two white pieces of felt are lined up perfectly all around. Once they are, start gluing the bottom of the two pieces together. Lift up the edge of the bottom and begin squeezing hot glue along the edge. Then press the top piece down on it as you go. Continue across the bottom of the bag.


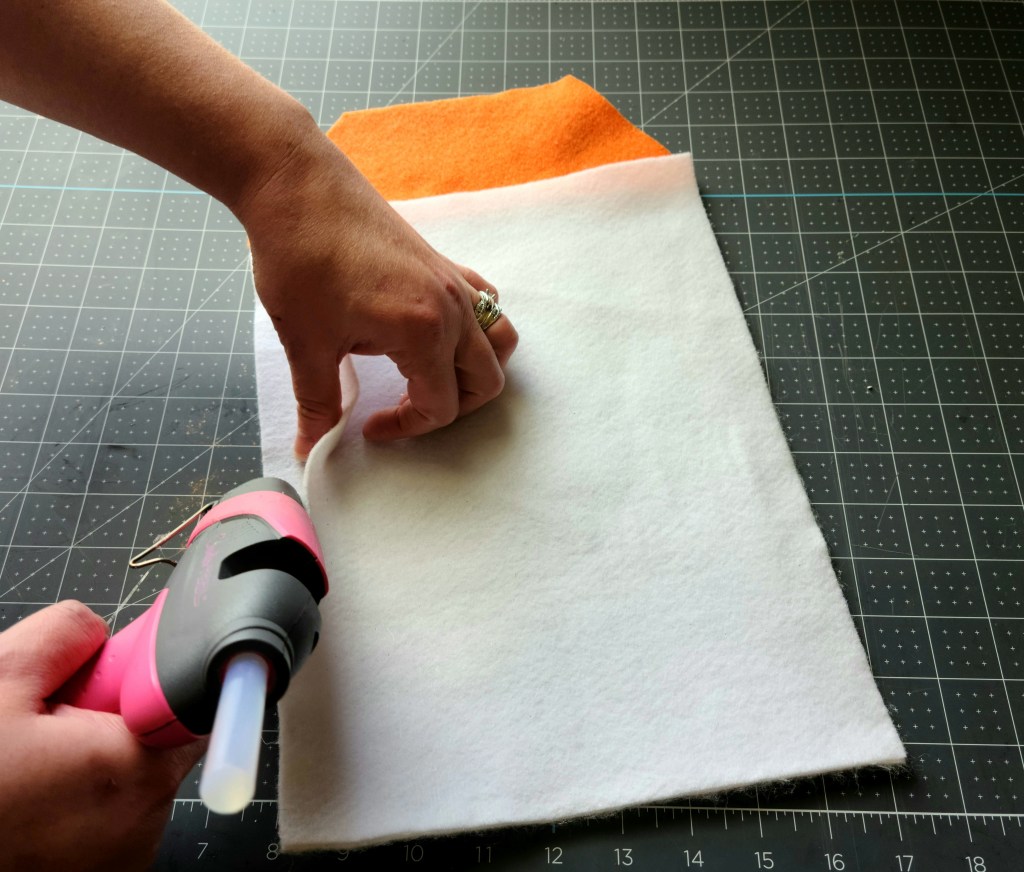
Start at the bottom and squeeze glue up the left side, pressing the top piece of felt down on it as you go. Repeat that process on the right side. You can do the right then the left. It doesn’t matter which. Stop gluing about 1.5″ from the top so that the bag/pouch can open and you can slide things in.

Add the Ribbon
Cut Slits in the White Felt
Next you will need to add a ribbon that will be used to close the bag. It’s also really cute. The ribbon will be placed in the middle. Since the bag is 9″ wide, the middle is 4.5.” If you’re bag is wider, place the ribbon at the half-way mark on your bag.
Fold down the flap and see where you’d like the ribbon to be when it’s closed. Lift it back up and lay your ruler across the white felt, right where the flap will be when it’s closed and you want the ribbon to end up. Press the craft knife through the felt at the 4.4″ mark. Since you need 2 holes to loop the ribbon through, they need to be spaced around the 4.5″ spot. So you’ll cut a hole at 4.4″ and 4.6.”


Now you can extend the holes a little with scissors if you need to. The width of your ribbon will determine how wide your holes need to be. I used 5/8″ ribbon on this bag, so I did extend the slits a bit.

Cut about 18″ of ribbon, and push one end through one of the slits.

Now push the other end through the other slit and pull it through.

Cut Slits in the Flap
Extend half of the ribbon to the left and the other half to the right. This will allow you to line up the ruler with them which will help you to cut slits in the flap at the right level. Pull the flap down and line up the ruler with the bottom of the ribbon on each side. Again cut a slit at the 4.4″ and the 4.6″ mark.

Finish Off the No Sew Gift Bag
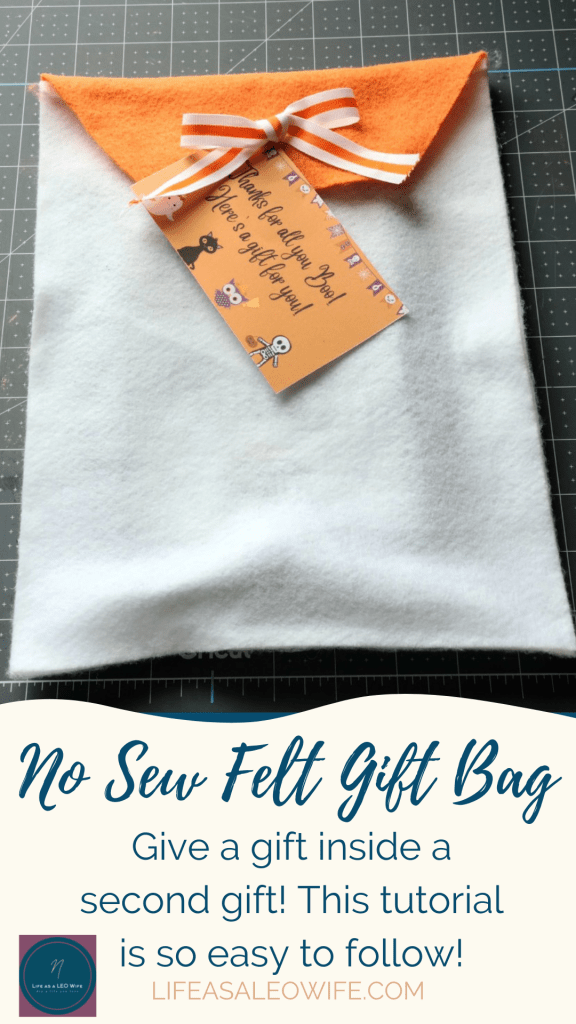
Place your gift inside your newly created no sew gift bag. Now push the ribbon through each slit just like you did on the white felt. I have a 5×7 frame in here that I’m giving as a Halloween happy to my son’s teacher.
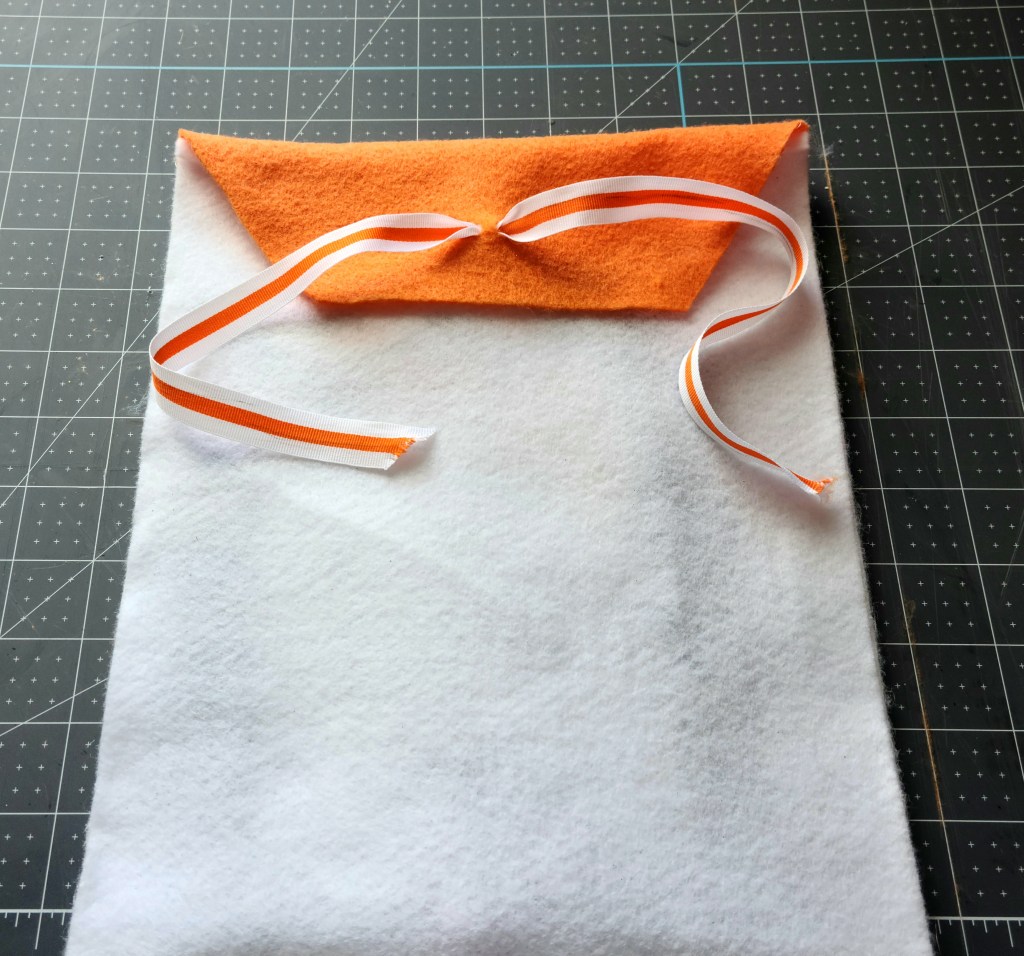
Tie the ribbon in a cute little bow, and BAM! An adorable gift with an additional second gift in the reusable bag!

If you have a gift tag, feed the ribbon through it, and then tie your cute little bow. How cute would this be for Christmas or a birthday?!

Here’s my gift with the picture that’s inside next to it. (It’s actually a second frame next to the bag with one already in it.)

My son has three teachers, and I made one for each of them.

If you learn easier by watching, here is a sped-up video of me making my final bag. I think my doctor really needs to up my Lasik because my hands and wrists are swollen. Forgive me for bumping the tripod 15 times!
I hope that you’ve enjoyed this tutorial and you get a lot of use from these no sew felt gift bags! Make sure you pin this tutorial or share it on social media using the buttons at the bottom of the page so that you have it when you’re ready to make one.
I would love for you to follow me on social media using the buttons on the sidebar. Follow me on Pinterest for more great ideas. You don’t want to miss a fun tutorial or free printable, so enter your email address below and you’ll get an email when I add a new post.
Get new content delivered directly to your inbox.
Don’t forget to go check out and share your family friendly posts on my three link parties, Happiness is Homemade, You’re the Star Blog Hop, and Crafty Creators. Sign up to follow me via email so you get an email when the link parties open so you never forget to share with us!


I love all of your ideas!
meiboochhome | https://www.meiboochhome.com
Thank you!