Today I’m going to share a Dollar Tree Cricut sign tutorial. I love my die-cutting machine. There is so much that you can do with it. However, it can seem daunting at first. Where to start? What to make? How to do it? Here I will take you through a step-by-step tutorial on how to make a Dollar Tree sign using your Cricut. If you’re looking to learn to use your Cricut you might like this tutorial that shows you how to make banners and garlands!
To make your Dollar Tree Cricut sign you will need:
- Cricut
- Dollar Tree sign- Any sign they have will work. We will be using the back, so it doesn’t matter what sign.
- robin’s egg blue acrylic paint
- paint brush
- scissors
- twine or leather cord- I had navy leather cord from Target Dollar Spot.
- ribbon of your choice- I used a 1.5″ navy blue silk ribbon.
- dark gray heat transfer vinyl (HTV vinyl)
- hot glue gun and glue
- iron
- wax paper
- ruler (optional)

Paint the sign.
First paint the back of the sign. I sanded mine a little before painting it, but that’s optional. You will need at least two coats of paint. Mine took three using Craft Smart acrylic paint in robin’s egg blue. That’s one of the colors in my living room, and I love it.
Creating your Dollar Tree Cricut sign in Design Space.
When you first get your machine, plug it in to your computer then follow the instructions to set it up. Once you have it set up, open Design Space. You will use the program to create your design. I subscribe to Cricut Access which gives you a lot of fonts, images, and projects for one monthly payment. I didn’t do that for years, trying to download free fonts, finding clip art then uploading it to the program. It was a long process and could be really aggravating! I am so happy with the subscription, I love it!
Click the “new” button with a “+” on it. That will take you to a new canvas, a grid with actions you can use while designing your project. Click the “image” button along the left side of the screen to find a design you like.

In the search bar type, “family that prays” and press enter. Select the image on the screen and click insert at the bottom. We will use this design throughout the tutorial.

In the bar at the top of Design Space change the width and height of the quote to fit your sign. For my sign I set it to 9.865″ wide and 4.909″ high. When you change the height, the width will change to keep the quote distributed the way it was made to. If you need to make the height to change, but keep the width the same, click the lock button in the left bottom corner that shows up when you click the image. You can see it in the picture below.

Now we will move to cutting the image. Press the green “Make It” button in the top right corner of your screen.

Using the cut screen on the Cricut.
On your machine, turn the dial to “iron-on.” You will use this dial every time you use the machine. It makes sure it will cut the right depth for what you’re cutting. For example vinyl, cardstock, corkboard, fabric, etc.

On the left of the screen you will see options for cutting. Since you are using heat transfer vinyl, you will have to “mirror” the image. If you don’t, the image will come out backwards on the sign. Remember to do this every time you use HTV. Then press the green “continue” button at the bottom of the screen. When you do, you will see the screen below on the right.

Note that the words are backwards here. This is what you want when you you cut HTV. When this is on your screen, you will load the mat into the machine.


Load the vinyl for the Dollar Tree Cricut sign.
Load the HTV on a standard grip mat. The Cricut brand is green, but I have the Michael’s brand which is pink. I have the 24″ mat too, which you will need if you want to cut images larger than 11.5.” Place the HTV on the mat with the shiny side face down. If it isn’t done this way, it will cut the wrong side of the vinyl. I’ve wasted a few pieces of HTV doing that. Picture me, shaking my head in hands and really mad at myself!

Slide the mat under the two tabs in the machine, you can see one in the picture below. With slight pressure on the mat, press the flashing arrow button on the Cricut. The mat will be pulled into it.

Next press the flashing “c” which will begin the cutting process.

Once the cutting is finished, the arrow button will flash again. Press it and the mat will be ejected from the Cricut. Go ahead and plug your iron in if you haven’t done that yet.
Prep the design to place on the Dollar Tree Cricut sign.
Pull the vinyl off of the mat. Cut the design from the rest of the vinyl. Next you need to “weed” the blank parts of the vinyl from around the words. I try to get a fingernail under the design at one edge or another, then slowly remove it from the design. If you can’t get it there, it’s sometimes easier to bend the vinyl slightly at the cut around a letter and get your nail under it there. Then lift it up there and slowly remove the vinyl around the design. Now remove the vinyl from the center of letters like the “a’s” and “e’s.” You are left with the quote on a sticky transfer sheet.
Place the HTV on the sign.
If your paint is dry, it’s time to put the Dollar Tree Cricut sign together. Measure your sign, then place the vinyl in the middle, with same amount of space from the top of the words to the top of the board and from the bottom of the words to the bottom of the board. Since my sign had holes on the left where twine was originally used to hang it, I decided to use it to add a little flare. I left more room on that side, and put the end of the vinyl about an inch from the right side.
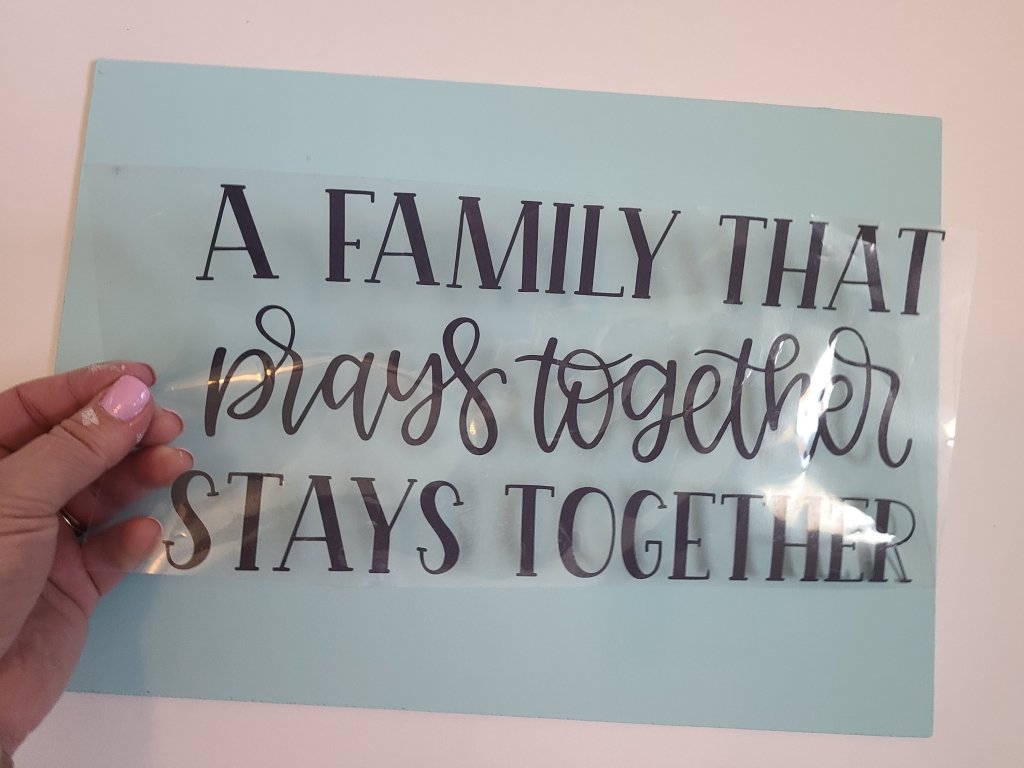
If you’re not a perfectionist, you can just eyeball it. Sometimes even if you use a ruler, you just can’t get the entire quote perfectly straight, and you end up with the right side of the design, “FAMILY” being a little higher or lower than “THAT” side. When that happens use the ruler to measure from the “A FA” to the top of the board. Next measure from the end of that line, the “AT,” to the top of the board to make sure they are the same distance. If it is off, you can put a dot with a pencil where the end of the word needs to be, then lift the sticky paper and place the top of the letters on that dot. Now you have a perfectly straight design.
It was kind of hard to take this picture and put the ruler where it needed to go, so I have the ruler too low on the pic on this side!


Iron the HTV on.
Take enough wax paper from the roll to cover your all of your HTV design on the sign. Place it on top of the sign, covering everything. If you don’t you will melt the plastic that holds the HTV in place making it useless, a big mess, and maybe burn your sign too.


Set your iron on the cotton setting. Make sure you have the steam turned off. Place your sign on a solid surface so that you can press down on the iron. Begin attaching the HTV by pressing down on the iron and move it around the entire design. You’ll need to have the iron on each section for about 45 to 60 seconds. I think I spent around 2 minutes total ironing the HTV on to the sign.

After ironing, take off the wax paper and lift up the plastic a little. If the design is adhered to the sign, remove the rest of the paper.

Embellish the sign.
I added some stylish touches to my sign. The holes on the sign couldn’t be hidden, so I threaded a leather cord through them, from the back, across the front side, and in the other. That left the cord showing across in the front. You can use ribbon, twine, rope, anything that can fit through the holes. To keep the cord on the sign, tie a knot on each end of the cord on the back of the sign.


Next add a bow to the side of the sign. At first I wasn’t sure what I wanted to make the bow with. Finally I narrowed it down to three items: a bow with the same leather cord, a sheer navy wired .5″ ribbon, and a 1″ silky navy ribbon. I made a bow with each of them and laid them on the sign.
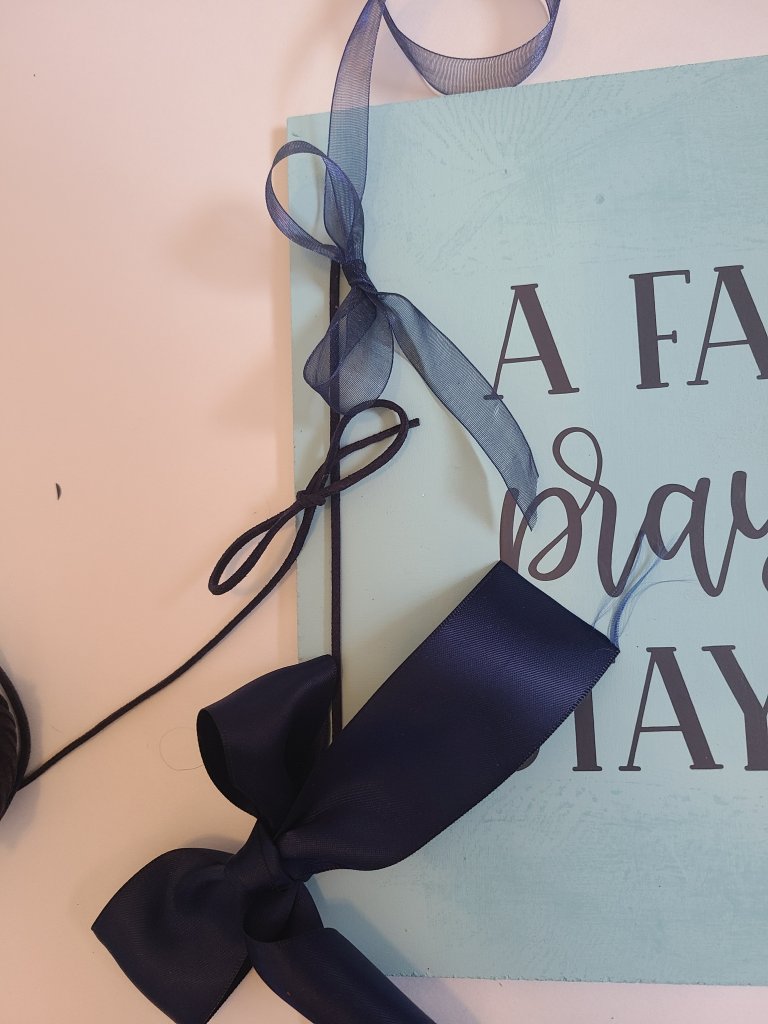
The silky ribbon looked the best. Make a bow for your Dollar Tree Cricut sign with the material you like the best. I made mine small with small tails. Attach the bow to the top hole, which is what I did, or the middle of the cord, or even at the top of the sign. Go with whatever you like best and will fit in with your decor.

Sign Reveal!
You are now finished with you Dollar Tree Cricut sign! I can’t wait to hang mine! I’m working on several pieces to create a new gallery wall in my living room. I don’t want to hang anything until I am finished with them all. I love the finished sign!

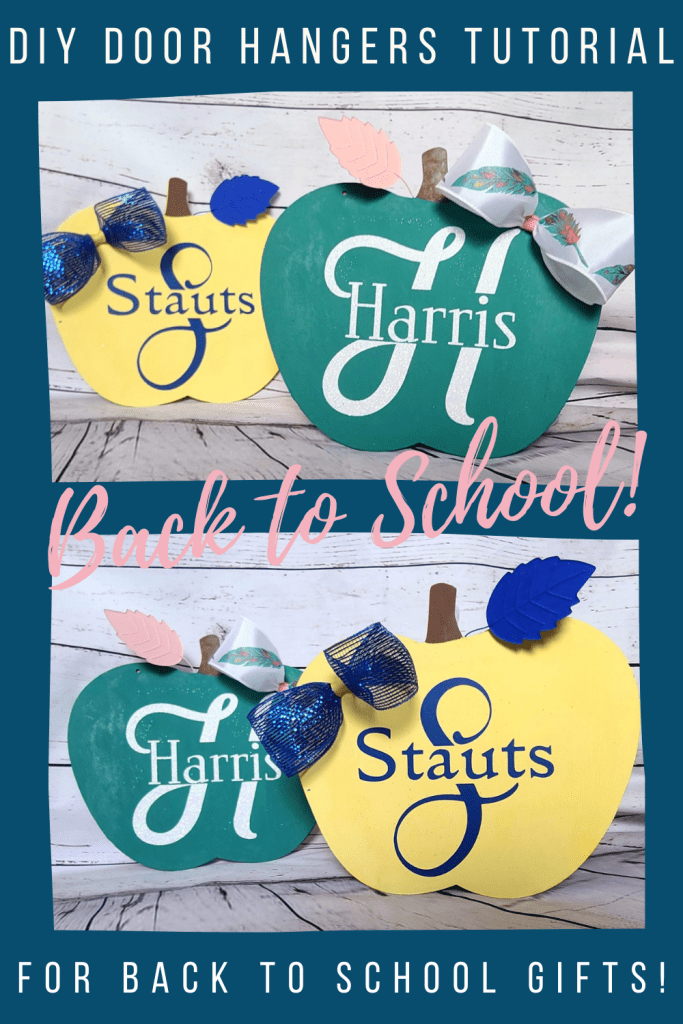
If you enjoyed this project you might like this prayer in progress sign. Hang this on your door when you are having your conversations with the Lord so you won’t be interrupted. This large farmhouse sign is easy to do, beautiful, and cheap! In this post I show you how to make a split letter monogram using your Cricut, then you can see the beautiful door hangers I made for my son’s teachers with them. They loved those adorable apple signs!


If you are a fellow blogger, we have three link parties each week. On Sunday we post Happiness is Homemade which runs from Sunday until Thursday. The second blog hop is You’re the Star. It runs all month, but each week we will share five new features. On Thursdays Traffic Jam Weekend opens at 5pm CST and runs through Sunday. Link up with us this week for a chance to be featured next week and to widen your audience! If you’re not a blogger, you definitely want to check these posts out to find DIYs, home and seasonal decor, recipes, crafts, fashion, and family posts. Every week you’ll find great new things!
I hope you have enjoyed this tutorial. When you make your own Dollar Tree Cricut sign, I would love for you to tag me social media! Enter your email address in the box along the side or at them bottom. You will get an email when I post, that way you won’t miss any of my new posts! Use the buttons below to follow us on social media. I would love for you to share your DIYs and thoughts with us!
Stick around and check out some more posts from Life as a LEO Wife!


Oh, how pretty, turned out nice. Love using my Cricut. Thanks so much for linking up with me at the Unlimited Monthly Link Party 23. Pinned!
Hello Niky! Really love your tutorial on using the Cricut. I have one and have literally used it a couple of years ago to cut some stencils (made cute painted chair covers for our RV’s chairs). I need to pull it out and make some fun signs!!! I have the vinyl already to go, too. I am really slow about getting around to projects lately (wasn’t like that when I was younger; don’t know why I am now. Weird, huh?). Too busy building the garden, I guess! ;)’
Anyway, happy to feature your fun post at this week’s Share Your Style #299 for you. <3
Enjoy your sweet sign and it'll be nice to see the new wall when you get them all hung up!
Hugs,
Barb 🙂
Thank you Barb! When I first got my Cricut, I made two or three things, then put it up for a while. It seems daunting at first. Thanks so much for the feature. I’d love for you to add your posts to my link parties. Tonight Traffic Jam Weekend begins at 5pm CST. Sunday Happiness is Homemade begins, then You’re the Star Blog Hop begins Monday. Thank you for stopping by!