Designing Devotion Edition
When I shop, it’s always for deals! I found this piece of wall art with scripture from Isaiah 41:10 written in a brush script. The original price was $59.99. No, we live on a tight budget, and I can’t justify buying it when I could buy something that is essential… like food! My husband gave me a $100 gift card at Kirkland’s for Christmas. That set me on the hunt to get as much as I could with it.

Once I saw that the piece of wall art on clearance for $14.99, I had to buy it! It is 16×24″ with a scripture I love, and it’s mounted on a burlap looking background. The only problem is that it was various colors of green and dark and light tan. Those colors don’t go well in my house, so it sat, unhung, for about two years. Since we’re working with a scripture here, I’m making this this week’s Designing Devotion edition. If you would like to jump to the devotion click here.
Wall Art Re-Fab Process
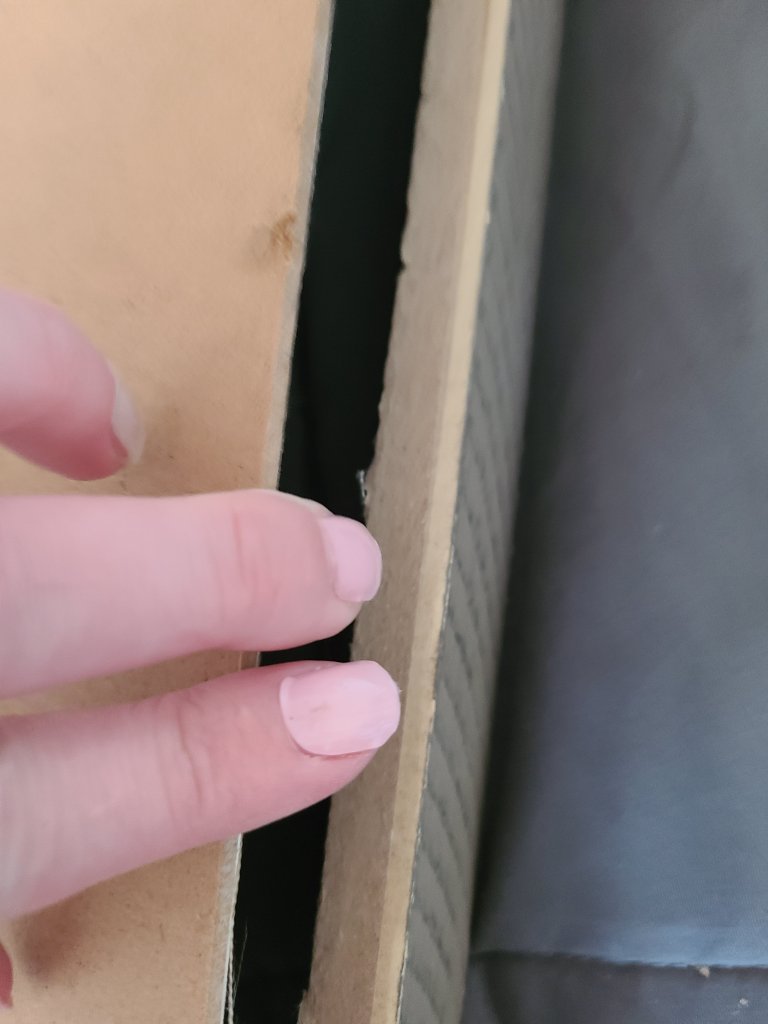
To change the colors on the wall art, you first need to open the back to get to the picture. On mine there was a layer of kraft paper, then two layers of thicker pieces, kind of solid cardboard type things. On each corner there were triangle wood squares attached with staples, which I pried out in order to be able to take the picture out. Finally there was only one more solid piece under tabs that I pried up.


Yesterday I wondered what giving the wall art a re-fab would look like. I grabbed acrylic paint in colors that would go well with my existing decor: robin’s egg blue, English navy, white, and tan. When you do your own wall art re-fab, choose colors that compliment each other and ones that will be cohesive with that particular room.

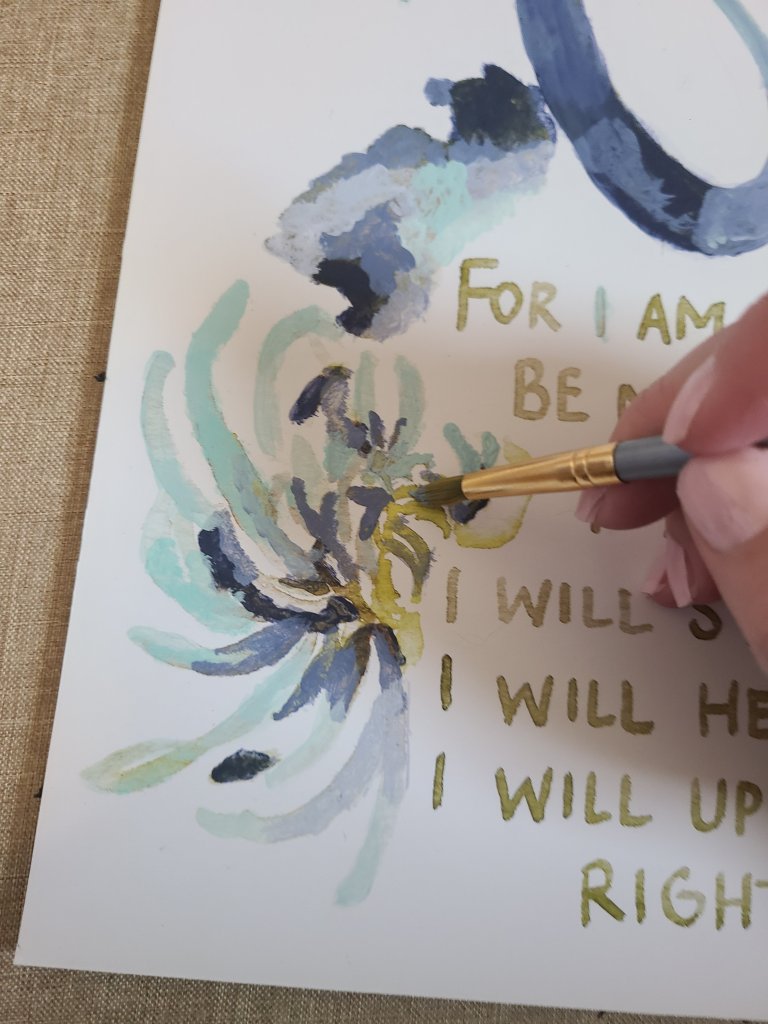
The picture has variations in color throughout, so I decided to go a similar route. I used English navy, then mixed it with white in three amounts, making each one a bit lighter in color. Using robin’s egg blue and white, I did the same thing.
When I started my wall art re-fab, I painted the darkest sections of green in the word art navy. I used a very small paint brush and dabbed along the brush strokes. That allowed me to keep control of the darkness and stay within the lines. From there I blended the colors into one another. It isn’t hard, just time consuming. You can definitely do it if I can!


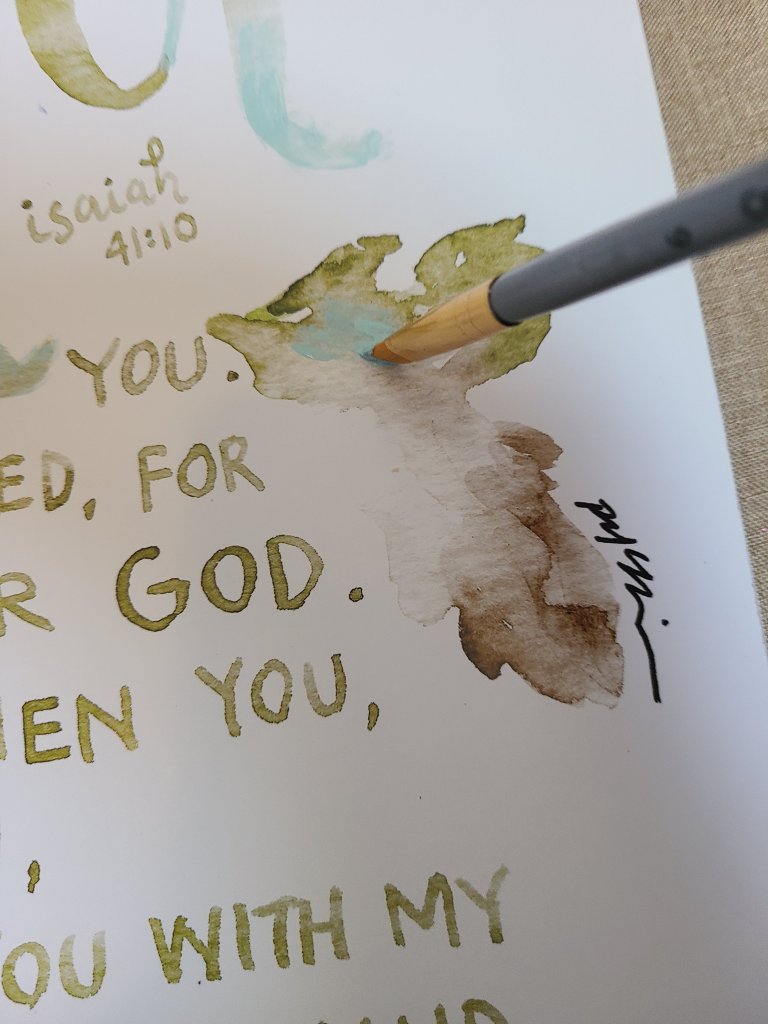


Once I had the “fear not” and other embellishments painted, I wet a small paint brush and went back over them to blend the colors a bit better. Finally I used tan acrylic paint and a tiny paint brush to go over the rest of the scripture words that were originally light olive green.

When the paint dries you will need to clean the glass and frame. On mine two screws weren’t holding the back on correctly. I think that’s why it was on clearance. I had to drill new holes and attach the hanging bracket back on. Due to that I had to brush out a bit of saw dust, then I Windexed the glass, then put it all back together.
All there’s left to do is find the perfect spot and hang it up. I hung mine in my living room with two shutters, one on the left and one on the right. I’m still decorating this wall in my living room, so I’ll share the full picture with you soon.

Shopping the clearance sections of stores is an excellent way of being able to decorate your home on a tight budget. If something is marked down a lot, use your imagination to think about ways to alter it slightly in order to make it fit your home. My wall art re-fab saved me $45! Multiply that with the amount of rooms you have and would like to update, and you could save from hundreds to thousands of dollars in you lifetime. That’s a deal I’ll take any day!
If you have any projects you’ve upcycled, why don’t you link up to Happiness is Homemade and You’re the Star Blop Hop? Make a few friends, get some inspiration, & more views! We’d love to have you.
Designing Devotion
Isaiah 41:10 is one of my favorite verses. It states, “…fear not, for I am with you; be not dismayed, for I am your God; I will strengthen you, I will help you, I will uphold you with my righteous right hand.” Did you know that the Lord tells us, in one form or another, that we should not fear 365 times in the Bible. He holds our life and well-being in His hands.
Having a severe chronic illness that will one day be fatal, I lean on those verses. I have never one time, been afraid of any of my illness. I worry over other things that you’d think would pale in comparison with not seeing your child graduate, or marry, or give you grandchildren. Learning to trust Him with all of those things is what I need to do! I’ve never been feared being sick. Ever. I guess it’s because I know He holds that key to my next heartbeat.
I think we all have those things that scare us more than others. However the Lord tells us fear not. Not be afraid of losing your job, but not of dying. Not don’t be afraid that your children won’t come to know Him, but be afraid of being alone or heights. He told us 365 times for a reason. One for every day of the year. He’s here every single day in every single second! God has already walked every place you will ever step. He knows how everything will end up, and He’s there in the good and bad!
Wrap it Up
Well that is it for this week’s Designing Devotion. I hope you will update your home with items that are super budget-friendly. Make them your own! Take this week’s verse with you every where you go, reminding yourself there is no reason to fear. God’s got this! God bless you all, and thank you for stopping by this week Wifers!
I hope that you enjoyed this tutorial & devotion. I’d love for you to use the buttons at the bottom of the post to share. Use the buttons on the sidebar to follow me on social media to make sure you see what’s going on over here on Life as a LEO Wife! Enter your email address below so you don’t miss a thing! You’ll get an email when I add a new post, tutorial, or free printable, never any spam!
Get new content delivered directly to your inbox.
If you love great ideas, check out our three link parties each week. You’ll find posts for DIYs, recipes, crafts, home decor, fashion, gardening, family ideas, and more. If you’re one of my blogger friends, be sure to link up your family friendly posts every week! Happiness is Homemade runs Sundays thru Thursdays, You’re the Star Blog Hop runs all month long with posts of our features every week, and Traffic Jam Weekend runs Thursdays at 5pm CST thru Sundays.


Thank you for sharing at #OverTheMoon. We appreciate your shares. They have been Tweeted Pinned. Have a lovely week. I hope to see you at next week’s party too! Please stay safe and healthy. Come party with us at Over The Moon! Catapult your content Over The Moon! @marilyn_lesniak @EclecticRedBarn
********************************************************
Thank you! Happy Easter!
Congratulations! Your post was my feature pick at #OverTheMoon this week. Each Hostess displays their own features so be sure to visit me on Sunday evening and to see your feature! I invite you to leave more links to be shared and commented upon. Please don’t forget to add your link numbers or post title so we can be sure to visit!
I need to pay attention to clearance items when I shop! You inspired me!
I’m glad! I’d love to see what you find and re-fab. When you get done I’d love for you to share it!
Love it, looks really nice!! Thanks so much for linking up with me at the Unlimited Monthly Link Party 23. Pinned!
CONGRATS! Your post is FEATURED at my Unlimited Link Party 24! Open for two weeks now instead of a month.
Thank you Dee for the feature! I will be back to your site today!