Hello friends! Boy, do I have a simple, yet beautiful spring decor tutorial to share with you today! This DIY framed bunny and Easter egg can be customized to fit your spring decor, and they will cost you about $3 each. Amazing, right?! Let’s get started.
It’s time for our monthly Sustainable Craft Challenge hosted by Julie from Sum of Their Stories. Every month we bring you a craft with a sustainable twist, like cleaning out our craft stash so as not to purchase any new supplies, reducing waste, or recycling. Our theme this month is spring. Stick around after the post to see what all of the other lovely ladies are sharing this month!
If you missed last month’s challenge, you can see my spring chunky wreath tutorial here.

If you haven’t entered our Spring 23 Giveaway, where you can win $100, what are you waiting for?! It’s only open through April 14, so don’t wait. Share with your family and friends so they have a chance to win too!
DIY Framed Bunny Supplies:
- beveled edge wood bunny and/or egg
- 5×7 frame(s)
- scissors and/or a paper slicer
- Quick Grip
- hot glue gun and glue
- 2 different spring patterned pieces of cardstock
- white chalk paint
- paint brush
- sandpaper

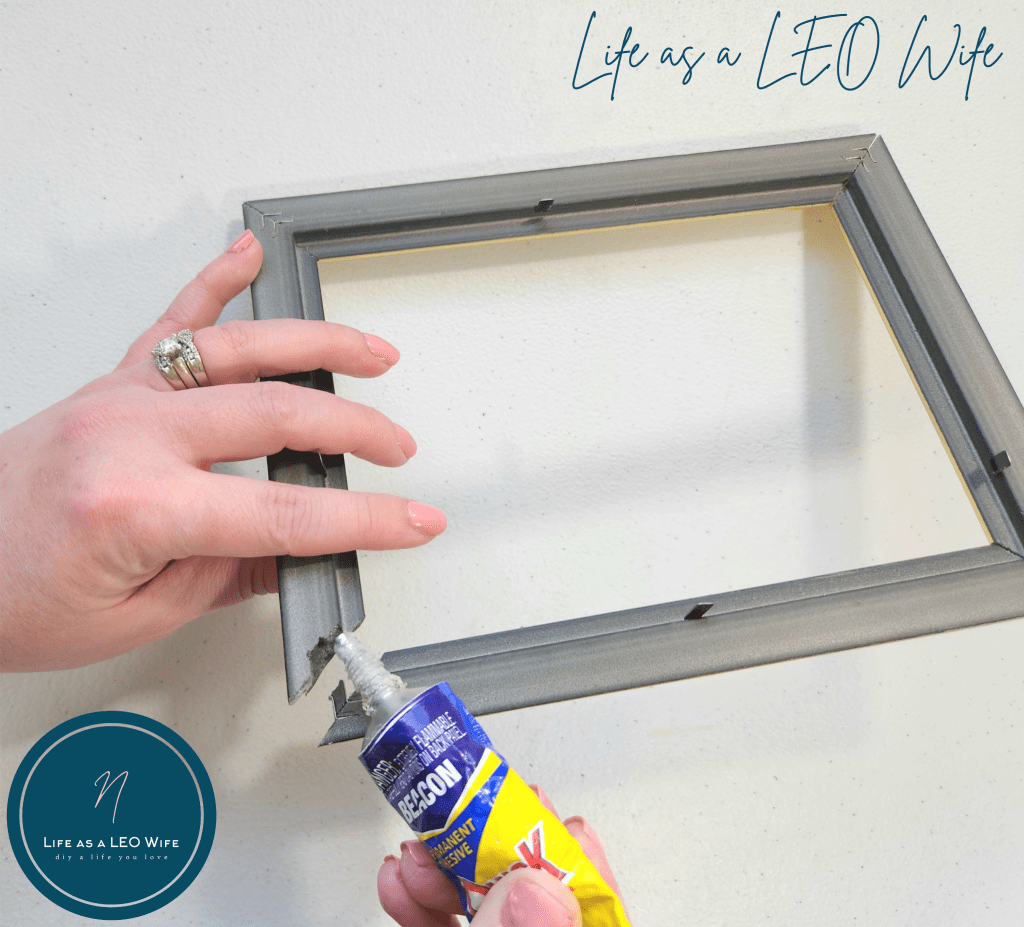
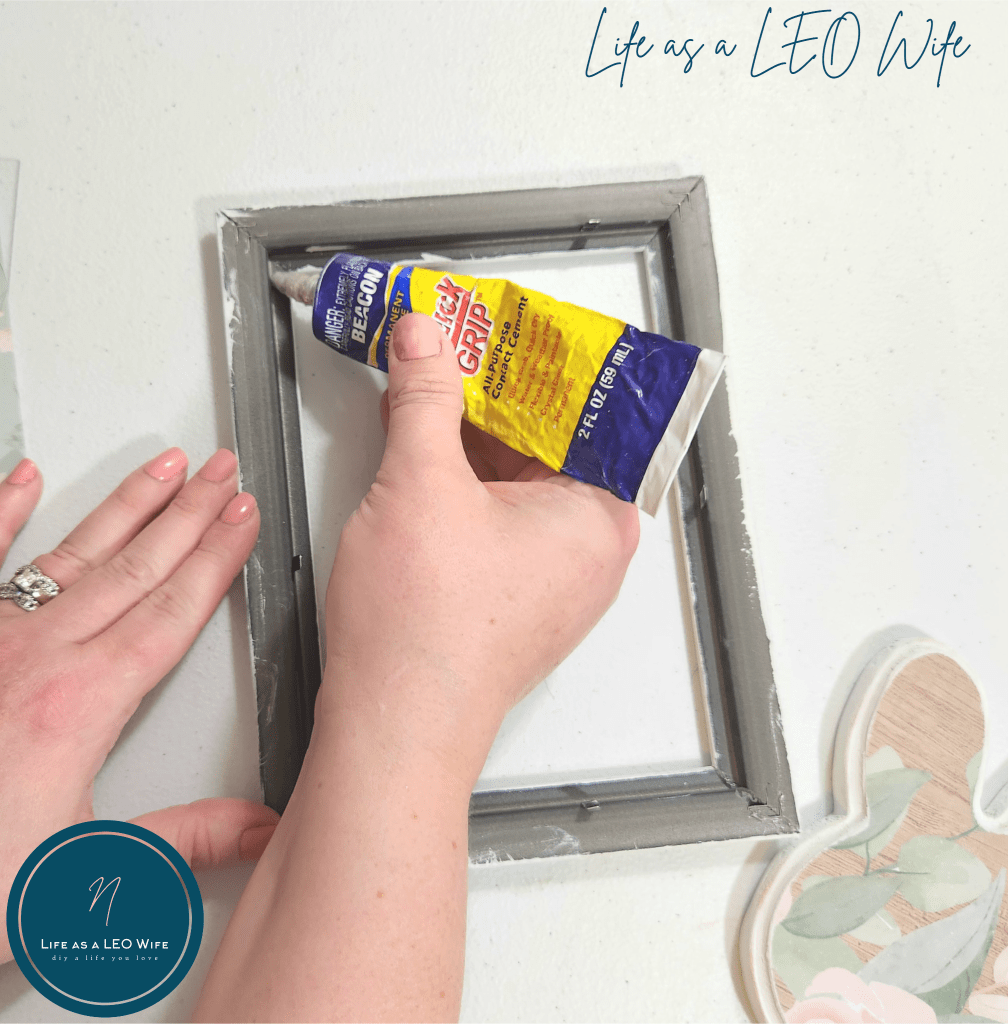
Before I could begin, I needed to fix one of my frames.
I have been saving a broken 5×7 frame for a while. Since I was making my DIY framed bunny for our Sustainable Craft Challenge, I thought what better time to use it? What would’ve gone into the trash, was saved by today’s challenge!
The Dollar Tree frames have a tendency to come apart at the corners. I added Beacon Quick Grip to the broken corner, then held it together while it dried.

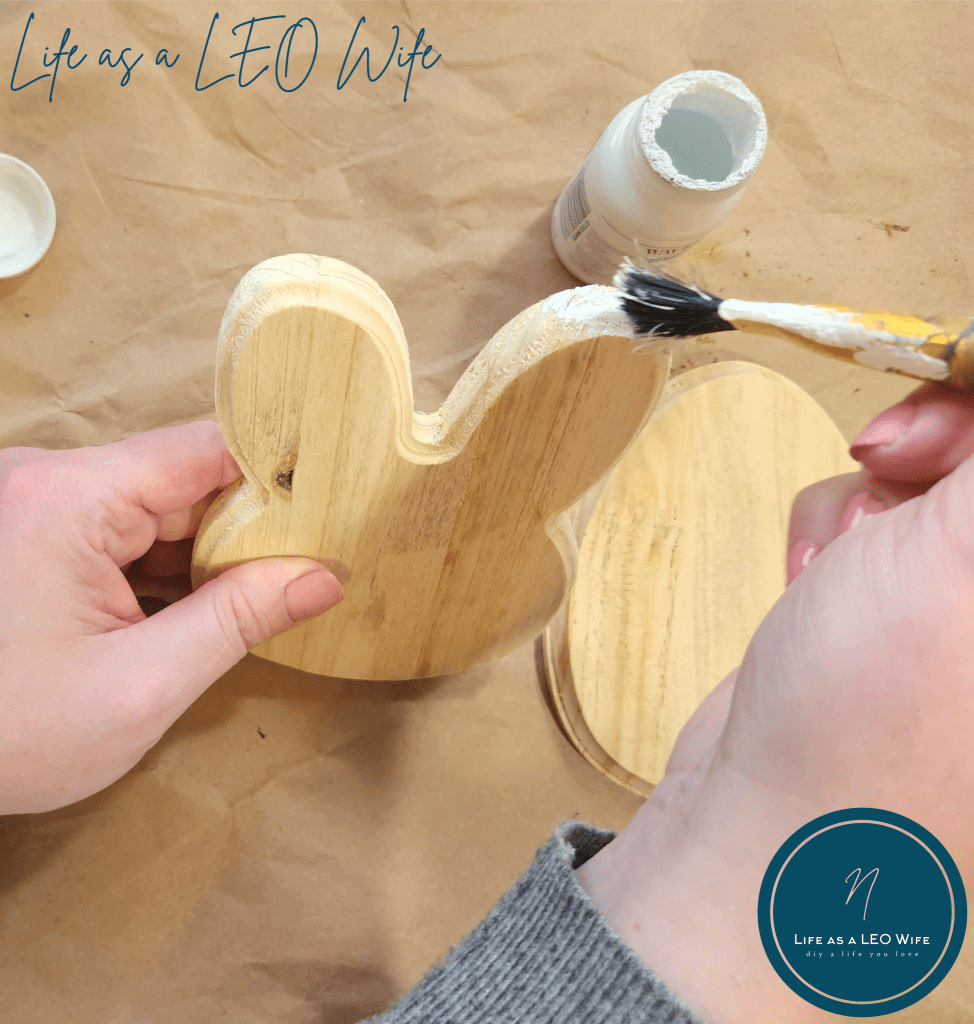
Paint the frames & the wood bunny.
For this project I used white chalk paint. It works better than acrylic paint on the shiny frame surface.

Dollar Tree’s wood items usually need sanding along the edges, so go ahead and do that before painting.
Next paint the edges of the beveled edge bunny and Easter egg (if you’re making two like I did). You will be covering the top with cardstock, so you don’t have to paint it.
Cut cardstock to fit the frame and the wood bunny.
To make my framed bunny and Easter egg even more sustainable, I used scrap pieces of cardstock that I had leftover from other projects. I save all of my scraps if I feel like they’re big enough for anything lol!
Place the frame’s glass on the back of your spring patterned cardstock and trace it. Use scissors or a paper trimmer to cut it.


Next, place the wood bunny on your second patterned cardstock. Go under the edge of the wood and trace the beveled edge. You will probably have to trim off more of the paper, but going under will save you some work. Cut out the bunny.


Now place the cardstock bunny shape onto the wood. Use your finger and press down on the beveled edge and slide it around the entire shape. That will leave a crease, allowing you to cut the bunny to the correct size. Trim off the excess paper.


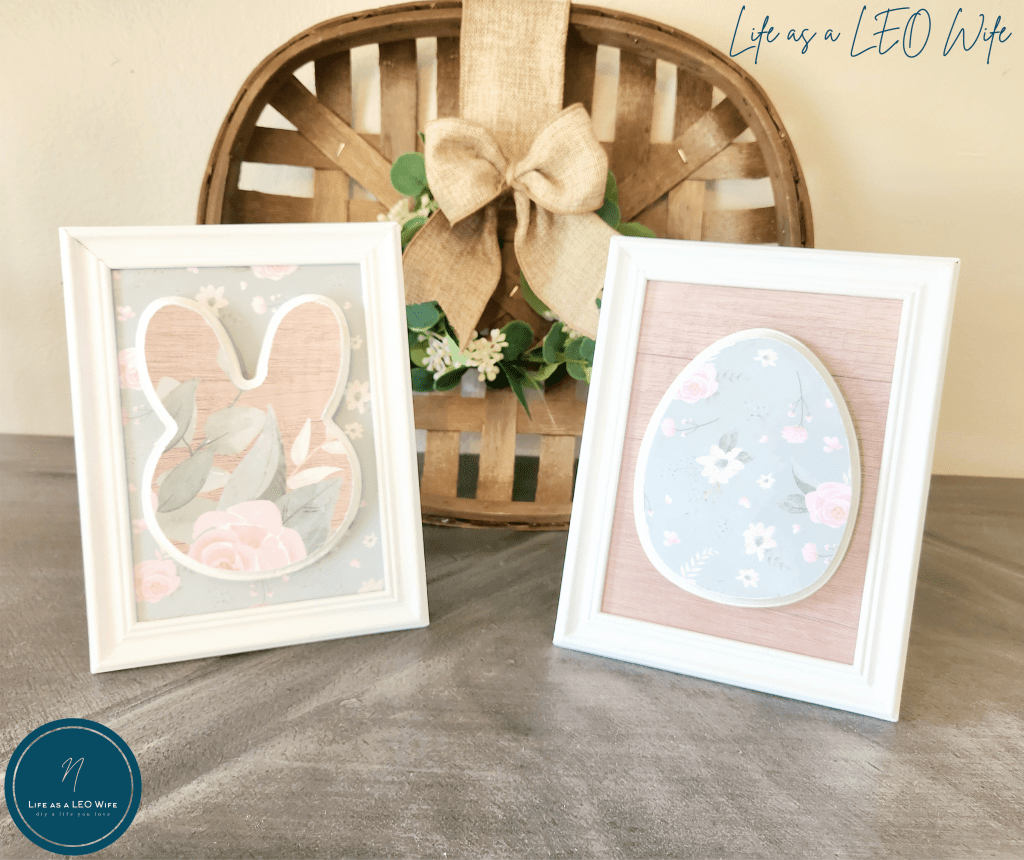
Repeat the process with the Easter egg, but with the opposite patterns of cardstock. For example, I used my mint/sage-y floral pattern in the frame and the wood print with roses and greenery on the bunny. Then I used the floral pattern on the Easter egg and the wood pattern inside the frame. I love the way my DIY framed bunny and Easter eggs look together, matching, but not too match-y match-y.
Attach the spring cardstock to the bunny.
Brush a layer of Mod Podge on the top of the wood bunny then place the bunny on it.

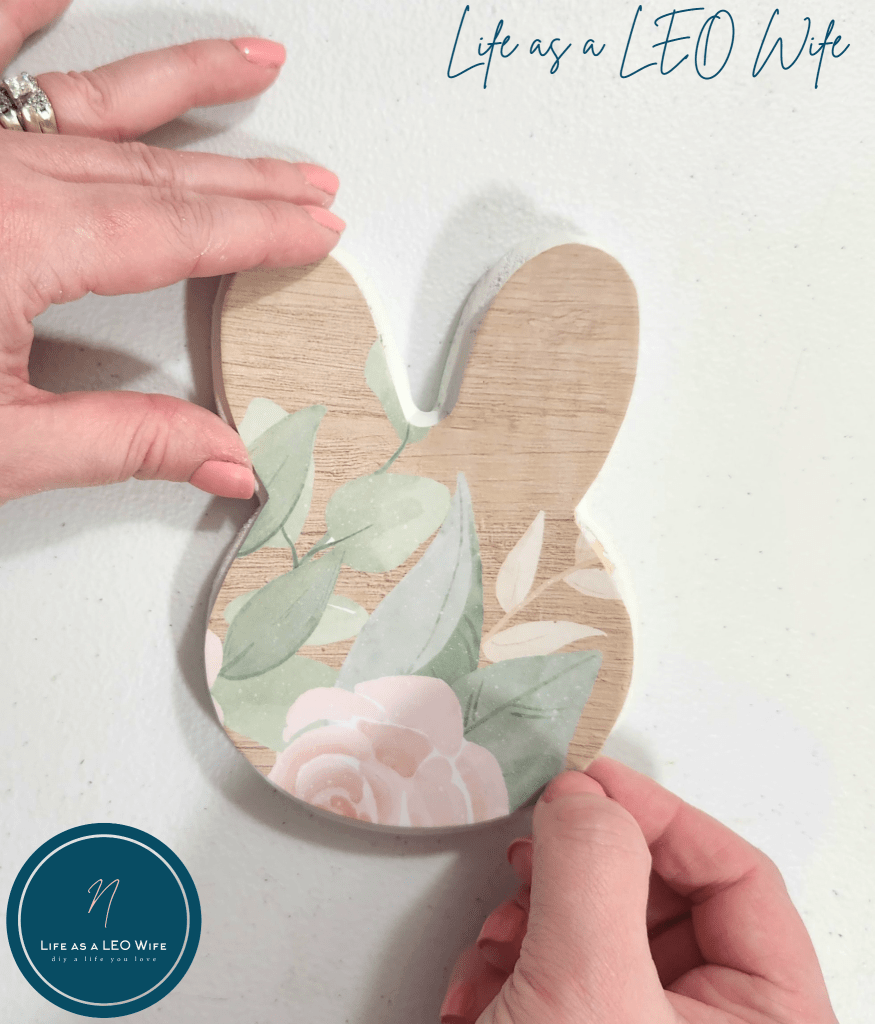
Once you’ve given it a little bit to dry, use sandpaper or a sanding block (that would be easier, but I couldn’t find mine) to sand along the beveled edge of the bunny. That will remove any overhang and it gives it that signature farmhouse look. Also sand the wood to distress it a bit.

You can seal the cardstock with another layer of Mod Podge if you’d like. I didn’t, or at least I haven’t yet, but I may do it before I put the bunny frames away for the year.
Finally, assemble your DIY framed bunny.
Add Quick Grip to the inside edge of the 5×7 frame and place the cardstock in it.
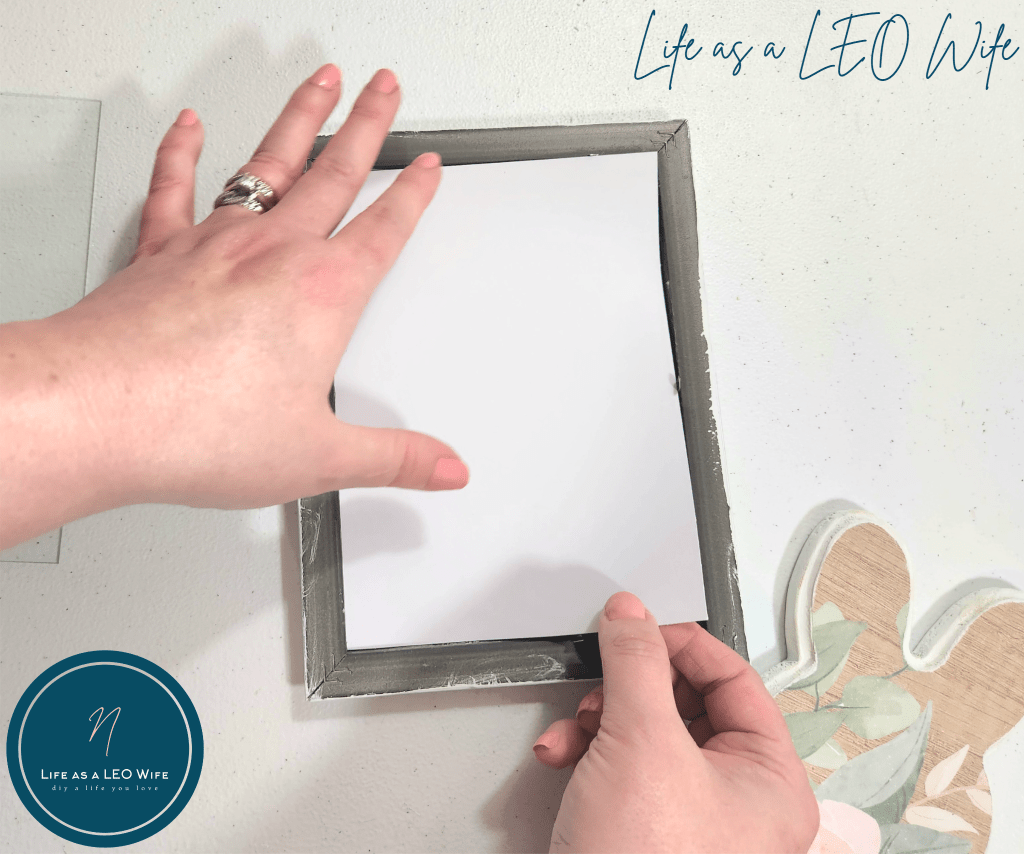
To give my DIY framed bunny a little extra strength, I glued the glass into the frame behind the cardstock. Add the Quick Grip and a little bit of hot glue, then place the glass into the frame. Pop the back in and press the tabs back down to hold it in.


Squeeze some Quick Grip, followed by hot glue, onto the back of the bunny, then press it onto the center of the frame.


Here’s a quick video tutorial for those that prefer to watch step by step.
That’s it! Your DIY framed bunny and Easter egg is ready to display!
I absolutely love the way these turned out. They match my family bunny butt sign and my spring decor blocks. You can customize your sign to fit your home, and if you change up your decor next year, you can change these with ease!
Remember this is a blog hop, so keep reading to see what the other ladies are sharing!


For now my DIY bunny & Easter egg frames are sitting on my sofa table underneath our mounted TV. You can also see my bunny topiaries and bunny butt sign as well. I think I’m going to replace the cardstock paper behind the bunny butt sign to the one that’s behind my framed Easter egg.

Remember to pin the image below or share this post with the buttons on the left side of the page so you can find it when you’re ready to start your project! Also, follow me on Pinterest for new ideas added weekly! Be sure that you never miss a great tutorial for decor like wreaths, signs and other home decor, free printables, crafts, and other fun posts! Enter your email address below to be notified of new posts! Use the buttons below to follow me on social media for other great content.

Spring Sustainable Craft Challenge

Julie – Sum of their Stories | Tulip Collage Greeting Cards
Christine – Christine’s Crafts | How to Easily and Quickly Fold a Cute 3D Origami Tulip
Gail – Purple Hues and Me | Everlasting Spring Blossoms DIY
Mel – Decor Craft Design | DIY Spring 3D Gift Can
Marianne – Songbird | Natural Spring Decor: Perfect for Easter!
Don’t go yet! There’s more to see!
There’s plenty more to see here on the blog! If you’re looking for something specific, use the search box in the sidebar to look it up. If not, you might enjoy these ideas. Don’t have time to read them all now? That’s ok, just click over to the posts using the pictures and pin them for later. You can also add Life as a LEO Wife to your favorites and check back for new ideas and free printables and SVGs every Wednesday, as well as link parties with tons of shared ideas on Sundays!


These are simply adorable! I love how you made such cute decorations from simple supplies.
Thank you! Both took about 20 minutes minus dry time!
This is so cute! Pinned it and shared it in one of my Easter Bunny posts.
Thank you!
This is so pretty, you have picked such lovely papers. Such a great way to save and reuse an old frame and I love how you can mix and match all your seasonal decor.
Thank you! I’m in love with the paper, and I’m going to be sad when I run out!
What a fun and adorable activity! Thanks for sharing your wonderful idea for framing a bunny and egg! Both turned out really cute!
Thank you! I really love these cardstock patterns, so I’m trying to figure out where I can add them into my decor!
Absolutely adorable Niki and as always, you’re tutorial is so easy to follow! Thanks so much for sharing. Pinned!
Thank you!