
Welcome friends! It’s time for one of our monthly blog hops, this month with all of us trying to de-stash our craft supplies. Boy, do I have a ton! Luckily, I was able to get rid of a few by making this St. Patrick’s Day sign (pun intended!). Let me show you how to make your own sign without a Cricut or other cutting machine.
Our Craft De-Stash Blog Hop is hosted by Beverly from Across the Blvd. Stick around after the post to check out what all of the other talented ladies on the hop are sharing this month.
Supplies for a St. Patrick’s Day sign:
- 14×11 blank wood sign (or a blank canvas to do a reverse canvas sign)
- paint pen- I used a black Sharpie paint pen because Walmart has been out of the gold ones every single time I’ve tried to get one. The paint pen aisle is extremely empty! This is my favorite if you can find them!
- chalk paint- I used white, celery, and a mix of moss and Kelly green.
- wood stain (optional)
- painter’s tape
Disclosure: I am a participant in the Amazon Services LLC Associates Program and the Dollar Tree Affiliate Program, affiliate programs that allow me to link to the products that you can use to make this project quickly and easily. If you purchase any of these products I may receive a very small commission at no cost to you! That commission helps me continue to bring these great decor DIYs, free printables, and all of the other goodies on this site to you. Thanks so much for your support!
Shop This Post


Stain the Wood Frame
First tape off the main part of the sign with painter’s tape so that you can stain the frame.

Use wood stain or paint on the outside frame. I used Rust-oleum’s weathered gray stain and polyurethane in one. When you stain remember to only brush in one direction.

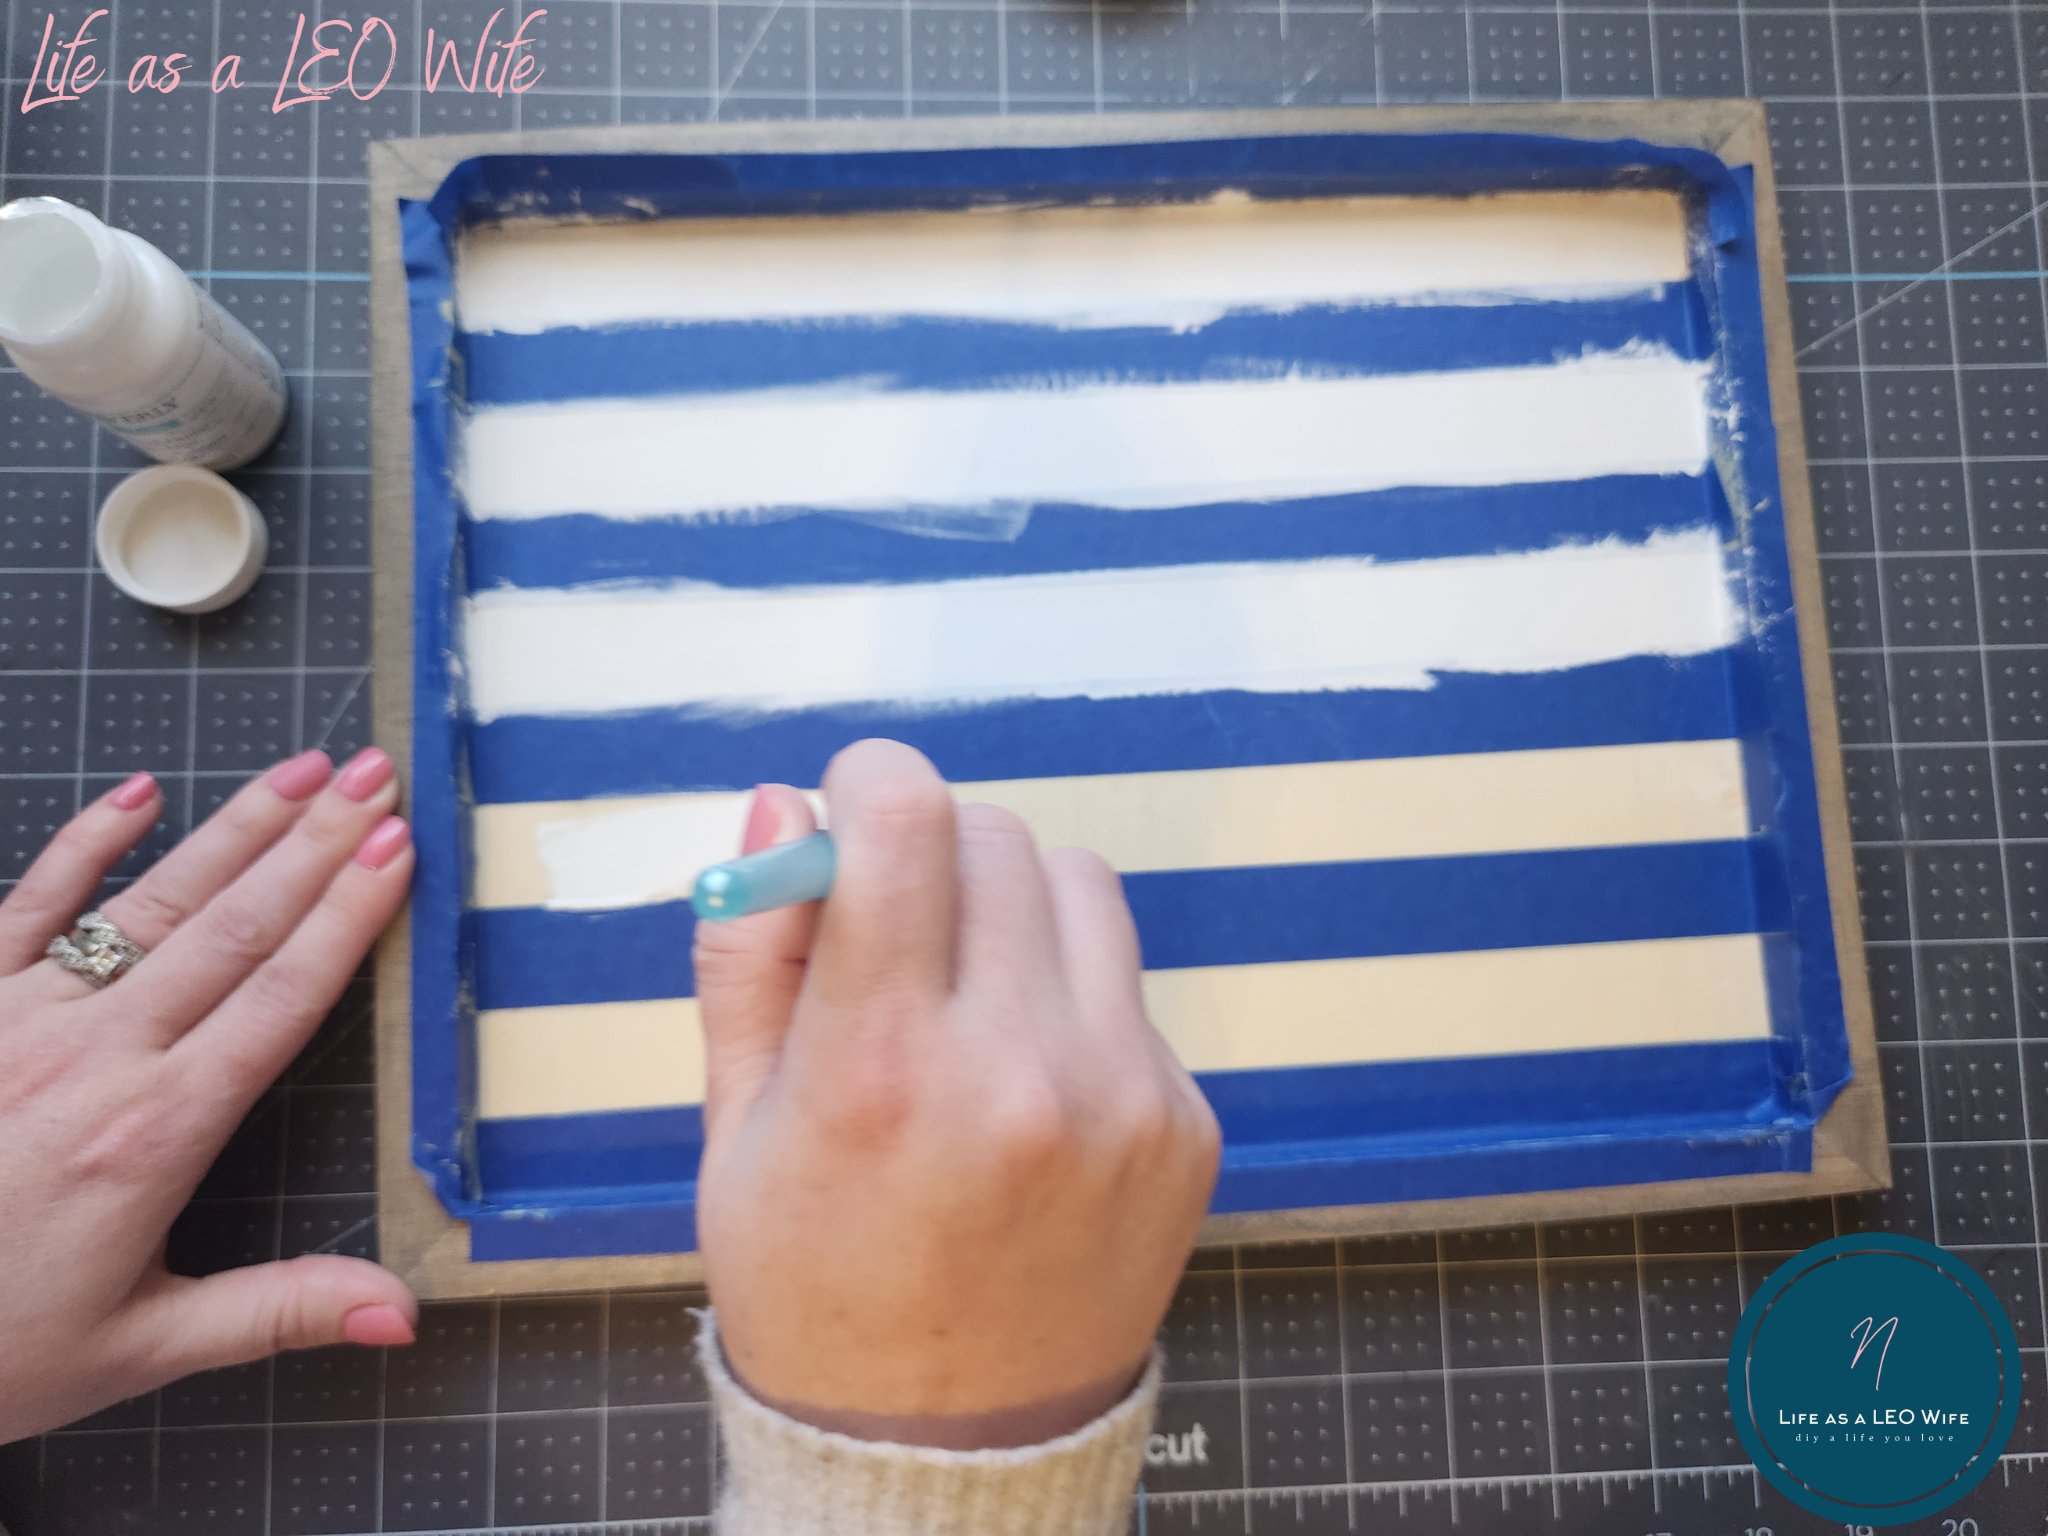
Create Stripes on the Sign
Once the stain is dry, it’s time to tape off the first set of stripes.
I like to use quick or easy release painter’s tape for this. It never gives me a problem with ripping off the first layer of paint.
Tape off the stained edges of the wood frame, then place a stripe at the top of the sign.

Put two small pieces of tape under it to create the right distance between stripes.

Add another stripe below those.

Continue adding stripes until you reach the bottom.
Paint the First Stripes
Use the celery chalk paint to paint between the stripes of painter’s tape. I used two coats to cover well.

Add a Second Row of Stripes
When the first color of paint is dry, remove the painter’s tape. Next, tape over the first stripes that you painted with the celery chalk paint. If you have easy release tape it won’t remove them. Smooth the tape down to make sure the next color doesn’t seep under it.

Paint the empty slots with the white chalk paint.
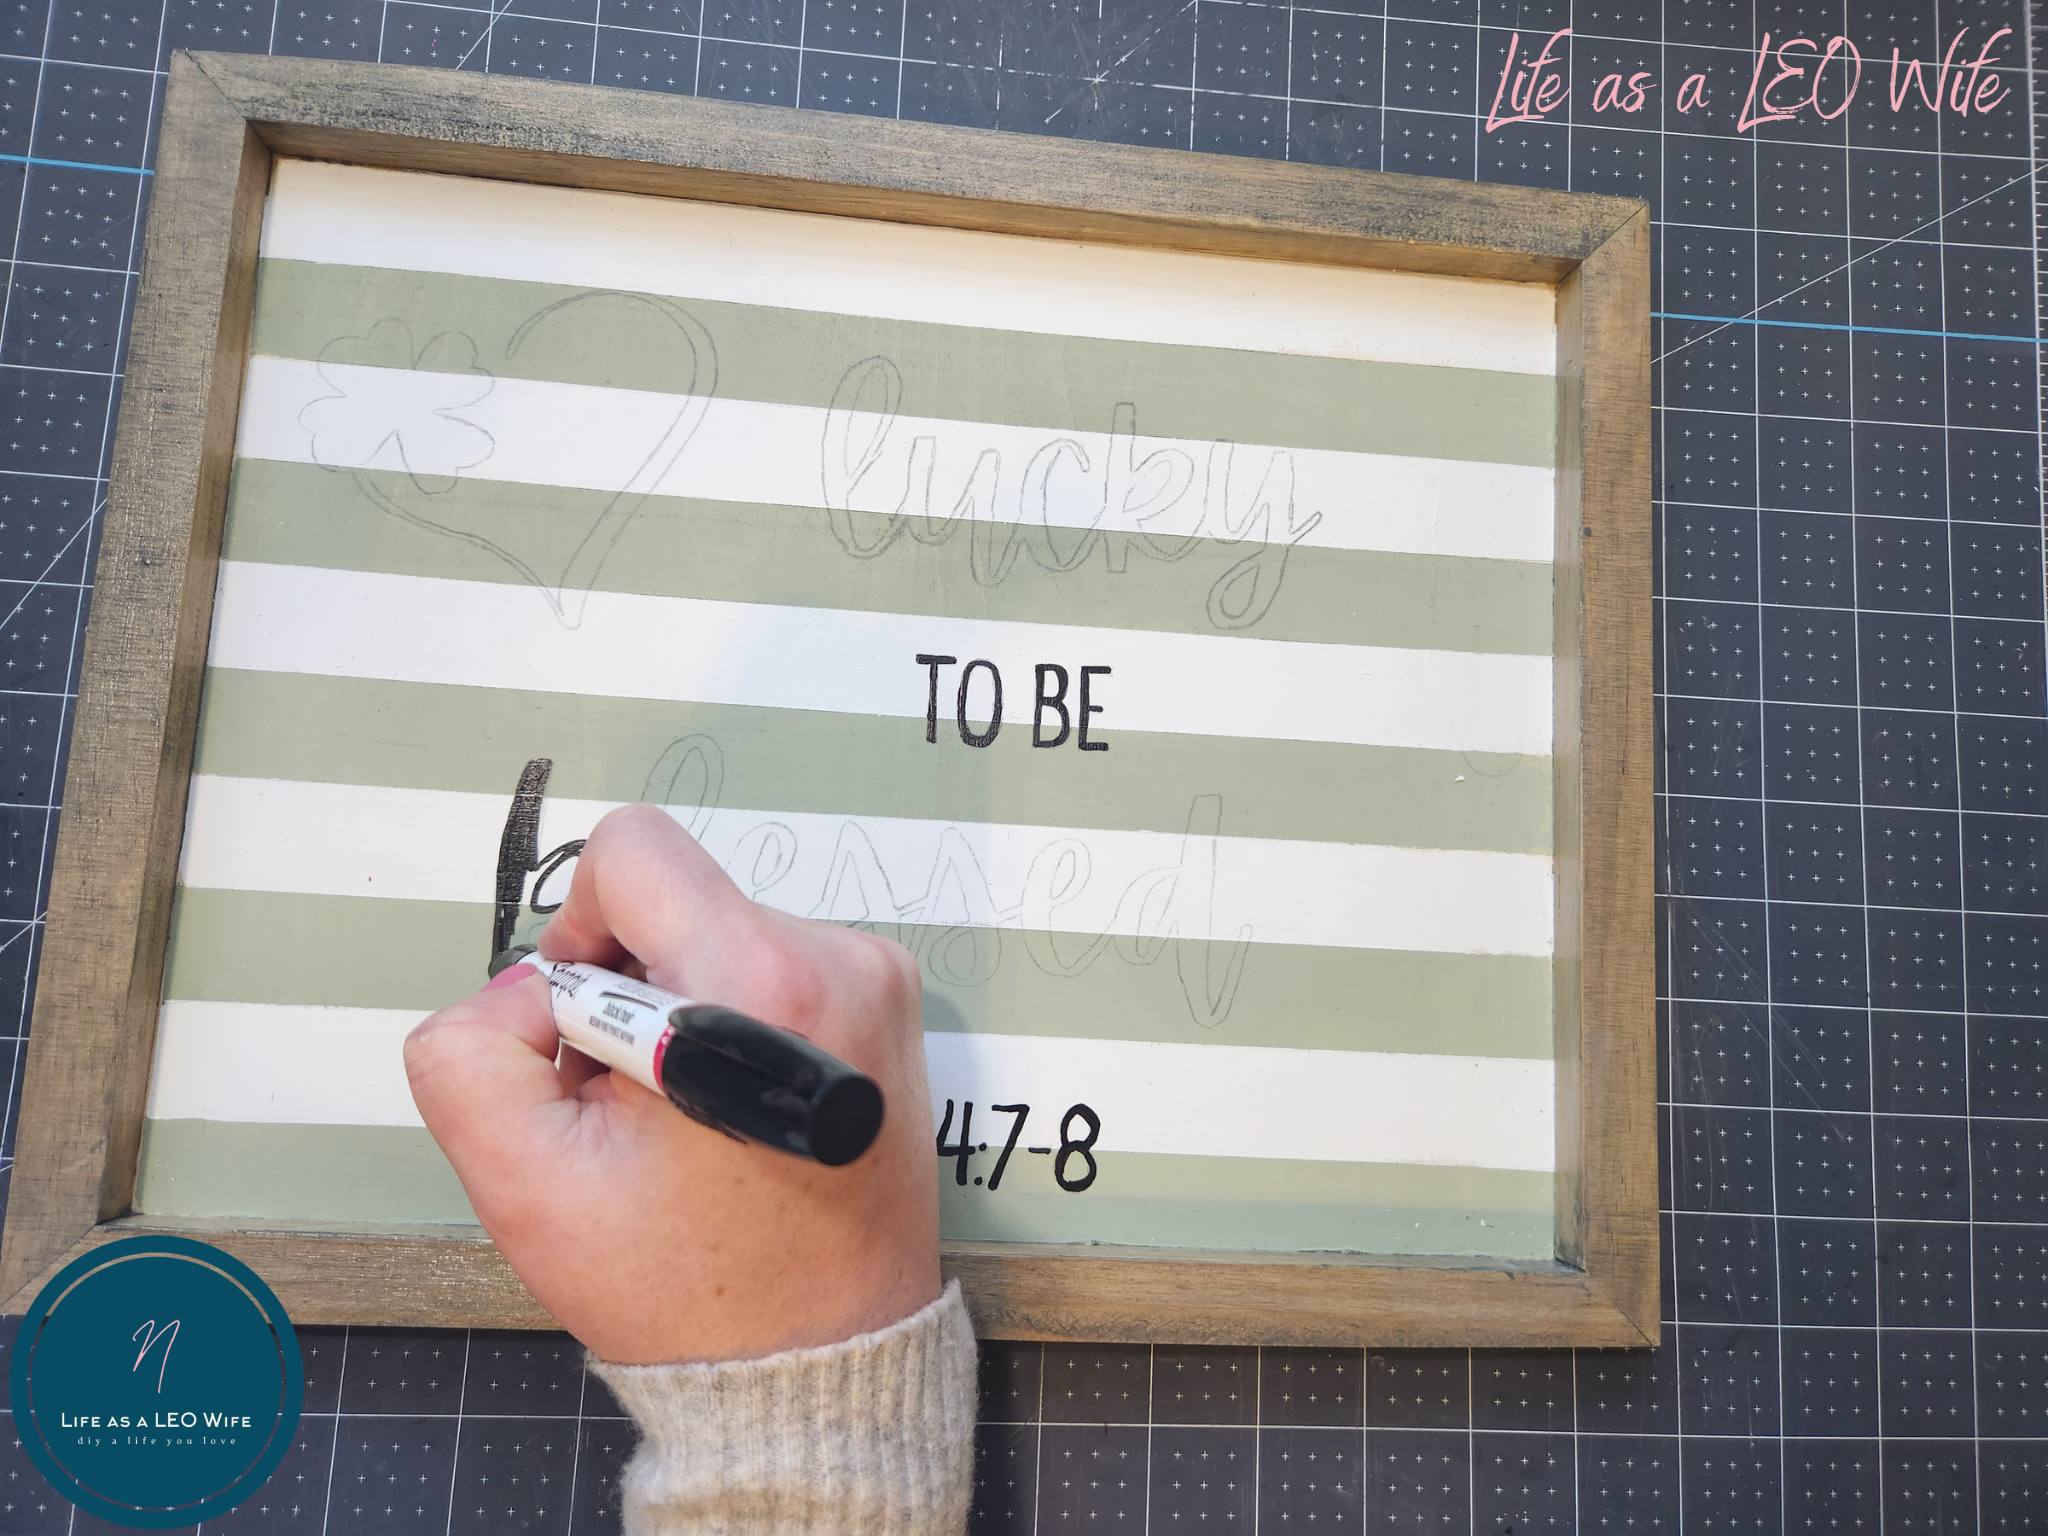
Download & print the St. Patrick’s Day design.
I created a simple design for this St. Patrick’s Day design. Since the holiday is all about luck, I thought I’d let everyone know that I’m lucky to be blessed by God!
Download and print the design, making sure to change the orientation to landscape before doing so.
Prep the design to be placed on the St. Patrick’s Day sign.
Turn the paper with the design over and scribble all over the back with a pencil. You only need to cover the areas with the letters and shapes.

Place the design, right side up, on the center of your sign. I chose to cut it apart to spread it out a bit. Use the painter’s tape to secure each piece to the sign.

Before you remove all of the tape, lift up one side to make sure the design has been properly transferred. If not, trace over it again. If it is, remove the paper and tape.

Paint design on the St. Patrick’s Day sign.
Use your paint pen to fill in the design that’s left on the sign. If you have a gold pen, I would use that, but if all you can find is black like me, that works too.
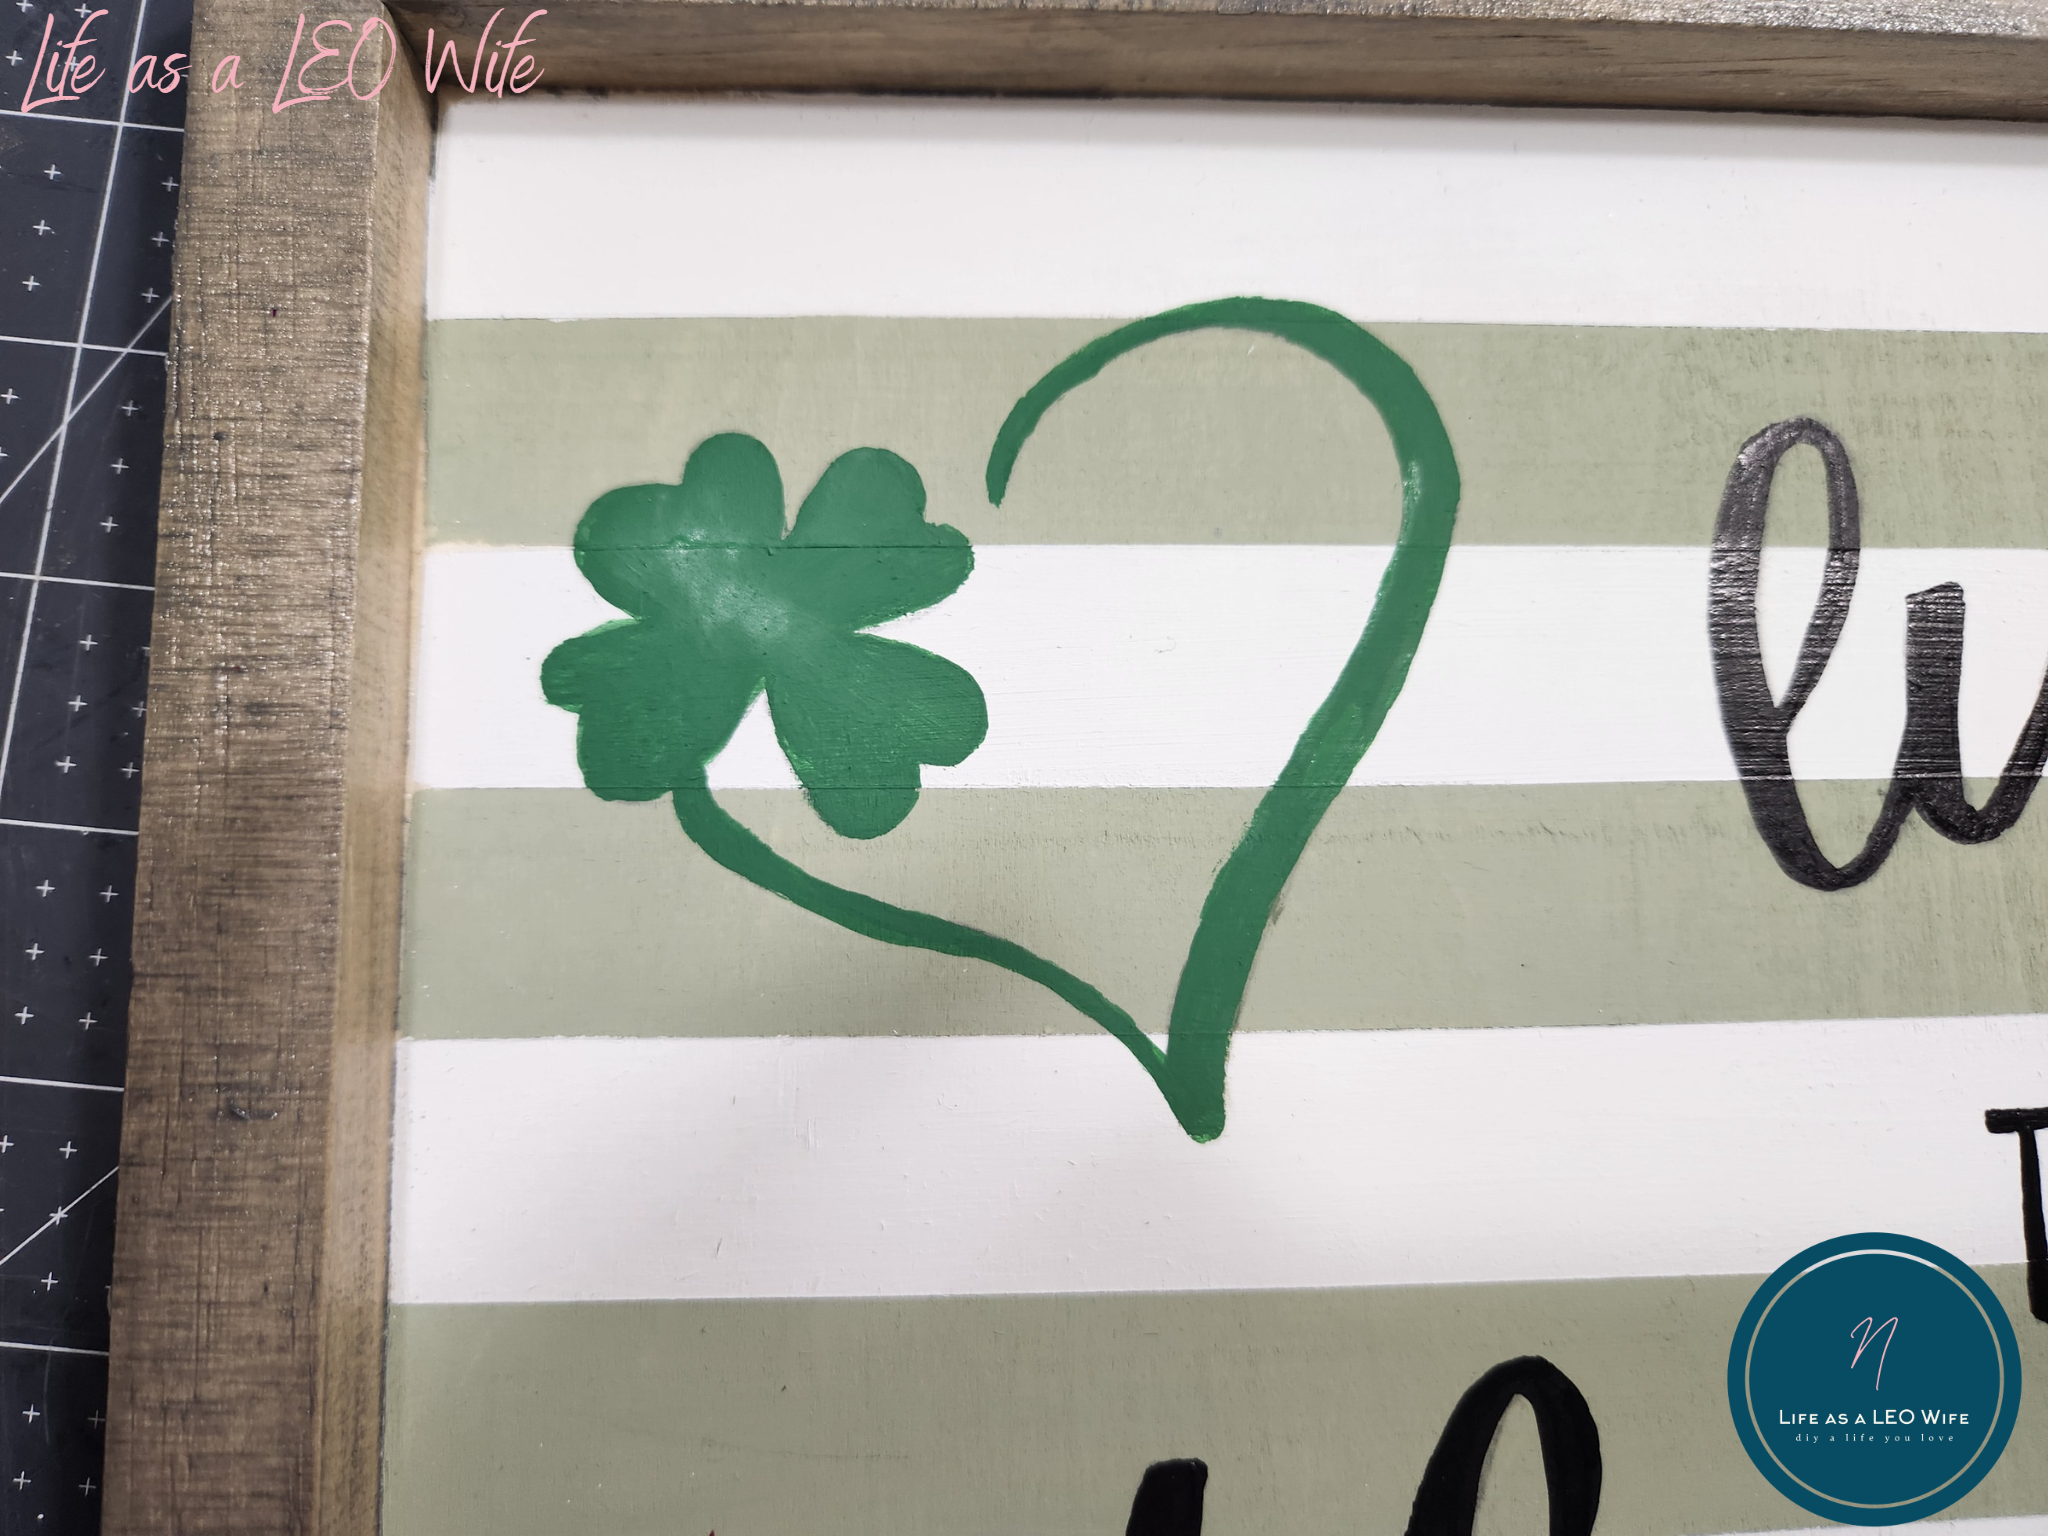
I didn’t have a green paint pen, so I used a tiny paint brush and a mixture of moss chalk paint and Kelly green acrylic paint to fill in the shamrock heart.
That’s it! Your St. Patrick’s Day sign is ready to display!
How easy is it to make your own DIY sign?! You can customize it to your liking and make your own sign for any occasion.
Right now my Valentine’s decor is still up, so I had to just take a few pictures of my sign in my craft room. I’ll try to update this post with some styled pictures once I put the V-day decor away. Remember this is a blog hop, so keep reading to see the projects the other bloggers are sharing.

Remember to pin the image below or share this post with the buttons on the left side of the page so you can find it when you’re ready to start your project! Also, follow me on Pinterest for new ideas added weekly! Be sure that you never miss a great tutorial for decor like wreaths, signs and other home decor, free printables, crafts, and other fun posts! Enter your email address below to be notified of new posts! Use the buttons below to follow me on social media for other great content.

Craft Room De-Stash Challenge Blog Hop

Beverly | Across the Blvd
Allyson | Southern Sunflowers
Niki | Life as as LEO Wife
Gail | Purple Hues and Me
T’onna | Sew Crafty Crochet
Marci | Stone Cottage Adventures
DIY Photo Frame using a Craft Stencil
Don’t go yet! There’s more to see!
There’s plenty more to see here on the blog! If you’re looking for something specific, use the search box in the sidebar to look it up. If not, you might enjoy these ideas. Don’t have time to read them all now? That’s ok, just click over to the posts using the pictures and pin them for later. You can also add Life as a LEO Wife to your favorites and check back for new ideas and free printables and SVGs every Wednesday, as well as link parties with tons of shared ideas on Sundays!


This is a great way to set the mood for St. Patrick’s Day, Niki! “To Be Blessed” My son was born at 26 weeks on St. Patrick’s Day over forty years ago. We were truly blessed that he grew and flourished without any major health problems thanks to all the wonderful health care professionals. Your lovely sign is quite special and meaningful! Thanks for sharing!
Thank you! Wow! It’s amazing that he made it! Especially boys because their lungs develop slower than girls for some reason. Mine were both born early, 33 & 34 weeks. God blessed me because one went home with me after 2 days and the other after 4 days amazingly!
I love this sign for St. Patrick’s Day! Wonderful Bible verse and it looks great with the stripes! -Marci @ Stone Cottage Adventures
Thank you Marci!
Such a gorgeous St. Patrick’s Day sign! I love the shade of green you used for the stripes, and the handwriting looks great. Pinning!
Thank you! The paint is Waverly chalk paint in celery if you’d like to grab a bottle from Walmart. If it’s in stock. They’re hit or miss with having everything in stock these days!
I love the St. Patrick’s printable design you made and it looks so good coming all together as a painted sign. Great project!
Thanks Allyson!