Happy August everyone! Today is the 10th which means it’s time for our monthly Under $10 on the 10th Blog Hop hosted by Tammy of Patina and Paint. That’s where I join up with other lovely ladies to bring you a project that you can make for less than $10. Our theme this month is “back to school,” so I’m sharing a DIY fabric or felt gift envelope to place your teacher’s back to school gift in. It’s both packaging and a second gift in one. I use them for makeup brushes, purse organization, bathroom storage, and more. You can either sew or do a no-sew version of these babies in just a few minutes!

You might’ve seen my free printable back to school teacher gift tags that I’ve shared over the past few days for keychains or lip balm (7 different printables to choose from) and hand soap (4 options). Last year I shared my back to school supply basket idea with free printable tags and a monogram door hanger. Click the pictures below to head over and pin the posts or use the search box in the sidebar to find my many other teachers gift ideas for any occasion!


Fabric or Felt Gift Envelope Supplies:
- felt or fabric cut to fit the size of the gift- I used a standard 9×12 piece of felt.
- iron-on interfacing for fabric (no need for felt envelopes)- Cut 1″ less than the size of fabric on the length & width. For example, for my felt envelope, I would have needed an 8×11 piece of interfacing. Felt interface will work as well.
- pins
- scissors
- ribbon- I used 1.5″ wired ribbon on one envelope and satin 7/8″ ribbon on another, so anything under 1.5″ will work.
- sewing machine or needle & thread for hand sewing
- or hot glue gun for no-sew method.

Cut Fabric to Size
Decide what size envelope you need for your gift. I used a standard piece of felt, straight from the craft store, for this project. Last year I made a no-sew version that was a full-size “bag” that fit a 5×7 picture frame. If you’d like to make a gift bag without sewing, check out that tutorial. Remember to pin or share it for later. If you’re using fabric, you can make it as big as you’d like.
This gift envelope was used for a customized fabric keychain with a free printable key-shaped gift tag, so I didn’t have to do a lot of measuring and cutting. I’m going to give you directions for a 9″x12″ piece of felt folded into an envelope, but just remember you can change the size to fit your needs. the measurements on the seams, the ribbon, and such will remain the same.

Fold the bottom of the felt or fabric up 4.5″ and iron the crease (if you’re using fabric). Pin each side in place. This will create the pocket that will hold the gift.
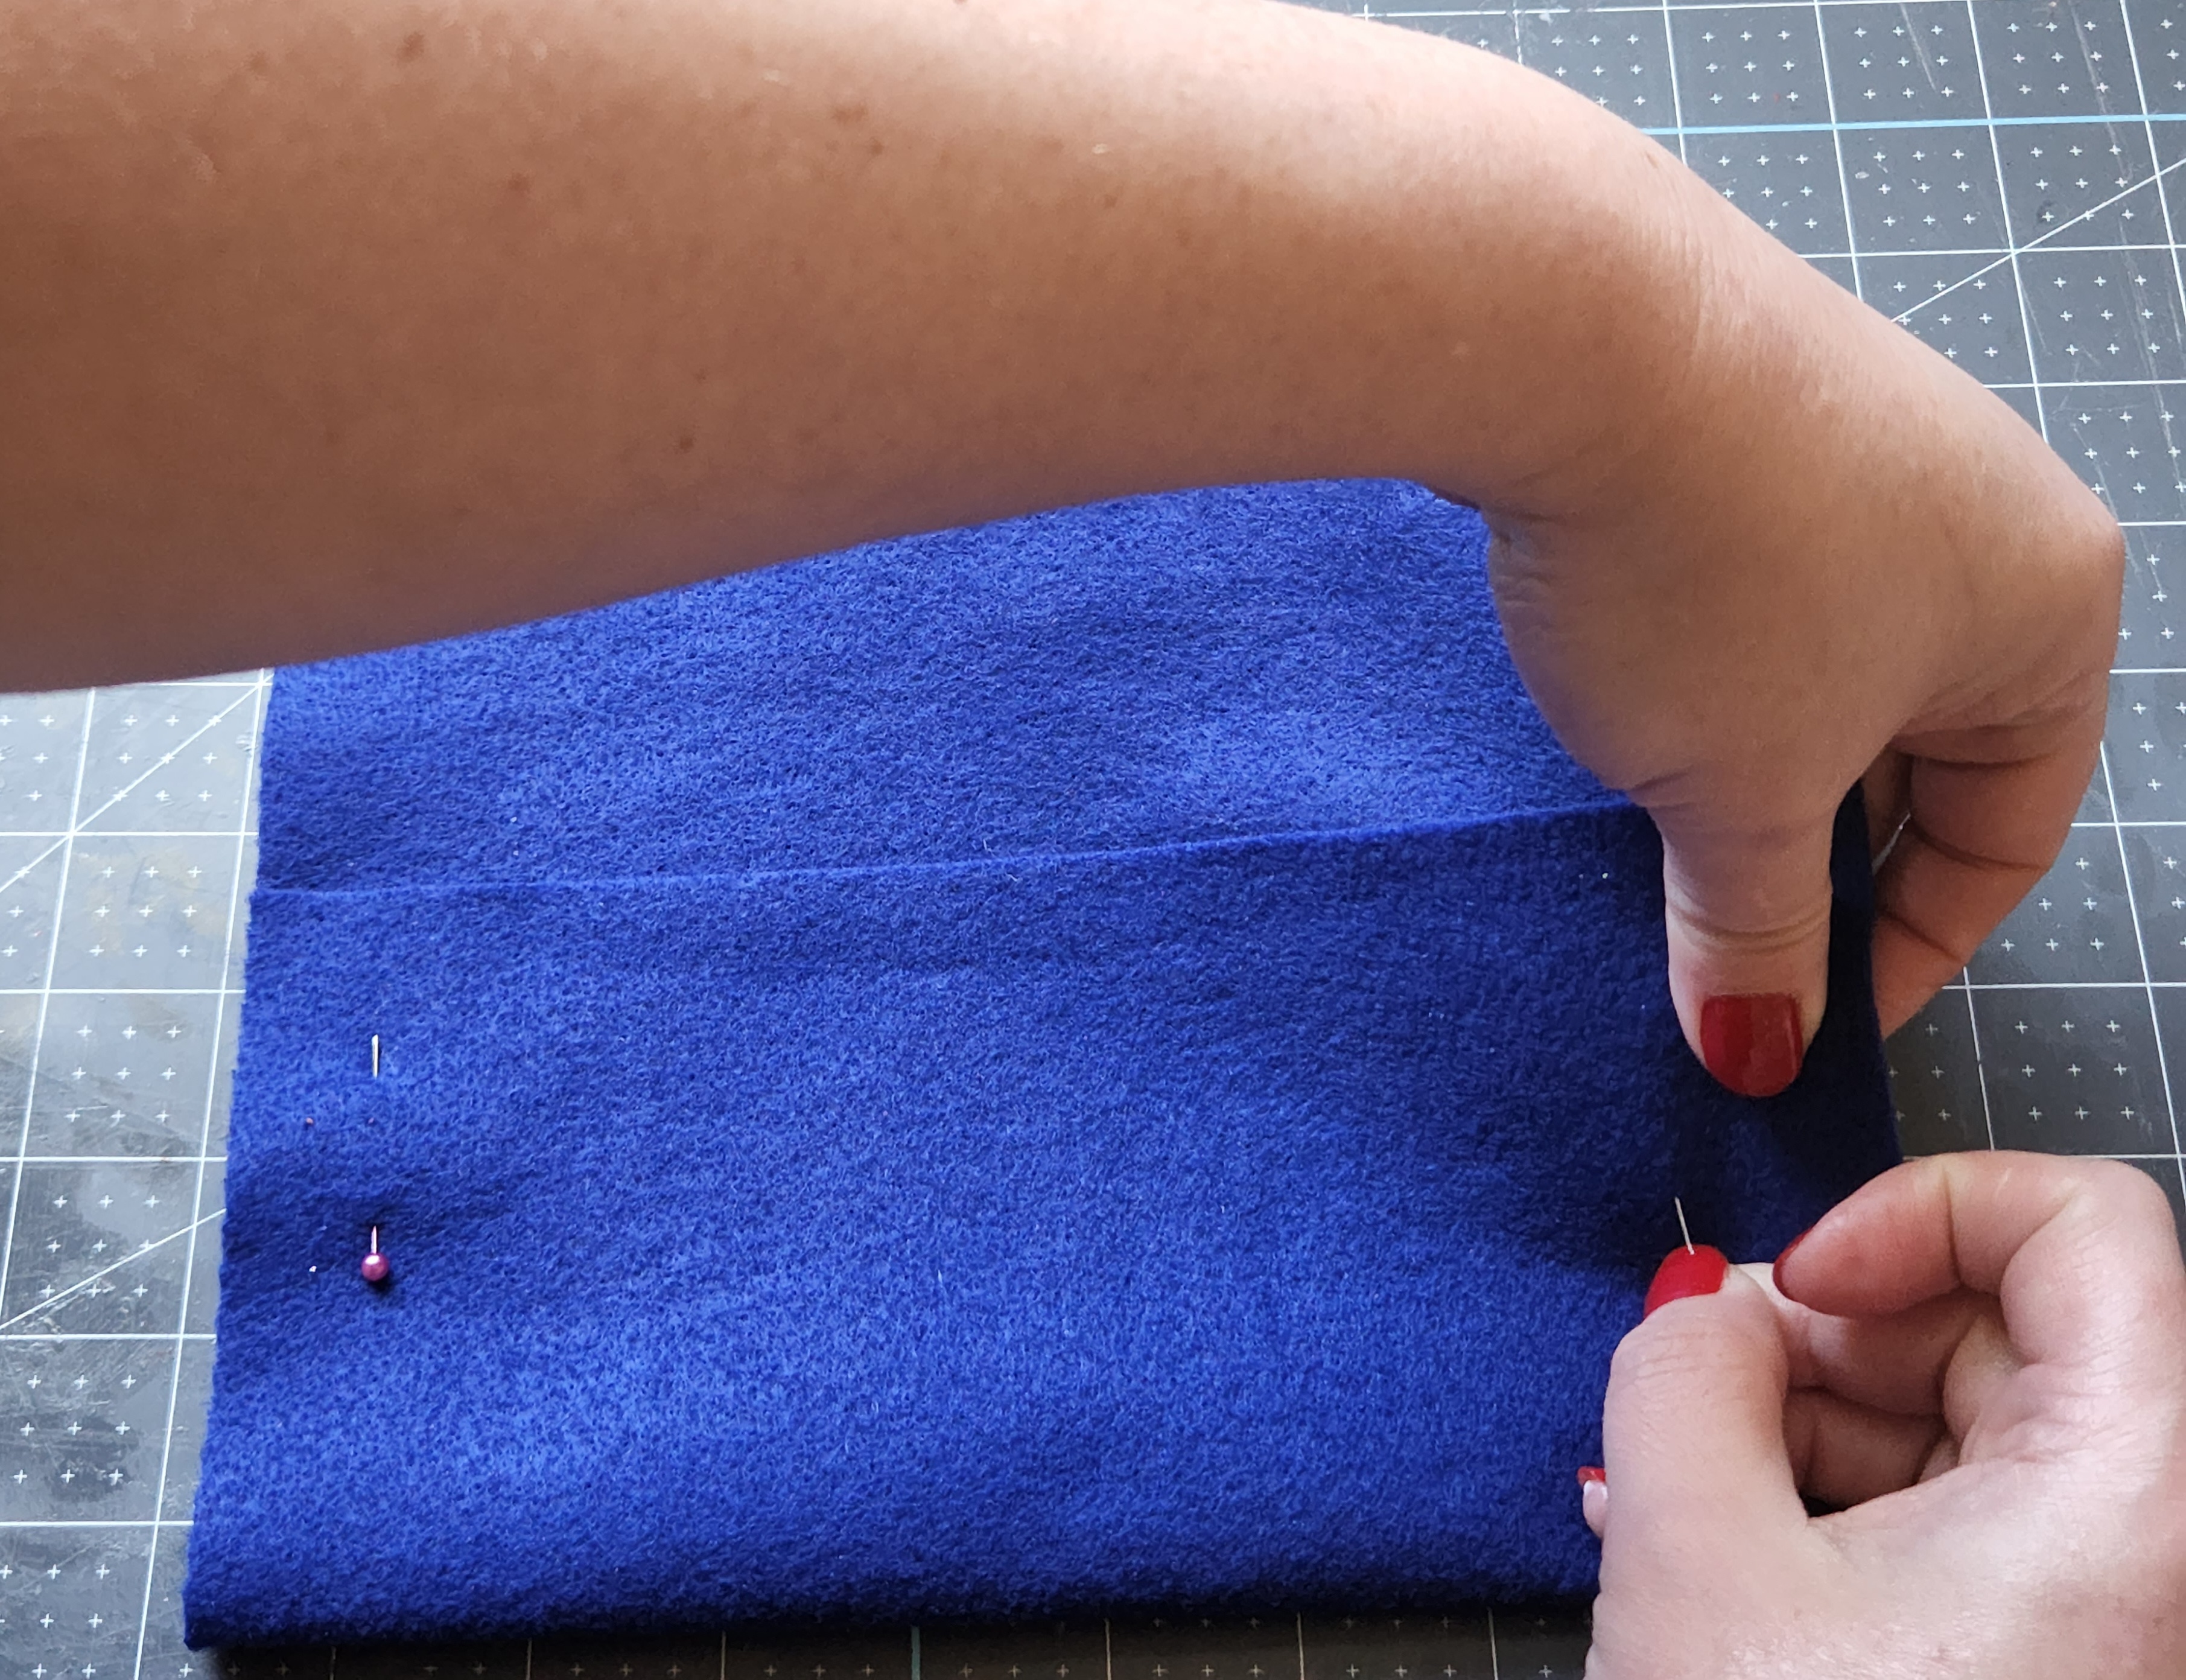
Fold the top down and iron or crease the fold well with your fingernails. Since I was using felt, folding and creasing worked fine. You can see your gift envelope taking shape.

Interface
If you’re using fabric, cut an 8″x11″ piece of iron-on interface. I cut the interface so that I have up to a 1/2″ seam allowance on each side where I won’t sew over it. As a new sewer, I hate trying to keep the fabric flat over it while sewing. It seems to fold and wrinkle, and I’d rather just avoid sewing over it. Iron the interface in place before folding and pinning the envelope.
The picture below is of cut interfacing from my lip balm keychain holder.

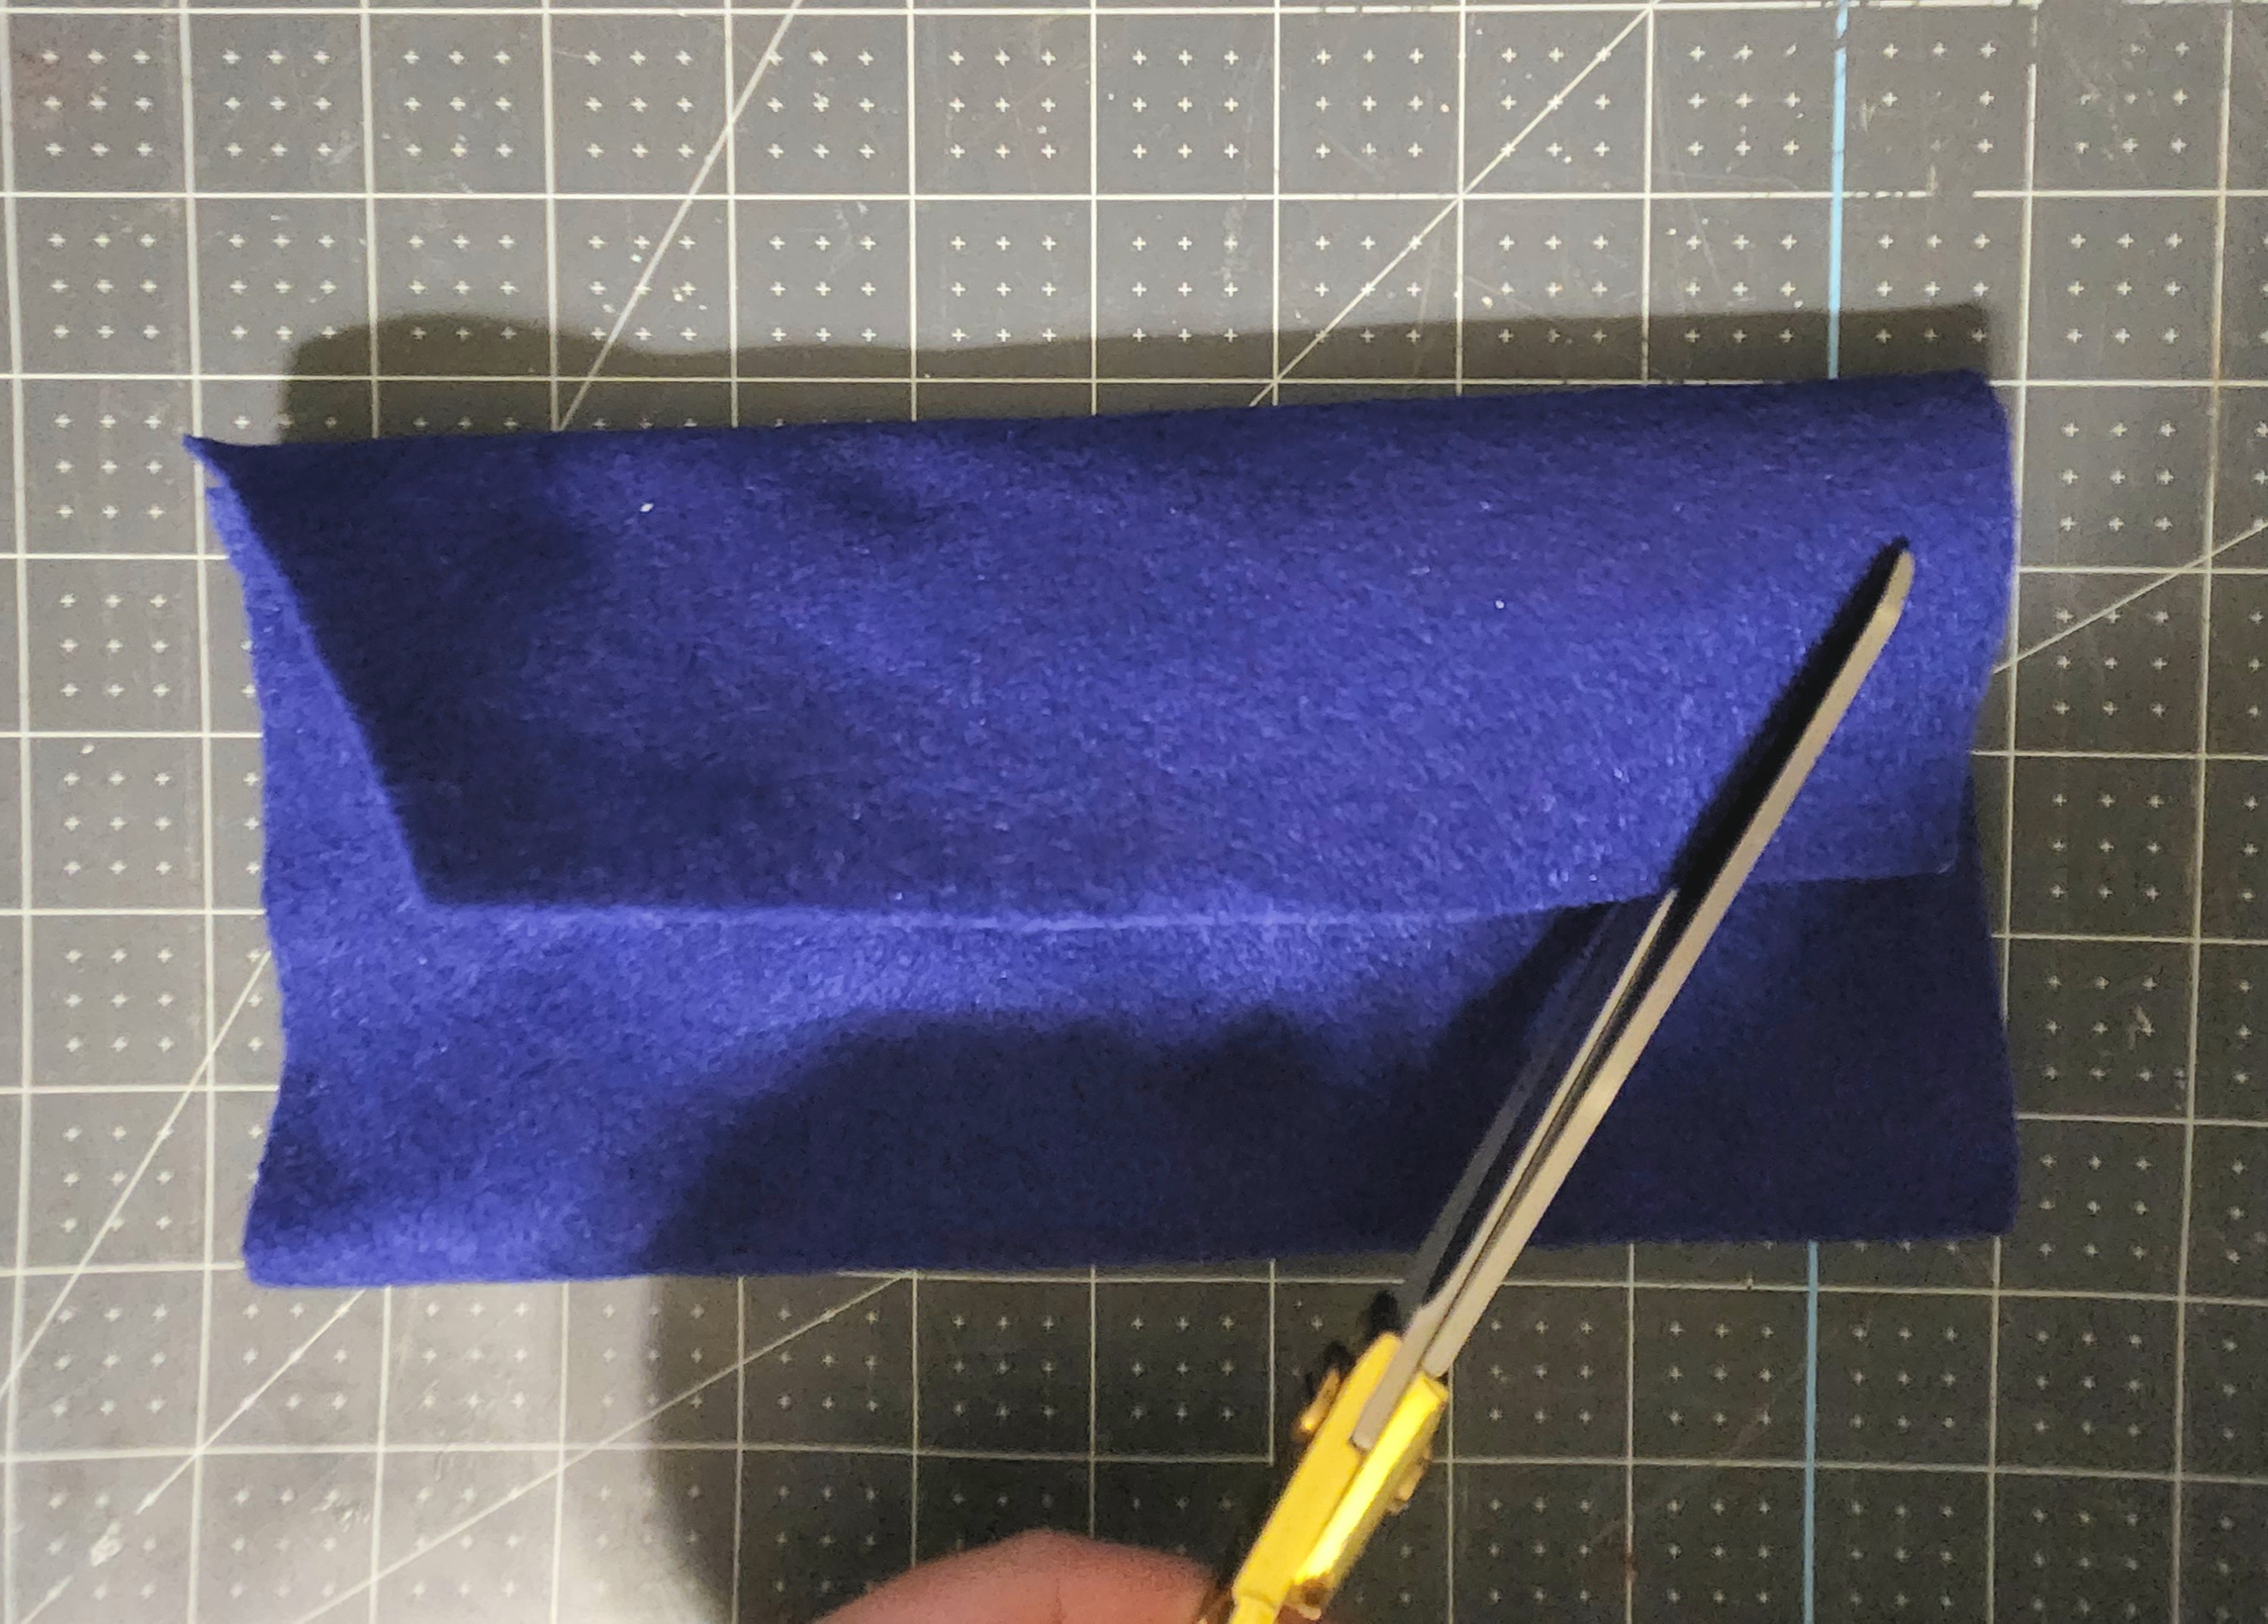
Cut the “Envelope” Shape
Now you need to create the “enveloped” sides on the folded down flap. Make diagonal cuts on each side from the corner where the two pieces of felt (or fabric) meet to the edge.
Cut & Pin Ribbon on the Fabric Gift Envelope
Cut a length of ribbon that you will use to tie the flap in place. I cut 24,” leaving enough to cut some off to dovetail the bow ends later. Fold the ribbon in half. You will use this to tie the fabric envelope closed.


Determine where the center of the pocket section of the gift envelope will be. If you’re using the same dimensions as me, that would be 4.5″ from the side. Pin the middle of the ribbon in place about 2″ from top of the pocket. You don’t need to be precise about that; you just want that spot to be about 1-1.5″ from the bottom of the flap once it’s folded down. If you’re using a wide ribbon like I did, twist or fold it in a little. I made a gift bag with a 7/8″ ribbon, and that was easier to use. However, I didn’t have gray ribbon in that size, so the 1.5″ worked.


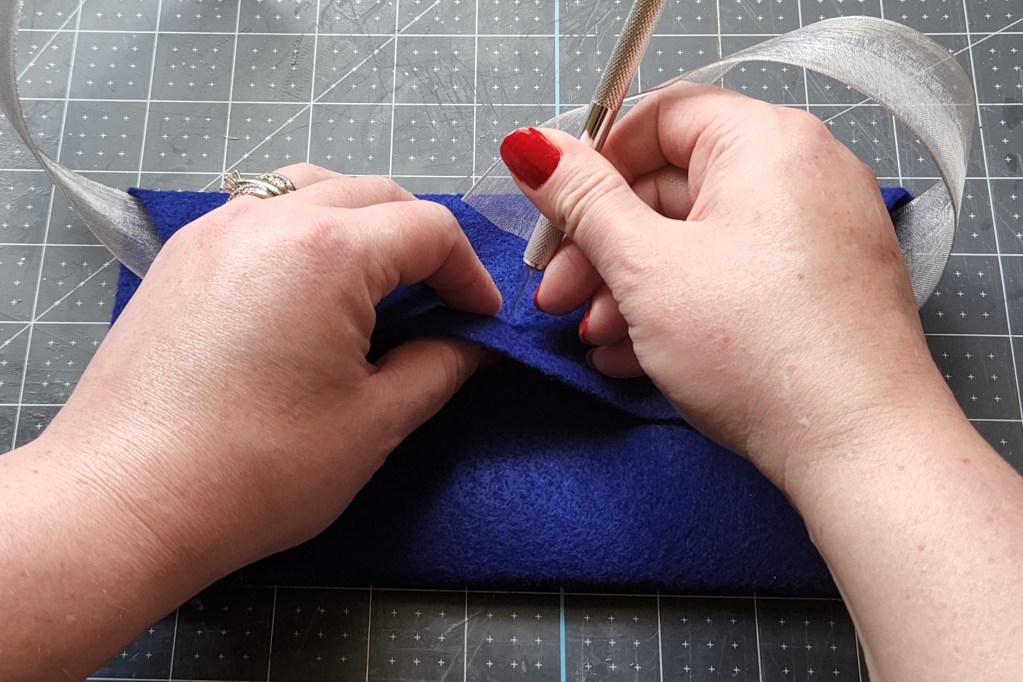
Next, cut slits for the ribbon to slide through on the top flap. Fold the flap down over the pinned-on ribbon to determine where it will need to go. Cut two slits about 1/4″ apart with a craft knife.

Once your fabric gift envelope is cut and pinned, this is what you’ll have.

Later you’ll feed the ribbon through like this:
Another Ribbon Option
I had quite a time trying to get the fabric and ribbon into my sewing machine. The pocket wasn’t deep enough for it to slide onto the arm, so I had to finagle it quite a bit before getting it right. If you don’t want to fight your machine to get the ribbon section of the fabric under the needle, you can also cut it. This is also a good option if you want to change the ribbon out from time to time.
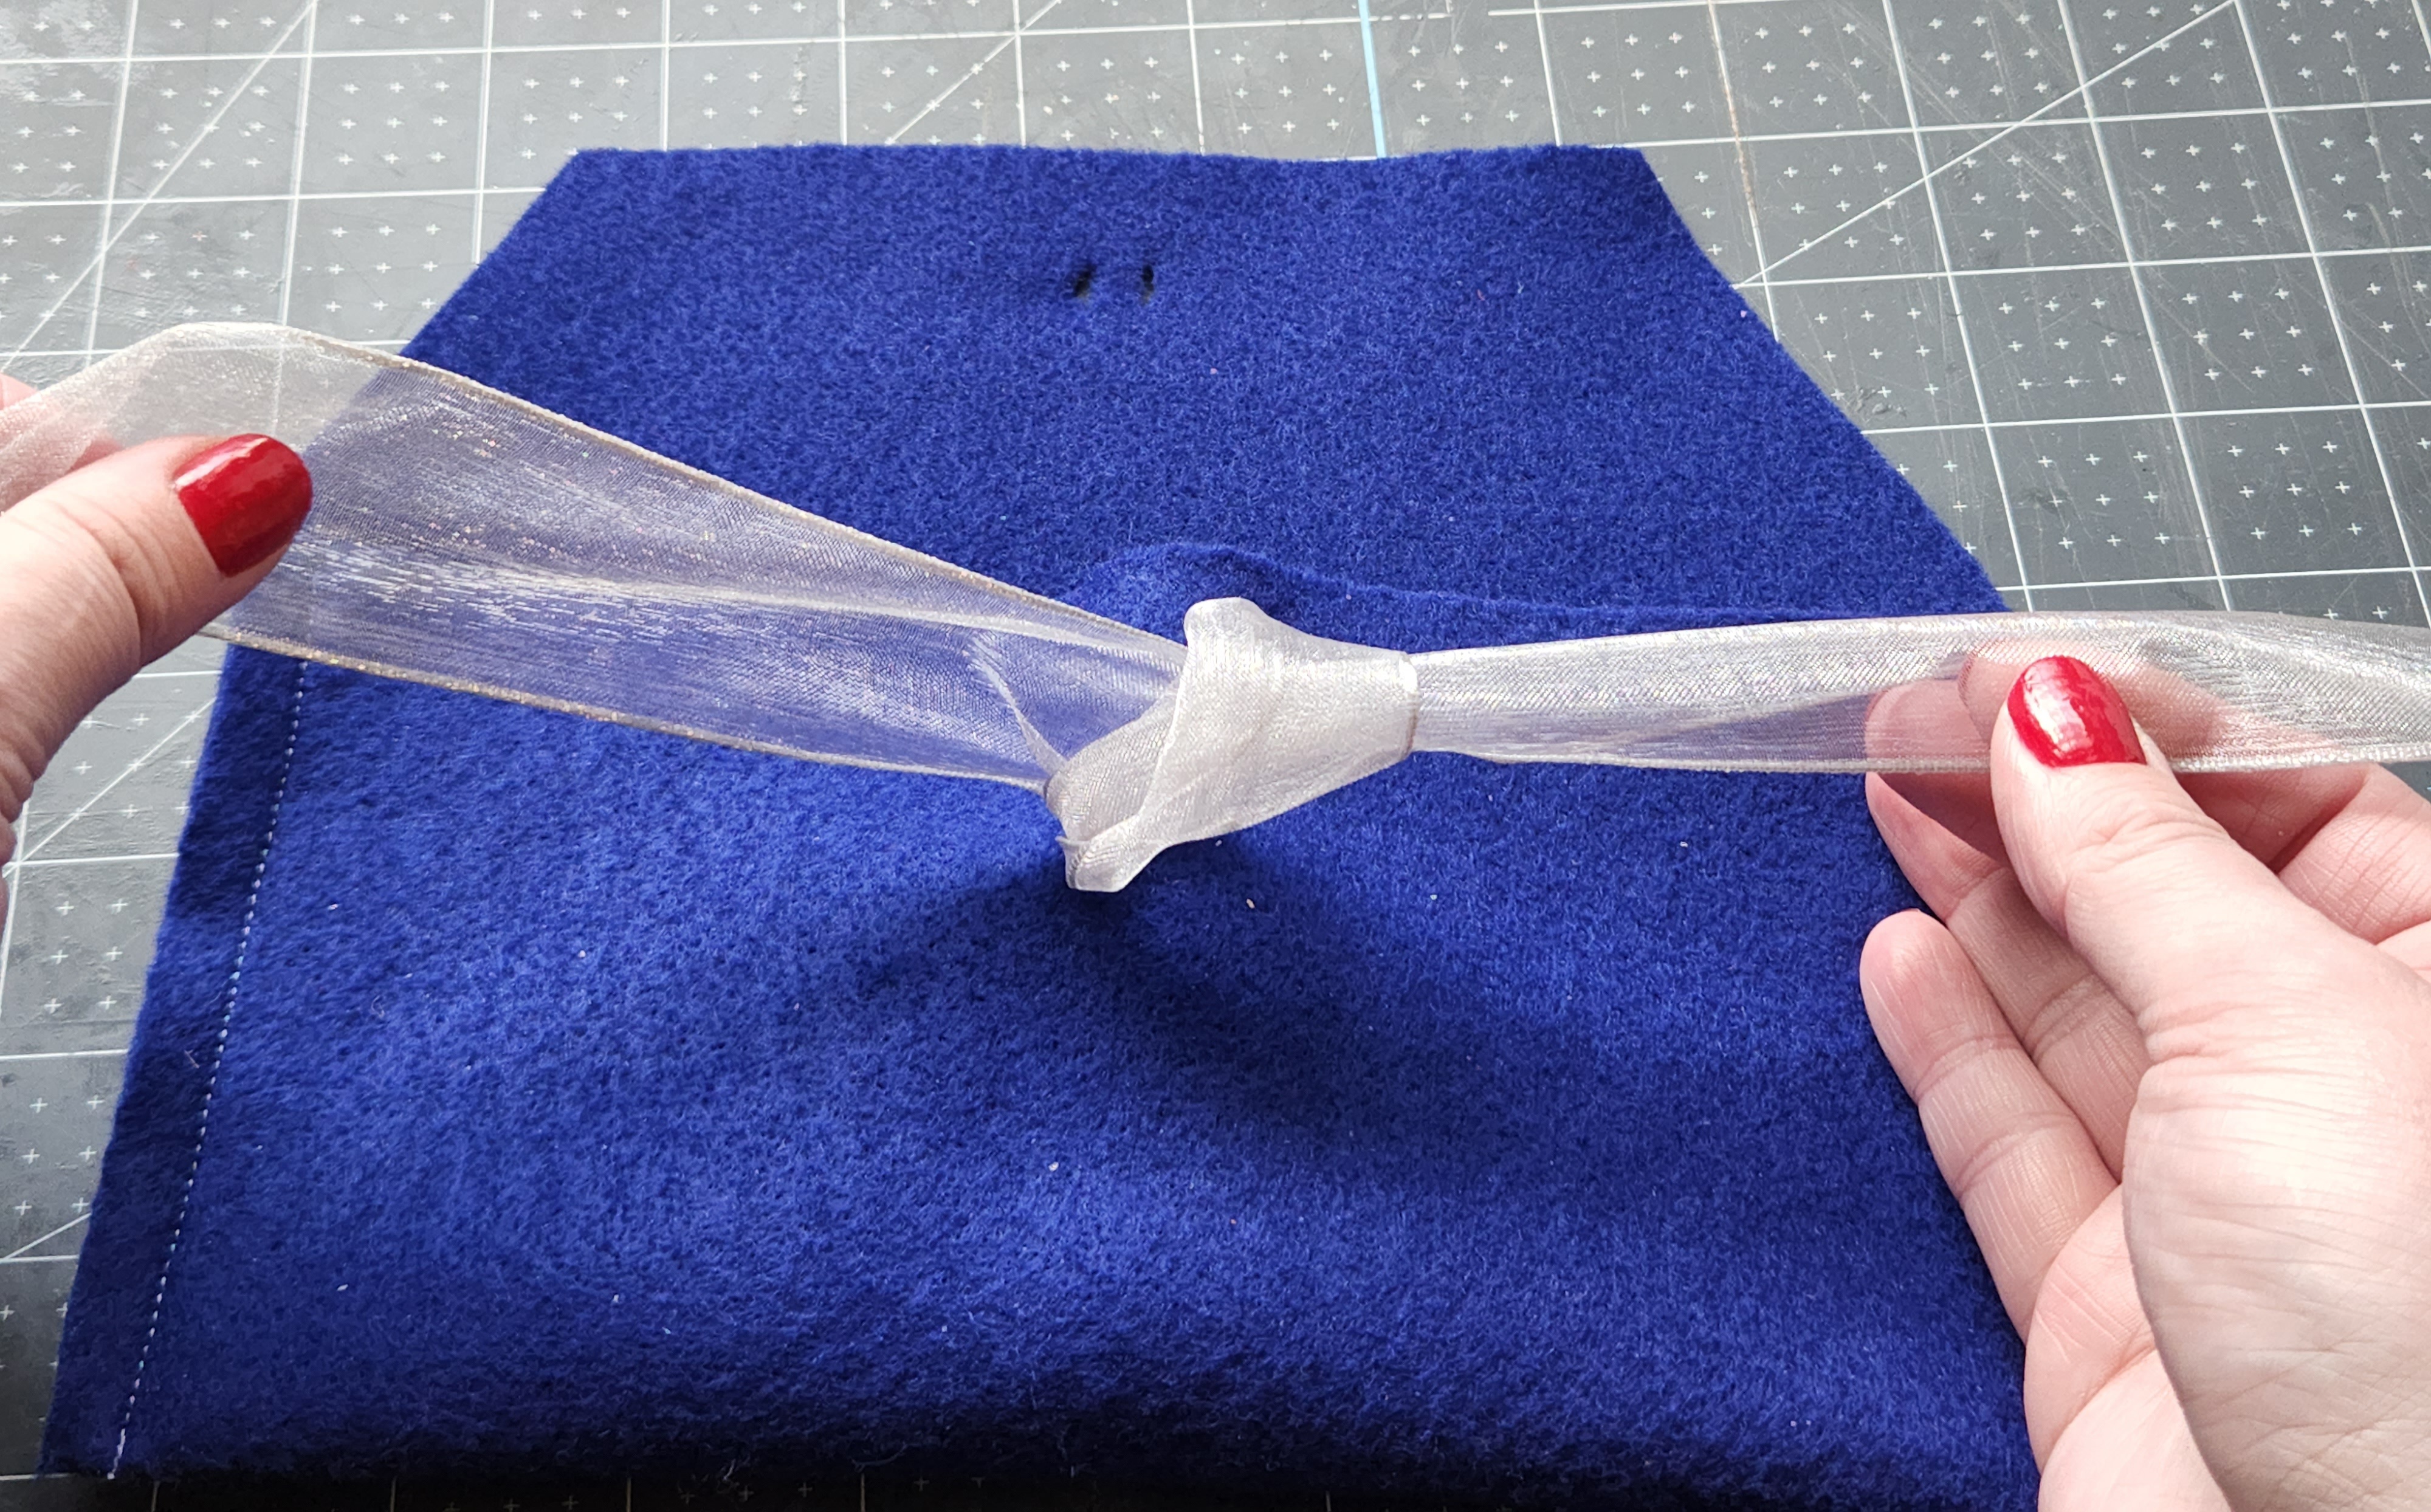
Find the center of the fabric gift envelope’s pocket just like you did in the previous step. Again, you’ll want it to overlap the with middle section of the front, about 1″ from the bottom once closed. Use a craft knife and cut two small slits about 1/4″ from each other, just like you did with the flap slits above.

You can feed each side of the ribbon through the slits now or wait until later.

Sew the Fabric Gift Envelope
Finally sew the sides of the felt together with 3/8″ seams. If you feel you need more of a seam allowance, you can do that, up to 1/2″ seams if you used interfacing and you don’t want to sew over it. If you don’t have a machine you can hand sew the sides. Want a no sew version? No problem. Add a line of liquid seam or craft glue, like Tacky Glue, along the sides of the felt or fabric and press the other side on top of it. For more details, check out my fabric gift bag tutorial.

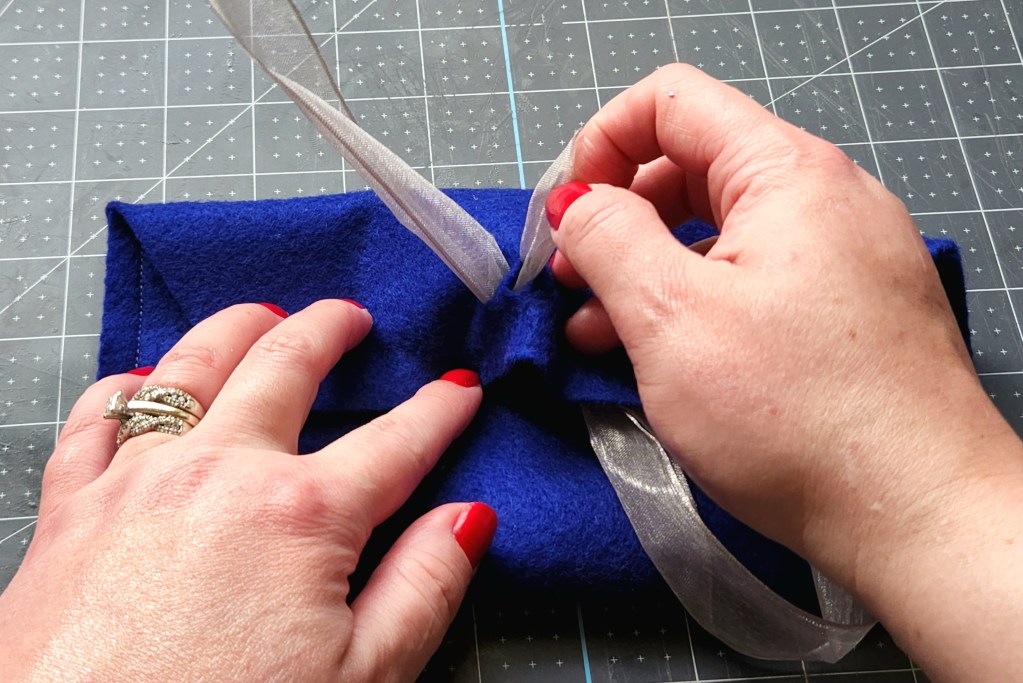
Finally, sew the ribbon on the pocket of the gift envelope. I put a few stitches in, backstitched over them, then went forward over it again.


Tie the ribbon in a knot over the stitches to hide them, especially if you’re using a wide ribbon.
Place your gift in the fabric envelope, and, voila! An adorable, reusable gift package!
I made two blue felt envelopes. On the first one I used a white ribbon attaching it with slits in the pocket without sewing it in place. The third picture has the gray ribbon sewn on.


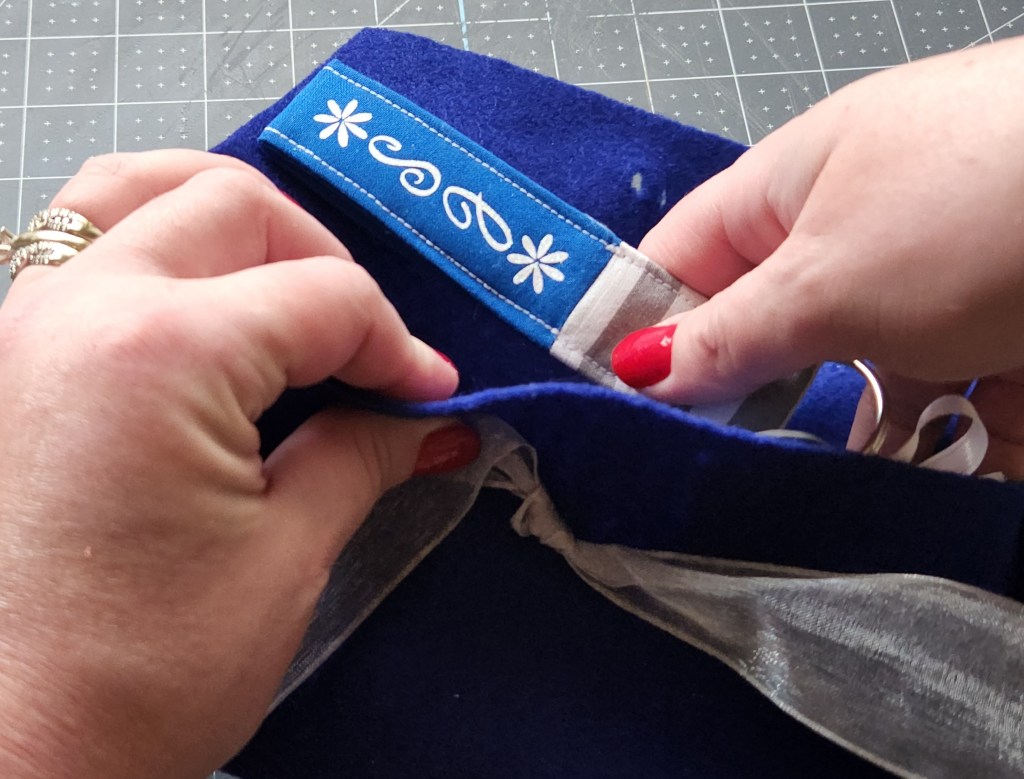
Once your gift is inside, feed one side of the ribbon through each of the slits in the flap. Tie it in a bow, keeping the envelope neatly closed.


Fold the ends of the bow together and cut it diagonally, creating dovetails.

Or cut the ribbon at an angle on each end like I did with this gift envelope. I also tied my business card to the package by punching a hole in the top corner and feeding the ribbon through it. The card doubled as a gift tag since I added the teacher’s name to the back, as well as letting her know about Life as a LEO Wife and my other blogger friends sharing on today’s blog hop (keep reading for their back to school project ideas)!

You or your gift recipient can use the bag in so many other ways. I put some of my makeup brushes in one.

I’ve also used them in my purse to organize everything. You could use several, keeping lotions, perfumes, and hand sanitizer from spilling on your other items.

I hope that you enjoyed this fabric gift envelope tutorial! Keep reading to see the other projects on our back to school blog hop. I know you’ll love what the other ladies have for you!
Pin it for later!
Remember to pin the image below or share this post with the buttons on the left side of the page so you can find it when you’re ready to start your project! Also, follow me on Pinterest for new ideas added weekly! Be sure that you never miss a great tutorial for decor like wreaths, signs and other home decor, free printables, crafts, and other fun posts! Enter your email address below to be notified of new posts! Use the buttons below to follow me on social media for other great content.

Under $10 on the 10th Blog Hop
Now check out the other back to school projects that you can make for under $10! The bloggers on this hop are so talented, so I know you’re going to love everything they’re sharing!
Tammy – Patina & Paint (main blog)
Allyson – Southern Sunflowers (main blog)
Don’t go yet! There’s more to see!
There’s plenty more to see here on the blog! If you’re looking for something specific, use the search box in the sidebar to look it up. If not, you might enjoy these ideas. Don’t have time to read them all now? That’s ok, just click over to the posts using the pictures and pin them for later. You can also add Life as a LEO Wife to your favorites and check back for new ideas and free printables and SVGs every Wednesday, as well as link parties with tons of shared ideas on Sundays!


You are so clever and talented! I love this idea and it is so cute. And that keychain is SO adorable. Great job and thanks so much for sharing!
Thanks Tammy!
So cute Niki! Such a clever idea!
Thank you!
I love that this gift envelope is made from felt. My brain would have been stuck on fabric only. It turned out really cute! The key chain and tag looks great, too. Pinned to gift wrap ideas board.
Thank you Allyson!
How pretty! Thanks so much for linking up at the Unlimited Link Party 79. Pinned.
Thank you!