Welcome! I haven’t gotten all of my spring decor out this year, so as I was trying to set up a cutesy spring tablescape, I realized I didn’t have much else to go with my buffalo check spring centerpiece that I shared last week. Since we are under contract for a new house (YAY YAY YAY!), I don’t want to go through bin after bin to find something else for it. So, I decided to make some tiny spring wreaths to go around a few large candles. Today I’m going to share with you how to make a buffalo check spring candle wreath. I just love buffalo check!

Spring Candle Wreath Supplies:
- 2 pack of 8″ wire wreath forms- I used both because I made two wreaths.
- yarn- I used turquoise.
- 2 colors of felt- 1 sheet of each- I used pink and white.
- scissors
- hot glue gun
- wood bunny- I used wood pieces that came off two Dollar Tree signs, but they also sell packs.
- acrylic paint in white and another color- I used white and pink.
- paint brush
- painter’s tape

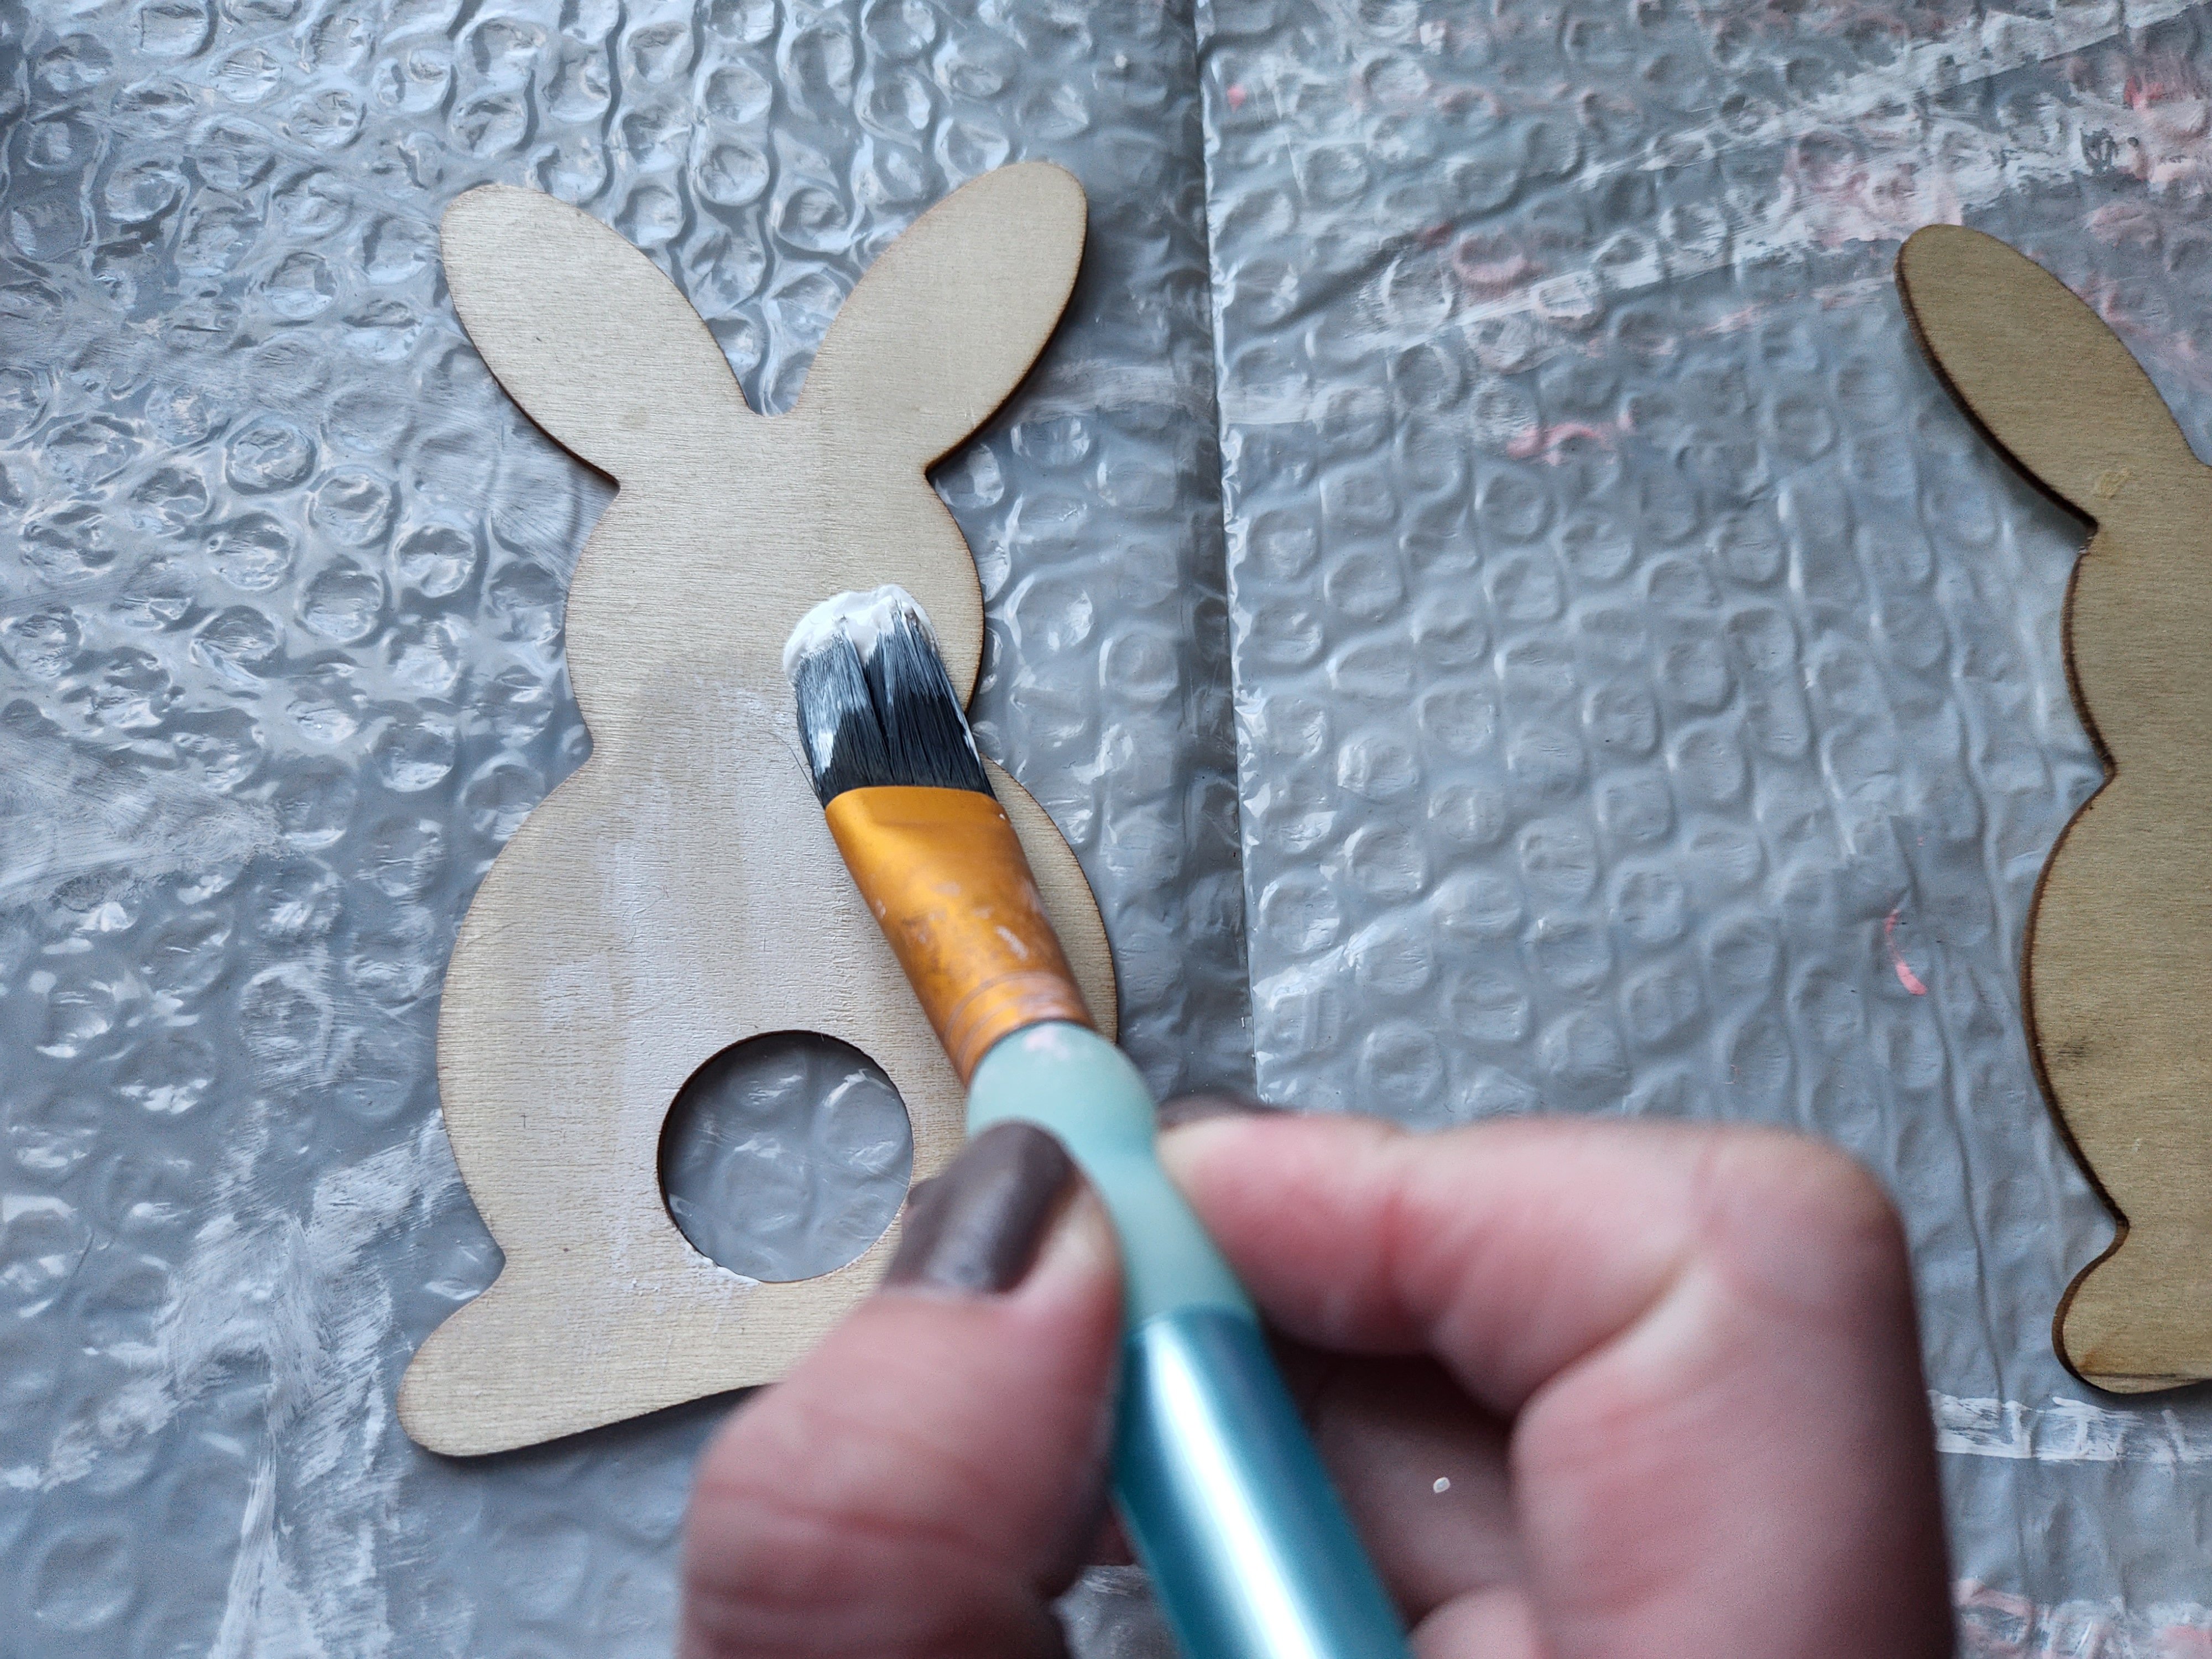
Paint the Bunnies
Use my buffalo check painting tutorial to paint the wood bunnies in that pattern.


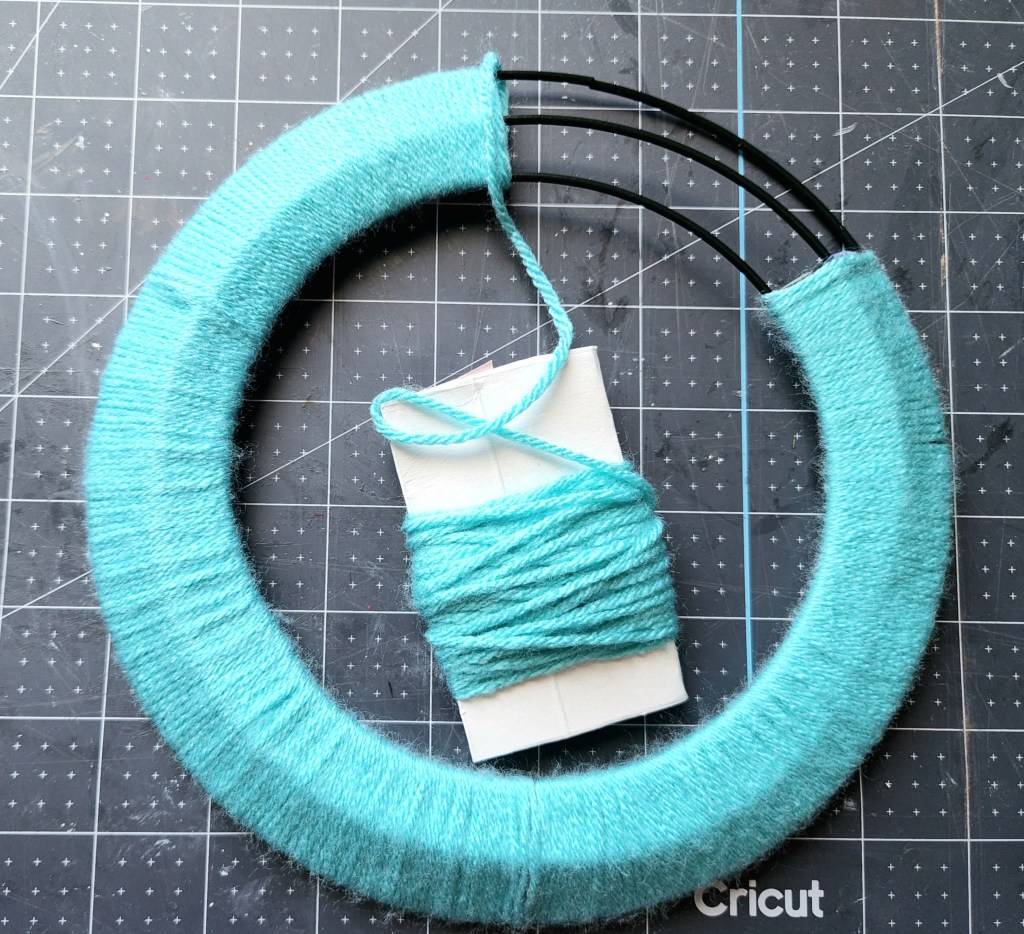
Wrap the Wreath Form
Wrap the yarn around the wreath form. Place a dot of hot glue on the back of the form on the outer wire then place the yarn on the glue. Wrap the form until it’s completely covered by the yarn. If you need a further tutorial on how to wrap a form, check out my summer yarn wreath tutorial.
Create Felt Flowers for the Spring Wreath
I made plain felt roses using pink and white felt. You’ll need about four in both colors. If you’re using two colors and neither are white, you’ll need only three in the second color and one white flower to use as the bunny’s tail. Making two wreaths? Double the number of flowers.
Making the flowers are easy. I didn’t get pictures this time, but you can check out the full tutorial with lots of pictures in this spring wreath and wood bead garland tutorial. Cut a square of felt with rounded edges. Cut a spiral in the felt from the outside to the center but stop just short of the circle left in the middle. Roll the spiral starting from the outside. Place a dot of hot glue on the circle of felt left from the middle and press it to the bottom of the flower to hold it together.
Assemble the Spring Wreath
Bunny Tail
I didn’t decide to add the flower as the bunny’s tail until I had glued it to the wreath. It’s much easier if you do that first. Place a ring of glue in the hole for the bunny’s tail.

Then place the white flower in the hole.

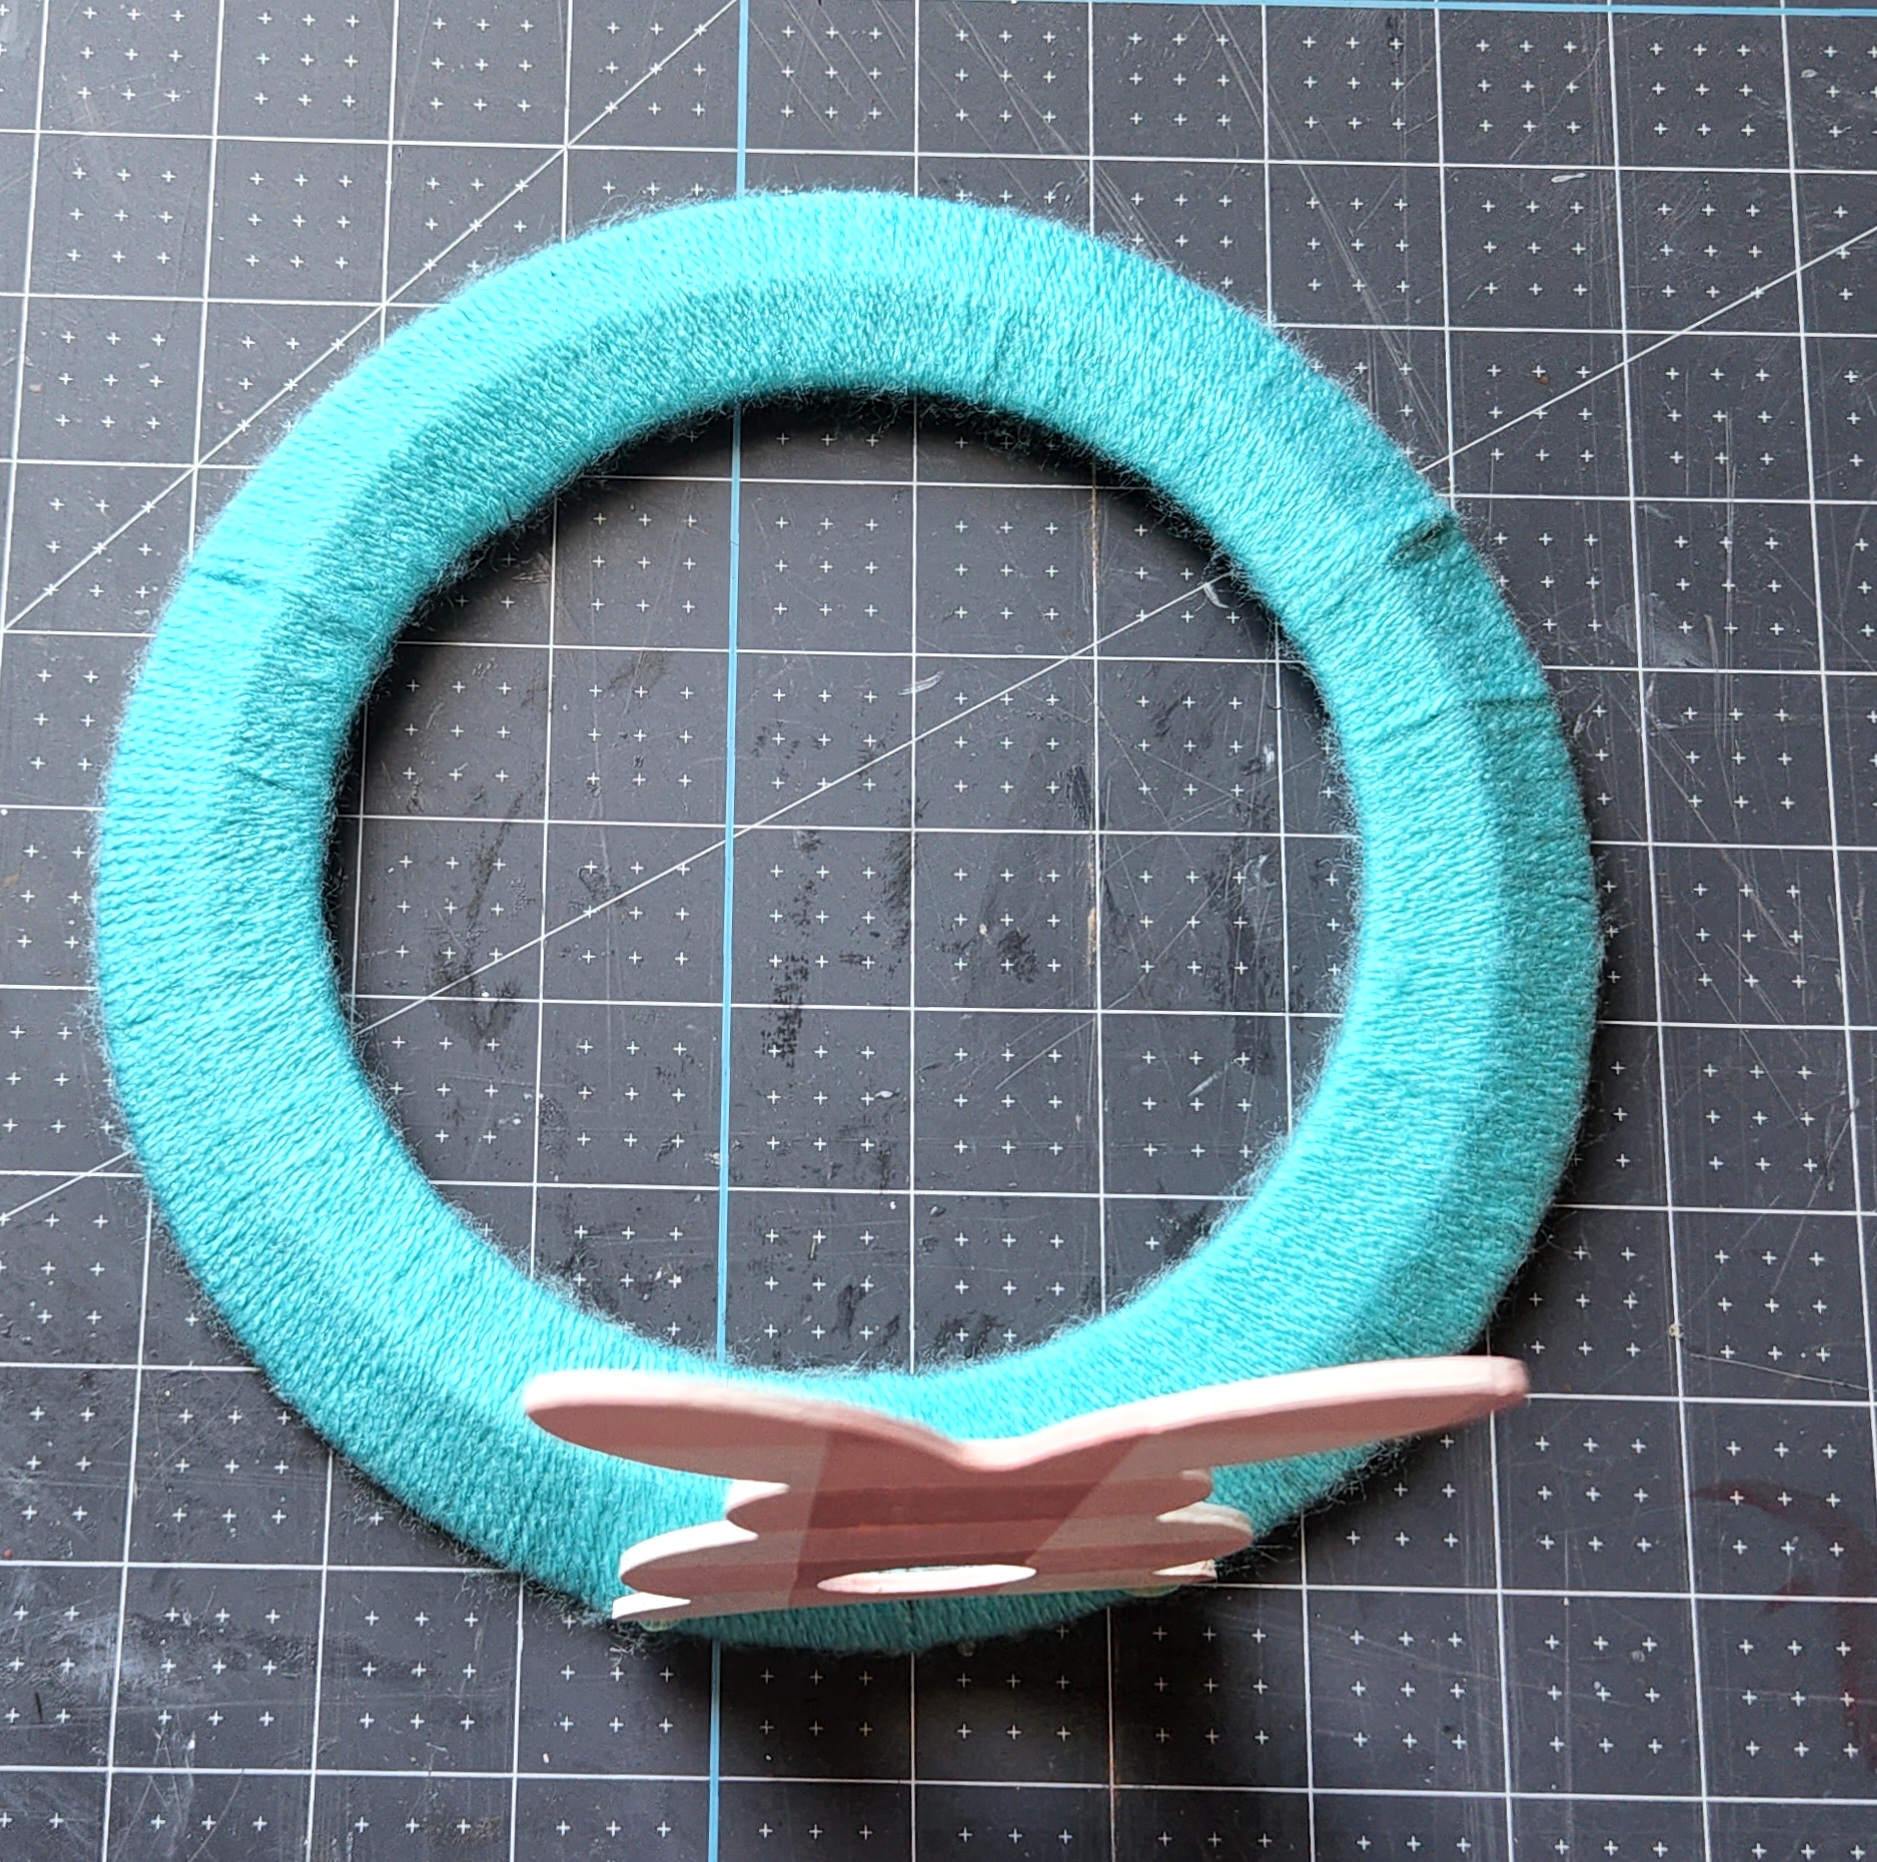
Add the Bunny
Squeeze a line of hot glue on each of the bunny’s feet, then a small line at the slight U shape in between them.

Place the bunny over one of the crossbars, which are a little higher on the wreath than the area between them. That allows the bunny to sit flat with the crossbar hitting the U shape between the feet and the feet hitting the lower places to the sides of it.

Add the Flowers
Now place the flowers across the top of the wreath. Once you’re happy with their placement, lift them up, add glue to the bottom, then place them back on the wreath.


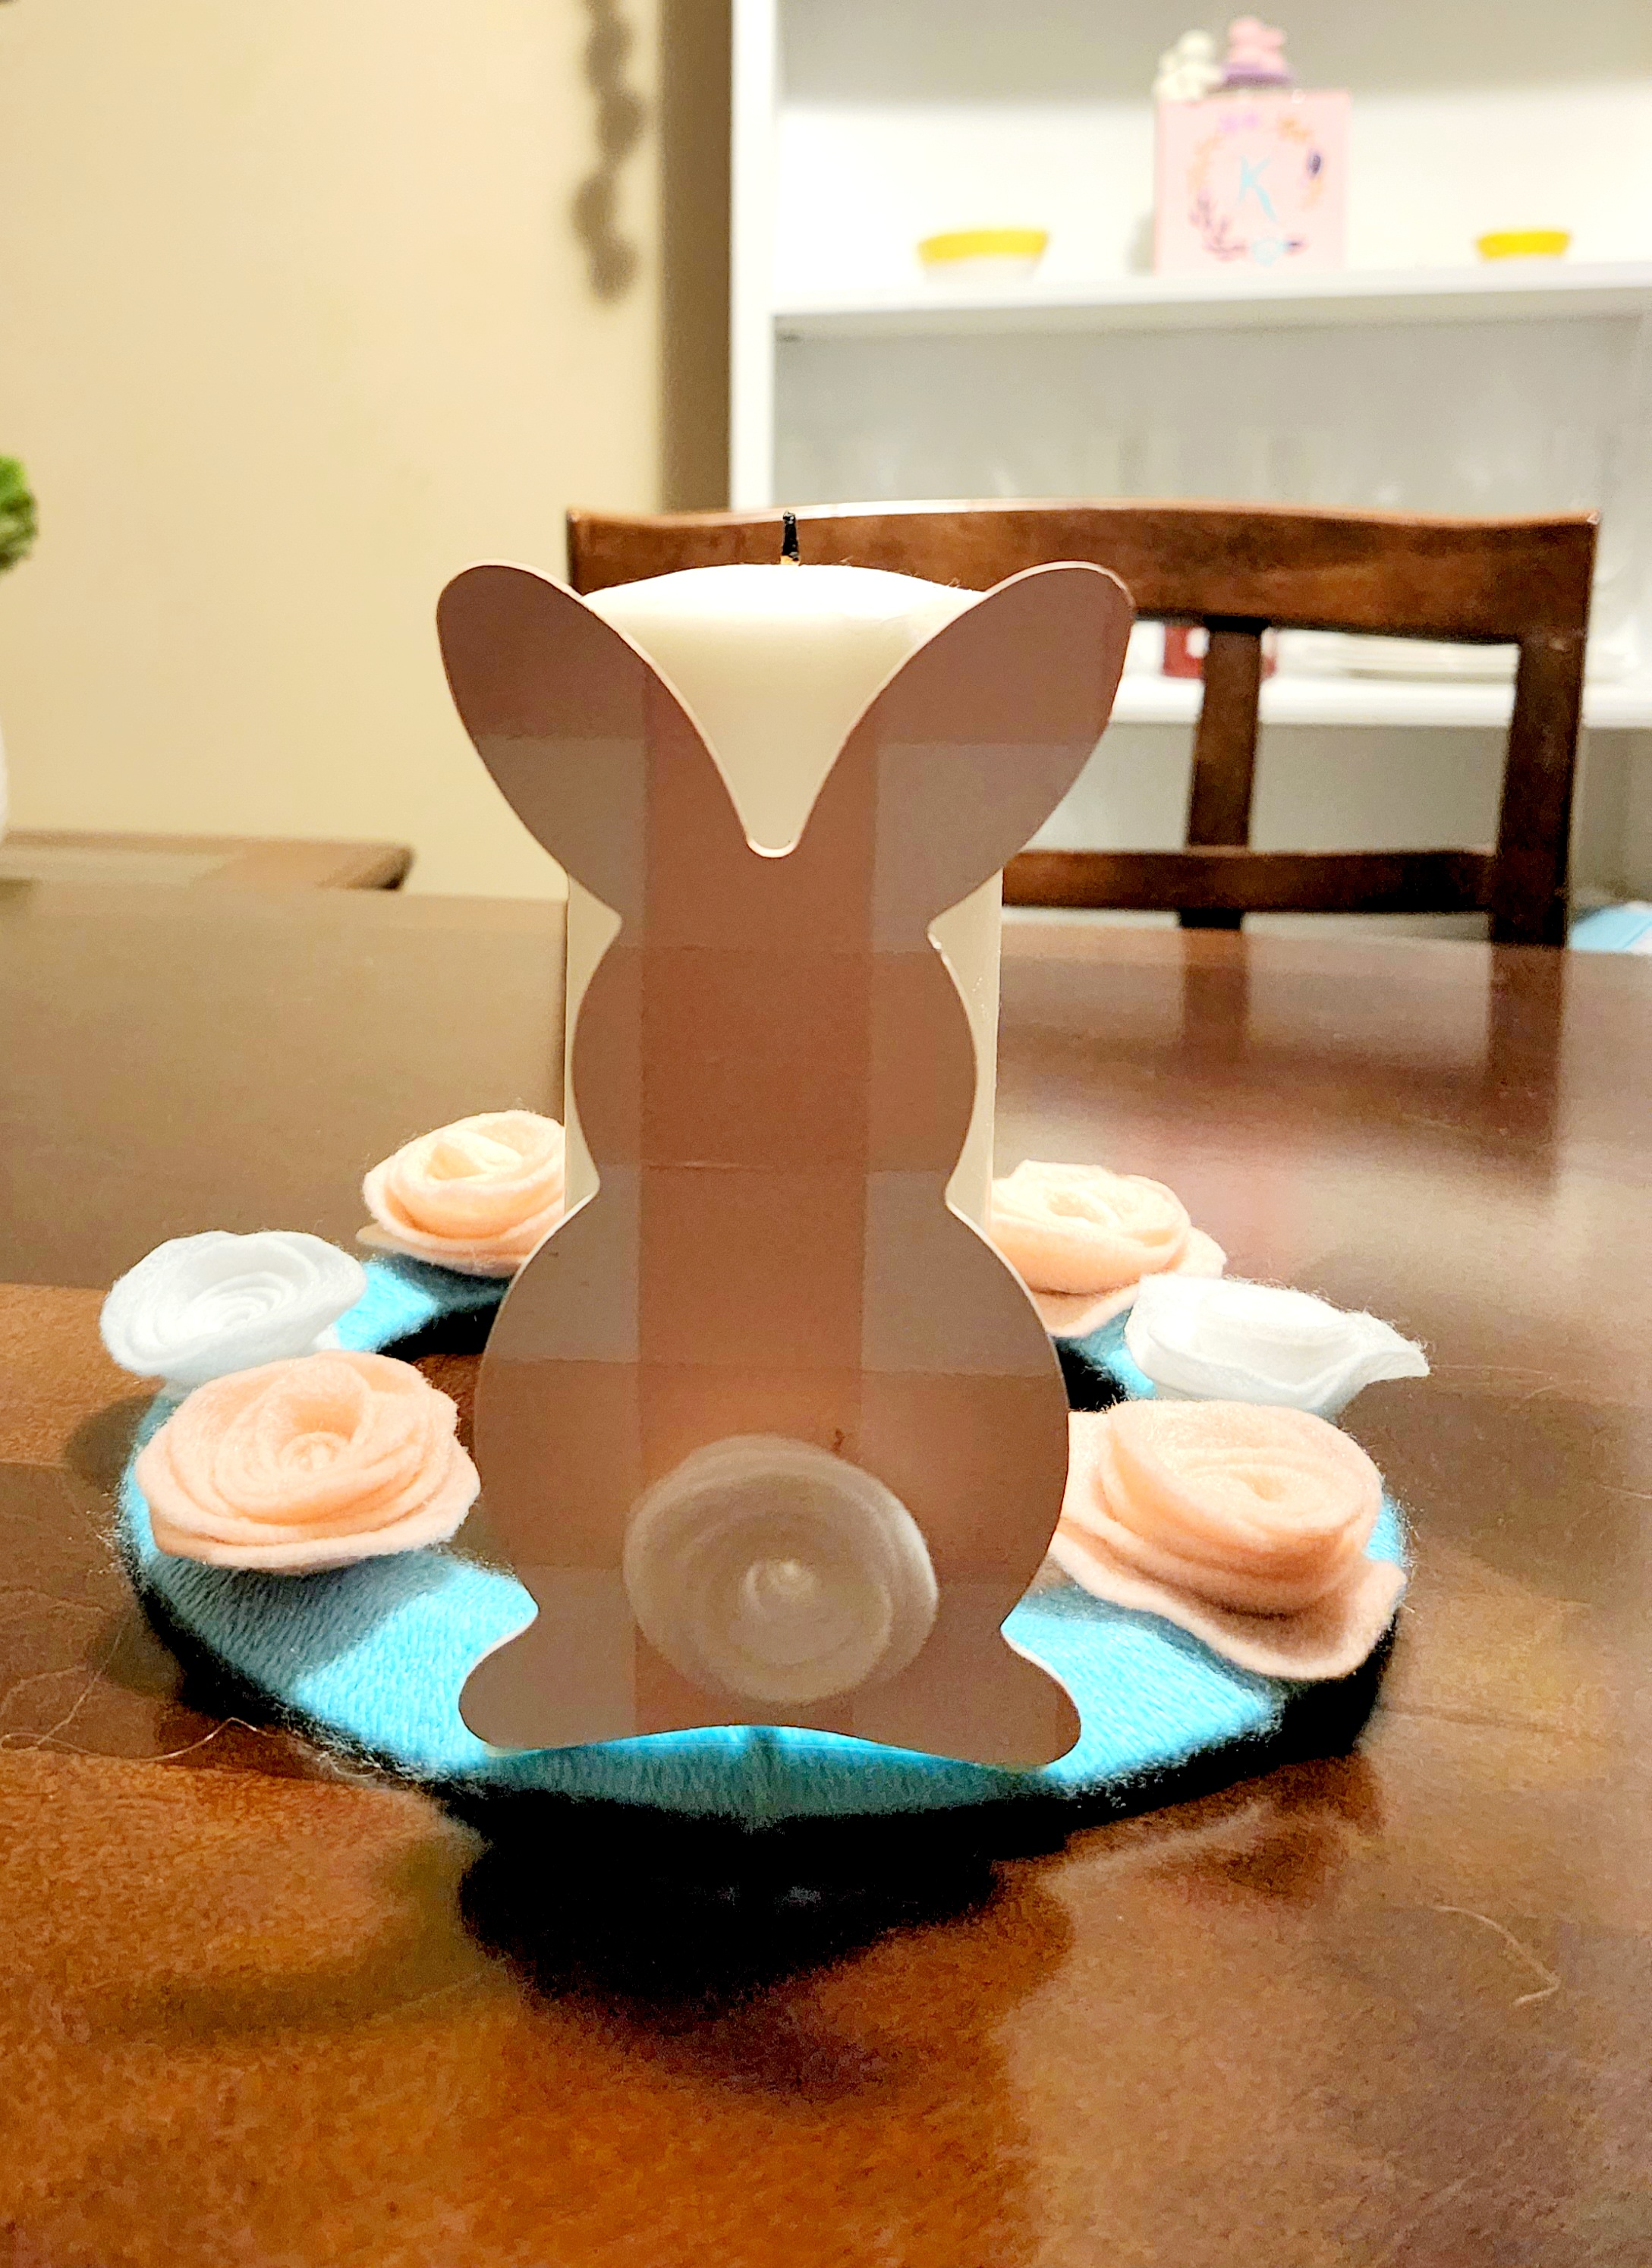
Your spring candle wreaths are done!
That’s it! How easy is that?! You can crank two of these out in about an hour and a half.

I placed them on my dining room table with large white pillar candles in the middle. I’m sorry that these pictures are dark. I lightened them up quite a bit, so the colors don’t look exactly the same as the ones above. We have the worst lighting in our current dining room. I can’t wait to get out of this place lol!


I hope you enjoyed this tutorial! Make sure to pin and share it so you can get back to it when you’re ready to make it. I have some adorable buffalo check spring printables coming up, so make sure you don’t miss them by entering your email address below and following me on social media!
You might enjoy these tutorials:


Such a cute project! I love how you used a rosette for the bunny tail! Too cute! Happy Spring! Donna
Thank you Donna!
This is such a creative idea for a delightful candle-holder — love the soft, Easter colors. It makes a really nice addition to your table-scape.
Carol
http://www.scribblingboomer.com
Thank you!
These are just the cutest bunnies ever. I love them. I want to make them.. so I guess I’ll add them to the list. Lol. I pinned these also to my Easter Board. Wishing you a wonderful Easter. Linda @Craftsalamode
Thank you! They are going to make an appearance on our Easter dinner tablescape! Have a happy & blessed Easter to you too!