If you’re like me you love finding bargains and decorating for the season for less. That’s an even more important skill now that the economy has crashed! After Thanksgiving Michael’s and other hobby stores have huge sales on their Christmas decor. It’s usually 70% off and this year I scored two small, flocked pinecone wreaths for $2.99 each! They would’ve been okay to hang on their own, but I wanted to add a little to them to make them more full and decorative. Today I’m going to show you how to turn a cheap wreath into a beautiful Christmas one that you can hang now and change up just a bit and leave up through winter!

Today I’m joining up with some talented ladies for a Winter Craft Hop, hosted by Beverly from Across the Blvd. Stick around after the post to see what the other ladies have to share this month!
Christmas Wreath Supplies:
- 12″ flocked pinecone wreath
- greenery stem
- decorative picks
- 2.5″ wired ribbon
- pipe cleaner
- hot glue gun & glue


Prep Wreath & Stems
First fluff the wreath, and if you have the same wreath that I bought, remove the pinecones. One of the pinecones would be hidden behind the bow. It would also make the other pinecones uneven next to the bow. They are attached with wire, and you can just unwind them.

To add a little more fullness to the Christmas wreath I added some flocked pine stems. I didn’t want to add the entire bunch to the wreath in one spot so I disassembled them.
Cut the floral tape that attaches the greenery to the stem. An exacto knife works well. Pull the greenery apart so that you have separate pieces. If you have picks that have individual pieces that pop on and off with plastic, pull them off.


Attach Greenery & Picks
You can attach the greenery to the wreath with hot glue or with pipe cleaners or floral wire. I used hot glue.
I attached the piece of glittery white stems to the Christmas wreath first. Squeeze a little hot glue to the ends and place them on the wreath. I added four pieces and spread them out evenly.


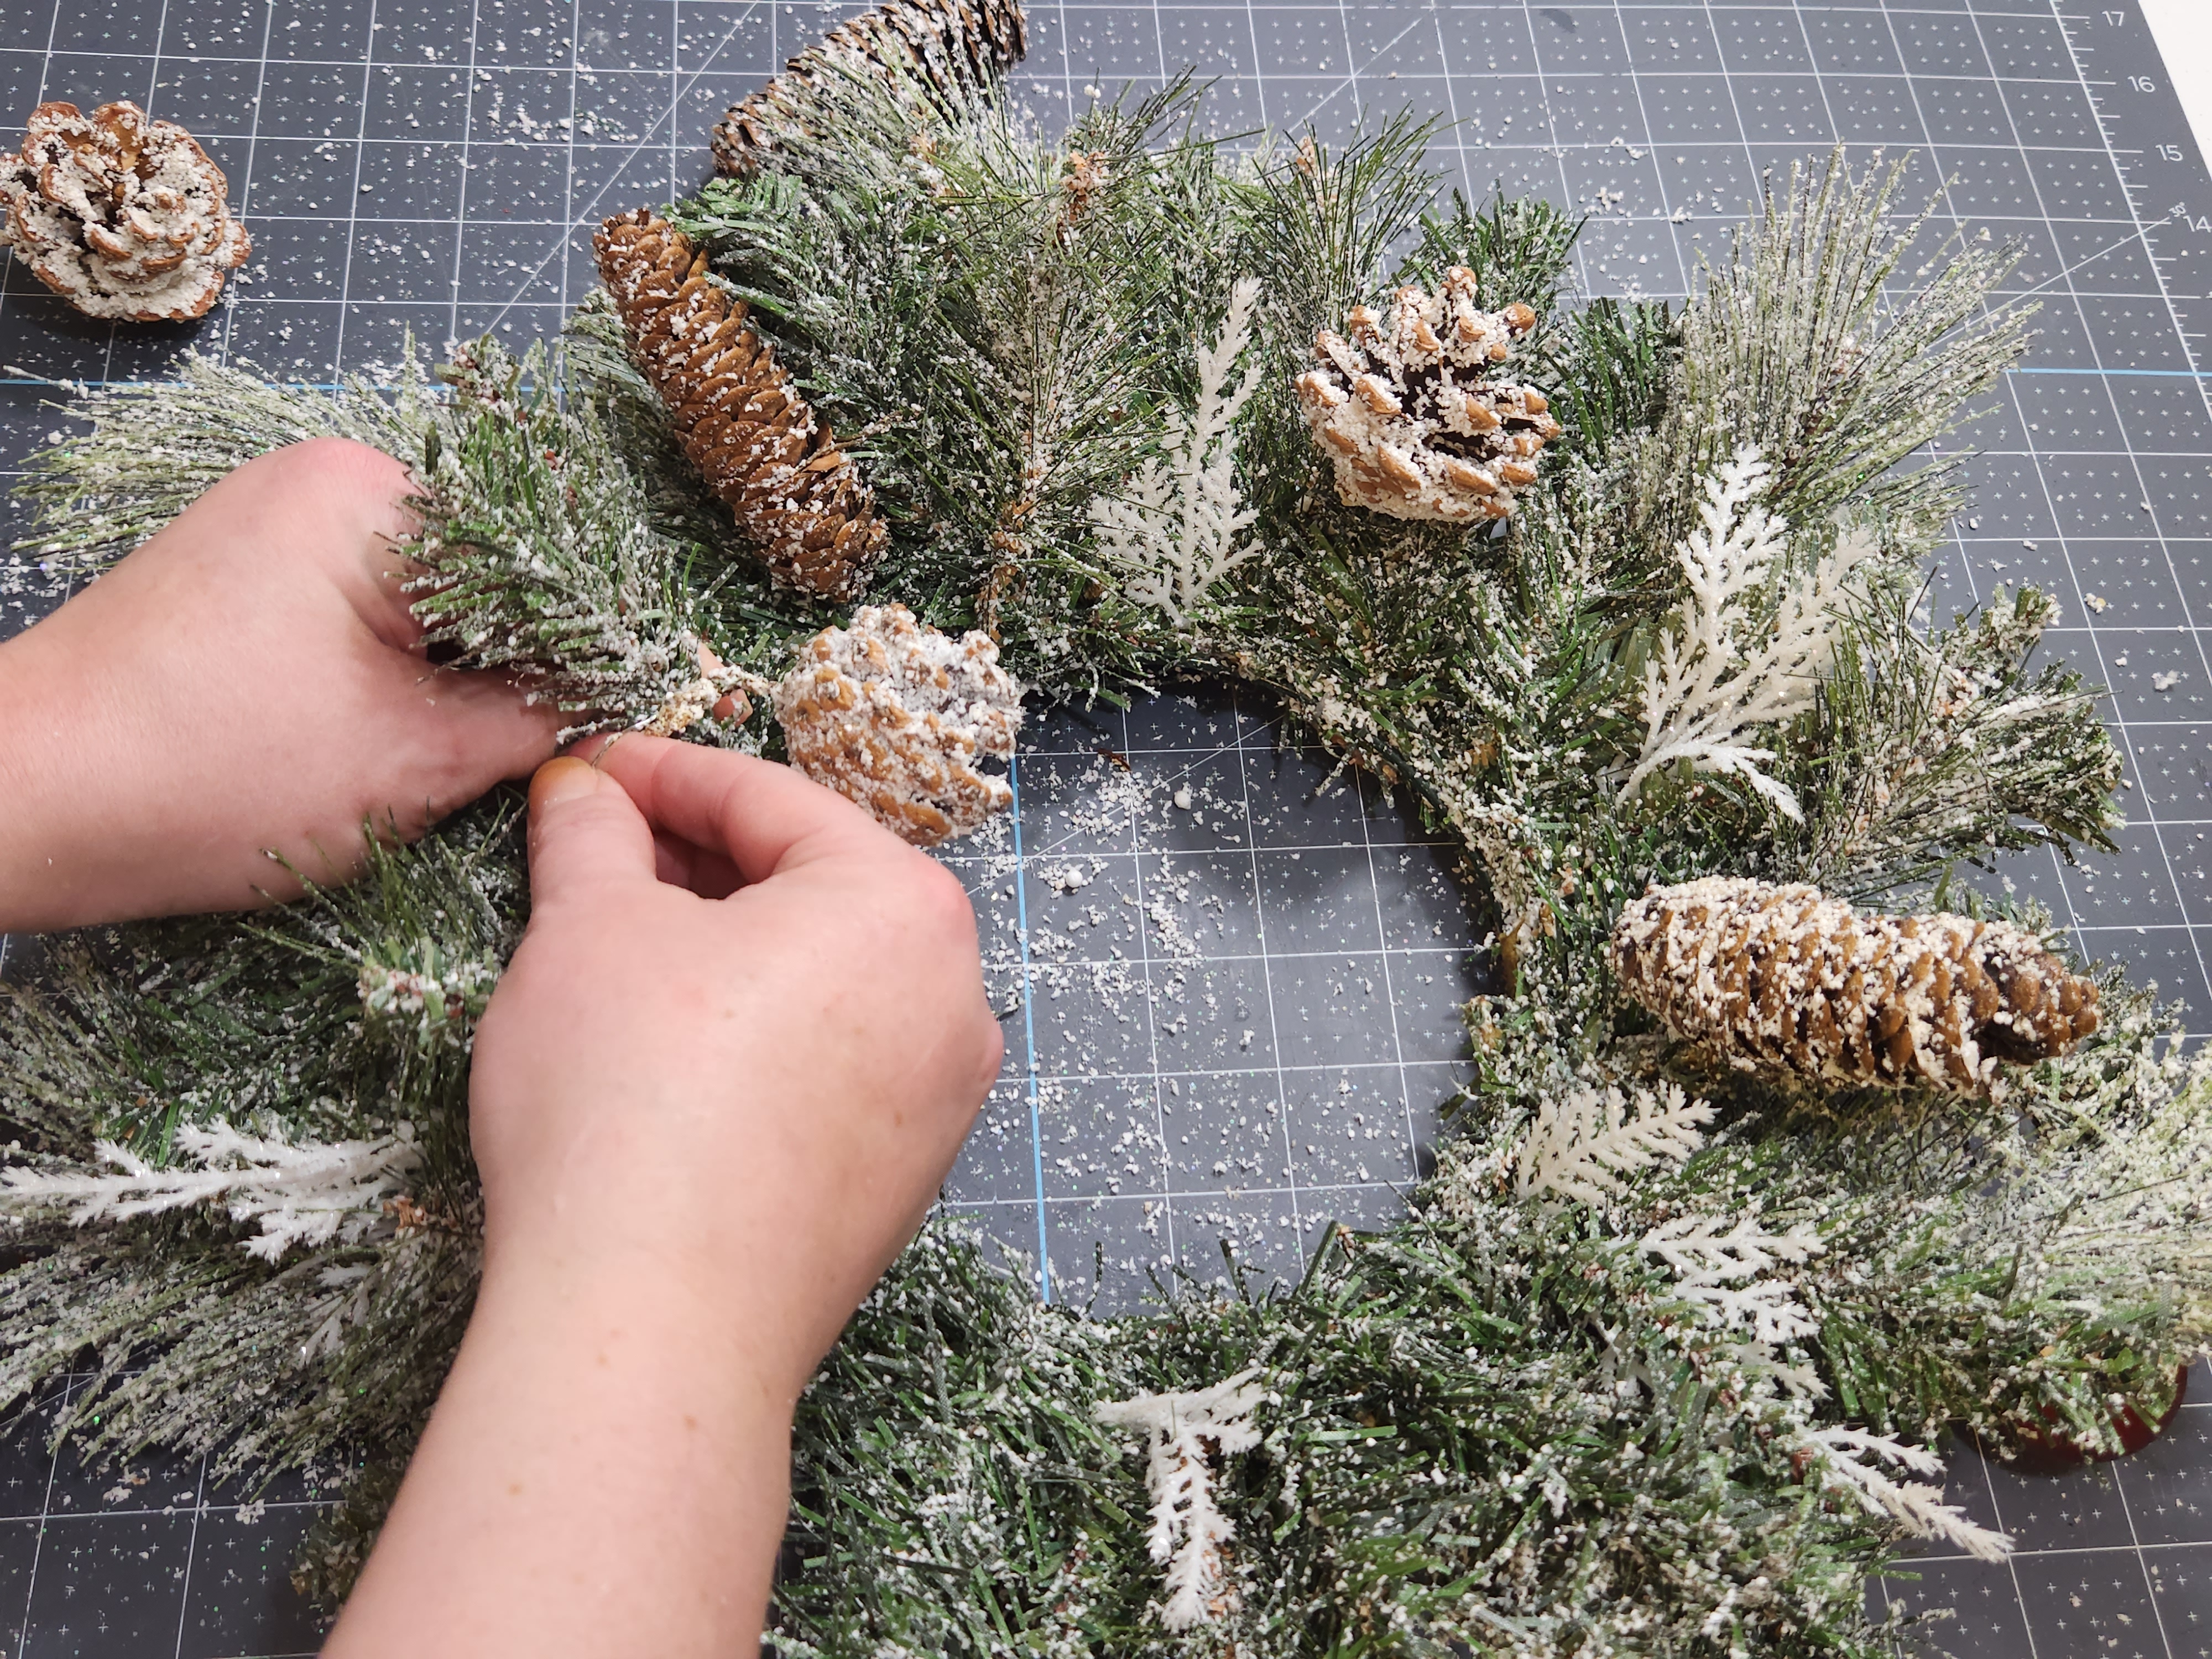
Add hot glue to the stem of one of the pine pieces and place it on the back of the wreath. Allow the wire to run parallel with the wreath wire. You can bend the stem however you’d like it to go once the glue is dry and secure.


Continue adding the pine stems to the back of the wreath. I used seven pieces to cover it, but didn’t add any in the section I added the bow to.

Now reattach the pinecones to the wreath. Leave a place for the bow. I added the pinecones every 2.”
Add Berries & a Bow
Next, to add a little color to the wreath, add some berries. I removed bunches of them from picks that I had stashed around. Add hot glue to the ends and scatter them around the wreath.


Since this wreath is small, I decided to add a simple four loop bow made with 2.5″ wired buffalo check ribbon to match my other Christmas decor. When you make yours, leave the pipe cleaner or wire you secure it with long so you can add it to the wreath. Wrap the wire around either the wreath’s ring or the stems of greenery like the pinecones.


Remember this is a blog hop so keep reading so I can send you to the other bloggers’ winter craft ideas!
That’s it! Hang your gorgeous Christmas wreath with pride!
This wreath was so inexpensive to make and it looks great hanging on my kitchen cabinet. Once I finish the second one, I’m going to hang it on the opposite side of the stove and microwave. I’ll update with pictures as soon as it’s finished. Can you believe this wreath cost $3?! You can keep using this wreath through February by swapping out the bow or removing it completely. The berries can also be taken off to remove all traces of the red that marks most Christmas decor. Gorgeous decor for three months for $3? Yes please!
Remember to pin the image below or share this post with the buttons on the left side of the page so you can find it when you’re ready to start your project! Also, follow me on Pinterest for new ideas added weekly! Be sure that you never miss a great tutorial for decor like wreaths, signs and other home decor, free printables, crafts, and other fun posts! Enter your email address below to be notified of new posts! Use the buttons below to follow me on social media for other great content.

Winter Craft Blog Hop
Beverly – Across the Blvd | Painted Logs for Cozy Winter Decor
Gail – Purple Hues and Me | DT Ornament Candle Holders DIY
Marci – Stone Cottage Adventures | Vintage Angels DIY
Allyson – Southern Sunflowers | Dollar Tree Makeover for Winter Decor
T’onna – Sew Crafty Crochet | Long Tail Snowman Scarf
Michele – Coastal Bohemian | Winter Window Swag -Snowball Fight
Julie – Sum of their Stories | Felt Snowflake Decoration
Don’t go yet! There’s more to see!
There’s plenty more to see here on the blog! If you’re looking for something specific, use the search box in the sidebar to look it up. If not, you might enjoy these ideas. Don’t have time to read them all now? That’s ok, just click over to the posts using the pictures and pin them for later. You can also add Life as a LEO Wife to your favorites and check back for new ideas and free printables and SVGs every Wednesday, as well as link parties with tons of shared ideas on Sundays!


Adding extra bits and pieces to zhuzh up an inexpensive wreath is such a brilliant idea. I love the little pops of red you added, they really bring it to life.
Thank you!
Your wreath is lovely, Niki. Pinecones on flocked greenery look pretty for winter decor.
Thank you!
I never use flocked and it’s always so pretty to me. Nice score at Michaels too.
Thank you! It looks like a snowstorm blew through my craft room after working on those wreaths!
Flocking always makes me think of the winter season. Your wreath base looks great beefed up with additional picks and a pretty bow!
Thank you! I love that I can use them all winter.
I love seeing wreaths hung on cabinet doors, Niki, and yours is quite lovely! It’s one that can be used over and over again – especially during the cold and winter months! You really found a bargain at three dollars!
Thank you! A definite score!
Your wreath is really lovely! And that was such a great deal! I love a good flocked wreath, and I like the red berries and the red buffalo check bow.
Thank you!
Adding wreaths to cabinet doors is always so pretty. I love the added pinecones and big red bow! Well done! -Marci @ Stone Cottage Adventures
Thanks Marci!