
Tonight is my family’s annual Christmas movie night. Every year I go all out with themed food and drinks and decor to match the movie with lots of fun and games thrown in. The kids have chosen How the Grinch Stole Christmas this year. You can get the full set of printables that I created for it here. I usually like to make something special for the kids, so this year I made an adorable DIY Christmas ornament glass for each of us. These glasses are the perfect thing from which to sip your holiday cocktails from and make a beautiful addition to your Christmas tablescape. Let me show you how easy they are to make!
It’s time for our monthly Under $10 on the 10th Blog Hop hosted by Tammy of Patina and Paint! Our theme for this month is last minute Christmas gifts. Each of the lovely ladies on the hop will be sharing a gift idea that you can make for less than $10, so be sure to stick around after the hop to check out all of their great ideas!
These ornament glasses are the perfect last minute gift idea because you can make a set of four in less than an hour, about fifteen minutes per glass. That’s how long mine took me, and that’s including time to create and cut the names with my Cricut! They make a fantastic hostess gift as you could add the family initial to each glass. Just adding the initial would cut the time to make them down even more. What more could you ask for in a homemade last minute Christmas gift?!
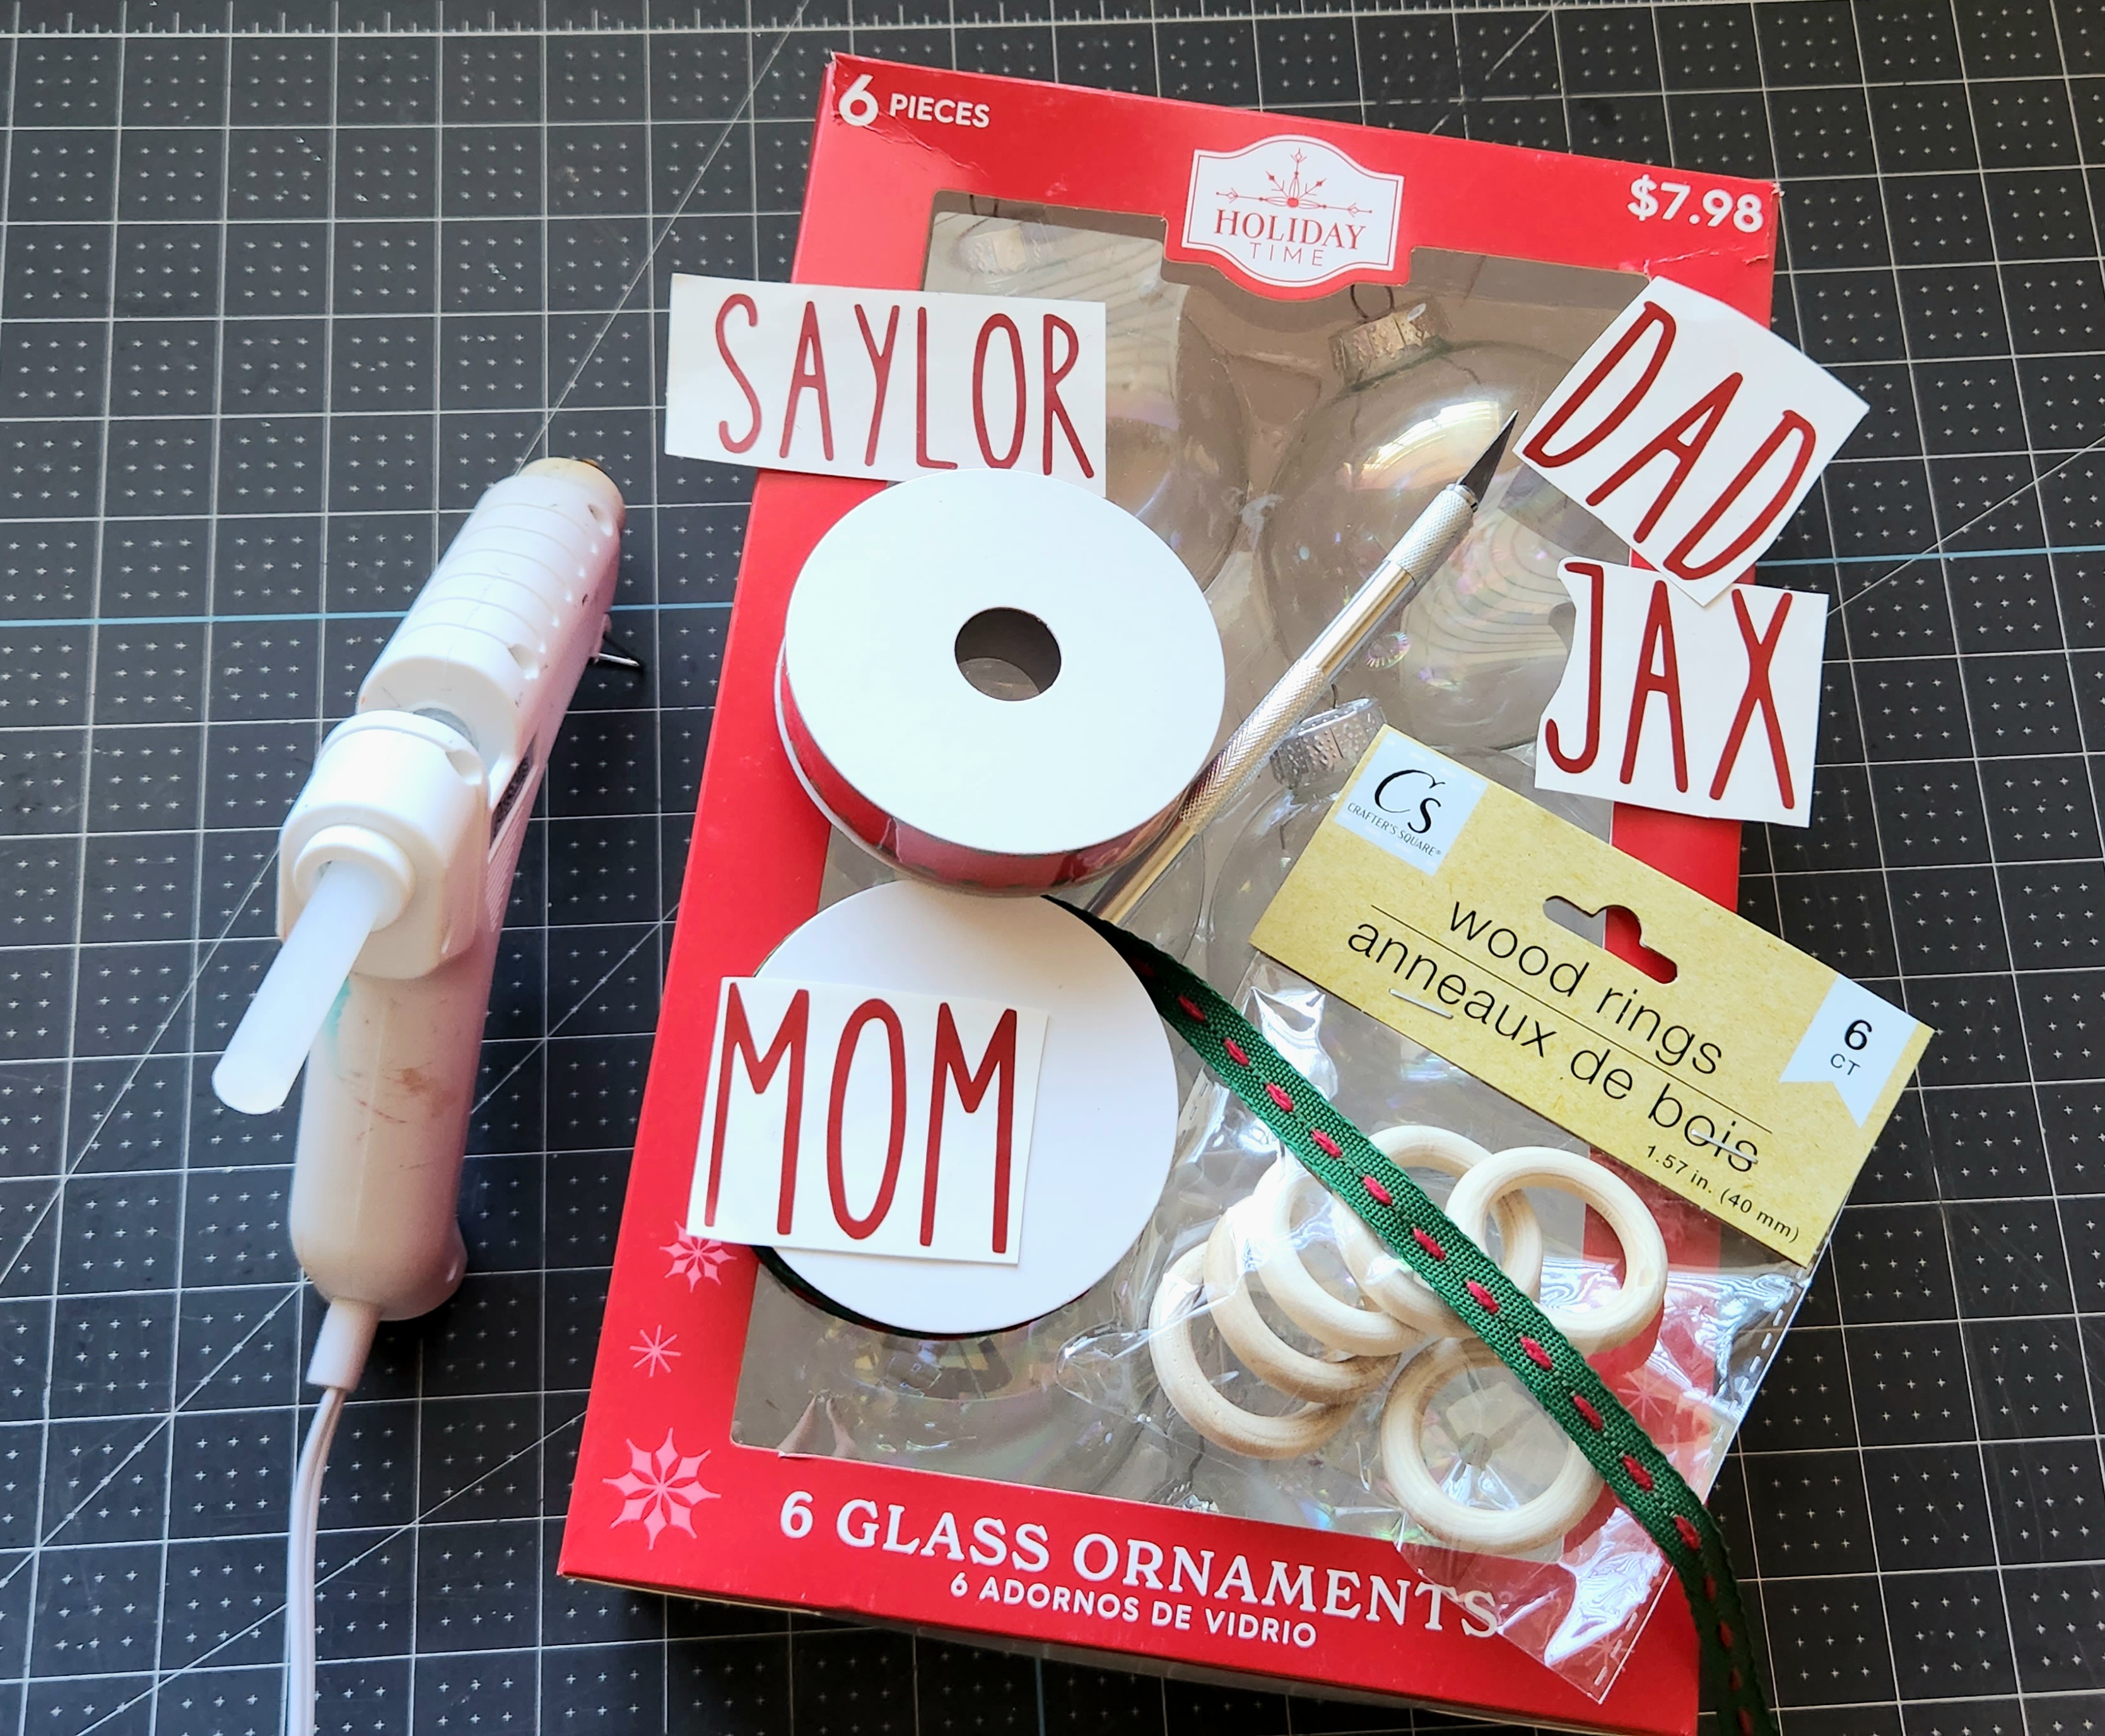
DIY Ornament Glass Supplies:
- large clear ornament- I used a 6 pack from Walmart, but Dollar Tree does have two sizes, one of which is larger. The ones I used are 3.5″ wide at their largest parts and fit an entire 12oz can of coke. If you’re using ornament glasses with kids, I recommend getting the plastic DT balls. However if you’re giving these to adults as a gift, use the glass balls for a more adult feel.
- wood rings (DT)
- hot glue gun & glue
- straw for drinking (optional)
- Beacon Quick Grip (optional)
- vinyl or paint pen (optional)
- thin ribbon (optional)
The only thing that I bought for this project was the package of ornaments which were $7.98. If you had to purchase everything, you could still make an ornament glass for well under $10 a piece. Each ornament cost $1.33 (or $1.25 at DT), the ribbon that I used was $.50, the package of six wood rings were $1.25 (so about $.21 each), and a piece of holly matte vinyl is $1.00 at my local U-haul rental location. If you price out each DIY ornament glass, you would pay $3.04 each or $2.96 if you use a DT plastic ornament. If you already have ribbon, you can make a set of six ornament glasses for $9.23 or $9.73 with ribbon! If you have to purchase vinyl as well, that will put you just over $10 at $10.23. But that’s six gifts!

Be sure to enter to win a $175 Etsy gift card in our Joy of Giving Giveaway! Come back every day for more chances to win as we have daily entries as well! Follow me on social media using the links in the sidebar for even more entries!
Wash Ornaments
Since you will be drinking out of the ornament glass, you need to wash it well. Get the water as hot as you can stand and clean the ornaments well. A bottle brush works well for this, but if you don’t have one, you can add soap and water to the inside of the ornament and use a long thin object like a bbq skewer to push a paper towel all around the inside. You can let hot soapy water sit in them for a while as well. Do not place them in the dishwasher as they will more than likely bust.
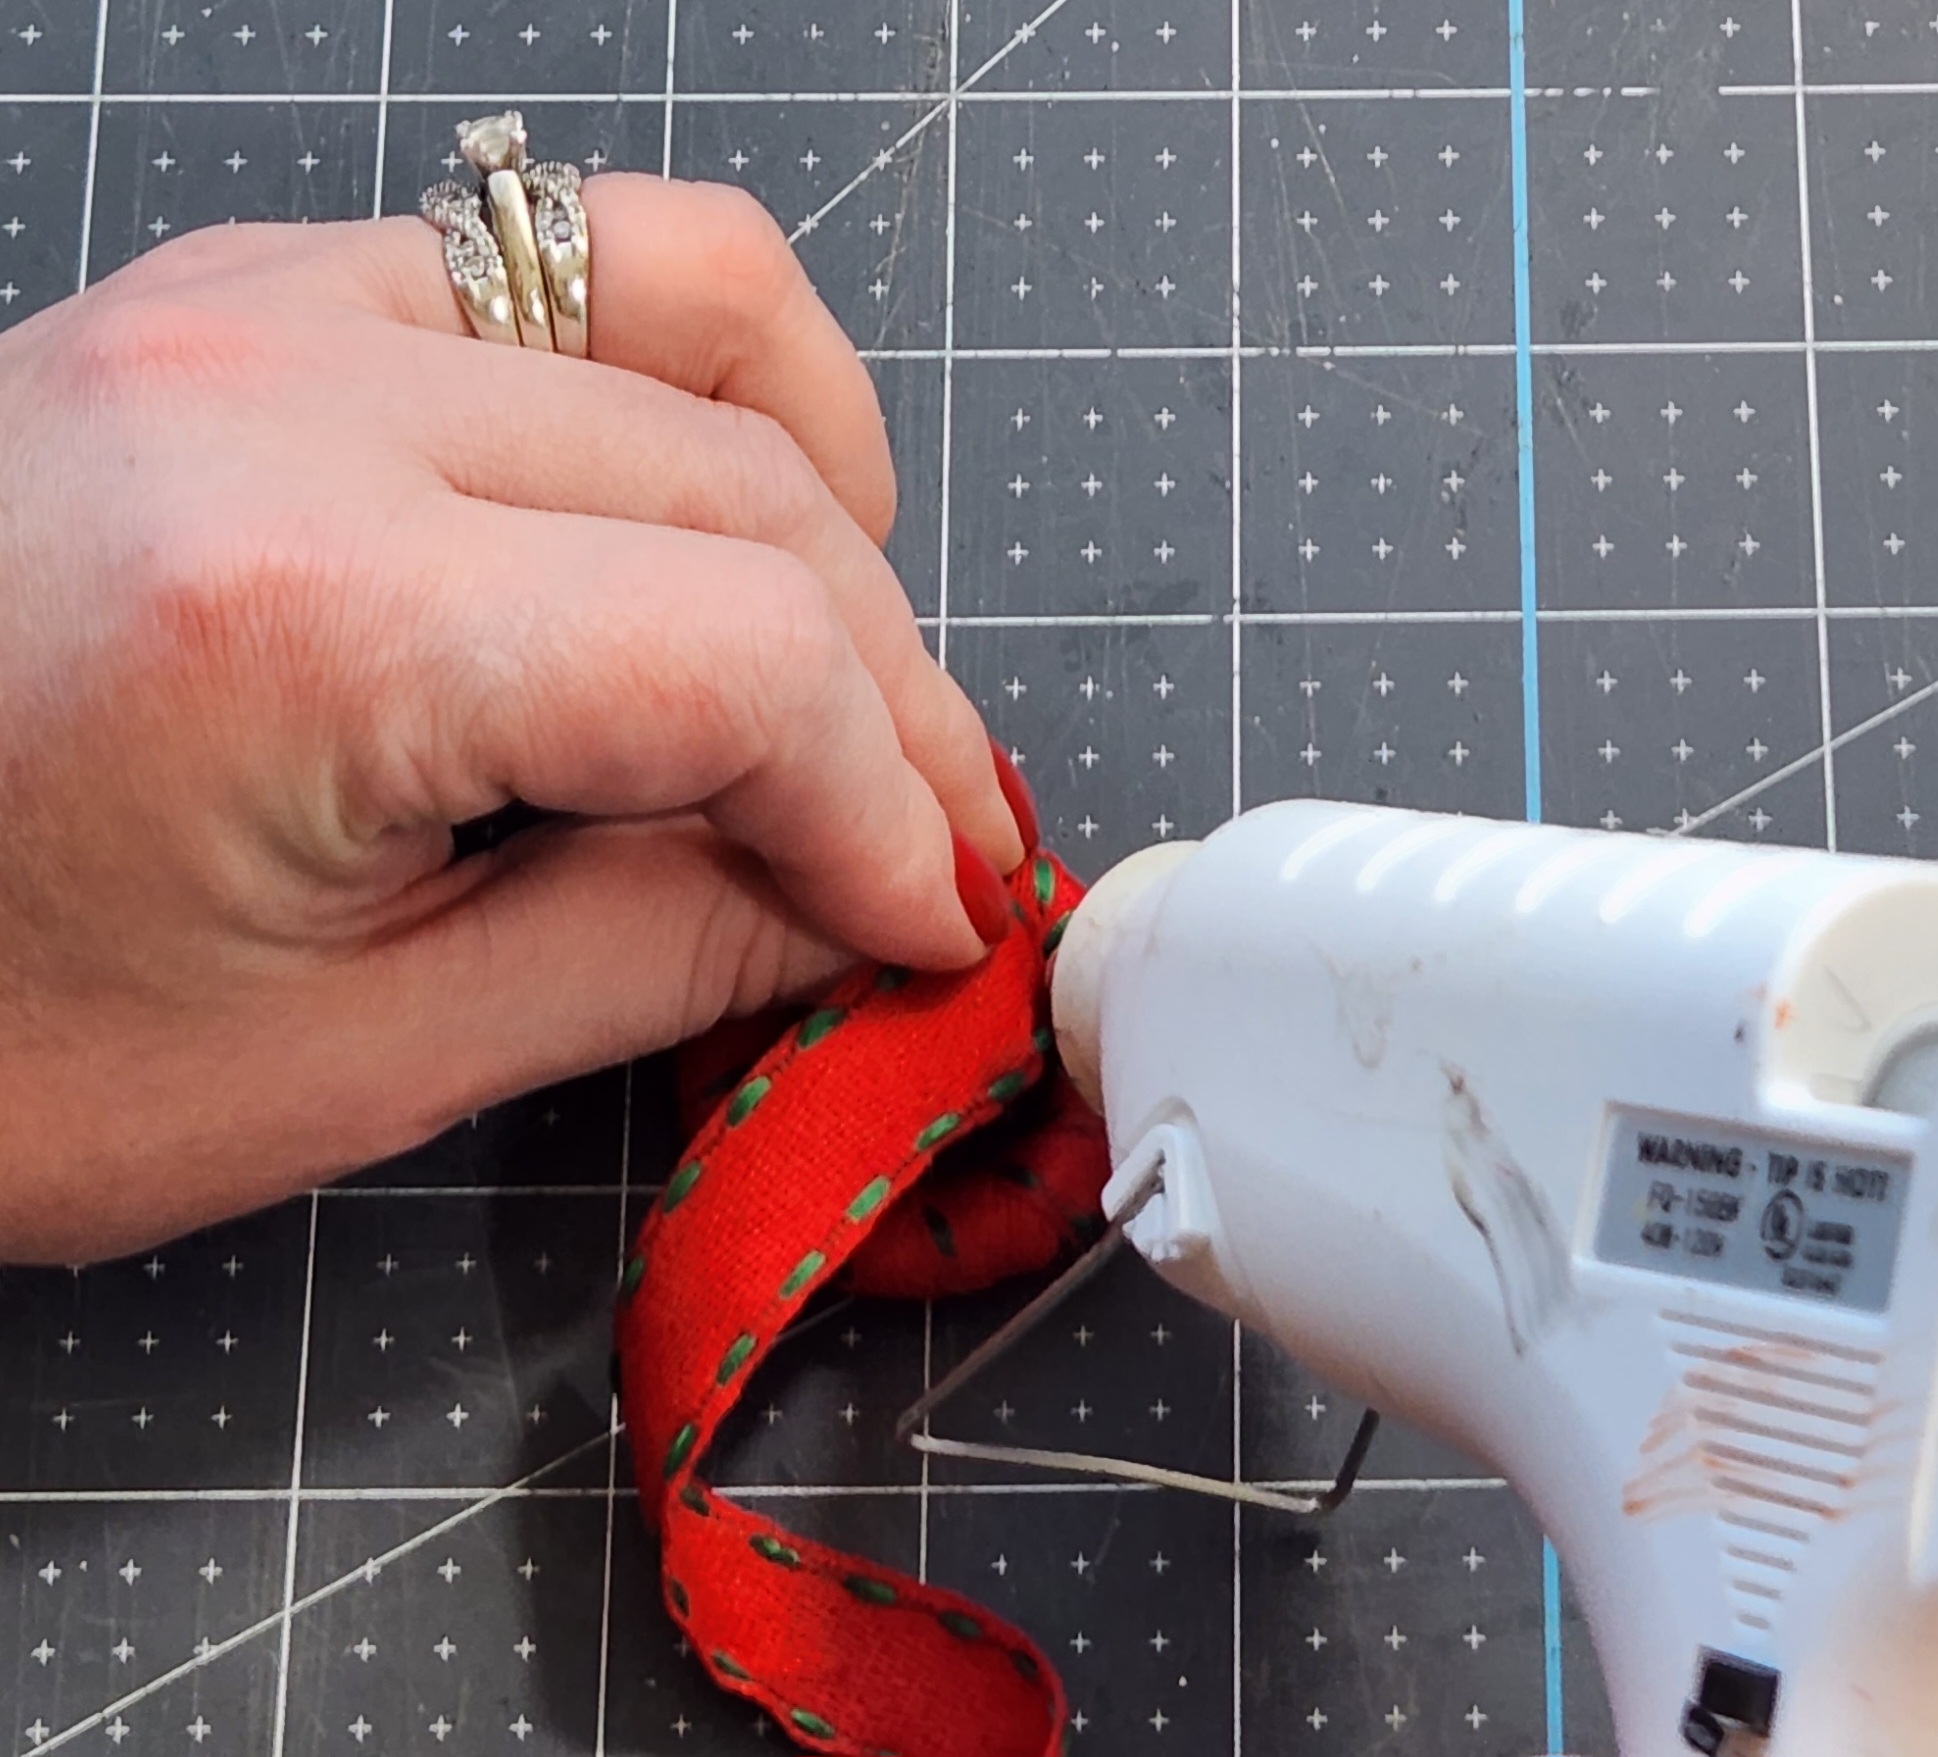
Wrap & Attach Wood Rings
Hot glue the end of a length of ribbon to one of the wood rings and wrap the ribbon around it until it’s completely covered. Glue the other end in place on the same side that you glued the first end. That will need to be the bottom of the ring so that you can’t see it through the ornament. Wrapping the ring is optional. You could paint them or leave them natural.

In order to be able to sit the ornament glasses down once they have drinks in them, you need to glue the wood ring to the bottom of the ornament. You can use hot glue, but you will be able to see the mess that it makes through the glass. I used Beacon Quick Grip which works well and doesn’t look bad.
Add a tiny strip of Quick Grip (or hot glue if you don’t have it) around the top of the ribbon wrapped ring.

Place the ornament right on top of the glue with the opening directly over the center of the ring. I added the vinyl to my first ornament glass before I added the ring to the bottom. On the subsequent glasses I added the ring first which worked out better (which you’ll see in the video tutorial). You can do it either way.
Customize the DIY Ornament Glass
To make the gift a little more personal, you can add the recipient’s name on them. This isn’t something you have to do. They’re cute on their own. You can use vinyl, stickers from Dollar Tree, or use a paint pen to write the name or initial on the ornament glass.
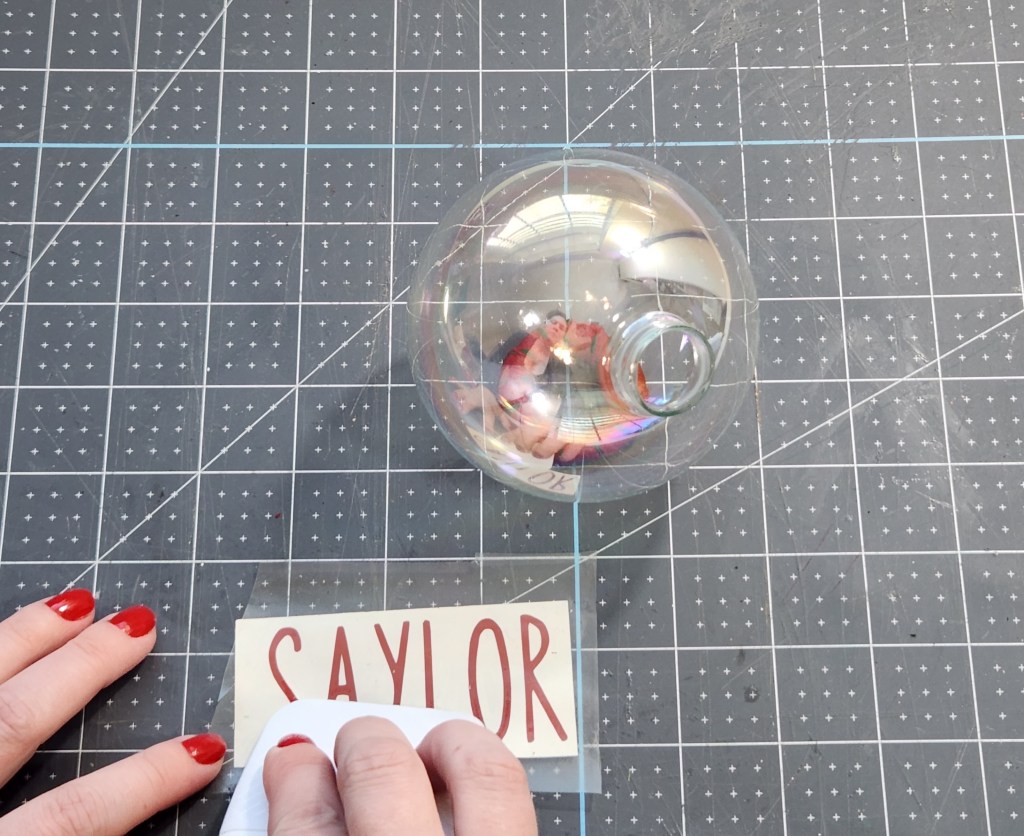
I added each of our names to the ornament glasses using my Cricut and holly colored vinyl. I used a Rae Dunn dupe font in Canva then uploaded the names to Design Space.
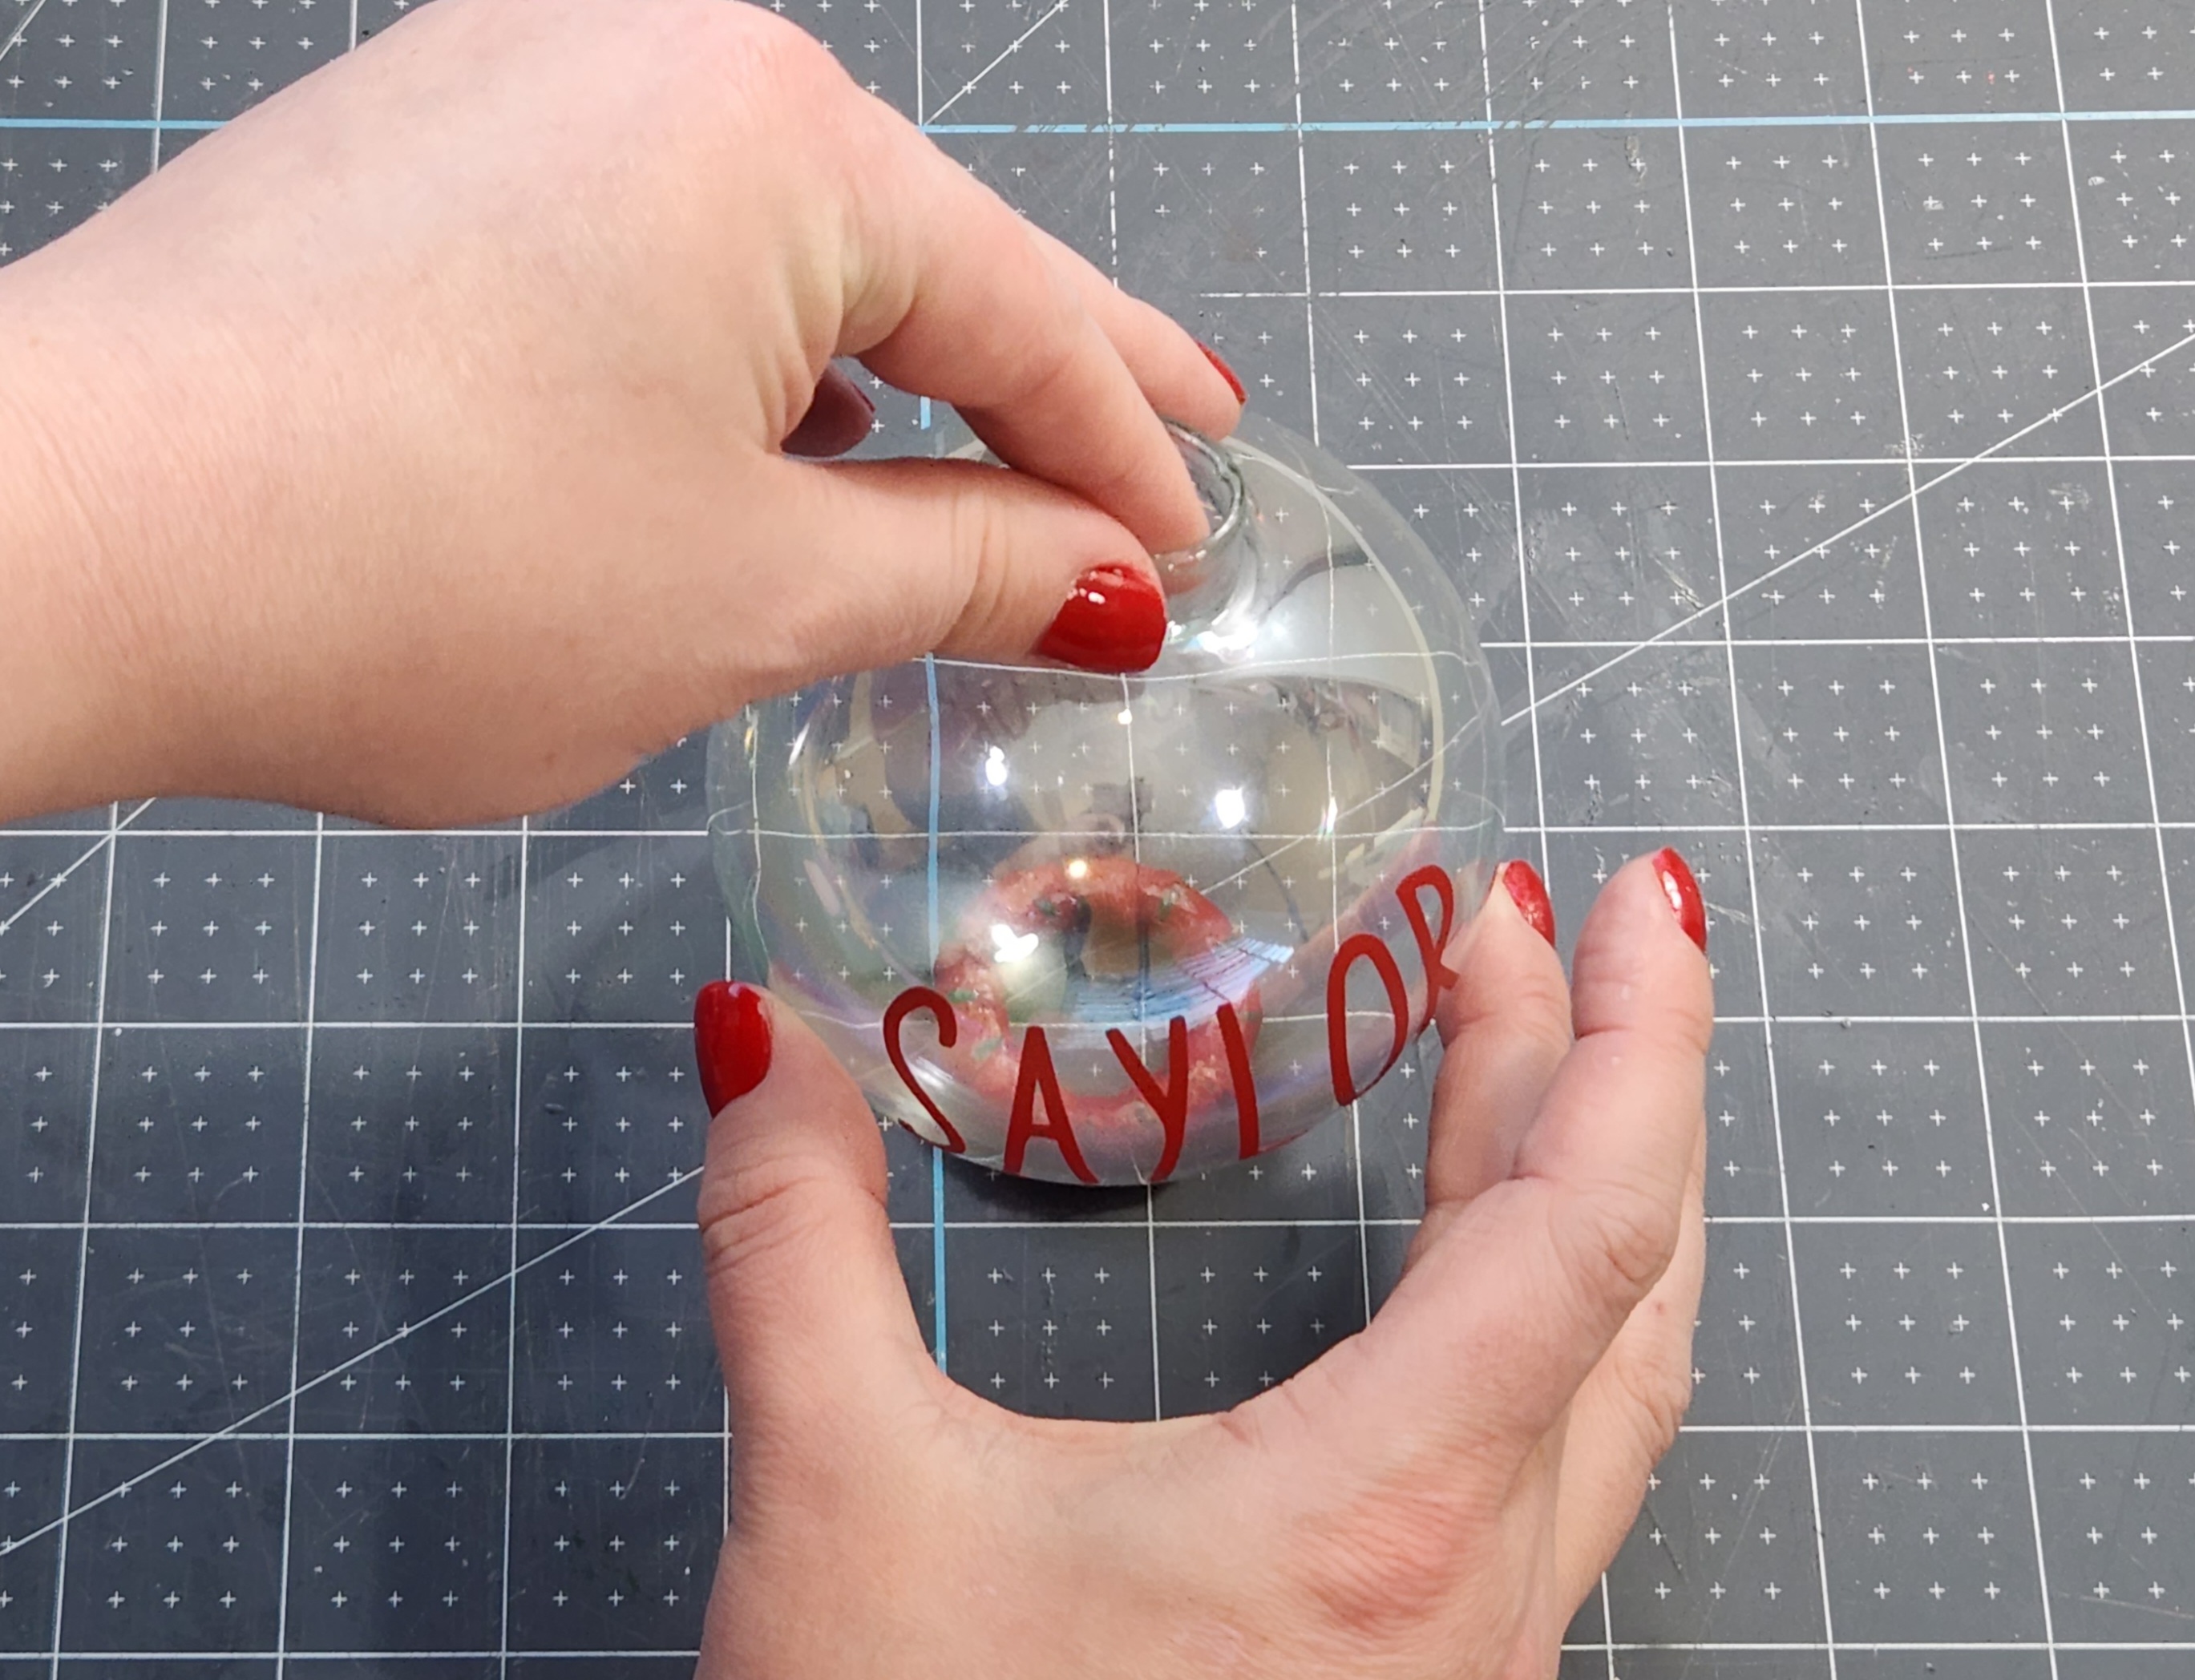
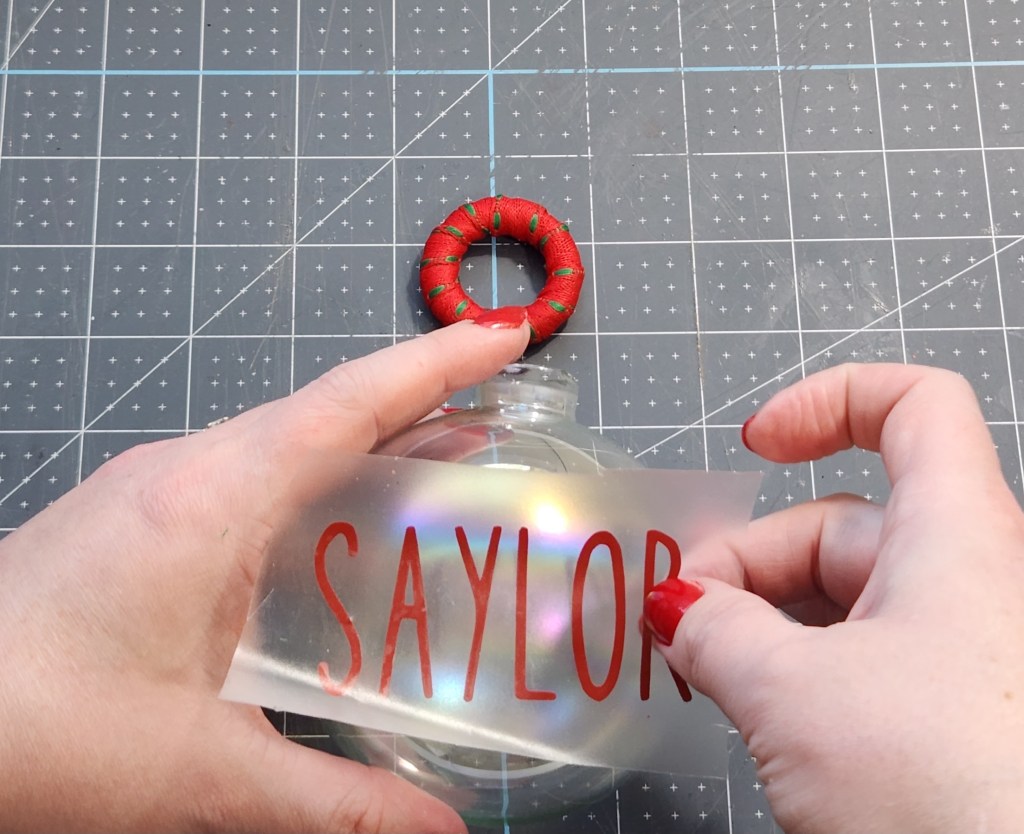
To transfer the name onto the curved surface, you can place one side on at a time. Meaning, lay the transfer paper with the full name on the ornament, but push down one end down first, leaving the other side hovering above the surface. Once those letters are on, you’re able to lift that side of the transfer paper, smooth down the middle, lift again, then smooth down the final side. In the pictures below you can see that I’m going over the L, but the “Say” isn’t touching the glass yet. You can see what I mean a little better in the video tutorial. You could also cut slits in the transfer tape to lay everything down at once. My way is a little easier.


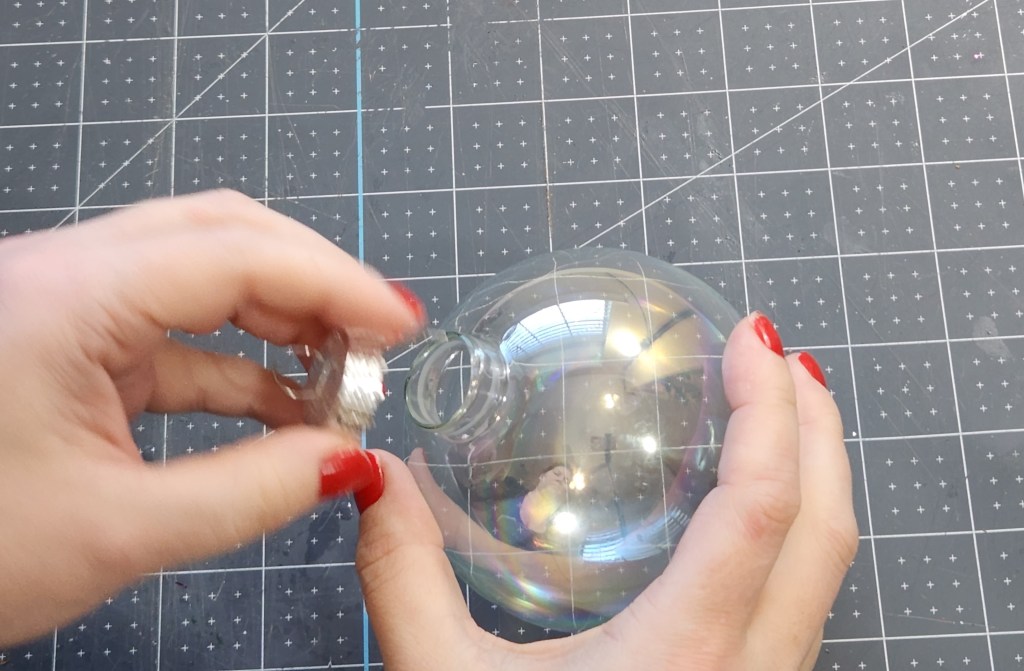
Prep & Assemble the Top
If you haven’t yet removed the top of the ornament, do that now. Squeeze the metal hanger and remove it from the metal cap.


Next, cut a hole in the cap for a straw. You can sit the cap on the ornament or place it on a cutting mat. I tried both options and they both work fine. Press an exacto knife through the metal, right where the slit for the hanger is. Slide the knife in a cutting motion moving in a circle. You can follow the path of raised circle that’s embossed on these particular ornaments. I’m sure that most brands have them. Once you get a small cut you can kind of push the metal in. Finally, when you have a decent hole, you can put a pen or even the other end of the exacto knife through it. It will make a straw sized hole.


The last step is to add a little bow. It’s optional, but since we are using ours for a Grinch family movie night with the kids, I thought it would be cute. I used a red 7/8″ ribbon on the girls’ ornament glasses and a 5/8″ green one for the guys’. If you have ribbon that frays, use a lighter to singe the ends of the bow. Add a dot of hot glue on the back and place it on the edge of the silver ornament cap.


Tips for Making Fancy Ornament Glasses
I mentioned that these make great gifts for hostesses or any woman in your life. My mom absolutely loves them, so I’m making her a set. A friend saw that I was doing that and now she wants a set too. I want those to be a little fancier and if you would like the same, I have a few tips.
Create the recipient’s initial with a script font and cut it on metallic colored vinyl: gold, silver, copper, or rose gold. Then use a thin coordinating1/8″ metallic ribbon to make a tiny bow or skip the bow all together. Use that ribbon or a metallic paint to cover the wood ring. You can also place the ornament in a martini glass and skip the wood ring if you’d like.
You could also make farmhouse style ornament glasses by leaving the wood rings natural. Wrap twine around the metal cap a few times then make a bow with it. You could also use thicker jute rope to make a bow and glue it to the cap. Neutral colored vinyl would look great for the names or initials. I saw cute napkins with farmhouse trucks on them at Walmart. If you cut the truck out, you could Mod Podge it on the ornament for even more of a farmhouse look.
DIY Ornament Glass Video Tutorial
Here is a video tutorial for those who are visual learners. Enjoy!
Pour, drink, & be merry!
Remember this is a blog hop, so keep reading to the end of the post so I can send you to the other bloggers on the hop!
The tops of the ornaments are very small, so it’s best to pour the drink into the ornament glass with a funnel. I ordered one to use tonight, so I’ll update this post with drink preparation tomorrow. I hope that you enjoy your beautiful Christmas ornament glasses! Here’s how mine turned out.

Here they are with some colored water inside.

Remember to pin the image below or share this post with the buttons on the left side of the page so you can find it when you’re ready to start your project! Also, follow me on Pinterest for new ideas added weekly! Be sure that you never miss a great tutorial for decor like wreaths, signs and other home decor, free printables, crafts, and other fun posts! Enter your email address below to be notified of new posts! Use the buttons below to follow me on social media for other great content.

Under $10 on the 10th Blog Hop
I know that you’re going to love the last minute gift ideas shared by the other ladies joining us on this blog hop!
Tammy – Patina & Paint | White Yarn Christmas Tree
Allyson – Southern Sunflowers | Hot Chocolate Christmas Basket
Don’t go yet! There’s more to see!
There’s plenty more to see here on the blog! If you’re looking for something specific, use the search box in the sidebar to look it up. If not, you might enjoy these ideas. Don’t have time to read them all now? That’s ok, just click over to the posts using the pictures and pin them for later. You can also add Life as a LEO Wife to your favorites and check back for new ideas and free printables and SVGs every Wednesday, as well as link parties with tons of shared ideas on Sundays!


Niki this is one of the cutest crafts I’ve seen all year. So cute!!! I have a few glass ornaments in my closet and I WILL be making some today. Pining! Great job. Thanks so much for sharing!!!
Aw, thank you Tammy! We had a blast with them!
What fun, so cute Niki!
Thank you!
Your ornament glasses are super cute! I like the font you chose to use. These will definitely be perfect inexpensive gifts for anyone. Hope y’all enjoyed your movie night!
Thank you! We had a blast. We laughed until we cried. I’m going to miss these years when they’re too old to hang out with mom and dad at Christmas. I don’t even want to think about it. Watching my baby leave will rip my heart out. Maybe I’ll just lock him in his room until he’s 40 lol!
What a fun idea! These are so cute and festive! I hope you and your family have a very merry Christmas!
Thank you! You as well!