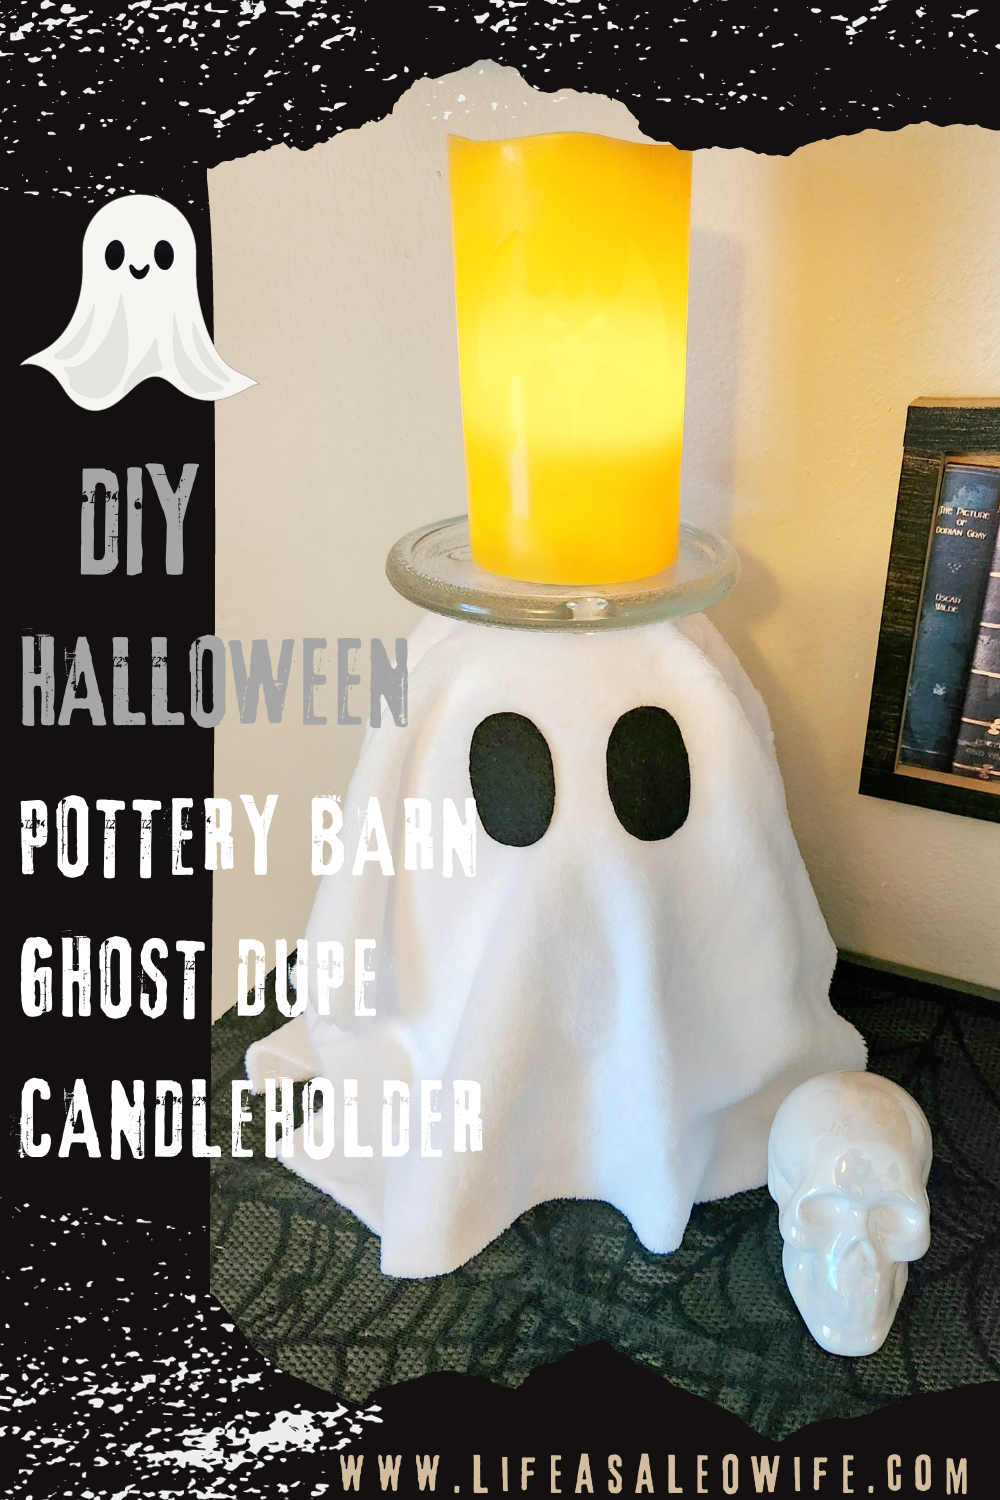
Hello everyone! Halloween is just around the corner, and I’ve got the cutest DIY decor idea to share with you! You may have seen those $80 Pottery Barn ghost pillows & their dupes floating around. I’ve gave it a little turn and make it a fun Halloween ghost candleholder. Let me show you how I did it.
If you’re coming over from Gail at Purple Hues and Me and her adorable plastic cup vase, welcome! It’s time for our monthly Creative Craft Hop, hosted by Sara of Birdz of a Feather, so stick around after the post and I’ll send you to the next post on the hop.
Halloween Ghost Candleholder Supplies:
- styrofoam skull
- styrofoam pumpkin
- black felt
- fuzzy microfiber cloths
- scissors
- glass candleholder
- Quick Grip

Pottery Barn Ghost Pillow
Before we get started, I thought I would show you the $79.50 Pottery Barn pillow that we are duping. It’s cute, but we’re going to make one just as cute for way less, about $5!

Cut the Microfiber Cloths
Since you will want to make this ghost taller because it will be a Halloween candleholder and not a short pillow, the usual microfiber cloths from Dollar Tree won’t cover it completely. My husband had to pick up some cloths from Auto Zone since Dollar Tree was out, so I had one extra step, cutting off the gray seams. If you have to do the same, since most DT’s never have the cloths, you’ll need to cut the seams of that brand too.

To make one long cloth, lay two cloths, with the seams removed, if necessary, next to each other. Squeeze a line of hot glue down one of them and press the two together.


Assemble the “Base” of the Ghost
First, remove the stem out of the styrofoam pumpkin.

Squeeze some Quick Grip then hot glue on top of the pumpkin. The hot glue will help them stick faster.


Place the skull on top of the glue.

This is what you will have.

Cover the Ghost with the Cloth
Finally, place the cloth over the top. I placed it so the seam I created would be toward the back of the skull at the top. The back of the cloth will be a little long; cut that off.

Next, cut that piece in half and add hot glue along the top of each piece and press one to each side of the ghost. No need for it to go all the way to the bottom because the front and back will drape in a way to cover it.


Create Ghost Eyes
To complete the ghost portion, draw an oval eye on black felt. If you can free cut it go ahead, I just wanted to make sure it was even. Fold the felt in half, then you can cut once to create two eyes for your ghost Halloween candleholder.


I trimmed up the eyes because I’m just nuts, lol. I’ve got to make sure it’s perfect. Most of the time I have to stop myself, so I don’t end up carving too much off!

Hot glue the eyes over the ones on the skull. You can feel them through the cloth.


Attach the Candleholder to the Ghost
Turn the glass candleholder upside down and add Quick Grip to the center, then place it on top of the ghost.


Here is my finished Pottery Barn Dupe ghost Halloween candleholder. See how the sides are covered nicely?

That’s it! Your Halloween ghost candleholder is complete!
Isn’t this ghostie cute?!

Remember this is a blog hop, so keep reading and I will send you to the next post on the hop!
Remember to pin the image below or share this post with the buttons on the left side of the page so you can find it when you’re ready to start your project! Also, follow me on Pinterest for new ideas added weekly! Be sure that you never miss a great tutorial for decor like wreaths, signs and other home decor, free printables, crafts, and other fun posts! Enter your email address below to be notified of new posts! Use the buttons below to follow me on social media for other great content.

Creative Craft Hop
Next up on this month’s Creative Craft Hop is Sara of Birdz of a Feather who will be showing you How to Make a Scrap Robot! After you’ve seen her fascinating and adorable idea, head over to the other projects on the tour!
Fall Wreath Using Fabric and Burlap
5 Easy Steps to Make a Thanksgiving Wreath
Wickedly Whimsical Salvaged Chandelier Centerpiece
DIY Dollar Tree Halloween Candleholder
Don’t go yet! There’s more to see!
There’s plenty more to see here on the blog! If you’re looking for something specific, use the search box in the sidebar to look it up. If not, you might enjoy these ideas. Don’t have time to read them all now? That’s ok, just click over to the posts using the pictures and pin them for later. You can also add Life as a LEO Wife to your favorites and check back for new ideas and free printables and SVGs every Wednesday, as well as link parties with tons of shared ideas on Sundays!


I just adore your candleholder version Niki! He’s a cutie!
Thank you Sara! I love him too!
Very cute, Niki!
Thank you!
Ghosts crafts seems to be all the rage this season and your adorable ghost candleholder fits right in, Niki! Too cute!
Thank you! I couldn’t pass up an $80 dupe that could be made into something cute & useful so affordably!
What fun Niki! Your ghost is adorable, he must be friends with Casper the friendly ghost! Super cute!
Jenna
Thank you! I couldn’t believe Pottery Barn’s pillow version was $79.50 when it could be made for so much cheaper! I call him “Ghostie,” probably the best friend of Casper, lol!
Your ghost candleholder is adorable! I love Halloween whimsical decor. Great PB dupe!
Thank you so much!
This is so cute, Niki! How clever to repurpose microfiber cloths–love it! Blessings, Cecilia @ My Thrift Store Addiction
Thank you so much!
Very cute Halloween idea, Niky. I love an easy but impressive project like this.
Thank you Carol!
What a cute candlestick! I adore people who makw something with their own hands. I would like to be so creative! A very cool thing that you made with your own hands. I think he can also start doing some crafts.. I’m just so unsure of myself in this regard. But listen, why not? Thank you for inspiring me! Halloween is a cool holiday, I love this atmosphere of the film “Casper the friendly ghost”. I love pumpkins and cute ghosts and kind vampires. That is such fun tho! How long have you been into creating stuff by yourself?
Thank you! I started this blog about 2.5 years ago (I think, lol), and that’s mainly when I started crafting a lot. Before that, I made a few wreaths and ornaments, little things, for maybe a few years. You should start crafting! It’s cathartic & once you have a good craft supply you can make decor that looks just as pretty as store-bought for cheaper! You’ll mess up at the start, but no big deal! Just paint over it & try again!