Welcome back to our fall Decorate with Me series. I’m joining Terrie from Decorate and More with Tip and Tammy from Patina and Paint for the third day to deck out our coffee table with fall decor. In this post I’m also sharing an end table and a DIY fall wood planter box tutorial. Let’s get started!
Here are a few things I used on my fall coffee table, end table, and my wood planter box:
- “thankful” wood fall planter box
- fall stems- I used a navy hydrangea, light tan hydrangeas, and light copper hydrangeas. along with leaf stems with styrofoam pumpkins.
- decorative pumpkins- I used ceramic, metal, and wood pumpkins.
- khaki fall table runner
- metallic pumpkin placemats
- styrofoam pumpkins
- wire cutters
- floral foam
Disclosure: I am a participant in the Amazon Services LLC Associates Program and the Dollar Tree Affiliate Program, affiliate programs that allow me to link to the products that you can use to make this project quickly and easily. If you purchase any of these products I may receive a very small commission at no cost to you! That commission helps me continue to bring these great decor DIYs, free printables, and all of the other goodies on this site to you. Thanks so much for your support!

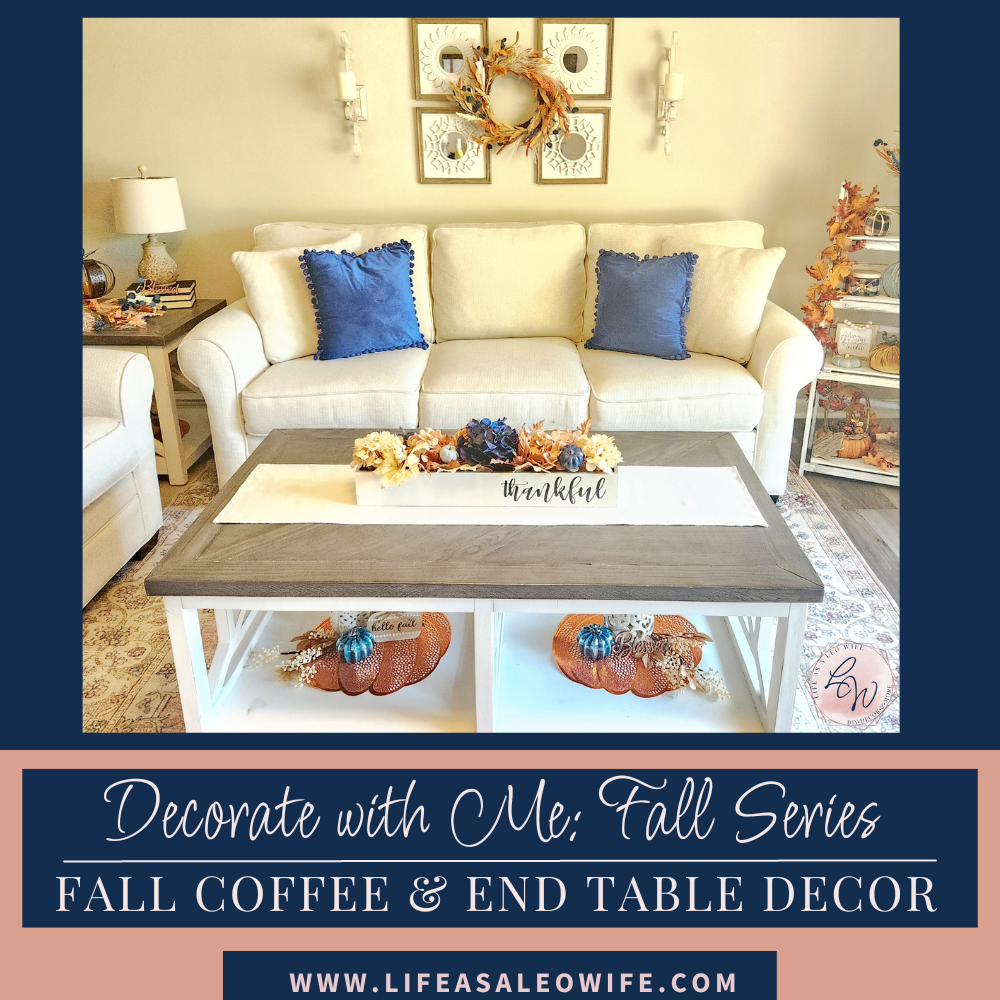
Fall Coffee Table Decor
Our farmhouse style coffee table is quite large. It’s about 4′ long and 2.5′ wide. It also has a shelf on the bottom which is split into two compartments. It is the heart of what goes on in our living room, which is, I’m sure, the same for you. So I kept the fall decor on top of the coffee table to a minimum.
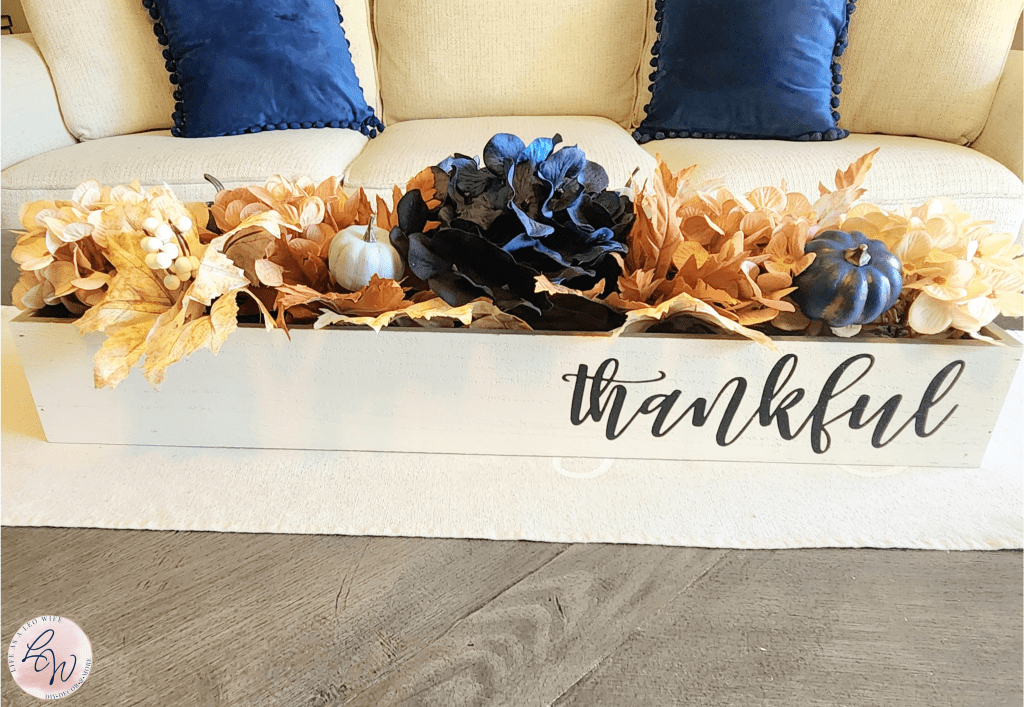
First, I placed a khaki table runner that says “thanks + giving” in the center of the table. The fall “thankful” planter box sits on top and covers the writing. Keep reading, and I will give you a tutorial for how to put together your own fall planter box. Like I said, it’s very simple and can easily be moved if need be.

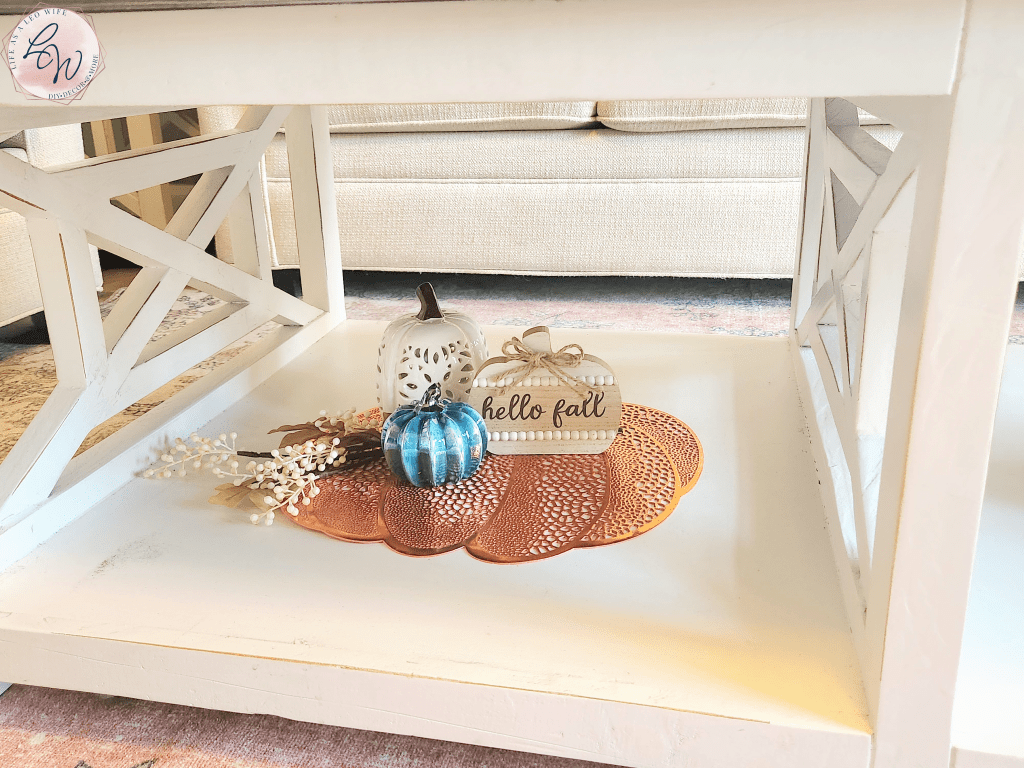
On the lower shelf, to the left side, I placed a metallic rust pumpkin placemat to use as a base, followed by a leaf stem with white berries which both came from Hobby Lobby. On top, I added a white ceramic pumpkin, a blue glass pumpkin, and a “hello fall” wood pumpkin from Dollar General.
On the right side of the shelf, I placed another pumpkin placemat and stem. On top went a cream ceramic wax melting pumpkin, another blue pumpkin, and finally a bronze “Blessed” decorative place setting piece.

That’s it! My simple fall coffee table was so easy to put together, is minimal, but packs a beautiful punch in the living room.

DIY Fall Planter Box
Isn’t that fall planter box just stunning?! I absolutely love the way it turned out! Let me show you how I made it.
Paint Styrofoam Pumpkins
For this fall planter box, I used some styrofoam pumpkins that came in a box of filler from Dollar General. They are 2″-4″. They weren’t quite the right color blue, so I got out my chalk paint.
First, I removed the stems from the pumpkins. Then I painted 2 larger ones with navy blue Folk Art chalk paint, and the pumpkins on the leaf stems I painted with silver marlin, which is a light steel blue, also by Fold Art. To make it easy to reach every part of the pumpkin, place a wood skewer in the hold where the stem was. If you are low on time, like I was, you can use a blow dryer to speed up dry time.


Next, I dry brushed some bronze paint on them.

Once they were dry, I replaced the stems.

Next, I placed wood skewers that cut the skewers to about 2.5″ in the bottom of my blue styrofoam pumpkins.

Assemble the Fall Planter Box
First, place floral foam in the planter box. I didn’t’ have enough, so I placed some balled up thick kraft paper that came as packaging in a delivery in the area where I would place my center navy hydrangea. It didn’t have a stem (who knows what I did with it!), so I was going to hot glue it down a bit, so floral foam right there wasn’t a must.
Next, I started adding hydrangeas. I used two light tan and two light copper ones on each end. In order to keep the stems as long as possible since these hydrangeas were actually picks, and so that I can use them later, I just bent them, using pliers to pinch the bend tight.
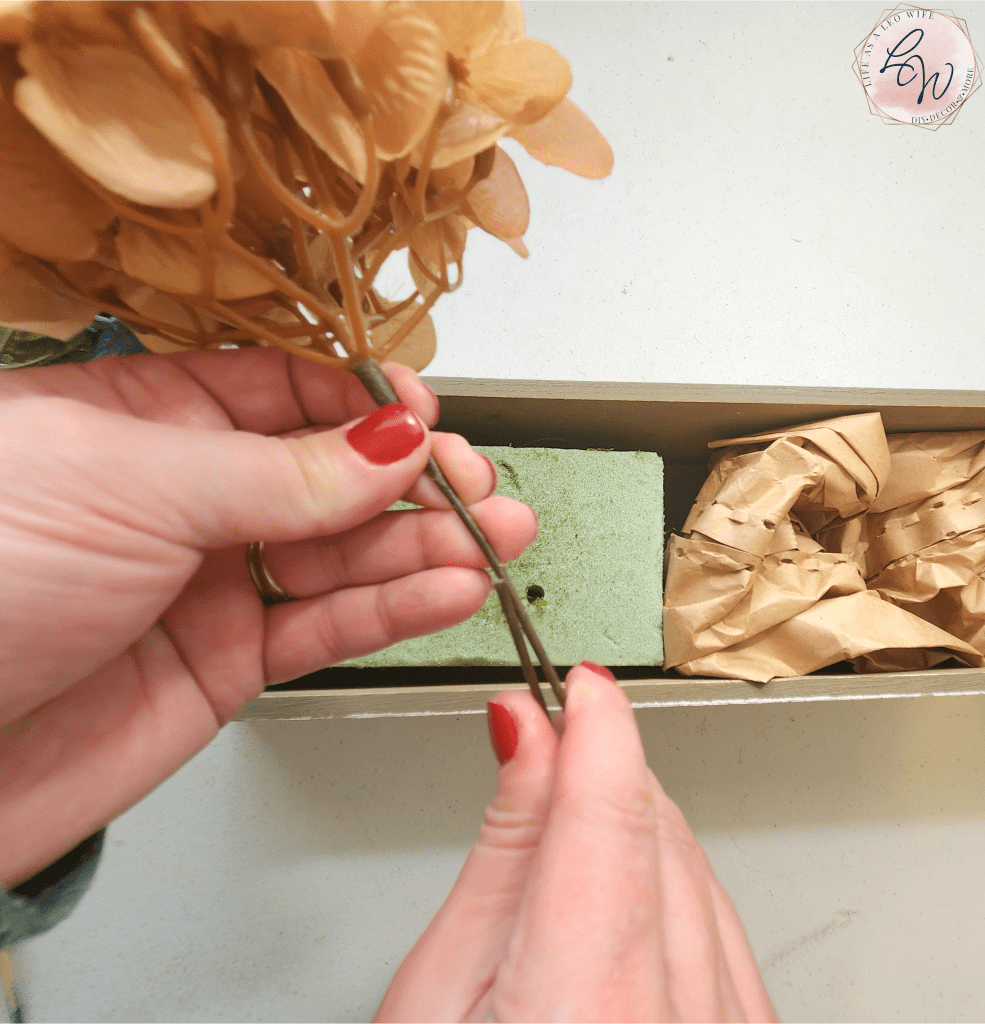

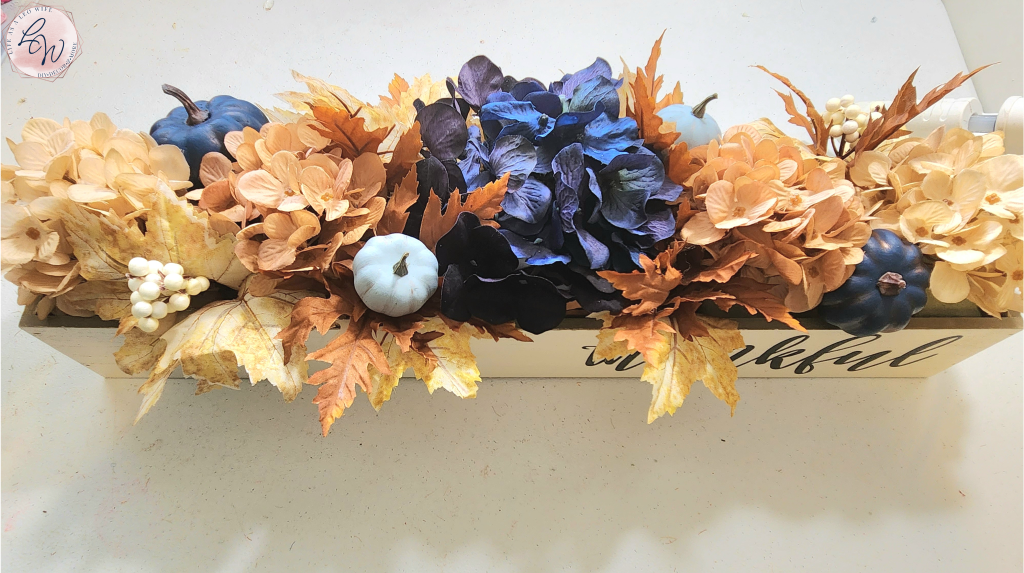
In the center, I placed a larger navy hydrangea. If you need to, you can use a ruler to make sure the center of it is 12″ from the end. This photo isn’t where I glued the flower down, I was just seeing how wide it was. The second hydrangea, a copper one, should go before it.

Then I placed another light tan flower and a light copper one on the right end.

I placed the navy pumpkins on each end of the fall wood planter box, next to the first hydrangea, by pushing the wood skewers into the floral foam. One went on the right and the other went on the left side. The picture shows a steel blue pumpkin on the left, but I removed it and placed a navy one in.

Finally, I cut leaf stems from the bunch and bent the stems much like I did with the flowers. Then I placed a leaf stem opposite each pumpkin, leaves with pumpkins attached between the copper and navy hydrangeas, one on the right side and the other on the left, and plain leaf stems opposite them.


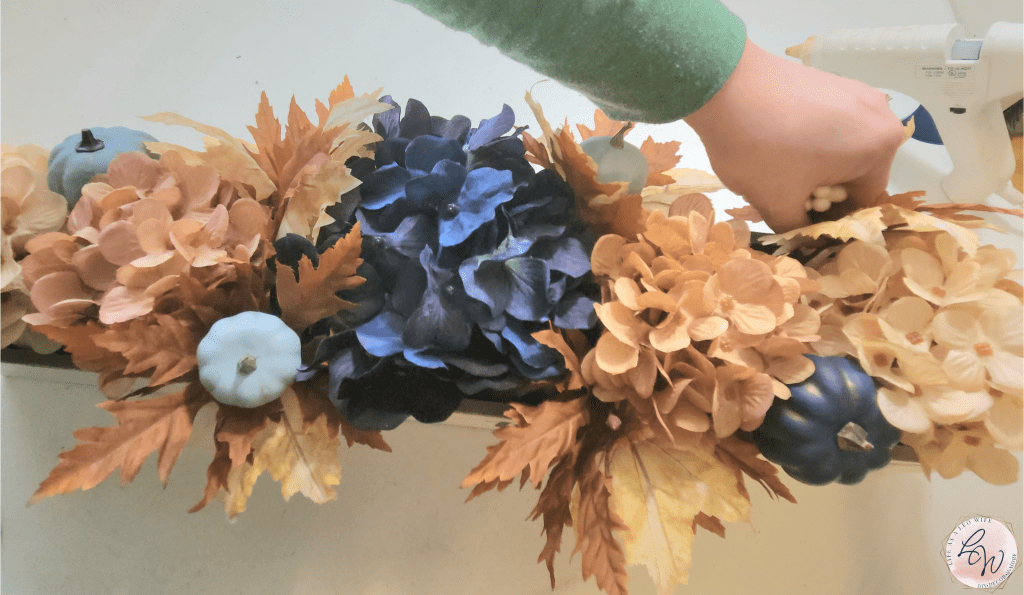
Now my fall wood planter box is complete! Just fluff the flowers and leaves where needed.
Here it is on my fall styled coffee table from the side…
and above.

Later today I will add a video tutorial for the DIY fall planter box, so be sure to pin this post to check back later to see it!
Fall End Table Decor
We only have one end table because we chose to get a sofa table in the set, which we use under our mounted TV, instead of a second end table. A second one isn’t really needed in our living room, and I think having a cute ladder shelf to decorate for all 4 seasons and holidays works better in the corner, rather than a second end table!
I planned to remove the fall decor from the end table once I decided where I wanted everything and take photos as I added each piece back to the end table, but I ran out of daylight! Sorry about that, but you can see everything that I did in these photos.
I left our lamp sitting on 3 black books because I’m a goober and thought an 18.5″ lamp would be tall enough when I ordered it on Amazon! We had a really tall one before that I hated, so I wanted a small one. Goofy me got a super small one, lol. Nevertheless, it looks cute on the books anyway! I placed a bronze “Blessed” name plate made for tablescapes that I got from Hobby Lobby on the second book.
Then I placed a small glass riser on the table with a bronze, metal pumpkin that holds a votive candle on top. Next, I used a fall stem from Hobby Lobby to wrap around the riser. It doesn’t completely hide it from this angle, but it does if you’re looking while sitting on the couches.

On the bottom shelf I added another metallic pumpkin placemat with a pumpkin vase on top. From this angle you can also see how I bent the stem of the florals around the riser.

I kept it simple on the end table as well. There’s still plenty of room for my husband to place his drinks, and for me to put our little morkie’s toys on the bottom shelf.

That’s all, folks! My fall coffee table & end table is decorated, and planter box is set!
Here’s a view of most of my fall living room, including the coffee table, end table, and the ladder shelf I shared yesterday. The only thing I’ve decorated so far that you can’t see from this photo is my fall entryway, which I shared on Friday. You also can’t see my love seat, which you’ll see tomorrow with fall pillows, or our console table, which I decorate as a mantle. You’ll see that decorated this Friday, so be sure to follow me via email so you don’t miss it!

What do you think?!
Be sure to follow me on Facebook, Instagram, and TikTok where I will be sharing the video of my fall coffee table styling. I hope to see you there!
Before you go, head over and check out my dear friends’ fall coffee tables!
Terrie – Decorate & More with Tip | Fall Coffee Table & End Table

Tammy – Patina & Paint | Fall Coffee Table

After you’ve seen their posts, check out Teresa with Through a Vintage Door and Corine with Curly Willow Acres aka Junk to Gems Facebook videos to see their beautifully styled fall coffee tables for even more fall decorating inspiration!
Remember to pin the image below or share this post with the buttons on the left side of the page so you can find it when you’re ready to start your project! Also, follow me on Pinterest for new ideas added weekly! Be sure that you never miss a great tutorial for decor like wreaths, signs and other home decor, free printables, crafts, and other fun posts! Enter your email address below to be notified of new posts! Use the buttons below to follow me on social media for other great content.

Don’t go yet! There’s more to see!
There’s plenty more to see here on the blog! If you’re looking for something specific, use the search box in the sidebar to look it up. If not, you might enjoy these ideas. Don’t have time to read them all now? That’s ok, just click over to the posts using the pictures and pin them for later. You can also add Life as a LEO Wife to your favorites and check back for new ideas and free printables and SVGs every Wednesday, as well as link parties with tons of shared ideas on Sundays!


Your coffee and side tables are simply gorgeous! Great job and thank you so much for sharing!
Thank you so much, Tammy!
Niki, your coffee and side tables are beautiful. You do such lovely work.
Thank you so much!
Niki, I love how your planter box turned out. I love how you painted those mini pumpkins blue. So cute!
You did such a great job and I also wanted to let you know you that I went by and watched a few of your decorate with me videos just like you asked me to, and you did wonderful. You explained everything in detail. I really enjoyed them.
Keep up the great work! Thank you so much for sharing this on Crazylittlelovebirds link party. I hope to see you again at the next party.
Thank you, & I really, really appreciate you checking out the videos!! The opinions of other bloggers/DIYers is so helpful! I’ll be there to share later this week!