It’s that time of year again! Time to begin planning your Christmas decor! Today I’ve got some DIY ornaments to share with you. In fact, I have three different DIYs to share using clear ornaments! Let’s go ahead and get right into it.
Supplies for DIY Clear Ornaments:
- clear ornaments– I used 3″ ball ornaments from Dollar Tree.
- Mod Podge
- paint brush
- fabric- I used 10×10 pre-cut squares of tartan plaid fabric that came in this pack.
- 7/8″ ribbon
- scissors
- glitter
- polycrylic
- syringe
- hot glue gun & glue
- my free printable vintage Christmas sheet music
- Christmas tree shape punch


DIY Clear Ornaments #1: Fabric Ornament
Cut Fabric Strips
You will need some fabric for this DIY clear ornament. I used 10×10 pre-cut squares of my Christmas theme print, Scottish tartan plaid. Cut them into strips about 1″ wide. I didn’t measure, I just used my ruler and the cut a snip, then moved the ruler and cut another snip the width of it. I needed five strips 10″ long. (You can get the full video tutorial for this ornament here.)
Next, fray each fabric strip by pulling on one of the strings at the top of the strip. It will pull down the length, fraying nicely. You will need a homespun fabric to fray the best (cotton or polyester).
Mod Podge the Strips onto the Ornament
First, remove the top of the ornament (the silver piece). Place a strip on the ornament, cutting off any excess.

Add Mod Podge to the strip then place it on the ornament. Try to keep as much Mod Podge as possible off of the frayed fabric edges.

The rest of the fabric pieces should be cut to end at the bottom. Then add Mod Podge and place the fabric so that they just meet at the widest part of the clear ornaments, the middle.
When you have just a little of the ornament showing, place the last strip of fabric on the ball.
Once the Mod Podge dries, replace the top of the ornament, then use your nail or a tool to loosen the frayed fabric from the ornament to keep that frayed look.


Embellish the Fabric Ornament
Use a 1/2″ ribbon to cover the silver part of the DIY ornament.
Make a bow with the same ribbon and glue it onto the ornament.
That’s it! Your fabric ornament is complete!
DIY Clear Ornaments #2: Glitter Ornament
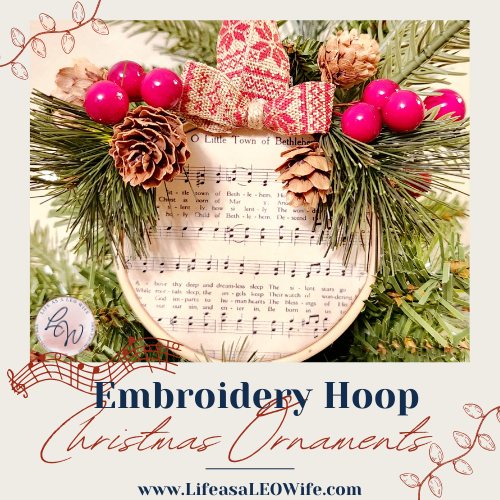
Last week I shared a mini wreath sheet music ornaments using 3″ embroidery hoops. Head over to that post and get the free printable vintage Christmas sheet music pages to complete these DIY clear ornaments.
These match the ornaments that I will be teaching everyone how to make at the Holiday Prep Summit. I am so excited to be speaking there! It’s a virtual summit with 16 speakers, and you can get your free tickets here! It’s a 2-day summit, from November 7-9. You don’t want to miss it because you will be earning a ton about how to prep your home, family, and hostessing skills, plus, you will get a free gift from every single speaker!
Insert Polycrylic into Clear Ball Ornament
First draw up some polycrylic into a small syringe. I used about 5ml but had to extract a little after that. Push it into one of the clear ball ornaments and move it around so the inside is covered completely.
Add Glitter to the Ball
I used glitter that came with a small funnel, so I didn’t have to create my own with paper, but if you don’t have one, you can do that. Walmart was completely out of every color glitter that I actually needed, so I was stuck with the small glitter tubes you see in the supply photo, unfortunately. If you can get a larger container of extra fine glitter, do that because the small tube was barely enough to cover the 3″ ball ornaments.
Place the funnel into the top of the clear ornament, then pour glitter in. I started with a small amount, then swirled the ornament around covering the polycrylic as I went.


Continue adding glitter to the ornament until the inside of your DIY clear ornament is covered. If needed, you can add a tiny bit more polycrylic if the glitter stops moving.


Turn the clear ornament upside down in a container until it dries.

Embellish the DIY Glitter Ornament
Since I wanted my three DIY clear ornaments to be cohesive, I used the same ribbon and fabric on all three. I will be using the colors in the Scottish tartan plaid for my theme this year, I used that fabric and a coordinating 1/2″ khaki linen and red reindeer ribbon on each one.
Fray the edges of the fabric that you used on your first DIY clear ornament (the one I shared in my Facebook video) by pulling on strings that run the length of the edge, then make a bow.
Cover the silver part of the ornament with the ribbon, then hot glue the bow on top.
I stopped here for now, but I think I will be making more and adding each of my family member’s initials with our names in another color vinyl on top of that. First, I will need some more green glitter!
DIY Clear Ornaments #3: Sheet Music Ornament
These DIY clear ornaments coordinate with my sheet music mini wreath ornaments that I shared last week. Head over to that post and download the free printable vintage Christmas sheet music pages and print them out for this ornament.
This ornament also coordinates with the mini wreath ornament that I will be giving a tutorial for during the virtual Holiday Prep Summit. You do not want to miss this free two-day summit that will prepare you and your home and have your hostessing skills at their peak before Thanksgiving! There are 16 speakers who are top-notch in their fields. Get your free tickets here! Don’t miss it because each of the 16 speakers are giving away a free gift!! Sign up now!
Print Sheet Music & Cut
Once you’ve printed the Christmas songs, punch Christmas trees with the shape puncher in a straight line across the page. (I wasn’t cutting in a straight line here, just using some left-over paper from a previous project.)

Next, cut the line of Christmas tree shaped holes that are left.

Continue punching trees and then cutting lines of sheet music until you have the amount you need to fill your clear ornaments.
Fill the Ornmaents
First, place some of the trees in the ornaments.

Then curl the strips of paper around a pencil and then place them in the ornaments.
You can alternate adding trees and strips until your DIY clear ornaments are full.

Embellish the Ornaments
Place the top back on the ornament, then add a strip of ribbon around it like you did with the other ornaments.

Make a bow with a frayed fabric strip and glue it onto the ribbon.

That’s it! Your DIY sheet music clear ornament is complete!

Aren’t these adorable?!
Now I can’t wait to get the Christmas tree up to hang them!
Terrie of Decorate and More with Tip and Tammy of Patina and Paint also shared some DIY’s for clear Christmas ornaments. Check them out!
Terrie – Decorate and More with Tip | Rub ‘n Buff Ornaments

Tammy – Patina and Paint | Nutcracker Ornament

Remember to pin the image below or share this post with the buttons on the left side of the page so you can find it when you’re ready to start your project! Also, follow me on Pinterest for new ideas added weekly! Be sure that you never miss a great tutorial for decor like wreaths, signs and other home decor, free printables, crafts, and other fun posts! Enter your email address below to be notified of new posts! Use the buttons below to follow me on social media for other great content.

Don’t go yet! There’s more to see!
There’s plenty more to see here on the blog! If you’re looking for something specific, use the search box in the sidebar to look it up. If not, you might enjoy these ideas. Don’t have time to read them all now? That’s ok, just click over to the posts using the pictures and pin them for later. You can also add Life as a LEO Wife to your favorites and check back for new ideas and free printables and SVGs every Wednesday, as well as link parties with tons of shared ideas on Sundays!