Hello friends! Can you believe that Easter is almost here?! Neither can I! If you’re busy like most of the us, time can slip by and events are on us before we know it. I know that’s what happens to me. If you’re looking for a last-minute Easter basket or even a super cute one, I’ve got just the thing for you. I made an adorable Easter basket for my son using a few Dollar Tree supplies that won’t be sold out if you have to run out today and get them. I know most of the actual Easter baskets are gone. This DIY Easter basket will cost you under $4, and it’s the cutest thing ever!

DIY Easter basket supplies:
- 2 bowls from Dollar Tree- You can use clear or colored ones like I did. They also have pink.
- bunny headband
- tape
- Easter grass
- hot glue
- HT V for adding a name to the headband (optional)
- iron for HTV (optional)

Place Easter grass into one of the bowls.
Since my bowls and bunny ear headband were blue, I chose green Easter grass. Well, that decision was kind of made for me because all of the other colors available at Dollar Tree were girly colors, ha! It worked out because I like the contrast of the green inside the blue Easter basket.
Add the Easter grass to one of the bowls. You will need more grass than you think you do because the gifts inside the bowl will press it down. I ended up using the entire bag.

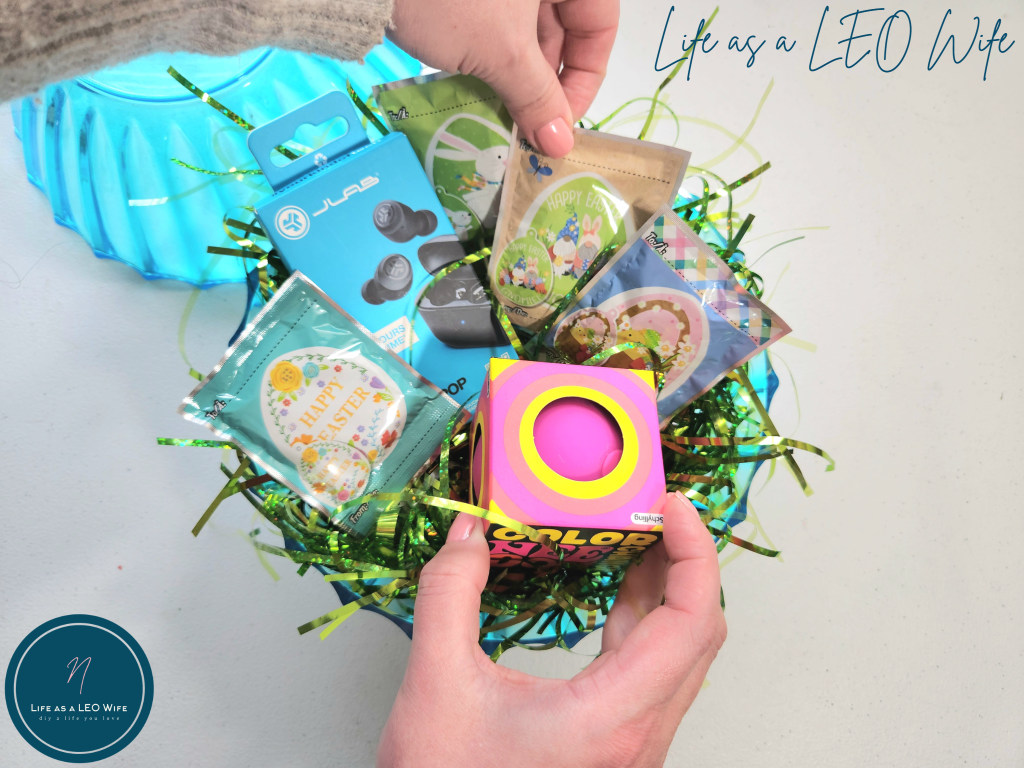
Place the Easter gifts into the bowl.
My son does not like candy. Like not even one kind! You should see the looks on people’s faces when they try to give him candy and he says, “No thank you. I don’t like candy.” When he was old enough to trick or treat by walking like two and a half, not in a stroller, he would walk to the door with his big sister. The first lady put the candy in his bag, and he took it back out and handed it to her and said, “No thank you,” and walked away, leaving his sister to apologize! I told him, “Boy, you get that candy for Mommy!” LOL!
So, every Easter I put gifts in his basket instead of candy.
Place the candy or gifts inside the Easter basket. His isn’t stock full like it normally is because he wanted money on his debit card to save up for something big later. If you have a lot of gifts you can attach another two bowls on top of the first. Dollar Tree has larger bowls that you can use, then put these two on top of those.
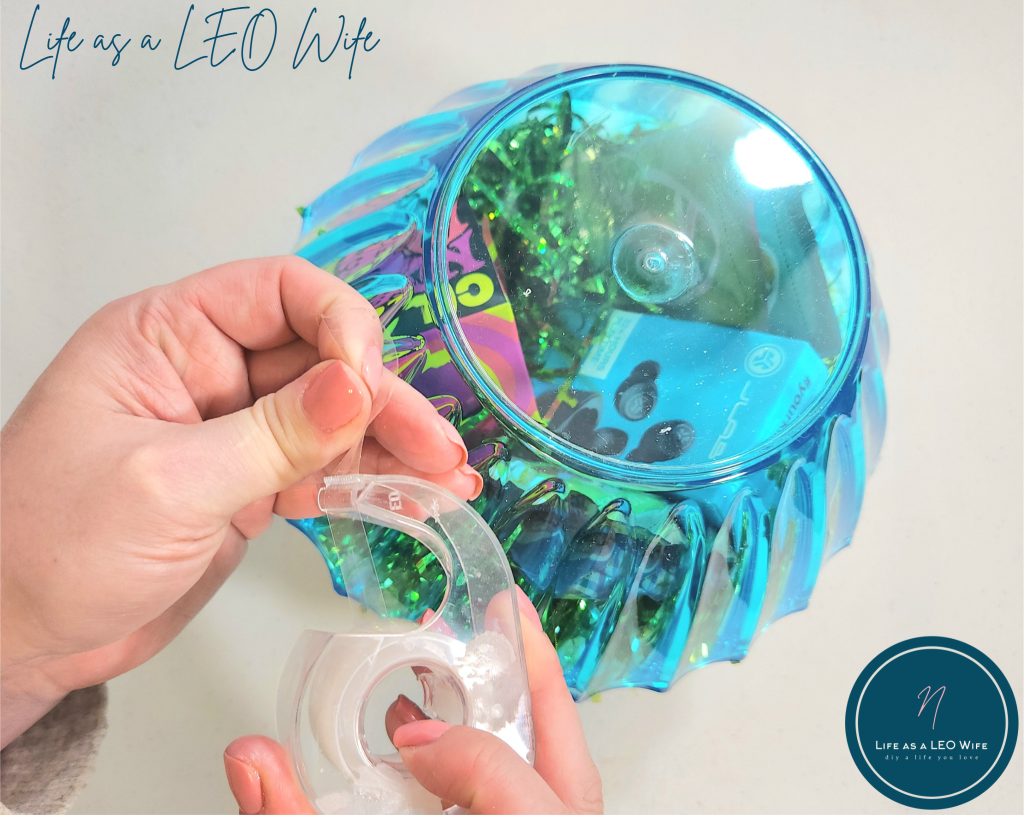
Attach the second bowl to the first.
When you have most of your Easter grass tucked in the basket, place the second bowl on top of the first. If you have fly away pieces you can cut them off once the bowl is in place.

When you have the scallops of the bowls aligned, tape the two bowls together in a few places. You don’t have to go crazy with the tape so that the kids can get into them easily.

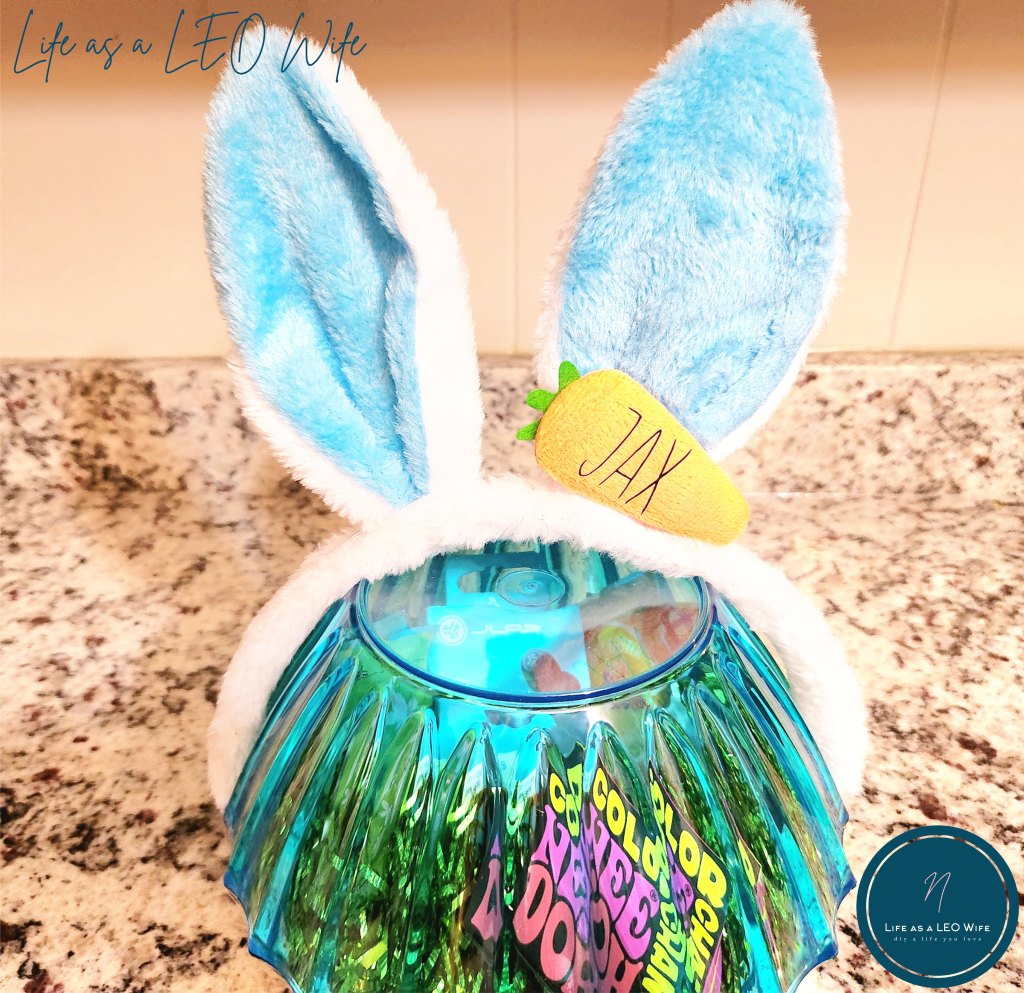
Add a name to the carrot on the headband.
If you don’t have a carrot on your bunny ear headband, you can place it on the ear. The ears on the headband that I got from Dollar Tree weren’t flat. They had little ripples due to having a lot of fabric on the inner ears. The carrot was the best place for me. However, if you have bowls that are smooth, you can place the name on one of them.
Cut your HTV (or vinyl if you’re adding it to the bowl) and weed it. Place the name on the headband and use an iron to transfer it from the adhesive layer to the carrot.


Didn’t that turn out so cute?!
Place the headband on the DIY Easter basket.
Since the Easter basket is pretty wide, you will need to glue the headband to it. Place it on, then move the band out enough to squeeze hot glue under it. That’s better than pushing the glue everywhere when you slide the headband down. Repeat on the other side.

That’s it! Can you believe how fast you can put your own together?!
I am so happy with the way my son’s last minute Easter basket came together! Run out right now and get your supplies so your baby can have one too!


Remember to pin the image below or share this post with the buttons on the left side of the page so you can find it when you’re ready to start your project! Also, follow me on Pinterest for new ideas added weekly! Be sure that you never miss a great tutorial for decor like wreaths, signs and other home decor, free printables, crafts, and other fun posts! Enter your email address below to be notified of new posts! Use the buttons below to follow me on social media for other great content.


