I’m sure that you’ve seen all of those mason jar signs all over Pinterest. Aren’t they adorable?! Today I’ll be showing you how you can make your DIY mason jar sign to gift to your mom this Mother’s Day. I’m including a couple of free designs in today’s post, so let’s get started!

Today is our monthly Creative Craft Hop hosted by the lovely Sara of Birdz of a Feather. If you’re visiting from her pegboard display stand post, welcome! Wasn’t that neat?! Stick around after the post where I will send you to your next stop on the tour.
Mother’s Day Mason Jar Sign Supplies:
- rectangle wood sign: I used a 12×5.5″ sign from Walmart.
- paint pen: I love DecoColor’s gold leaf pen. Be sure to get a fine tip one.
- cardstock
- regular paper
- pencil
- printer
- my designs
- Cricut (optional-No paper or pencil required if you use one.)
- scissors
- hot glue gun & glue

Download Paper Templates
For this project you don’t have to have a Cricut. I used mine for the flowers only so that I could make this project a little faster. You can download these flowers, print them on cardstock and cut them by hand if you need to.
If you are going to cut them by hand, I created a set of flowers that you can print on white cardstock in navy, tan/peach-ish, and pink. If you are using your Cricut, you can download the black ones and upload them to Design Space. I will be sharing more on the paper flowers, including more templates, later this week, so be sure to follow me via email and on social media so you don’t miss it.
Download Mason Jar Design
Next, download the design of your choice.
I created this design that you can make for yourself, your mom, or anyone else really.
This is a sweet design that any mom or grandmother will love.
Make paper flowers for your mason jar sign.
I cut my flowers on 12×12 cardstock with my Cricut. Again, if you don’t have one, no problem. Print them on white cardstock and cut them with scissors.
I used 12 flowers on my sign and made four of them a little bigger than the template. You can do that in Design Space if you want, but it’s not required.
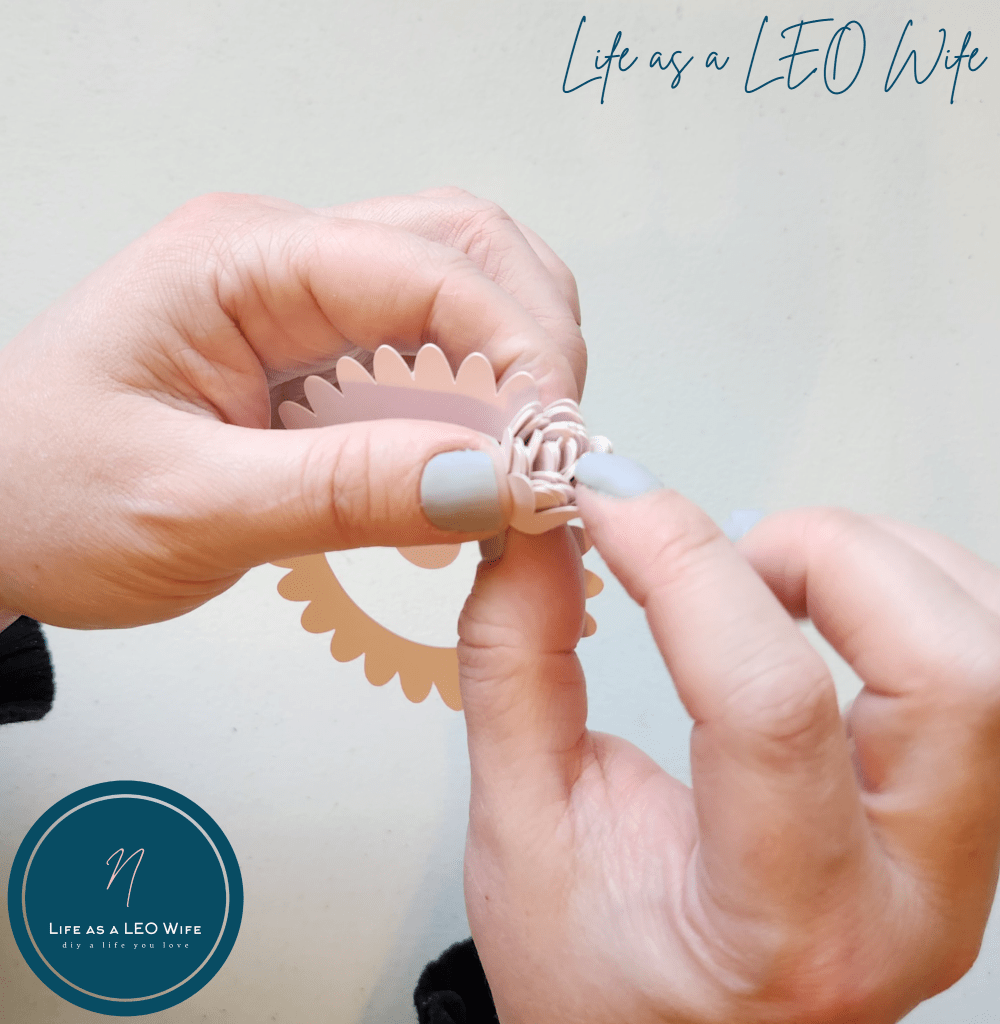
Once your flowers are cut, you’ll need something thin and pointy to help you start to roll them. I used the tip of a BBQ skewer.
Place the tip of the skewer on the outside edge of the paper flower and press the paper flower around it.

Roll the flower around the skewer. Once you get it started, you can remove the skewer. Most likely you’ll accidentally move the paper off the skewer, but that’s fine. You can roll it with your fingers after a bit. Hot glue the circle at the end of the flower under the flower. That will hold it together. I’ll will be sharing a longer tutorial on the flowers later.

Next, print the mason jar design of your choice.
You can print the design in black and white if you’d like. I was out of black ink, so that’s why the designs are in pink. I did not want to go to the store because I did not have makeup on, and I refuse to be seen without makeup. I gave birth to my children with makeup on lol! Any of you ladies with me or am I just weird?
Anyway- turn the design over and scribble over it with a pencil. Get a good coat of lead on the back. Don’t worry about the blank areas, but you don’t have to be perfectly over the letters or anything.


Transfer the mason jar design onto the blank wood of your Mother’s Day sign.
Cut the excess paper from around the design. Just a wide cut around it is fine. You don’t want to cut it out perfectly. Center it on the bottom of your sign then use painter’s tape to hold it on.
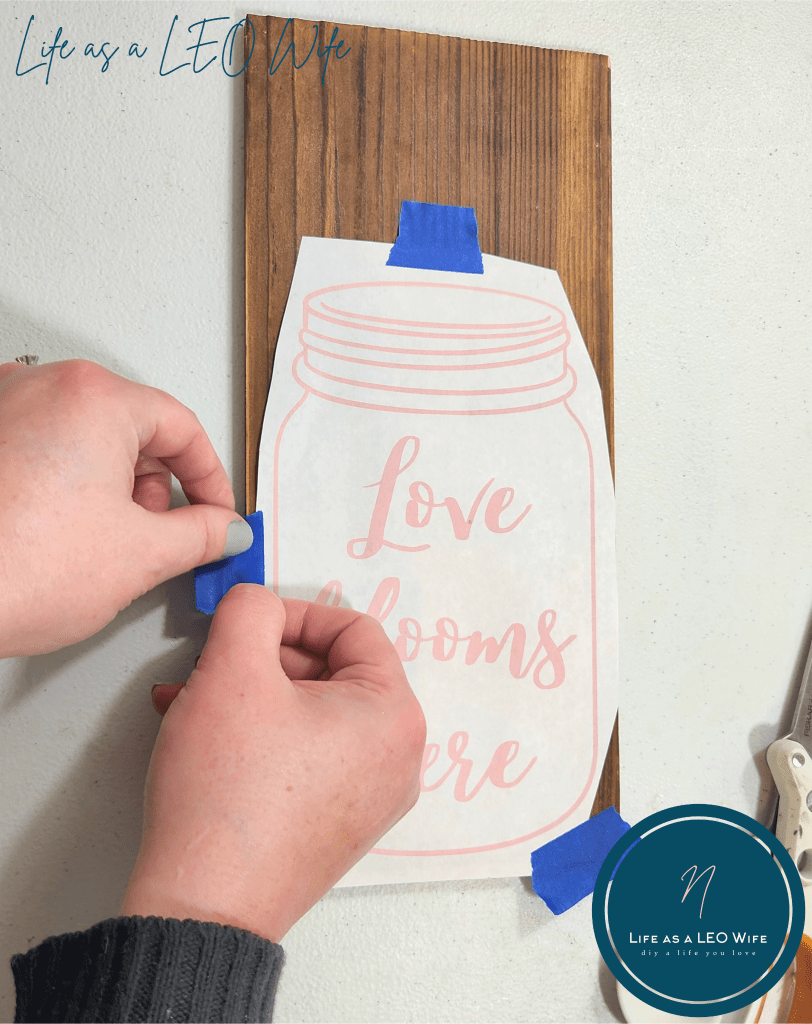
Now trace the outlines of the letters and the mason jar with a sharp pencil. Press down firmly so that the lead on the back of the paper will transfer onto the wood.


Leave at least one piece of tape on the sign and lift the paper to make sure all of the design has transferred onto the wood sign. If it has, remove the paper and tape completely. If not, trace it again.

Paint the mason jar sign onto the Mother’s Day gift.
Use a fine tip paint pen to fill in the pencil lead on the wood. I really love the DecoColor paint pens because they flow very well and go on smoothly.


Be sure you let the paint dry before letting your hand glide across any of it! You don’t want a palm-streak of paint across your DIY Mother’s Day gift! My hand was way too cramped to trace over another piece of paper on another piece of wood if I ruined this one!
Later today I’ll be updating this post to add a video tutorial, so if you have issues with any of these instructions, hopefully that will help!
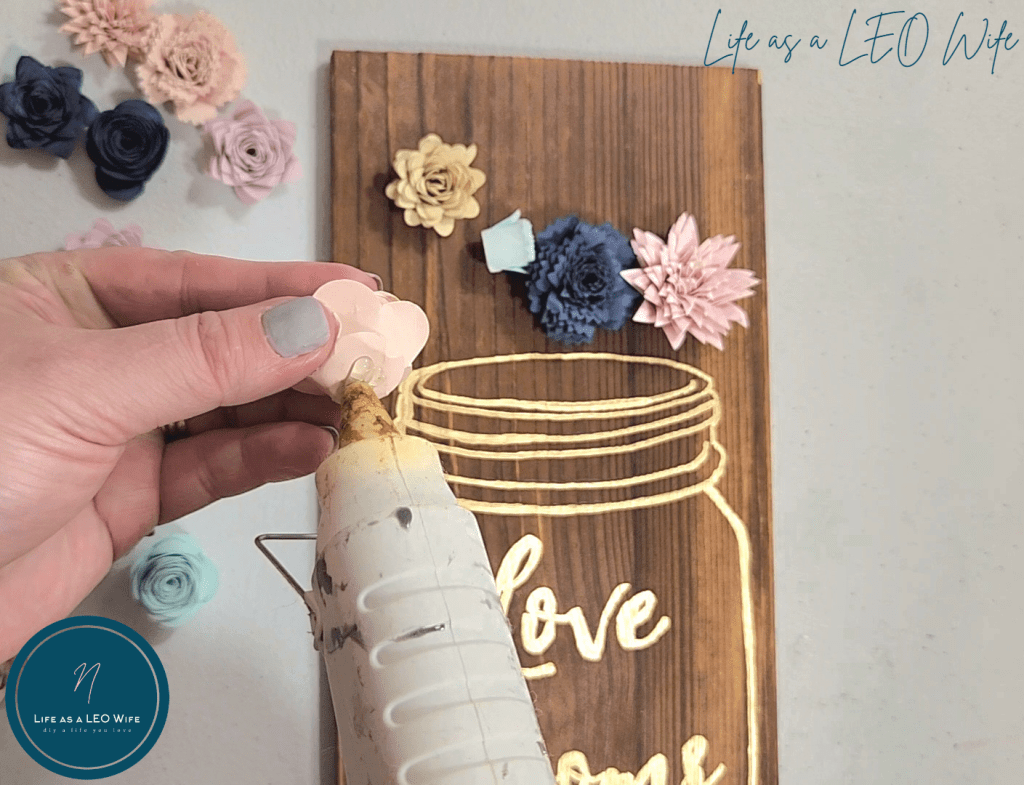
Glue your paper flowers onto the top of the mason jar.
Place your flowers on the top of the sign, coming up out of the top of the jar, and move them around until you’re happy with the placement.

Lift them up and hot glue them in place on your beautiful DIY Mother’s Day mason jar sign that I know you just can’t wait to gift to your mom!


Finally, if you choose to, add some greenery to the sides of the flowers. I pulled some leaves off of a boxwood garland and glued them around the outside of the flowers. You can use a weeding pick or another pointy object to press them in place under the flowers.


That’s it! Your Mother’s Day mason jar sign is ready to deliver!
Isn’t that an easy way to make a DIY sign to gift to your mom this Mother’s Day?! My mom will probably get her sign early. That, or I’ll keep it for myself because it matches my new rug! (Just wait until you see it next week! It’s gorgeous!)

This is a blog hop, so remember to keep reading to the end of the post where I’ll send you to the next stop on our hop!
I removed the jute rope that was on the back of the sign. I plan to place my Mother’s Day gift on a stand to have the mason jar sign on the tabletop like an actual mason jar. You can move the rope from the long side onto the top, short side if you’d like, or you can just leave it off.
Remember to pin the image below or share this post with the buttons on the left side of the page so you can find it when you’re ready to start your project! Also, follow me on Pinterest for new ideas added weekly! Be sure that you never miss a great tutorial for decor like wreaths, signs and other home decor, free printables, crafts, and other fun posts! Enter your email address below to be notified of new posts! Use the buttons below to follow me on social media for other great content.

Creative Craft Hop
I’m the last stop on today’s hop, but if you haven’t seen all of the wonderful posts, hop on over to Gail at Purple Hues and Me who is the first stop. She’s sharing a DIY flatware caddy. I’ll keep the supplies she’s using a secret, but you’ll love it, I’m sure! After that, check out the other ladies on today’s tour!
Cord Wrapped Tin Can Flatware Caddy
How to Make Pretty Planters with Vinyl
Repurposed Ceiling Medallion Whimsical Mushroom Wreath
Robot Craft Idea for Kindergarten Kids to Make for Friends
Beautiful Mother’s Day Mason Jar Sign with Free Designs & Paper Flowers
Don’t go yet! There’s more to see!
There’s plenty more to see here on the blog! If you’re looking for something specific, use the search box in the sidebar to look it up. If not, you might enjoy these ideas. Don’t have time to read them all now? That’s ok, just click over to the posts using the pictures and pin them for later. You can also add Life as a LEO Wife to your favorites and check back for new ideas and free printables and SVGs every Wednesday, as well as link parties with tons of shared ideas on Sundays!


What a gorgeous gift for mother’s day and your flower templates are incredible Niki!
I’m never fussed about going out without makeup these days; I just turned 60 and never wear makeup anymore. It’s actually quite freeing. But I probably wouldn’t bother replacing the ink anyway lol!
I have to give those paint pens a try; they look so quick and easy.
My husband always says, “Babe, you look fine. No one cares what you look like.” I tell him that sure as I’m standing here, I will see someone I know the minute I step out with no makeup!
The DecoColor paint pens are amazing. So much better than Sharpie and the other brands I’ve tried!
This is adorable Nikki. My mom would love receiving this for sure. Saved!
Thank you!
I love this Niki, so pretty! I can’t believe you made the paper flowers, wow, that is impressive! A very lovely gift, and a great way to give someone flowers that will last forever!
Thank you! Won’t be a surprise for my mom since she reads the blog lol. Maybe I’ll keep it & surprise her with something else!
This is certainly a beautiful Mother’s Day sign and gift! I love the 3D effect from the flowers! It’s all so pretty! Well done, Niki!
Thank you!
This is so pretty and just lovely for Mother’s Day! Blessings, Cecilia @My Thrift Store Addiction
Thank you!
Your sign will make a wonderful mother’s day gift, for sure! Lucky you to have a machine to make beautiful flowers like yours. The color scheme you chose is so pretty. Pinned.
Thanks Allyson! Yes, it’s much faster than doing it by hand, but I didn’t have one back when I got married & I made all of our bouquets by hand. Phew, that was some work for big flowers!
This is such a sweet project for gift-giving, Niki. I love the paper flowers!
Thank you Ann!
I absolutely love this project. Anything like flowers that I can use my Cricut is good with me. Such a pretty sign. Great instructions, too. Pinned for future.
Thank you! I love Cricut paper flowers!