
With less than a month to go until St. Patrick’s Day, it’s time to make your decor to display for the holiday! Today I’m sharing an adorable farmhouse style St. Patrick’s Day centerpiece that you can make with a few Dollar Tree supplies. In fact, I made this for less than $6! Let me show you how to make your own centerpiece.
St. Patrick’s Day Centerpiece Supplies:
- large Dollar Tree crate
- pack of shamrocks
- 3/16″ wood dowels
- Quick Grip or E6000
- hack saw
- wood stain (optional)
- chalk paint- I used white and moss green.
- moss
- my printable design (or if you have a cutting machine vinyl letters)
- painter’s tape
- paint pen– I used black but if gold had been in stock I would’ve used it.
- floral foam or styrofoam

Disclosure: I am a participant in the Amazon Services LLC Associates Program and the Dollar Tree Affiliate Program, affiliate programs that allow me to link to the products that you can use to make this project quickly and easily. If you purchase any of these products I may receive a very small commission at no cost to you! That commission helps me continue to bring these great decor DIYs, free printables, and all of the other goodies on this site to you. Thanks so much for your support!
Shop this Post


Stain or Paint the Crate
A lot of Dollar Tree wood is quite rough. If yours is, sand it wherever it needs it.
Stain or paint the crate. I used Rust-oleum weathered gray stain and polyurethane in one.

I was worried that some of the inside of the crate would show, so I gave it a light coat of stain. You don’t have to do the whole inside, just the upper 1/4 or so.

Paint the Shamrocks
While your crate is drying, you can move onto the shamrocks that will be inserted into the St. Patrick’s Day centerpiece.
Remove the paper layer that comes on the Dollar Tree shamrocks. Luckily it’s only on one side. You will need to do this on five of them.

Paint both sides with your green paint. In my case it was moss by Waverly.

My shamrocks needed two coats of paint for full coverage.
Cut the Wood Dowels to Fit the Centerpiece
The wood dowels that I used are 12″ long. That would be way too long to place the shamrocks in the St. Patrick’s Day centerpiece, so I cut them in half.
Mark three dowels at 6″.

Cut them in half at the mark.

Paint five of the dowels white.

Print & Add “Lucky” to the Centerpiece’s Shamrocks
Download & print my “lucky” design. If you have a cutting machine you could cut vinyl letters instead.
Turn the paper face down and scribble over the back of the letters with a pencil. You want a good coating of lead on it.

Cut the letters apart so that you can place them individually on each shamrock.

Place the cut letters on each shamrock and tape them in place. I like to use painter’s tape because it doesn’t damage the paint.

Transfer Letters to the Shamrocks
Trace the outline of the letters taped to the shamrocks. Press down firmly.

Lift up one side of the paper, leaving one of the pieces of tape in place, and ensure that the letter has been transferred onto the shamrock. If so, remove the paper, and if not, trace over it again.
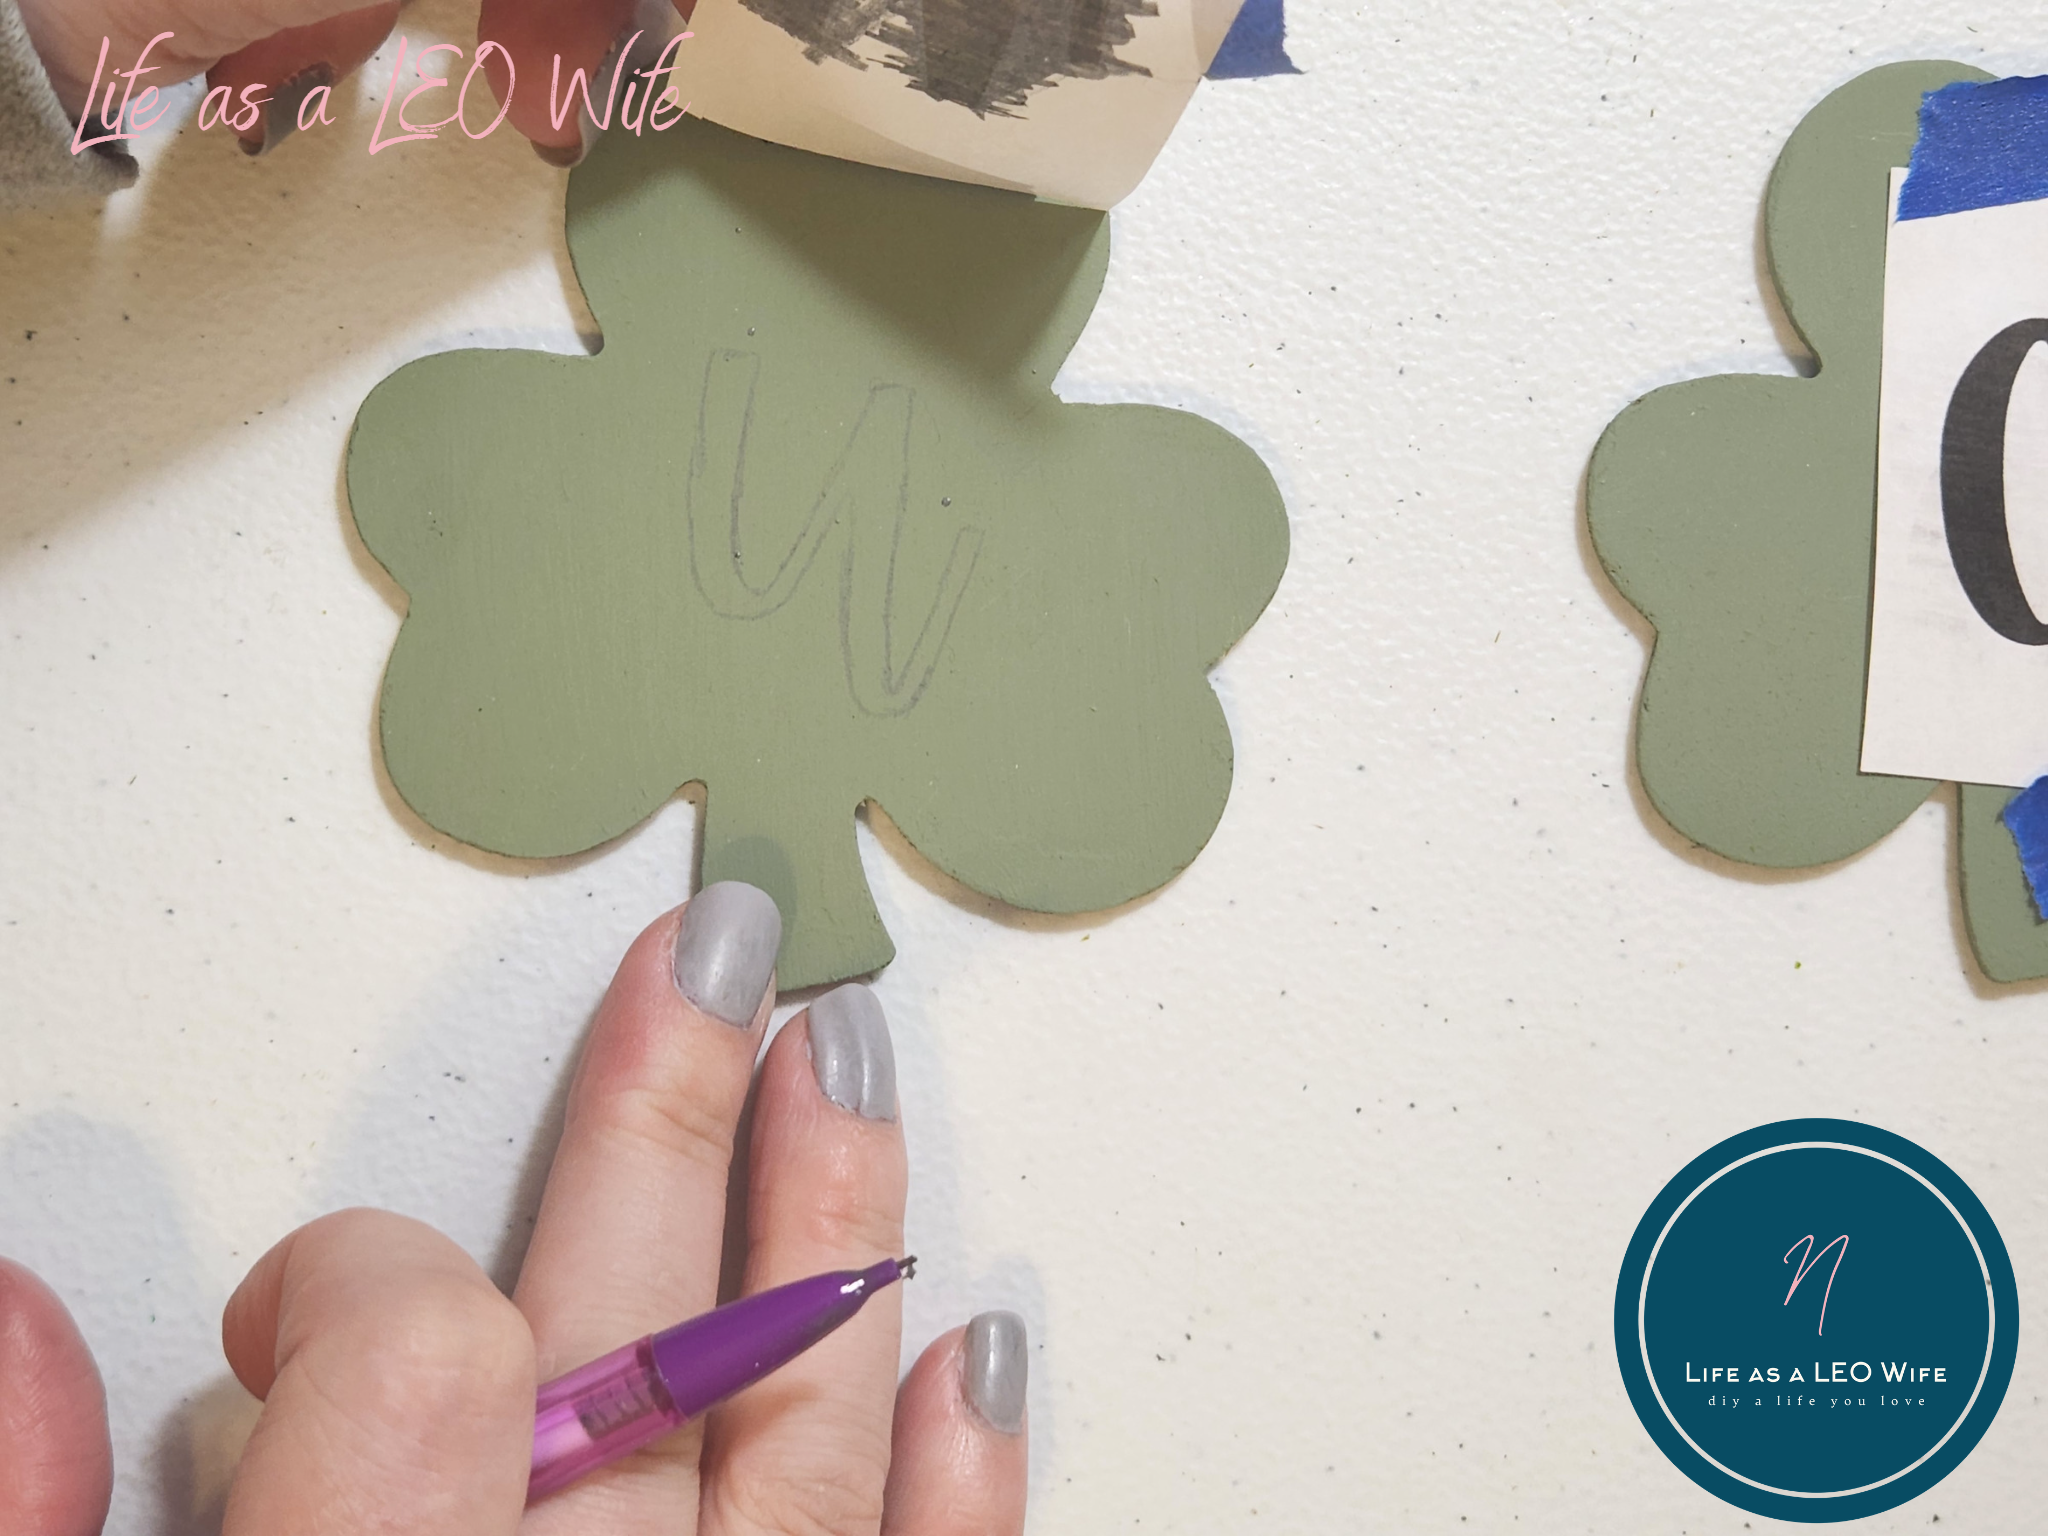
Here are all of my shamrocks with the pencil outline letters on them.

Finally, fill in the pencil outlines with a paint pen. If you don’t have one, you could use a small paint brush and regular paint. It’s just a lot easier with a paint pen!

Glue the Shamrocks to Wood Dowels
Add some Beacon Quick Grip or E6000 to the end of the painted dowels.

Place the glued dowel on the back of the shamrock. If you’re using Quick Grip, lift the dowel up three times before holding it in place. That allows it to adhere faster.

I clipped the dowel in place for a few minutes to allow the glue to dry. Normally Quick Grip dries extremely quickly so I prefer it to E6000.

Assemble the St. Patrick’s Day Centerpiece
Measure two pieces of floral foam and cut it to fit into the crate, then place them into it.

Cover the floral foam with moss.

Insert the shamrock letters into the St. Patrick’s Day centerpiece. I staggered them a bit because this crate isn’t wide enough to place them side by side. That also gave it a little depth.

St. Patrick’s Day Centerpiece Video Tutorial:
That’s it! It’s time to display your centerpiece!
I really like how this St. Patrick’s Day centerpiece goes with my farmhouse style decor. What do you think?

Remember to pin the image below or share this post with the buttons on the left side of the page so you can find it when you’re ready to start your project! Also, follow me on Pinterest for new ideas added weekly! Be sure that you never miss a great tutorial for decor like wreaths, signs and other home decor, free printables, crafts, and other fun posts! Enter your email address below to be notified of new posts! Use the buttons below to follow me on social media for other great content.

Don’t go yet! There’s more to see!
There’s plenty more to see here on the blog! If you’re looking for something specific, use the search box in the sidebar to look it up. If not, you might enjoy these ideas. Don’t have time to read them all now? That’s ok, just click over to the posts using the pictures and pin them for later. You can also add Life as a LEO Wife to your favorites and check back for new ideas and free printables and SVGs every Wednesday, as well as link parties with tons of shared ideas on Sundays!


One thought on “Farmhouse Style St. Patrick’s Day Centerpiece”