Welcome! I’m so glad you’re here on a hot, beautiful summer day (well at least for me). You may remember my projects with the coastal fabric, my rope tray and coasters and my upcycled basket that I got from the thrift store. Well I had plenty left over, so I decided I wanted to make a no sew pillowcase. Why no sew? I don’t have a sewing machine which means I don’t know how to use one lol! I do have a mission to get one! Let’s get started with the tutorial.

Supplies for a No Sew Pillowcase:
- Fabric: 1/4 yd- I used a coastal pattern packaged in 2yd rolls from Better Home & Gardens at Walmart.
- scissors
- That’s it!!


Cut the Fabric to Fit
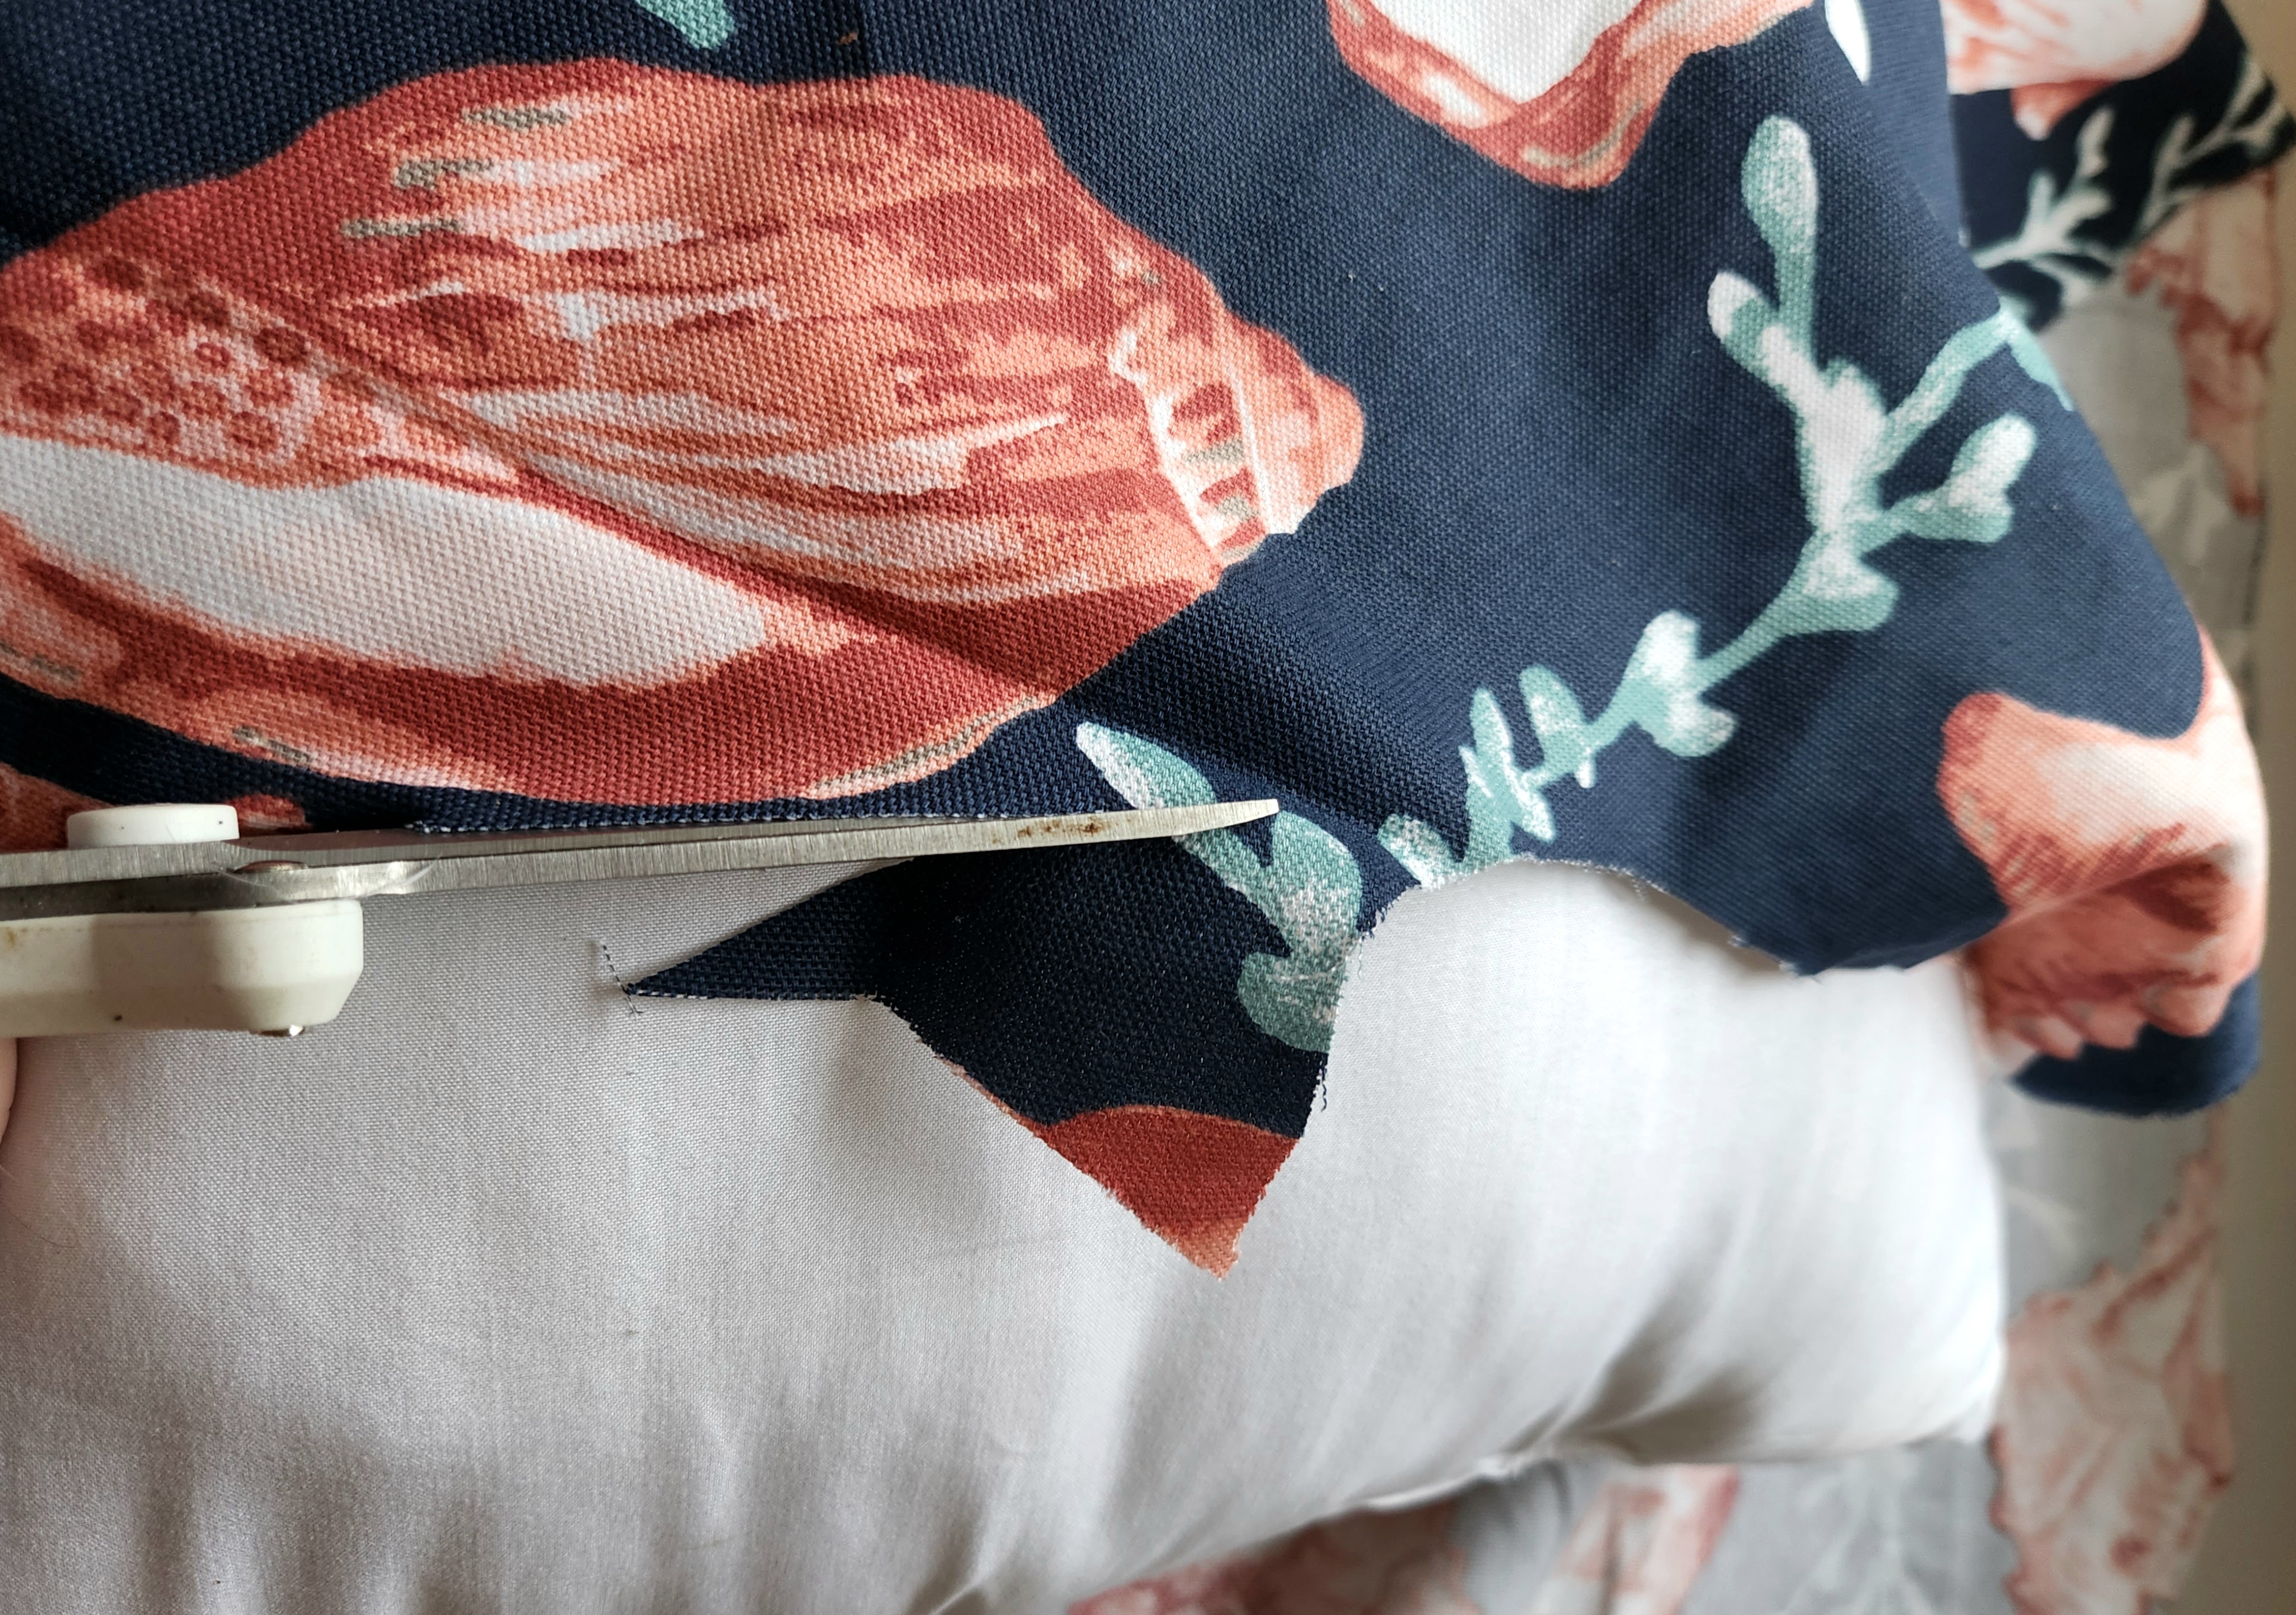
Lay the fabric face down on top of the fabric. Line it up so that one side will come down and cover half of the pillow from top to bottom and from the side to three quarters of the way across. You can use a pen or pencil to mark where to cut.

You can see the fabric around the pillow before I cut it in the picture above. Once every side is marked off, cut the fabric along the lines. Don’t worry, it doesn’t have to be perfectly straight.
Create the No Sew Pillowcase
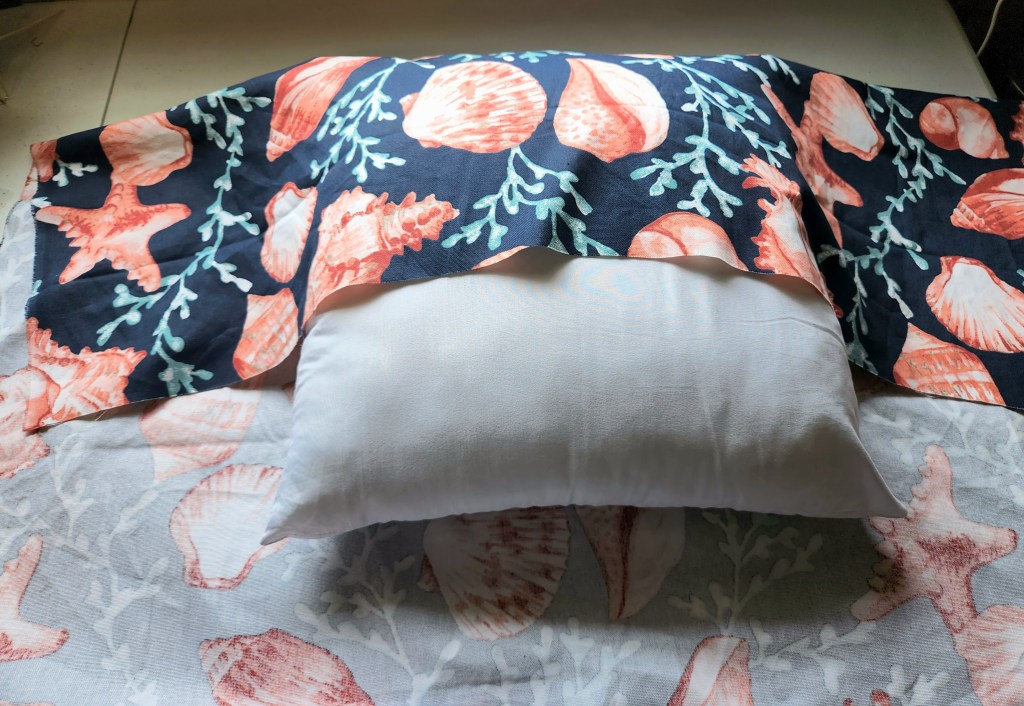
Center the pillow on the face down fabric.

Fold the top of the fabric down so that it’s covering half of the pillow.
Next bring the bottom half of the fabric up to cover the bottom half of the pillow.
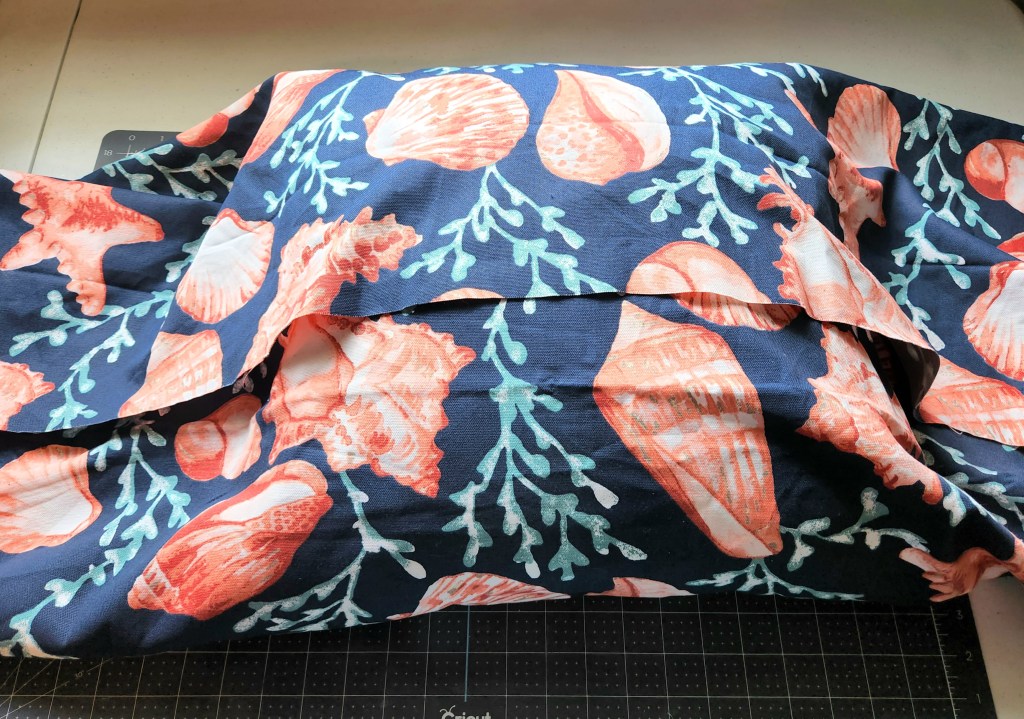
Now fold one of the sides toward the middle like you’re wrapping a present. Don’t bring it all the way down to the pillow yet, only about 3/4 of the way. Repeat that step on the other side of the fold.

Next fold one of those sides that you just created and fold it to the middle one more time but this time all the way down to the pillow, kind of like making a paper airplane. Repeat on the other side.
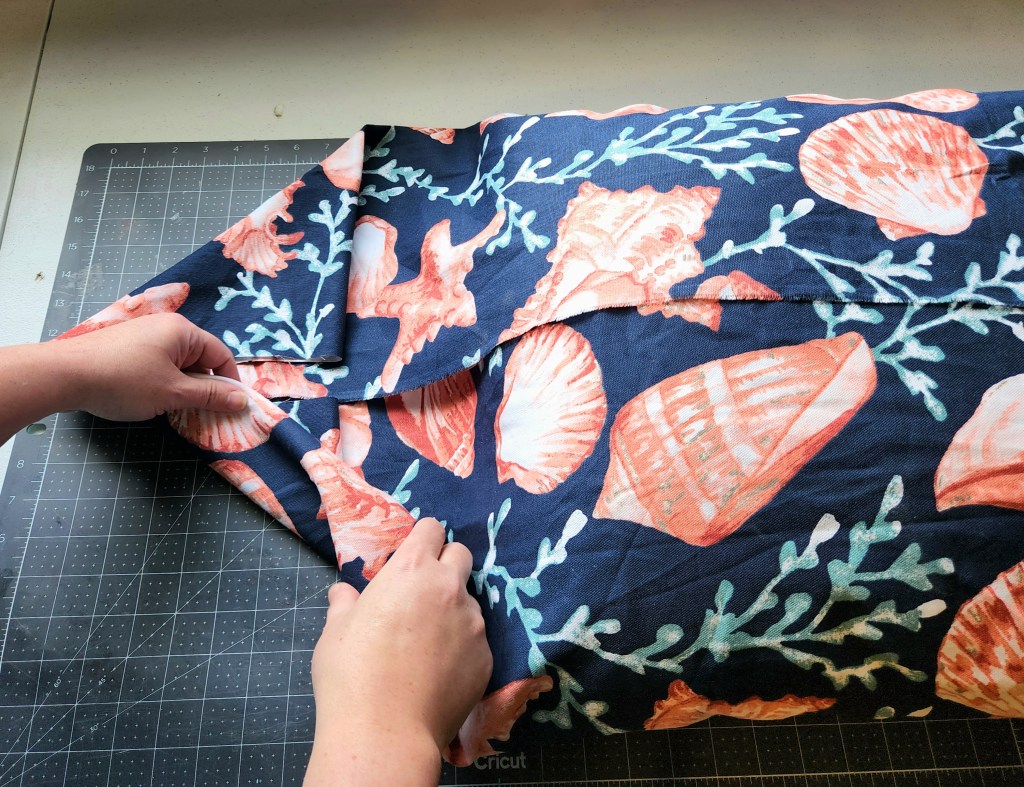

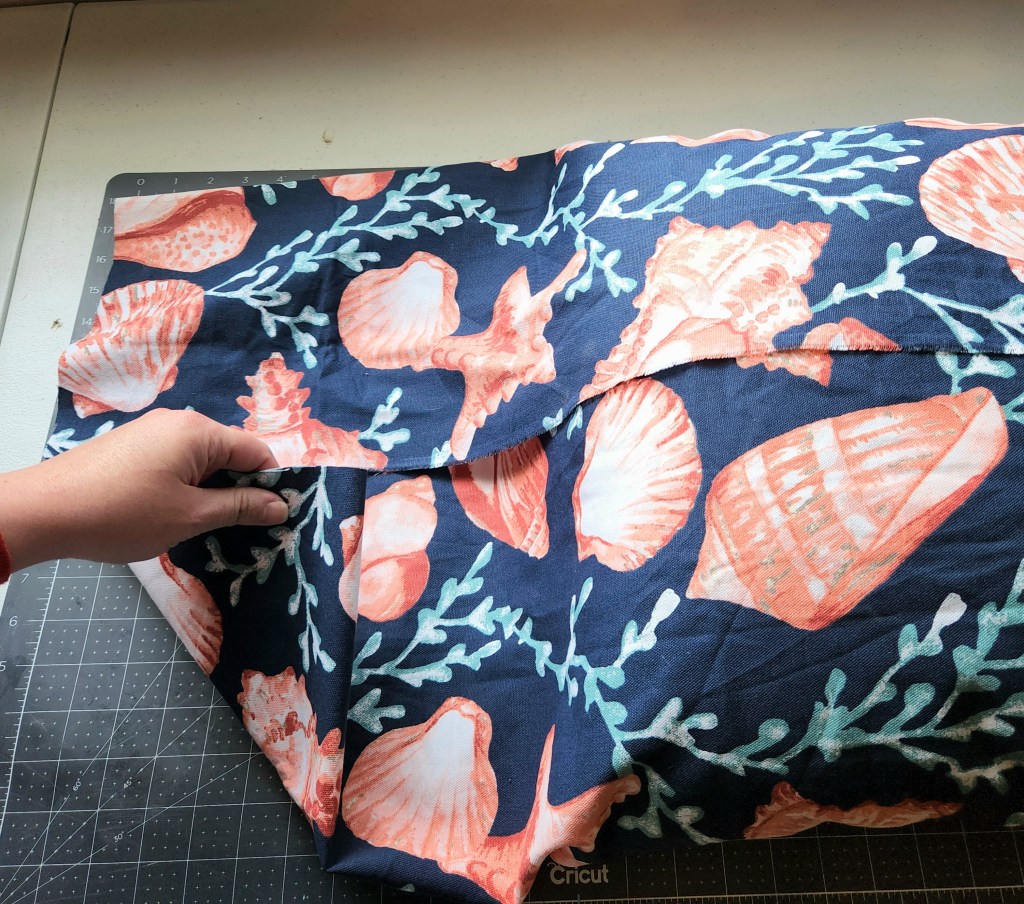
Bring the folded side up to the middle of the pillow.

Now repeat all of the steps on the opposite side of the pillow. Bring the new side up to meet the first one.

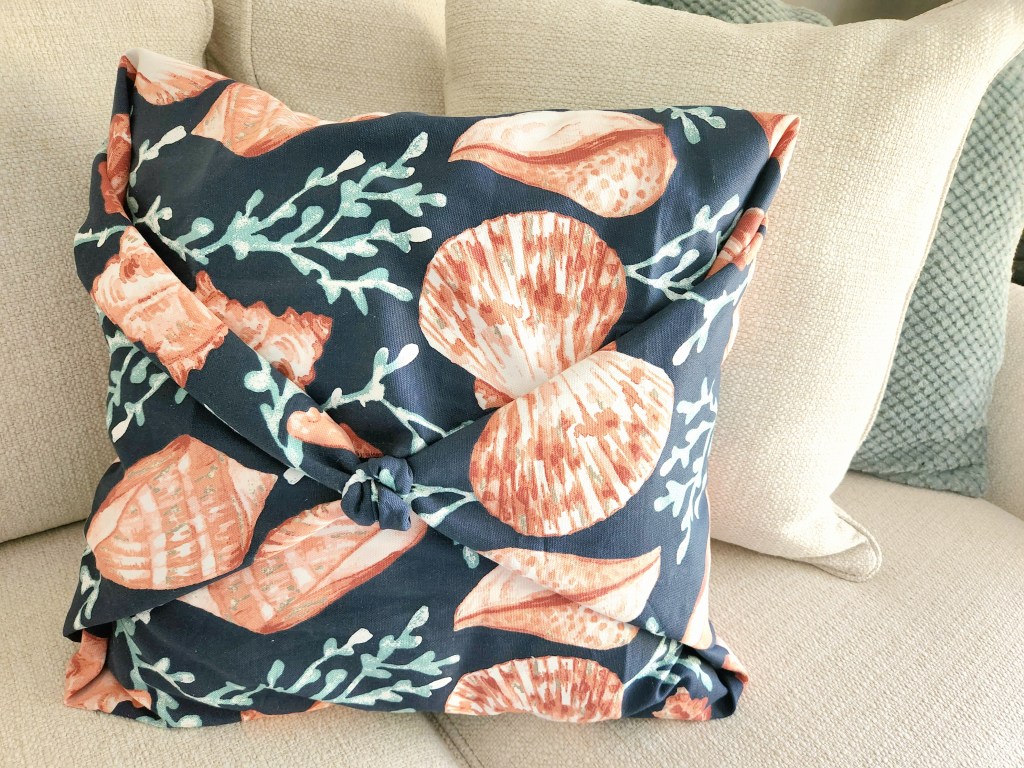
Finally, tie the two sides together in the middle in a cute knot.

That’s it! I wish I would’ve given myself a little extra fabric on the sides to tie into a knot, so take note of that when you make yours!

Now put out your new throw pillow and admire your handiwork!
Using this method, you can save yourself $20 or more per pillow! Here’s how mine look on my couch:


I hope this tutorial was helpful to you. I’d love to see your pillows, so tag me on social media because y’all always have the coolest twists on my projects!
Remember to pin the image below or share this post with the buttons on the left side of the page so you can find it when you’re ready to start your project! Also, follow me on Pinterest for new ideas added weekly! Be sure that you never miss a great tutorial for decor like wreaths, signs and other home decor, free printables, crafts, and other fun posts! Enter your email address below to be notified of new posts! Use the buttons below to follow me on social media for other great content.

Don’t go yet! There’s more to see!
There’s plenty more to see here on the blog! If you’re looking for something specific, use the search box in the sidebar to look it up. If not, you might enjoy these ideas. Don’t have time to read them all now? That’s ok, just click over to the posts using the pictures and pin them for later. You can also add Life as a LEO Wife to your favorites and check back for new ideas and free printables and SVGs every Wednesday, as well as link parties with tons of shared ideas on Sundays!
There’s so much more here on the blog, so I hope you’ll stick around and check it out! I’d love for you to bookmark the blog so that you can come back and visit me. I post on Tuesdays, Wednesdays, and Saturdays, as well as two link parties, one on Thursdays and the other on Sundays. If you’re looking for something particular, you can use the search box in the sidebar. If not, you might enjoy these posts:


What a clever idea! I’m pinning this now so I can try it out! Thanks for the inspiration!
Thank you! I wish I would’ve cut it a little wider on the sides, so make sure to give you a few extra inches on each side.
Love this Niki! I don’t have a machine either so this is just perfect. Of course I’m in love with the fabric too! Pinned!
Thank you! I’m trying to find more ways to use it!