If you’re like I used to be, you look at all the beautiful bows on Pinterest and on other people’s decor or gifts and think you just can’t do that on your own. Well, I’m here to tell you that there are some pretty loopy bow styles that anyone can make! Today I’m going to show you how to make this super easy loopy bow, in both a written and video tutorial. Let’s get right into it!
Supplies needed for this easy bow tutorial:
- wired ribbon- 2 to 2.5″ ribbon makes a good bow for a wreath or other home decor, but the width of the ribbon is up to you.
- pipe cleaner or floral wire
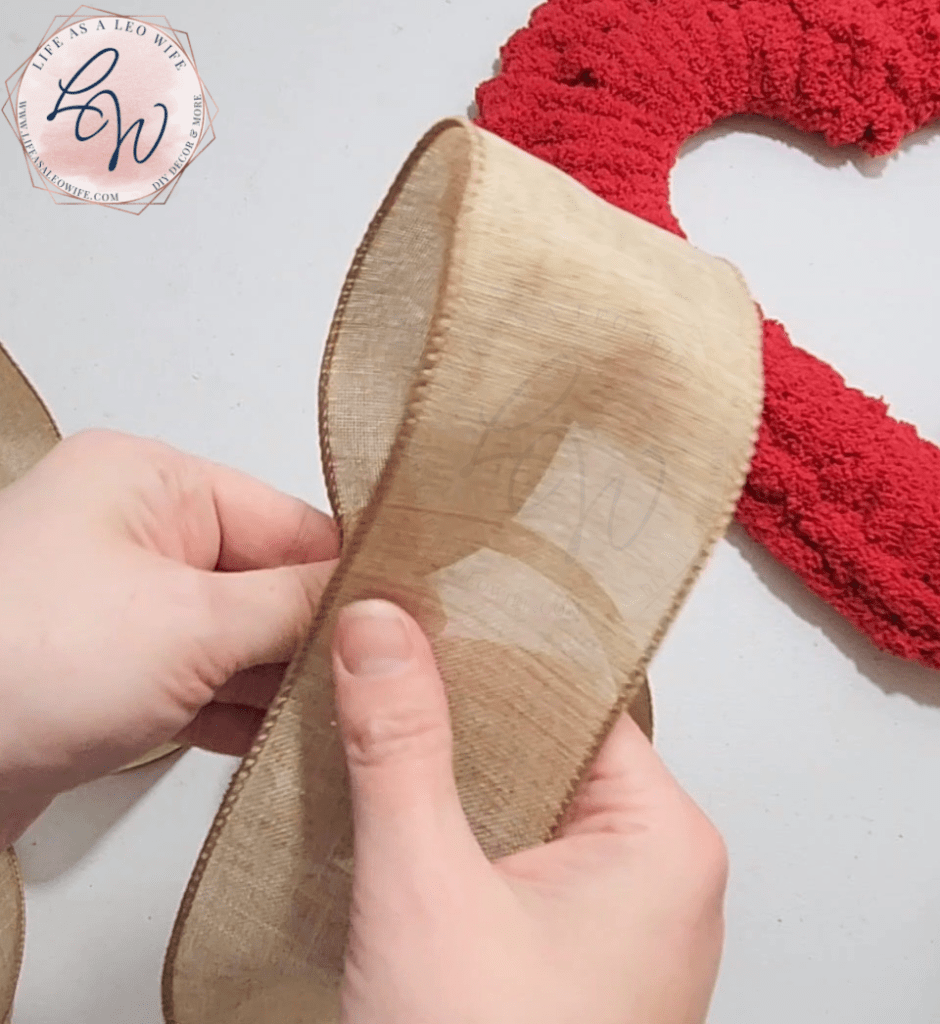
When you’re trying to make an easy bow, you need to start with a good, wired ribbon. When you’re very first starting out with this easy bow tutorial, it’s best to use a double-sided ribbon so that you don’t have to twist it to the front side for every loop. Once you have it down pat, you can use a ribbon with a one-sided print because you’ll be able to twist it a little easier.
Written Tutorial
There is an easy bow video tutorial toward the end of this post, but for those of you who prefer a written tutorial, this section is for you.
First pinch your ribbon at the end, holding it lightly between the side of your thumb and just below the pad of your forefinger.

Create a loop that’s the desired size for your bow. Mine is 3″ wide in this bow which required about 7″ of ribbon.
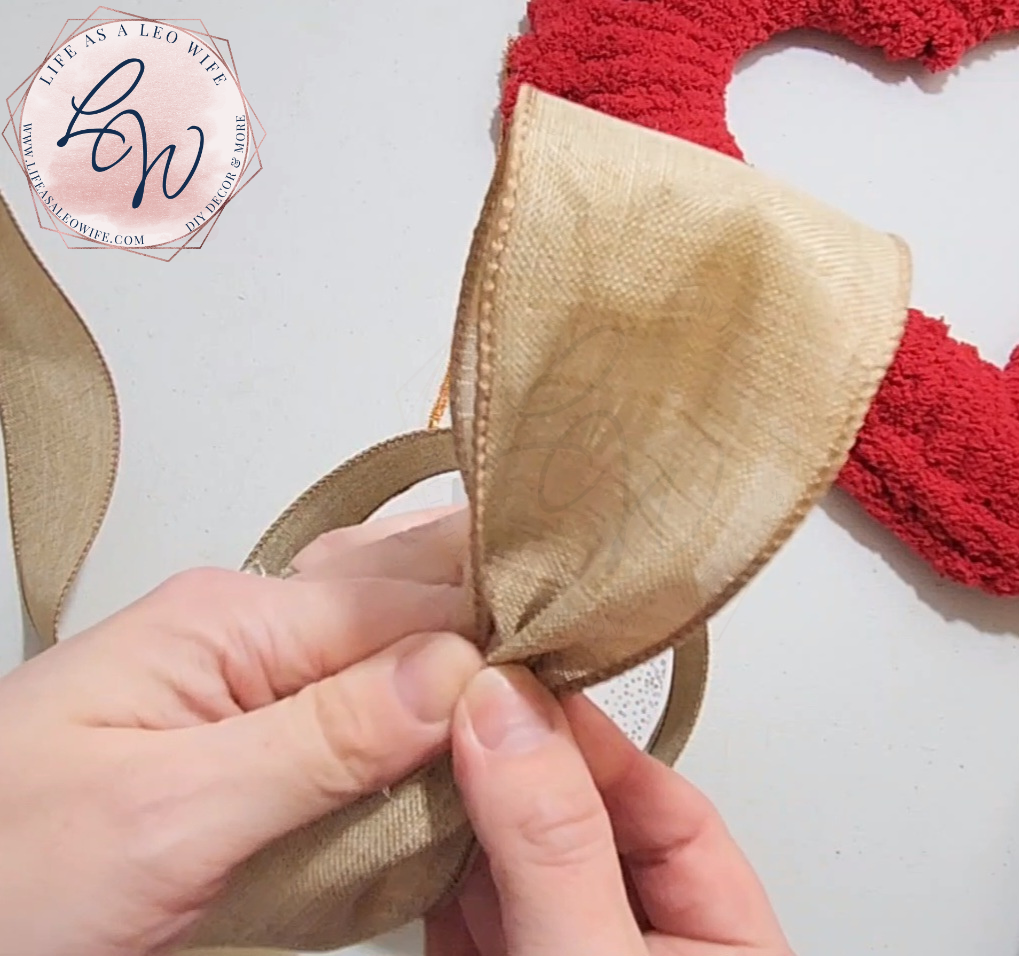
Next, create a second loop directly across from the first one. Pinch the ribbon back at the start, between the two loops, holding it loosely so that your fingers do not cramp up. Bring the loops up together in the middle to ensure they are the same size.
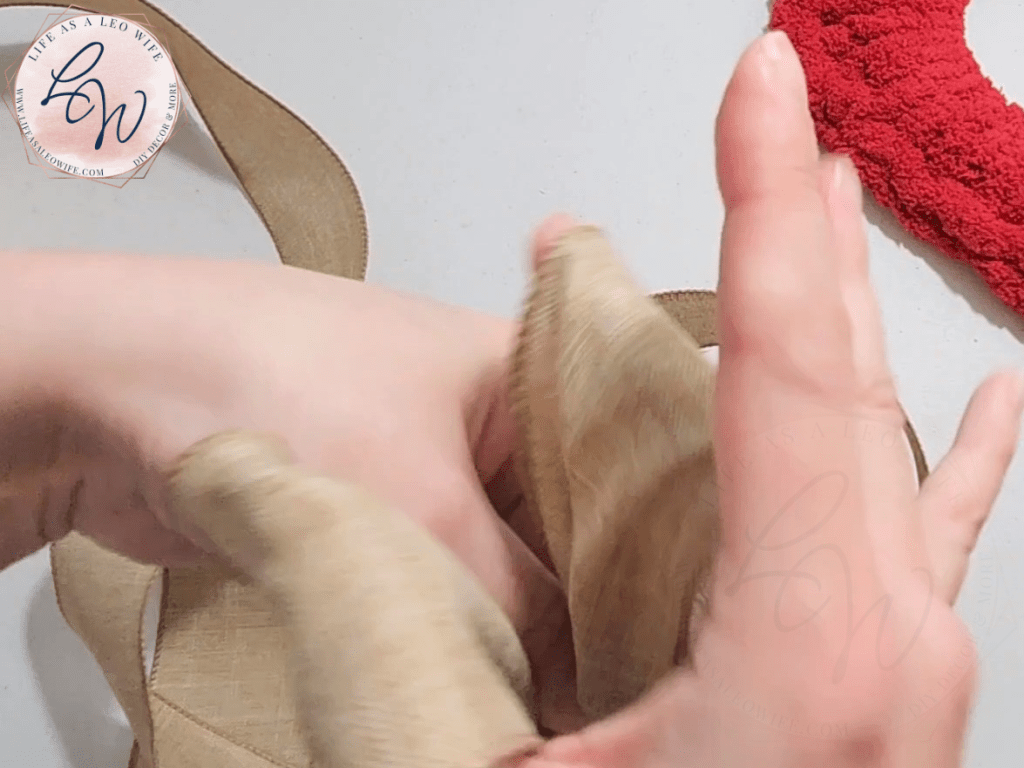
Turn the ribbon slightly, about 15° and form a third loop.


From the center of your easy DIY bow, bring the ribbon straight across from the third loop and form the fourth loop.


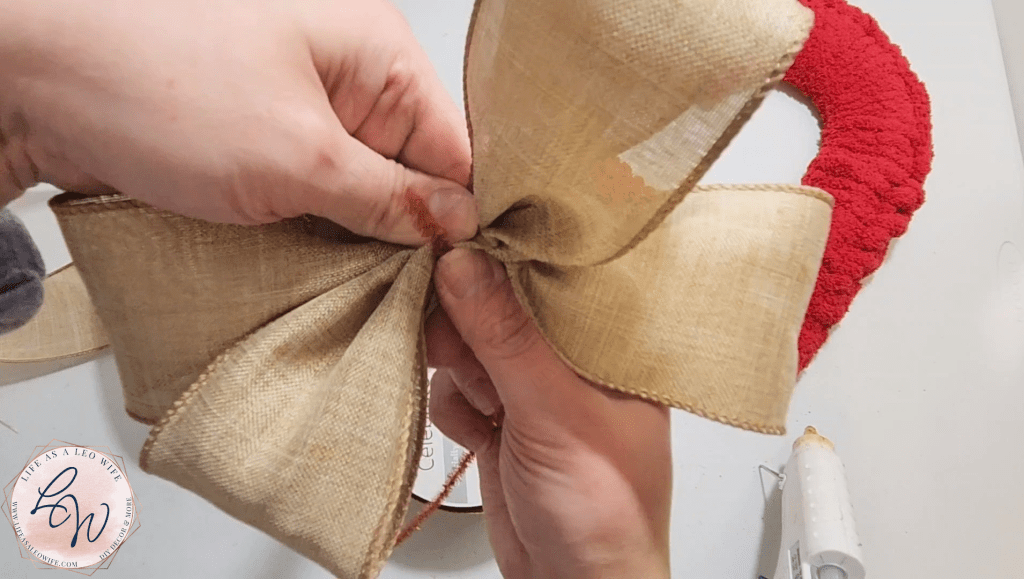
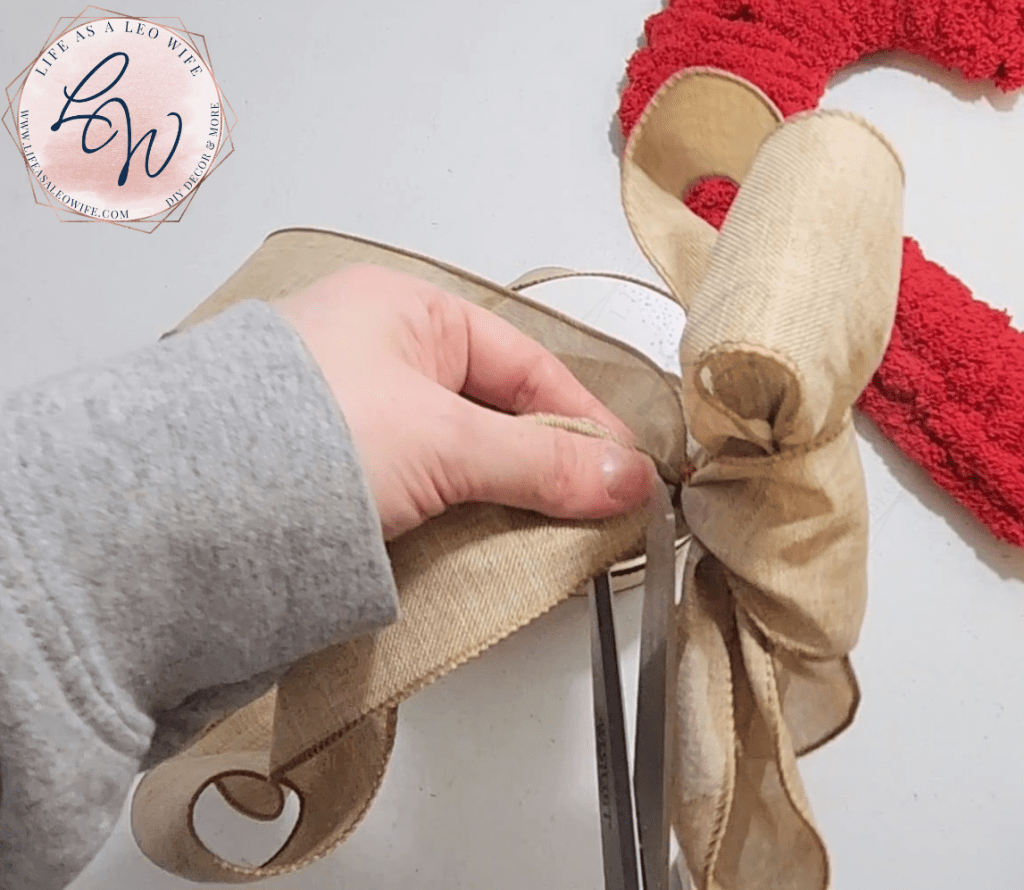
Now secure the bow in the center with a pipe cleaner. Make sure that you tighten it well so that your ribbon will not come loose. In this photo it looks like I use the end of the pipe cleaner, but I actually use the center. You will need even ends of the pipe cleaner on both sides to finish this easy bow tutorial. Do not cut off the ribbon.
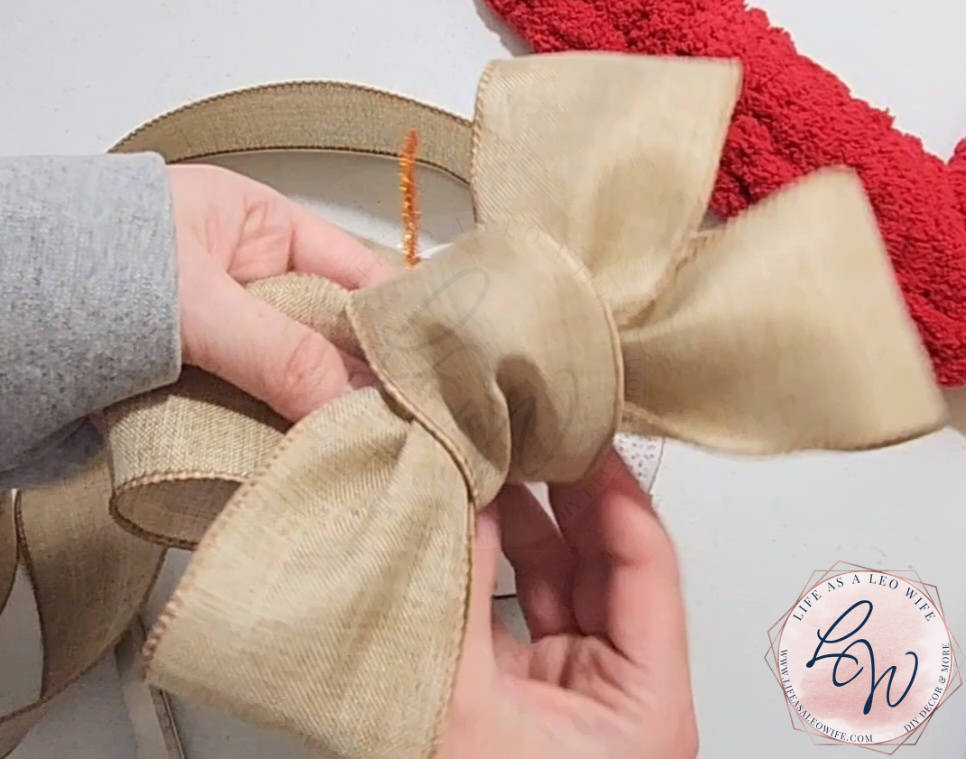
Next, you will be forming the center of the bow. Bring the ribbon back up and over the center of the bow, covering the pipe cleaner. Pinch the ribbon in the back and secure it with the pipe cleaner again.


Finally, to finish this easy bow tutorial, you will form the tails. Allow the ribbon to drape down from where it is secured in the center the length that you would like your tails to be. Mine are 6″ long. Then bring the ribbon back up to the pipe cleaner, so you will have a 12″ loop or longer depending on how long you want your tails.
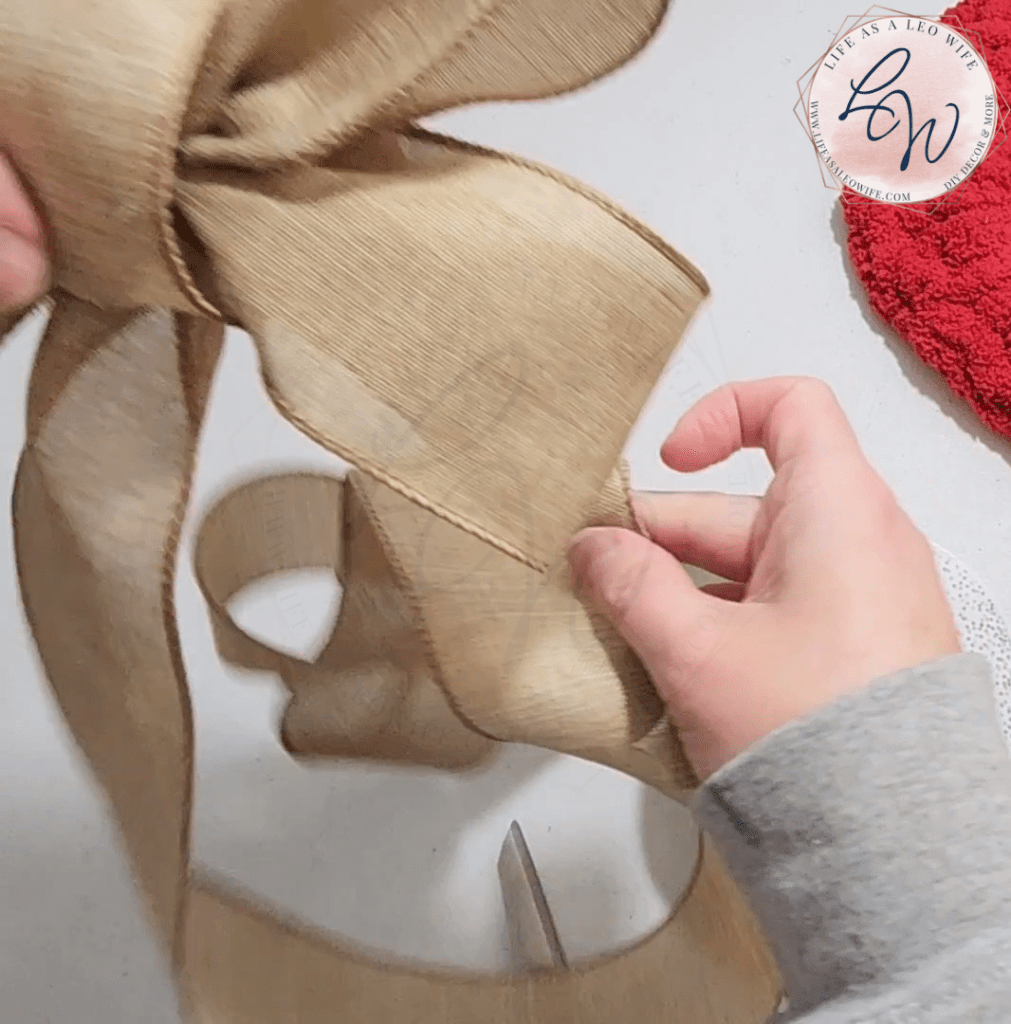

Cut off the excess ribbon above the pipe cleaner.
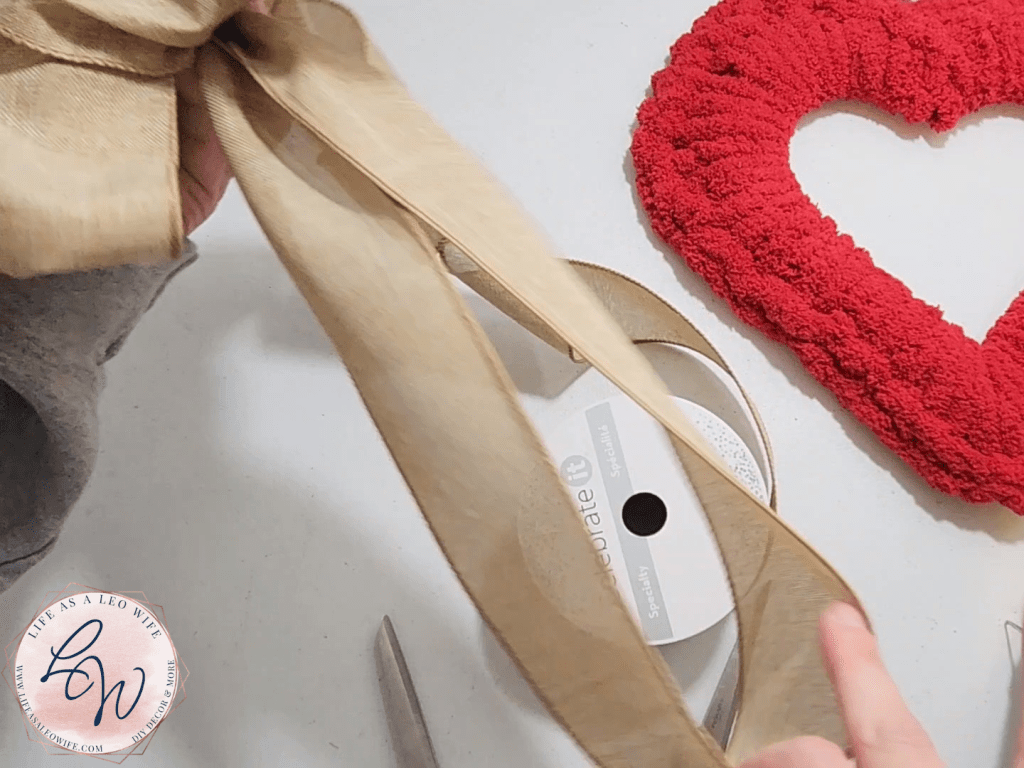
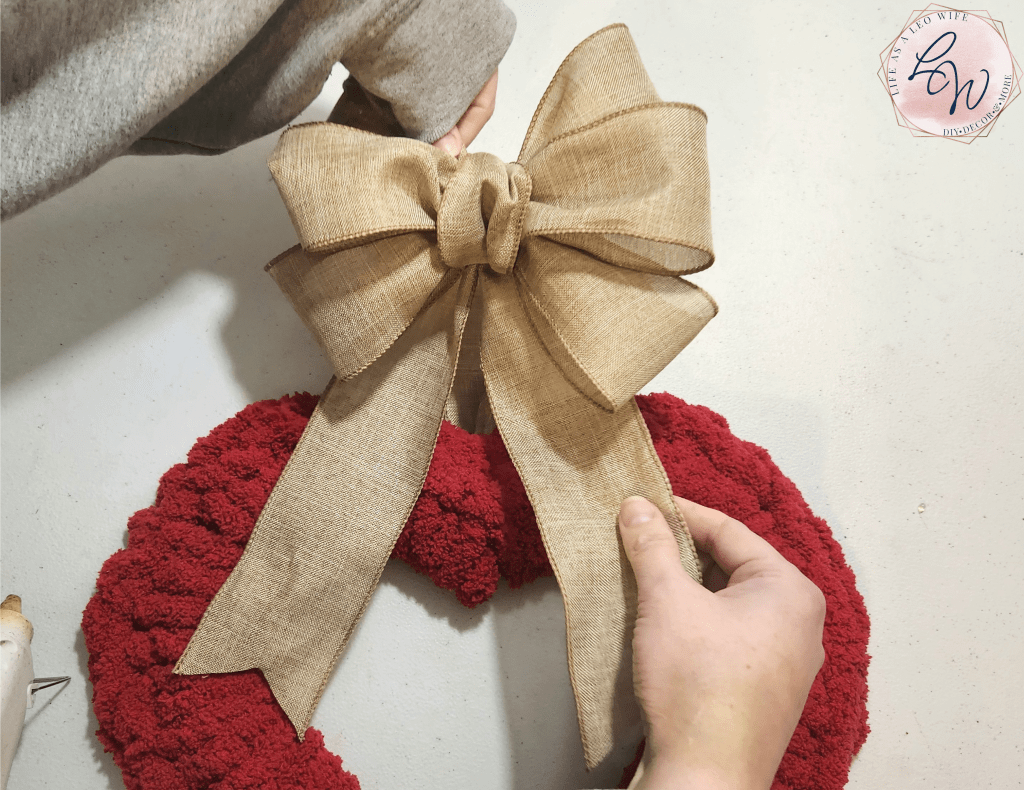
Finally, cut your tails into two separate ones by cutting it in the center.

You can now cut the tails either fold them in half and cut a half V to form dove tails or just cut them diagonally. I made mine dove-tailed.
Easy Bow Video Tutorial
Easy Bow Tutorial Video by Niki KlineThat’s it! Didn’t I tell you how easy this bow tutorial was?! Anyone can make this type of loopy bow. You can use it for wreaths, gifts, lanterns, swag, or any home decor really.
Remember to pin the image below or share this post with the buttons on the left side of the page so you can find it when you’re ready to start your project! Also, follow me on Pinterest for new ideas added weekly! Be sure that you never miss a great tutorial for decor like wreaths, signs and other home decor, free printables, crafts, and other fun posts! Enter your email address below to be notified of new posts! Use the buttons below to follow me on social media for other great content.

Don’t go yet! There’s more to see!
There’s plenty more to see here on the blog! If you’re looking for something specific, use the search box in the sidebar to look it up. If not, you might enjoy these ideas. Don’t have time to read them all now? That’s ok, just click over to the posts using the pictures and pin them for later. You can also add Life as a LEO Wife to your favorites and check back for new ideas and free printables and SVGs every Wednesday, as well as link parties with tons of shared ideas on Sundays!


One thought on “Super Easy Bow Tutorial: Video Included!”