When I shared my end of the year teacher’s gift earlier in the week, I promised to give you the tutorial for the flowerpot I used in it, so here it is, a DIY aged metal farmhouse flowerpot tutorial. If you missed the easy and thoughtful gift for your child’s teacher that I made using this pot, check out the free printable and instructions in this tutorial. This process can be used for any galvanized metal!


You’ll need (You can get everything from Dollar Tree unless noted*):
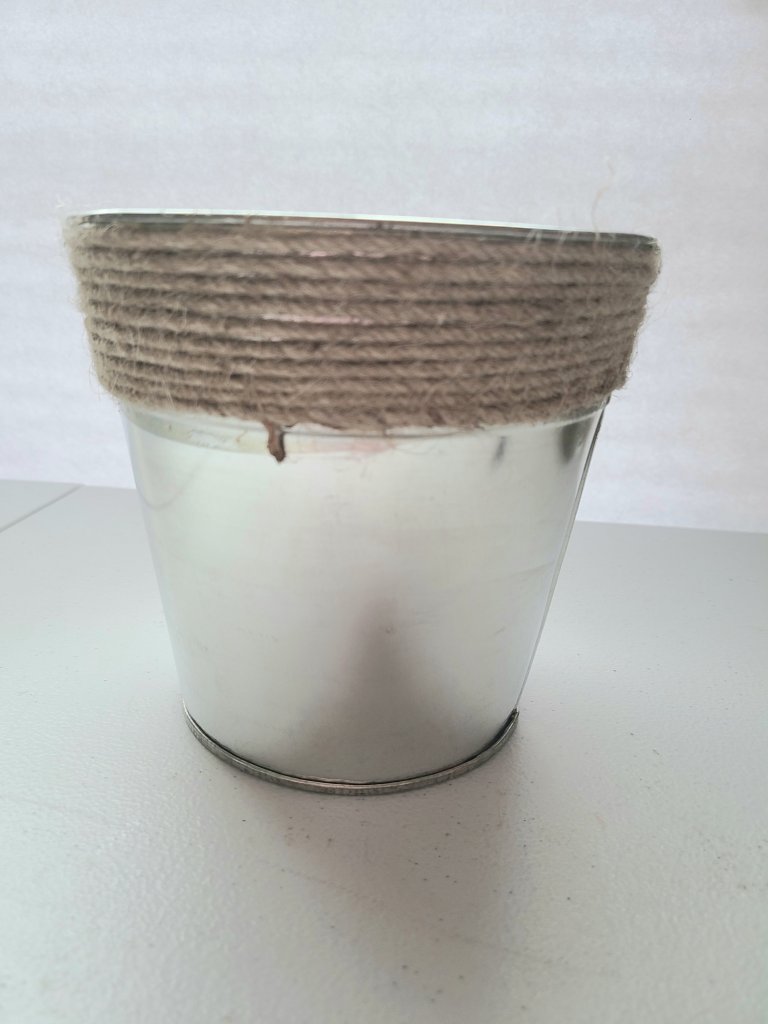
- galvanized metal pot
- distilled white vinegar
- hydrogen peroxide
- salt
- rag
- letter stickers or stencils with black paint- You want letters that are about 1″ tall.
- or Cricut with black vinyl*
- gift card or other card to apply the stickers or vinyl
- transfer/contact paper if you use vinyl
Step 1- Combine ingredients
In a small container combine your peroxide, vinegar, and salt. I didn’t measure them exactly, I just added the same amount of each ingredient into the bowl. I would guess it was about four tablespoons of each. With that amount, I was able to do more than one DIY aged metal farmhouse flower pot. If you’re only doing one, about half that amount would be good if you’re low on one of the ingredients.


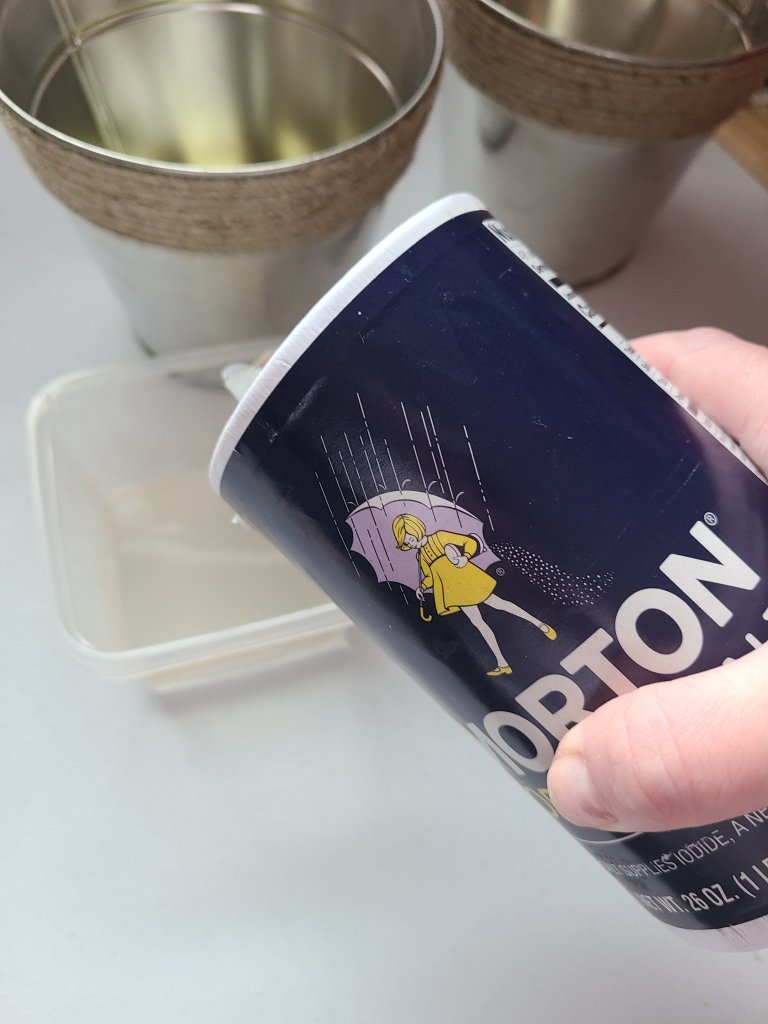
Use a spoon and stir your mixture well. My salt never completely melted away in it, but that’s ok. The salt is the abrasive which adds small scratches on the surface and the vinegar and peroxide can be soaked in.
Step 2- Apply the mixture
Place your rag into the mixture, soaking the part you will be rubbing on the pot. Rub it on the pot in small circular motions until you’ve coated the entire surface. If you are not getting the abrasions you’d like right away, add some salt directly onto the rag, and continue to rub.


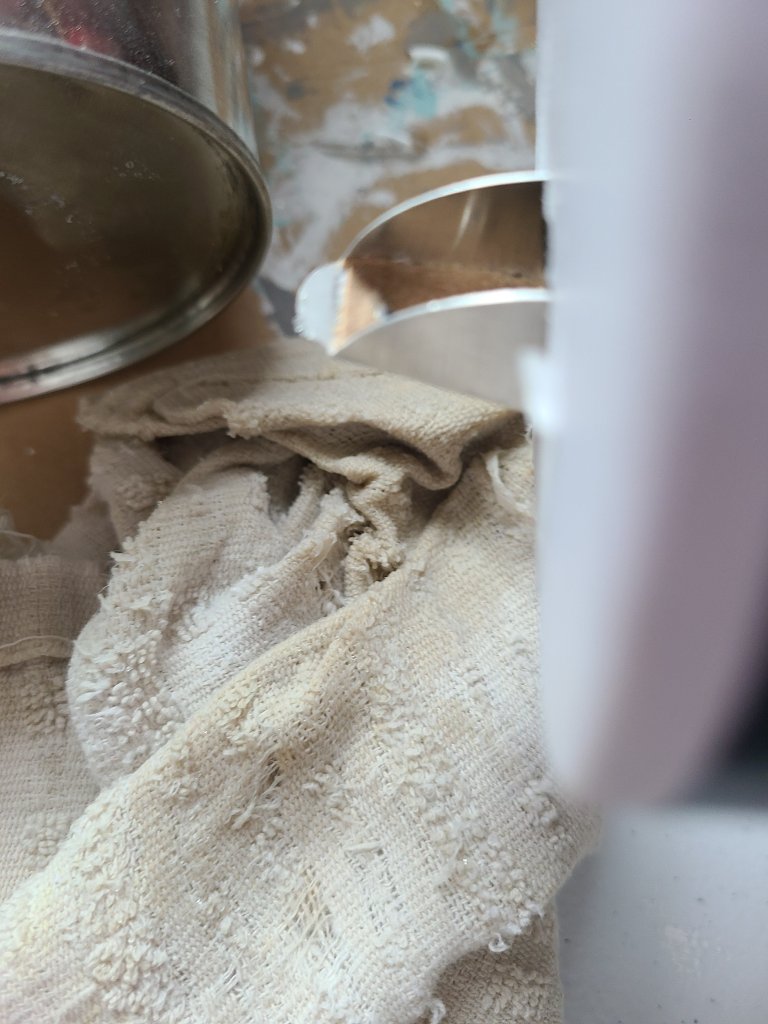
Once you’ve got a little aging going, soak your rag completely in the mixture and wrap it around your pot. Leave it on about twenty to thirty minutes. Check the flower pot and see if you’re happy with the look. Note that you will see more aging as you rub in the next step of wiping. If you are move on to wiping the pot. If not, leave it on for ten minute increments, then check it again. Continue until you are happy with the aging. If you’re using a Cricut to cut your design for the pot, go ahead and cut your design and get it prepped to apply while this is soaking.

Remove the rag and use a clean paper towel or rag to clean the surface. Rub again in circular motions and you will see more aging. The paper towel will have black stuff begin to gather on it which is good. On the edges of the pot you may see some slight rusting. This is what you generally want when aging, but if you don’t want as much rusting, don’t rub on the edges as much. The white build up of the salt will be removed as you go. Once you have rubbed the entire surface a few times you will be finished with the aging.
Step 3, option 1- Add lettering with stencils or stickers
Rinse the surface of the flower pot and make sure to dry it completely. If you are using a stencil to add the words on the surface of the pot, use a pencil to mark the straight lines where you will paint each letter. You want to have the letters and words even. I used my Cricut for this, but when I stencil on a round object, I use a fabric tape measure to mark the straight edge. For a farmhouse look, add “Fresh Flower Market” on three separate lines on the flower pot.
If you are adding sticker letters, again make a straight line to line up the bottom of each letter on. Use the same quote on three lines. You can switch up the fonts like I did with my Cricut. Use a sans serif font for the words fresh and market. Then use script or calligraphy font letter stickers for flowers.
Step 3, option 2- Add vinyl lettering
I used my Cricut to add the phrase to my DIY aged metal farmhouse flower pot. Using the Cricut Access plan is great if you make several things a month. I looked for farmhouse style images that were already available to make this a quick, easy project. Again, before you begin, rinse the surface of the pot and dry it completely.
Open Cricut Design Space and click images. Search for “fresh flower market,” click the image, then click add. You can leave the image the size that it automatically opens as. Next click the green “Make It” button on the top right of the screen.

Now follow the instructions on the screen to cut your vinyl. I used black because it goes best with the farmhouse look. Remove the vinyl from your cutting mat, and cut the design from the rest of the sheet of vinyl. Weed the excess vinyl from around the quote and from inside of the letters like O’s and E’s.


Now add the contact paper or transfer paper to the top of the design. Rub each letter with your credit or gift card to adhere it to the contact paper. Using contact paper will keep your design straight when you put it on the flower pot. Remove the backing from your vinyl and place the design on to the flower pot. Make sure it’s even before you press down! I placed mine directly opposite from the seam on the back of the pot. Once it’s even and where you’d like it, rub over each letter with your card again to secure it on to the metal surface. Then remove the contact paper from the pot.


Your DIY aged metal farmhouse flower pot is complete!
That’s it! It is a pretty straight forward project, and it will probably take you less than an hour including the time the rag is wrapped around the pot when using a Cricut. You can use this tutorial for any galvanized metal bucket to add to your home. I’m working on one now to hold items in my kitchen, so it doesn’t just have to be for flowers. It’s so customizable!
Here’s my completed DIY aged metal farmhouse flower pot.

This is my end of school teachers’ gifts that I put together for my son’s teachers. I added a large paper flower to the flower pots, a packet of flower seeds, and a gift tag that says, “You have planted seeds of knowledge in me that will grow forever. Thank you for helping me grow.” You can get those free printables here. I wanted to add a bunch of faux flowers, but I only had one bunch each. Next I began making a bouquet of paper flowers (I actually used paper flowers for my wedding bouquets way back), but I ended up running out of cardstock because I was cutting flowers that were larger than I expected. That was a fun eight hour crazy adventure. I’ll be adding a post on that and how to make the paper flowers this weekend.
Thank you for visiting!
I hope you have enjoyed this tutorial, and that you make your own farmhouse flower pot. Be sure to share those with us on social media! Follow me on social media using the buttons below. Enter your email in the space on the sidebar or at the bottom of the screen to receive an email whenever I upload a new post. That way you don’t miss a thing!
If you’re a blogger I would LOVE for you to share your family friendly posts in my link parties, Happiness is Homemade (Sun-Thurs) and Crafty Creators (Thurs-Mon). If you’re not a blogger you will love all of the great ideas shared in the parties like crafts, DIYs, home decor, recipes, family ideas and activities, fashion, Christian topics, life ideas and hacks, and a lot more!
Stick around and check out my other home decor ideas and ways to bring a little summer inside this season. Make sure you pin this idea to come back to it later. Follow me on Pinterest for more ideas like this one along with a wide range of other ideas!


Thank you for the feature! I love sharing on your charming blog and link parties!