
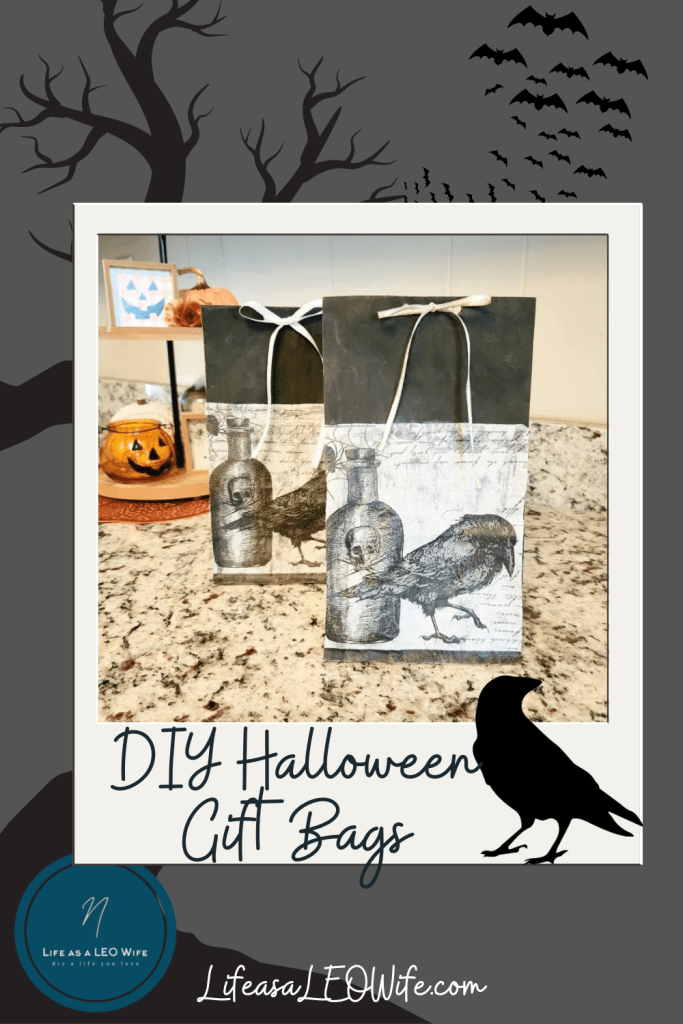
I can’t wait to “boo” my neighbors this year! Can you?! Whether you’re booing your neighbors or giving a little Halloween gift to a loved one (like these cute frames with free printables), a cute gift bag is a must have. Today I’m going to show you how to make a DIY Halloween gift bag with a brown paper lunch bag and a napkin.
Today’s gift bags are part of a monthly blog hop that I participate in with some lovely ladies. This month is a Halloween Craft Challenge hosted by Bev of Across the Blvd. Stick around after the post to see all of the great ideas shared by the very talented bloggers.
DIY Halloween gift bag supplies:
- brown paper lunch bag
- black acrylic paint
- paint brush & foam brush
- Halloween print napkins (I used raven print napkins from Dollar Tree.)
- Mod Podge
- thin ribbon
- hole punch (If you don’t have one, you can use a sharp tool.)


Paint the Bag
Paint one side of the paper lunch bag. You could paint the entire thing if you wish, I just didn’t feel the need to. Only one side of the gift bag will be facing the recipient, and I don’t think they will care if the rest is painted.

Prepare the Napkin
Next, unfold one of the Halloween print napkins. Some of them have prints on only two sides, but the pack that I bought from Dollar Tree, amazingly, had a print on all four sides! Score! That meant I could make four Halloween gift bags for every napkin that I had.
Cut one of the four sections of the napkin out. You’ll cut it down to fit the width of the gift bag later.

Decoupage the Gift Bag
Now you will attach the napkin to the Halloween gift bag. Brush Mod Podge on the bottom section of the painted side of the lunch bag.

Place the cut section of the napkin on to the Mod Podge covered bag. I centered the design on it so that the main part of the design wouldn’t be cut off and so the bottom lines up with the bottom of the bag.

Smooth the napkin over the Mod Podge trying to keep the wrinkles to a minimum. I didn’t mind having some wrinkles because of the design on my napkin. It just made my Halloween gift bag creepier.

Next, brush a thin layer of Mod Podge on top of the napkin.

Remove the Extra Napkin
Once the Mod Podge is dry, cut the excess napkin that is hanging over the edge of the gift bag. I added a strip of black napkin on to the bag that’s pictured below. It’s like the stripe that’s at the bottom, so I thought I’d like having the top match. If you’re using the same napkin, you can do that or not. I didn’t do it on the other Halloween gift bags that I made.

Embellish the Halloween Gift Bag
Finally, it’s time to add some cute details and a way to close the gift bag. Fold the top 2-3″ of the bag down. Then use a hole punch to create two holes an inch or so apart in the top center of the bag.


Take a length of ribbon and run one end through each one of the holes. I used a 3/8″ ribbon on one DIY gift bag and a 1/8″ on the other because I ran out of the first ribbon. Being able to use up materials I already have is a major plus for me. Tie the ribbon in a bow and that’s it!


DIY Halloween Gift Bag Video Tutorial
Can you believe how cute and easy these gift bags are?! Here’s a quick video to show you exactly how I made mine. Forgive the issues I had with tying the ribbon on camera lol. I had to stop and move the bag closer to me so that I could tie it in a cute little bow!
I hope you have a blast booing your neighbors with these DIY Halloween gift bags!


This is a blog hop, so keep reading to see the other DIYs on the hop!
Remember to pin the image below or share this post with the buttons on the left side of the page so you can find it when you’re ready to start your project! Also, follow me on Pinterest for new ideas added weekly! Be sure that you never miss a great tutorial for decor like wreaths, signs and other home decor, free printables, crafts, and other fun posts! Enter your email address below to be notified of new posts! Use the buttons below to follow me on social media for other great content.
On to the Halloween Craft Challenge

Bev – Across the Blvd | Dollar Tree Halloween DIY
Marci – Stone Cottage Adventures | Pumpkins Evermore Canvas
Gail – Purple Hues and Me | Halloween Pumpkin Witch
Allyson – Southern Sunflowers | Dollar Store Halloween Picture Frame
T’onna – Sew Crafty Crochet | Halloween Gnome Scarf
Don’t go yet! There’s more to see!
There’s plenty more to see here on the blog! If you’re looking for something specific, use the search box in the sidebar to look it up. If not, you might enjoy these ideas. Don’t have time to read them all now? That’s ok, just click over to the posts using the pictures and pin them for later. You can also add Life as a LEO Wife to your favorites and check back for new ideas and free printables and SVGs every Wednesday, as well as link parties with tons of shared ideas on Sundays!


I had no idea you could decoupage on paper! They turned out so cute, very brilliant Niki!
Thank you! It was actually my first time doing this, and I love the way they turned out.