At my first thrift store expedition in a few years, I found a solid wood magazine rack. You may remember my project with the first piece that I bought while at the store, this upcycled basket for blankets. I wasn’t sure what I was going to do with the rack at first, but a Pinterest search and many inspirations later, my upcycled magazine rack was turned into kitchen decor plus storage!

I’m glad that you are here today because it’s time for our monthly Creative Craft Hop hosted by Sara over at Birdz of a Feather. If you’re coming over from her, welcome! Weren’t her crocheted pendant lights amazing?! Stick around after the post to check out all of the projects brought to you by the lovely ladies on the hop!

Supplies for an Upcycled Magazine Rack:
- wood or metal magazine holder
- chalk paint (spray or regular)
- vinyl
- my free SVG or Printable

Prepare the Magazine Holder
As with any thrift store find, you’ll need to clean it before you do anything else. You can use water and Dawn dish soap or mineral oil.
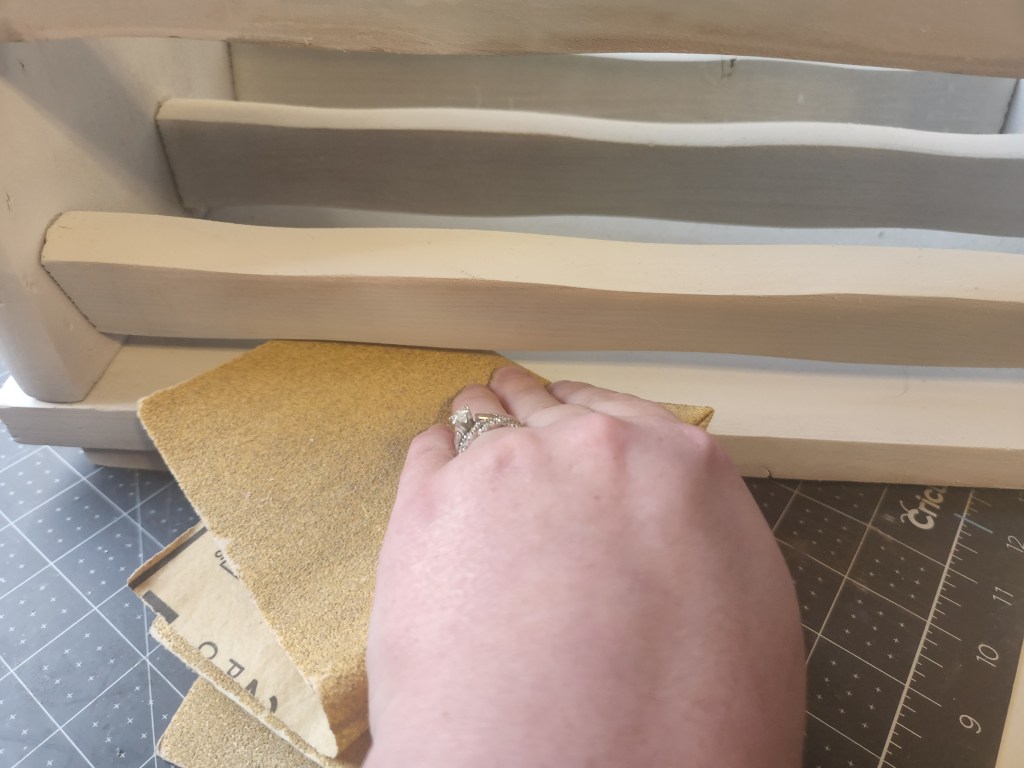
Now sand the entire thing. My hubby got me an electric sander for $20 at Walmart. Man, I love that thing! It cuts the time I spend sanding by at least 90%. If you don’t have one, you should definitely look into it. You can just sand it all by hand if you don’t. Clean the rack again to remove the saw dust.

Paint & Distress the Rack
I used Rust-oleum Chalked spray paint in linen white. You could also stain it or use regular chalk or acrylic paint. I gave mine three coats of paint, but it still needed a bit more in some places. Since I wanted to distress my magazine rack anyway, I stopped with three coats.
Once the paint was dry, I began to distress it. You can do that or just move on to the next step. I used sandpaper and went lightly over the paint in some areas.
Cut Vinyl for Decals
I created two decals, one to use on each end of the magazine rack. That way I can turn it around to display whatever graphic that I want during each season. The first vinyl decal I made can be used by anyone because I’m giving it to you for free!
For personal use only. All of my free printables & cut files are copyrighted material. Feel free to download these free designs and print them or use on your Cricut projects for your own use at home. They are not for commercial use, not to be placed on items for sale. That helps me keep these printables, SVGs, and PNGs coming to you for free! Another note: you will not my logo overlay on your downloaded design. It is there to keep people from downloading the images straight from Google, or others from stealing them to use on their site. Thanks for understanding! Feel free to share this post for your friends and family to make their own projects with this design!
If you’re new to the blog, let me tell you how this goes. The image you see below is a preview of the actual design. When you download it, it will not have my blog logo over it. It’s there for the preview so that no one can steal the image by downloading it straight from Google Images. You don’t have to have a cutting machine to use this image. You can print it out and use the carbon copy method using a pencil. I have a tutorial on how to do that here.
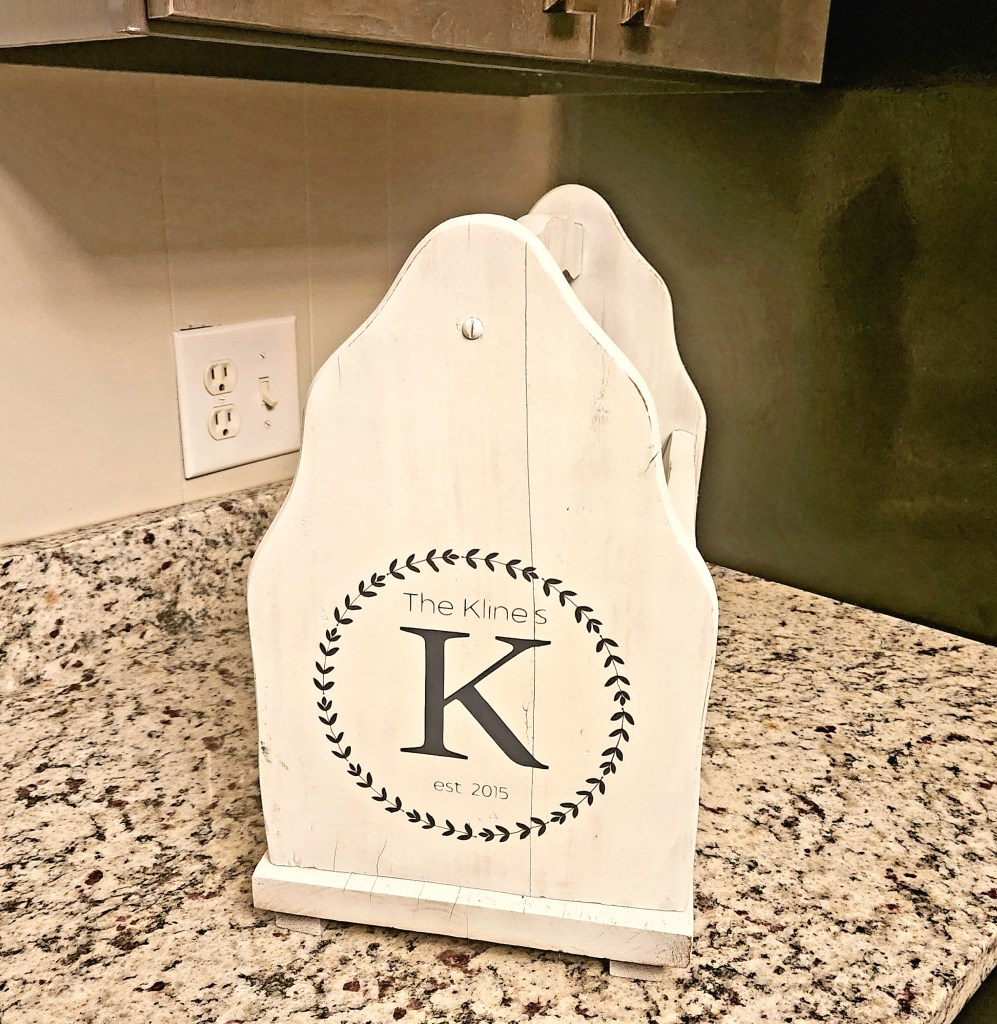
On the other side of the magazine rack I placed our initial, last name, and the year we became a family. It would be pointless for me to share that with you since I’m fairly certain you wouldn’t have the same name and year lol!
Add Decals to the Upcycled Magazine Rack
I used HTV for this project. I would’ve preferred regular, but I used what I had on hand. Using my Cricut I cut the vinyl.

Weed the design and place it on the end of the magazine rack.

Place a piece of wax paper on top of the HTV and adhere it to the magazine rack with an iron or transfer it onto the rack using transfer tape.


Once the design is on the rack, remove the paper and the backing.


If you’re embellishing the other side, repeat these steps for the other vinyl image.
That’s it! Your magazine rack is upcycled and ready to decorate your home!
I’m not sure exactly what I’m going to put in the rack, but so far I’ve tried pans, lids, aluminum foil, and Ziploc bags. Here’s how it looks now:

I hope that you enjoyed this tutorial! Remember to share this post using the buttons at the end and/or pin the image below. That will allow you to come back to this post when you need it! Follow me on social media and via email so you’re alerted when I add a new tutorial, free printables & SVGs, or other posts.

Don’t go yet! There’s more to see!
There’s plenty more to see here on the blog! If you’re looking for something specific, use the search box in the sidebar to look it up. If not, you might enjoy these ideas. Don’t have time to read them all now? That’s ok, just click over to the posts using the pictures and pin them for later. You can also add Life as a LEO Wife to your favorites and check back for new ideas and free printables and SVGs every Wednesday, as well as link parties with tons of shared ideas on Sundays!
If you’re one of my blogger friends, make sure you link up on Crafty Creators Link Party and Happiness is Homemade before you go!
On to the Creative Craft Hop!
I’m the last stop on this month’s Creative Craft Hop, but in case you’re here just hanging out with me, I encourage you to visit all of the other great projects shared this month!
Terrie from Decorate & More with Tip | Dollar Tree Mirror with Jenga Blocks
Allyson from Southern Sunflowers | Patriotic Party Table Free Printables
Tammy from Patina & Paint | Tin Wall Pocket
Gail from Purple Hues & Me | Bumblebee Wall Decor DIY
Jenna from The Painted Apron | Shells on the Beach Canvas
Carol from Blue Sky at Home | How to Make a Fabric Bowl with Mod Podge
Rebecca from Zucchini Sisters | How to Make a Paper Cone Flower Basket
Cecilia from My Thrift Store Addiction | Faded to Fabulous Garden Sign Refresh
Donna from Modern on Monticello | DIY Mid-Century Modern Inspired Wall Sculpture
Sara from Birdz of a Feather | Crochet Pendant Light
Thank you for visiting us today. I hope you’ve found several of your next DIY projects! Be sure to pin this post and any others you like so you can get back to them when you’re ready to get crafty.
If you enjoyed this post, you might like these:


Niki,
I LOVE it!! Great transformation!! Thanks for sharing!!
Hugs,
Deb
Thank you Debbie!
Great project Niki; isn’t it great to be thrifting again? I love how you personalized this magazine holder for your family! Can’t believe your Husband got you a sander for only $20; that’s a steal and I bet you’ll get a ton of use of it!
Yes! I thought I’d just check see how much they were online and checked Walmart. It was $19.88, and if I’d have known that I would’ve gotten one long ago lo!
Great find by the way! I love how it turned out. Enjoy your new piece it sure looks pretty.
Thank you!
Girl! I’m so impressed that you can create your own designs AND import them into your cutting system! They look so professional and really elevate the magazine holder. It looks fabulous. Great job!!!
Looks great, Niki! However you decide to use your holder, it’s certainly very eye-catching and a fun way to organize and display your magazines or other items! It’s an awesome upcycle!
Thank you! I think I’m going to use it for pot lids and Purex lids, so I know where they are all the time lol.
Great way to rescue and reuse an old piece.
Thanks Carol!
It really turned out great Niki! Decals scare me, I need to get over that because there is so many ways to use them! This is a wonderful addition to your decor, and I love how you personalized it. Thanks for the printables and great tutorial!
Thank you!
You did a great job of transforming this! Isn’t that chalked spray paint great? Pinning! Blessings, Cecilia @My Thrift Store Addiction
This is so cute! I love how you embellished both sides! Great upcycle!!
Your magazine holder looks so good with the new update. Love the designs you made! I’ve got a magazine rack waiting for an upcycle, too. Still waiting for the creative motivation to hit me.