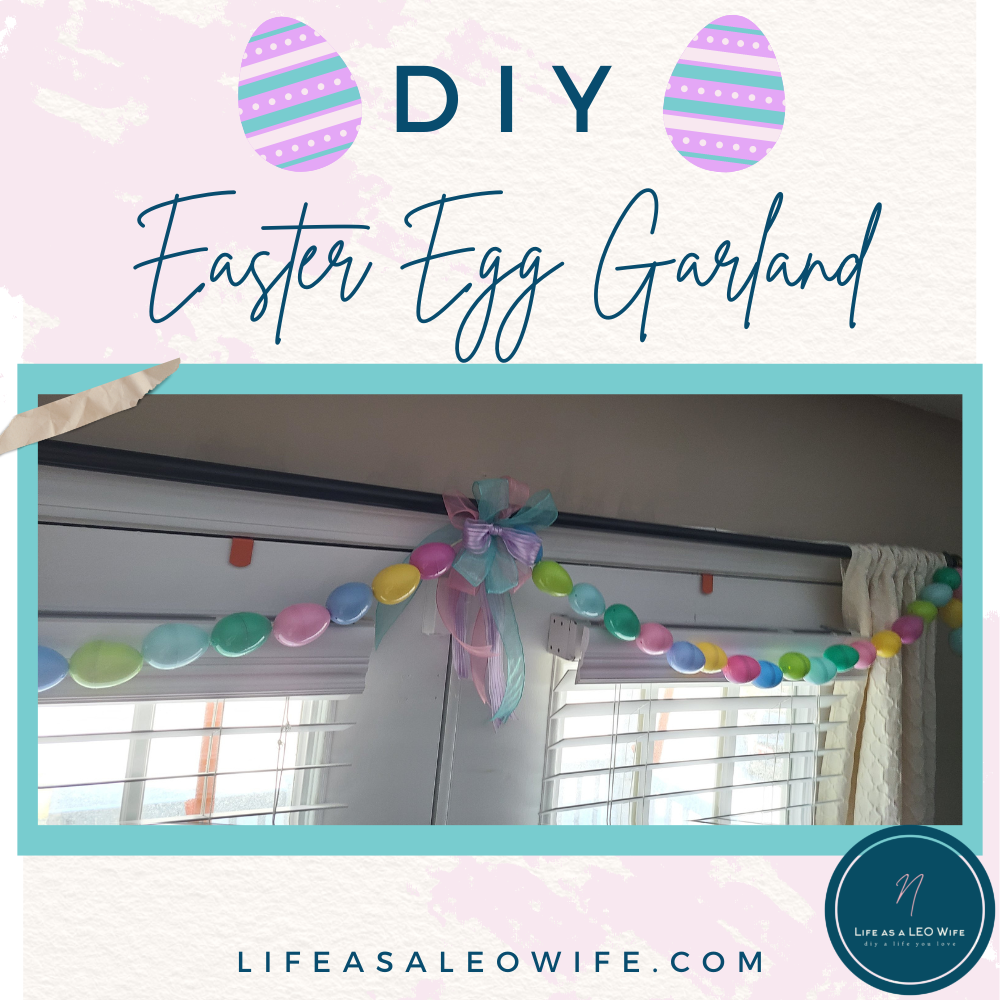
I made an Easter egg garland a few years ago, and I love hanging it up every spring. When I brought all of my spring decor, and hung my garland this string I had used broke and my eggs went everywhere. “Noooo!” I yelled in slow-mo, but too late. The string I used was not made to hold up.
So I decided to make a new one, this time with twine instead of string. This garland isn’t hard to make, it’s just time consuming. Find a binge-worthy show and settle in on the floor to do your work. Let me recommend a documentary for you called Before the Wrath. It’s a Christian documentary on the wedding customs in ancient Galilee which explains all of the speeches that Jesus gave to his disciples on his return in the time of the end. It’s very eye-opening.
To make your Easter egg garland you need:
- 42 plastic Easter eggs in your choice of colors (more or less depending on the length you’d like.)
- twine
- scissors
- 1.5″ wire ribbon- I used 3 colors, pink, teal, and light purple.
- chenille stems
- hot glue gun and glue

String your eggs.
This tutorial doesn’t have too many steps. Begin by unraveling some twine, but don’t cut any off yet. You’ll need to open the eggs to string them on easier. There should be two holes on the bottom half and two on the top half of the eggs. Pass the twine through one of the bottom holes, then up through the egg and pass it through the top half and out.
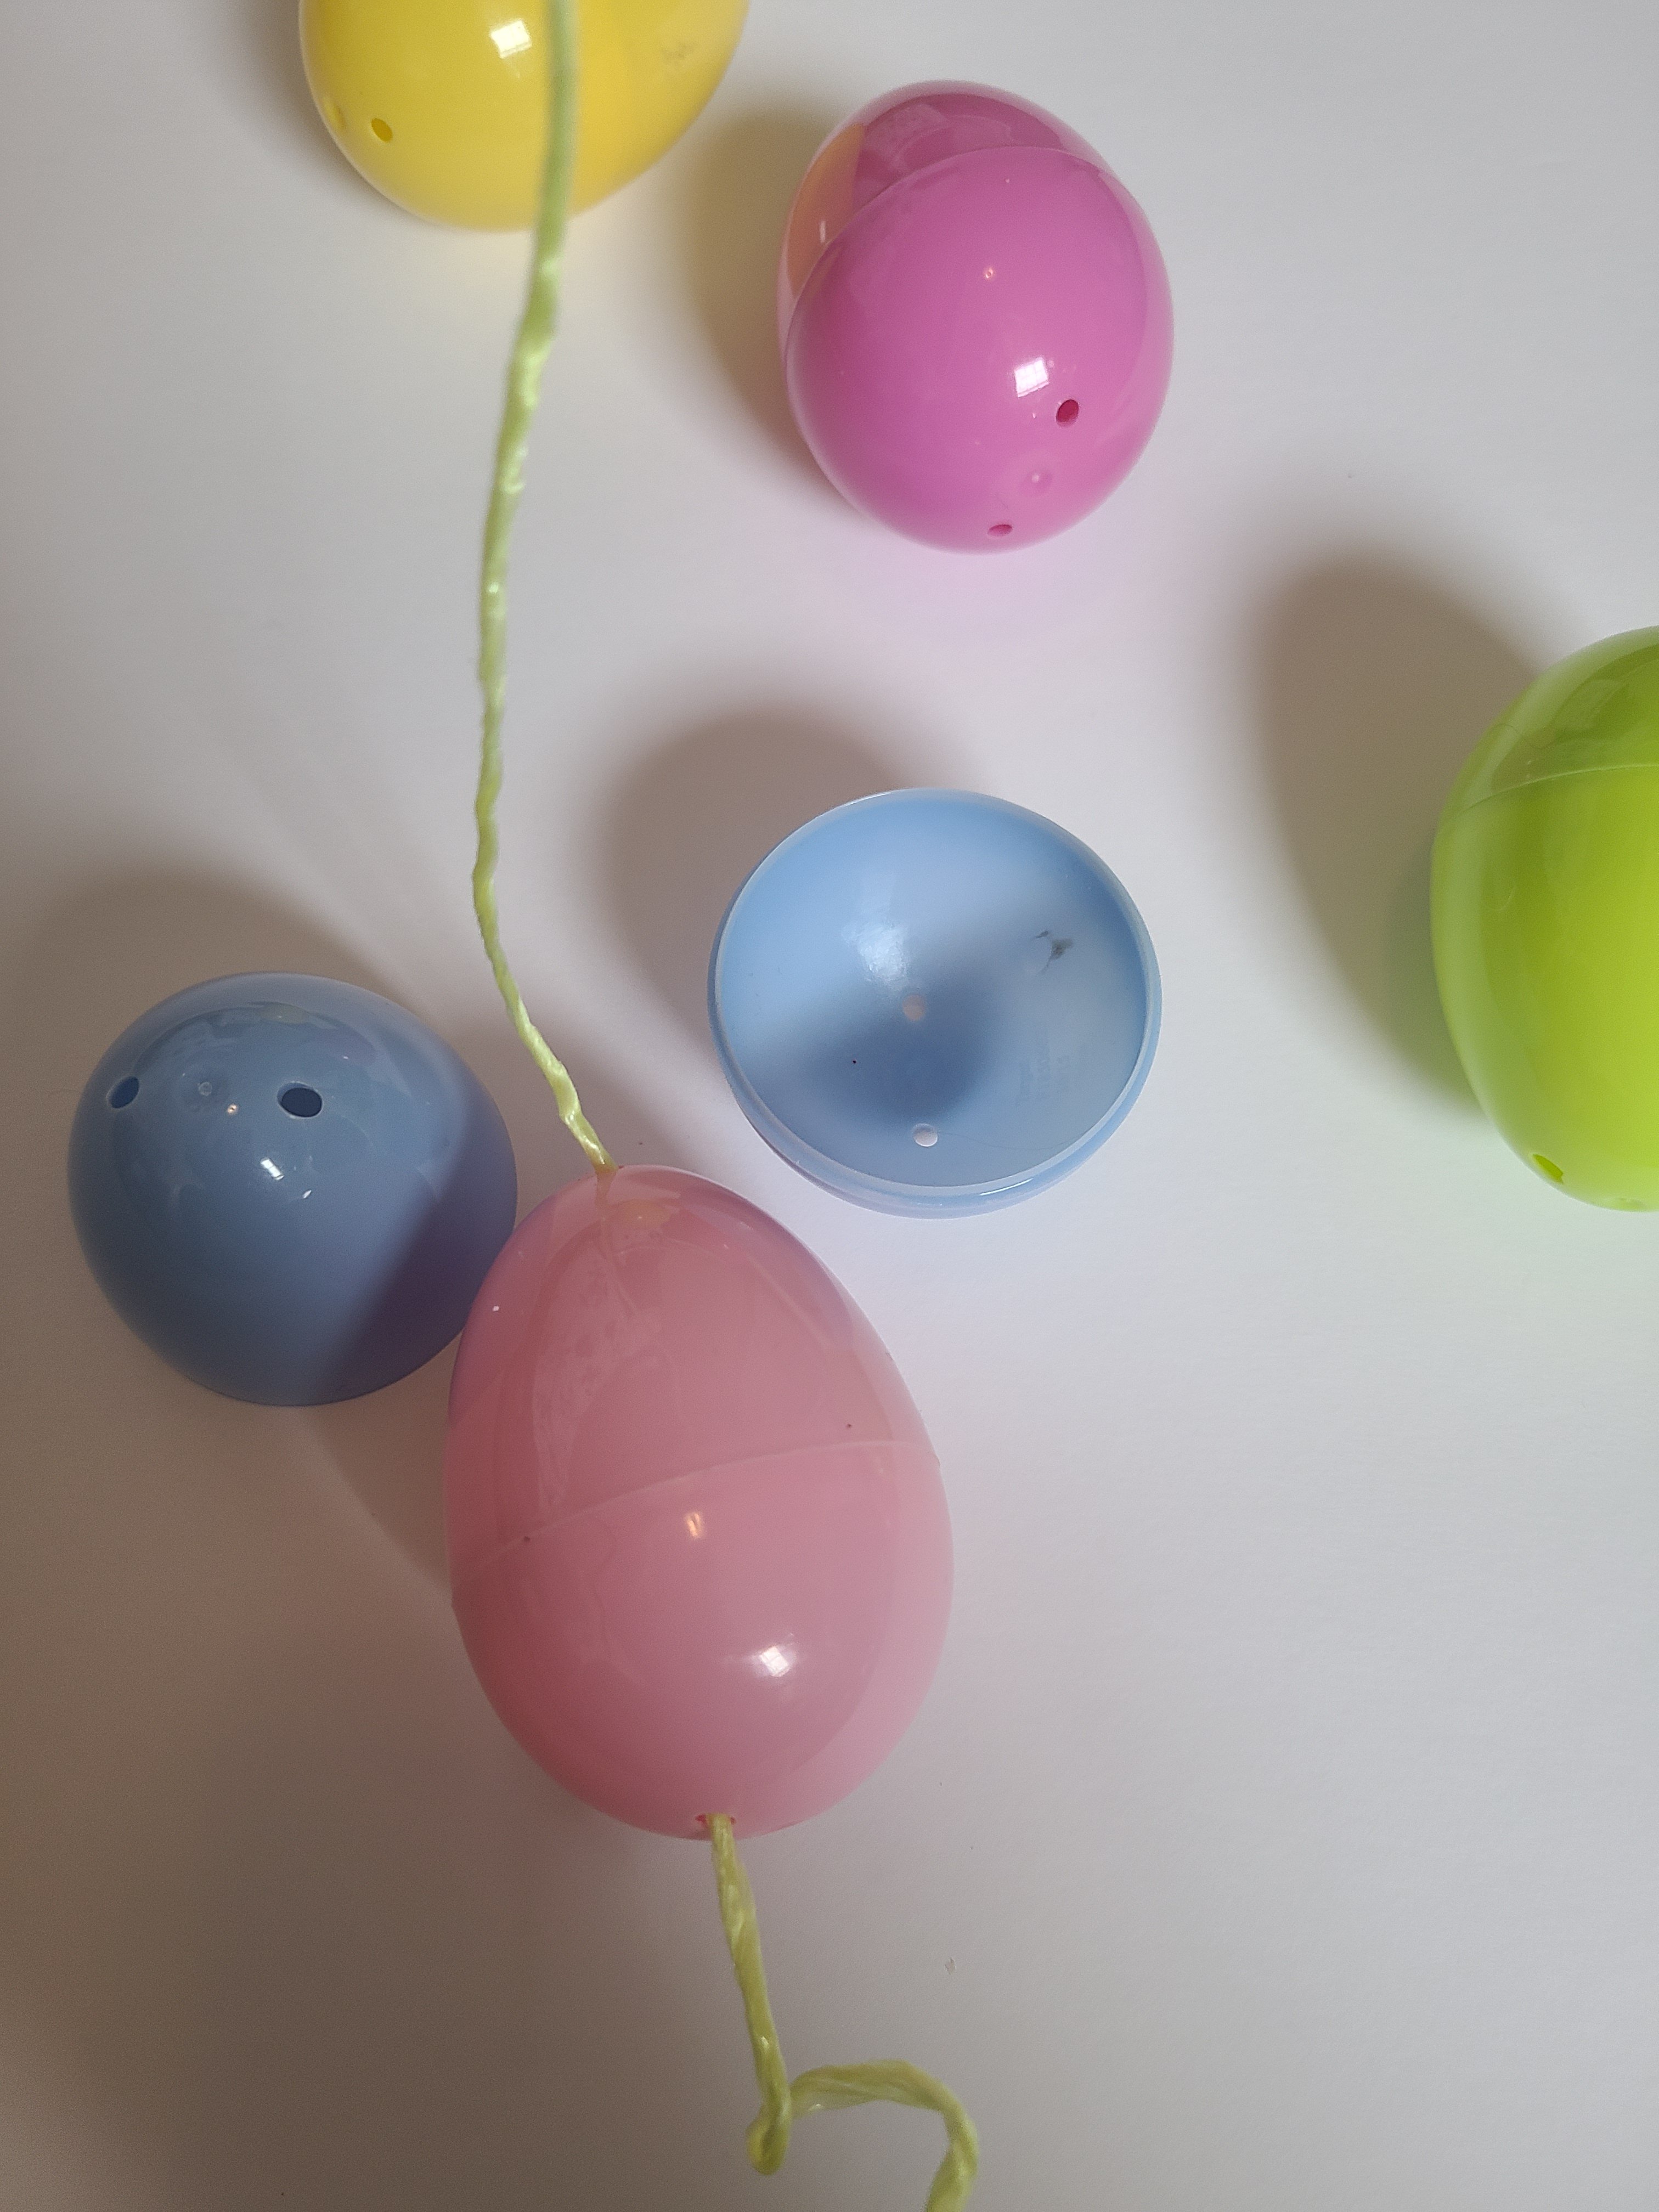
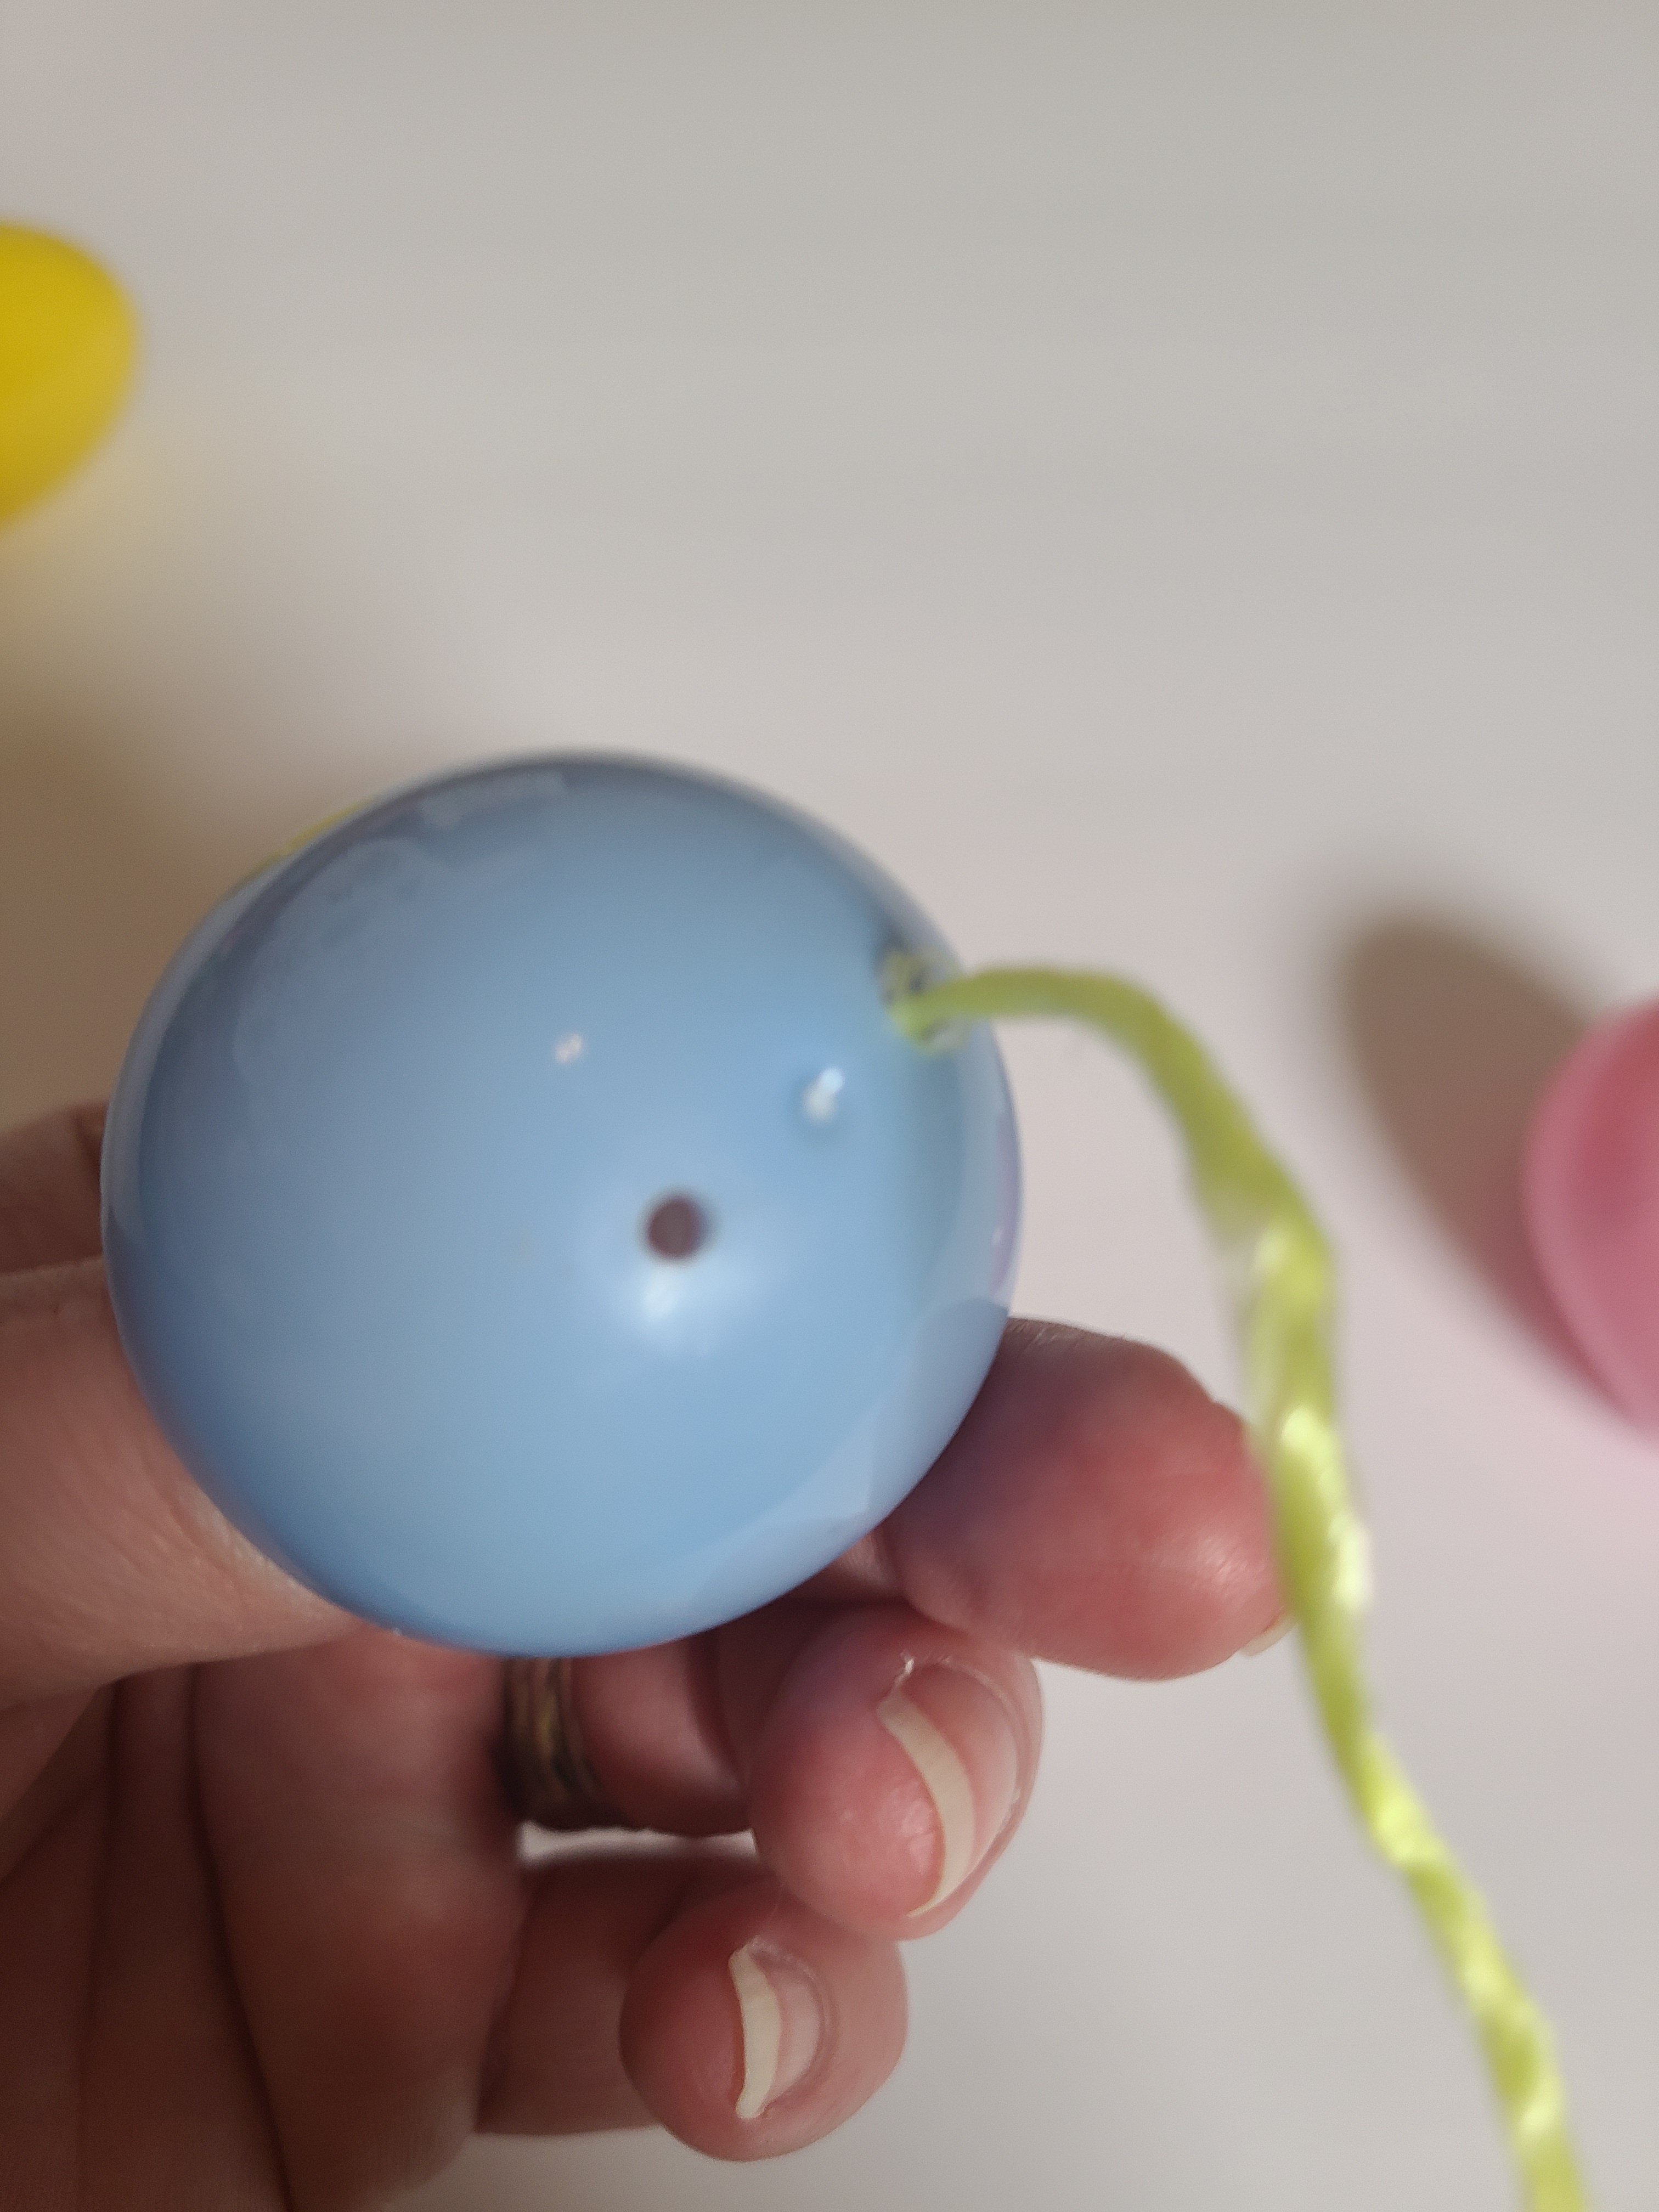

Continue stringing the eggs until you have the length of garland you want. You will want to have an even number of eggs. When I found an egg that was difficult to pass through, I placed the tip of my scissors into one of the holes, and twisted the scissors a few times to widen the hole. I had to do this many times, but it didn’t affect the look of my Easter egg garland.

When you have decided that you like the length of the garland, you will need to tie off both ends of it. First tie off the end that you don’t have to cut off. Once the twine is through the bottom half of your final egg, tie several knots over each other, which we keep the end twine from slipping out of the end egg. To ensure the eggs don’t slip off, put some hot glue over the knot so it sticks to the inside of the plastic egg.
Now you’ll need to tie off the other end. Add about 8-12″ from the end of the fist egg and cut it off. Tie this end off just like you did with the other. I ended up cutting only 4″ off, and that was definitely not enough. Since making this and making other garlands, I’ve learned to leave quite a bit of twine at the end to twist around whatever I’m hanging it from.


Make a bow
Finally you need to make a bow to put onto the garland in the middle. That’s why you need to have an even amount of eggs. I am terrible at very loopy bows, so I will probably be terrible at telling you how to make one, but I’ll try. (Update: I’ve gotten amazing at bow making! Check out my easy loopy bow tutorial for super beginners, my wreath bow tutorial, or a simple 4-loop bow in my spring chunky yarn wreath tutorial.)
I used three 1.5″ ribbons, pink, purple, and teal. Make a bow with two loops on each side out of two ribbons. Once made, layer the bows on top of each other, slightly turning each one. Tie each one together using a pipe cleaner. Now using the last ribbon make a regular bow with it. Attach that one to the top of the other two with the pipe cleaner. Cut off 14″ of each ribbon and use the pipe cleaner to attach the ribbons in the middle using the pipe cleaner.

Now, if you can’t make the bow using my half explanation, you might rather follow another bow tutorial given by someone who is good at making bows! You can try this loopy bow from My Life Full of Hope. Or this one that promises to be a quick, easy bow from Crystal’s Crafties.
Hang your beautiful Easter egg garland.
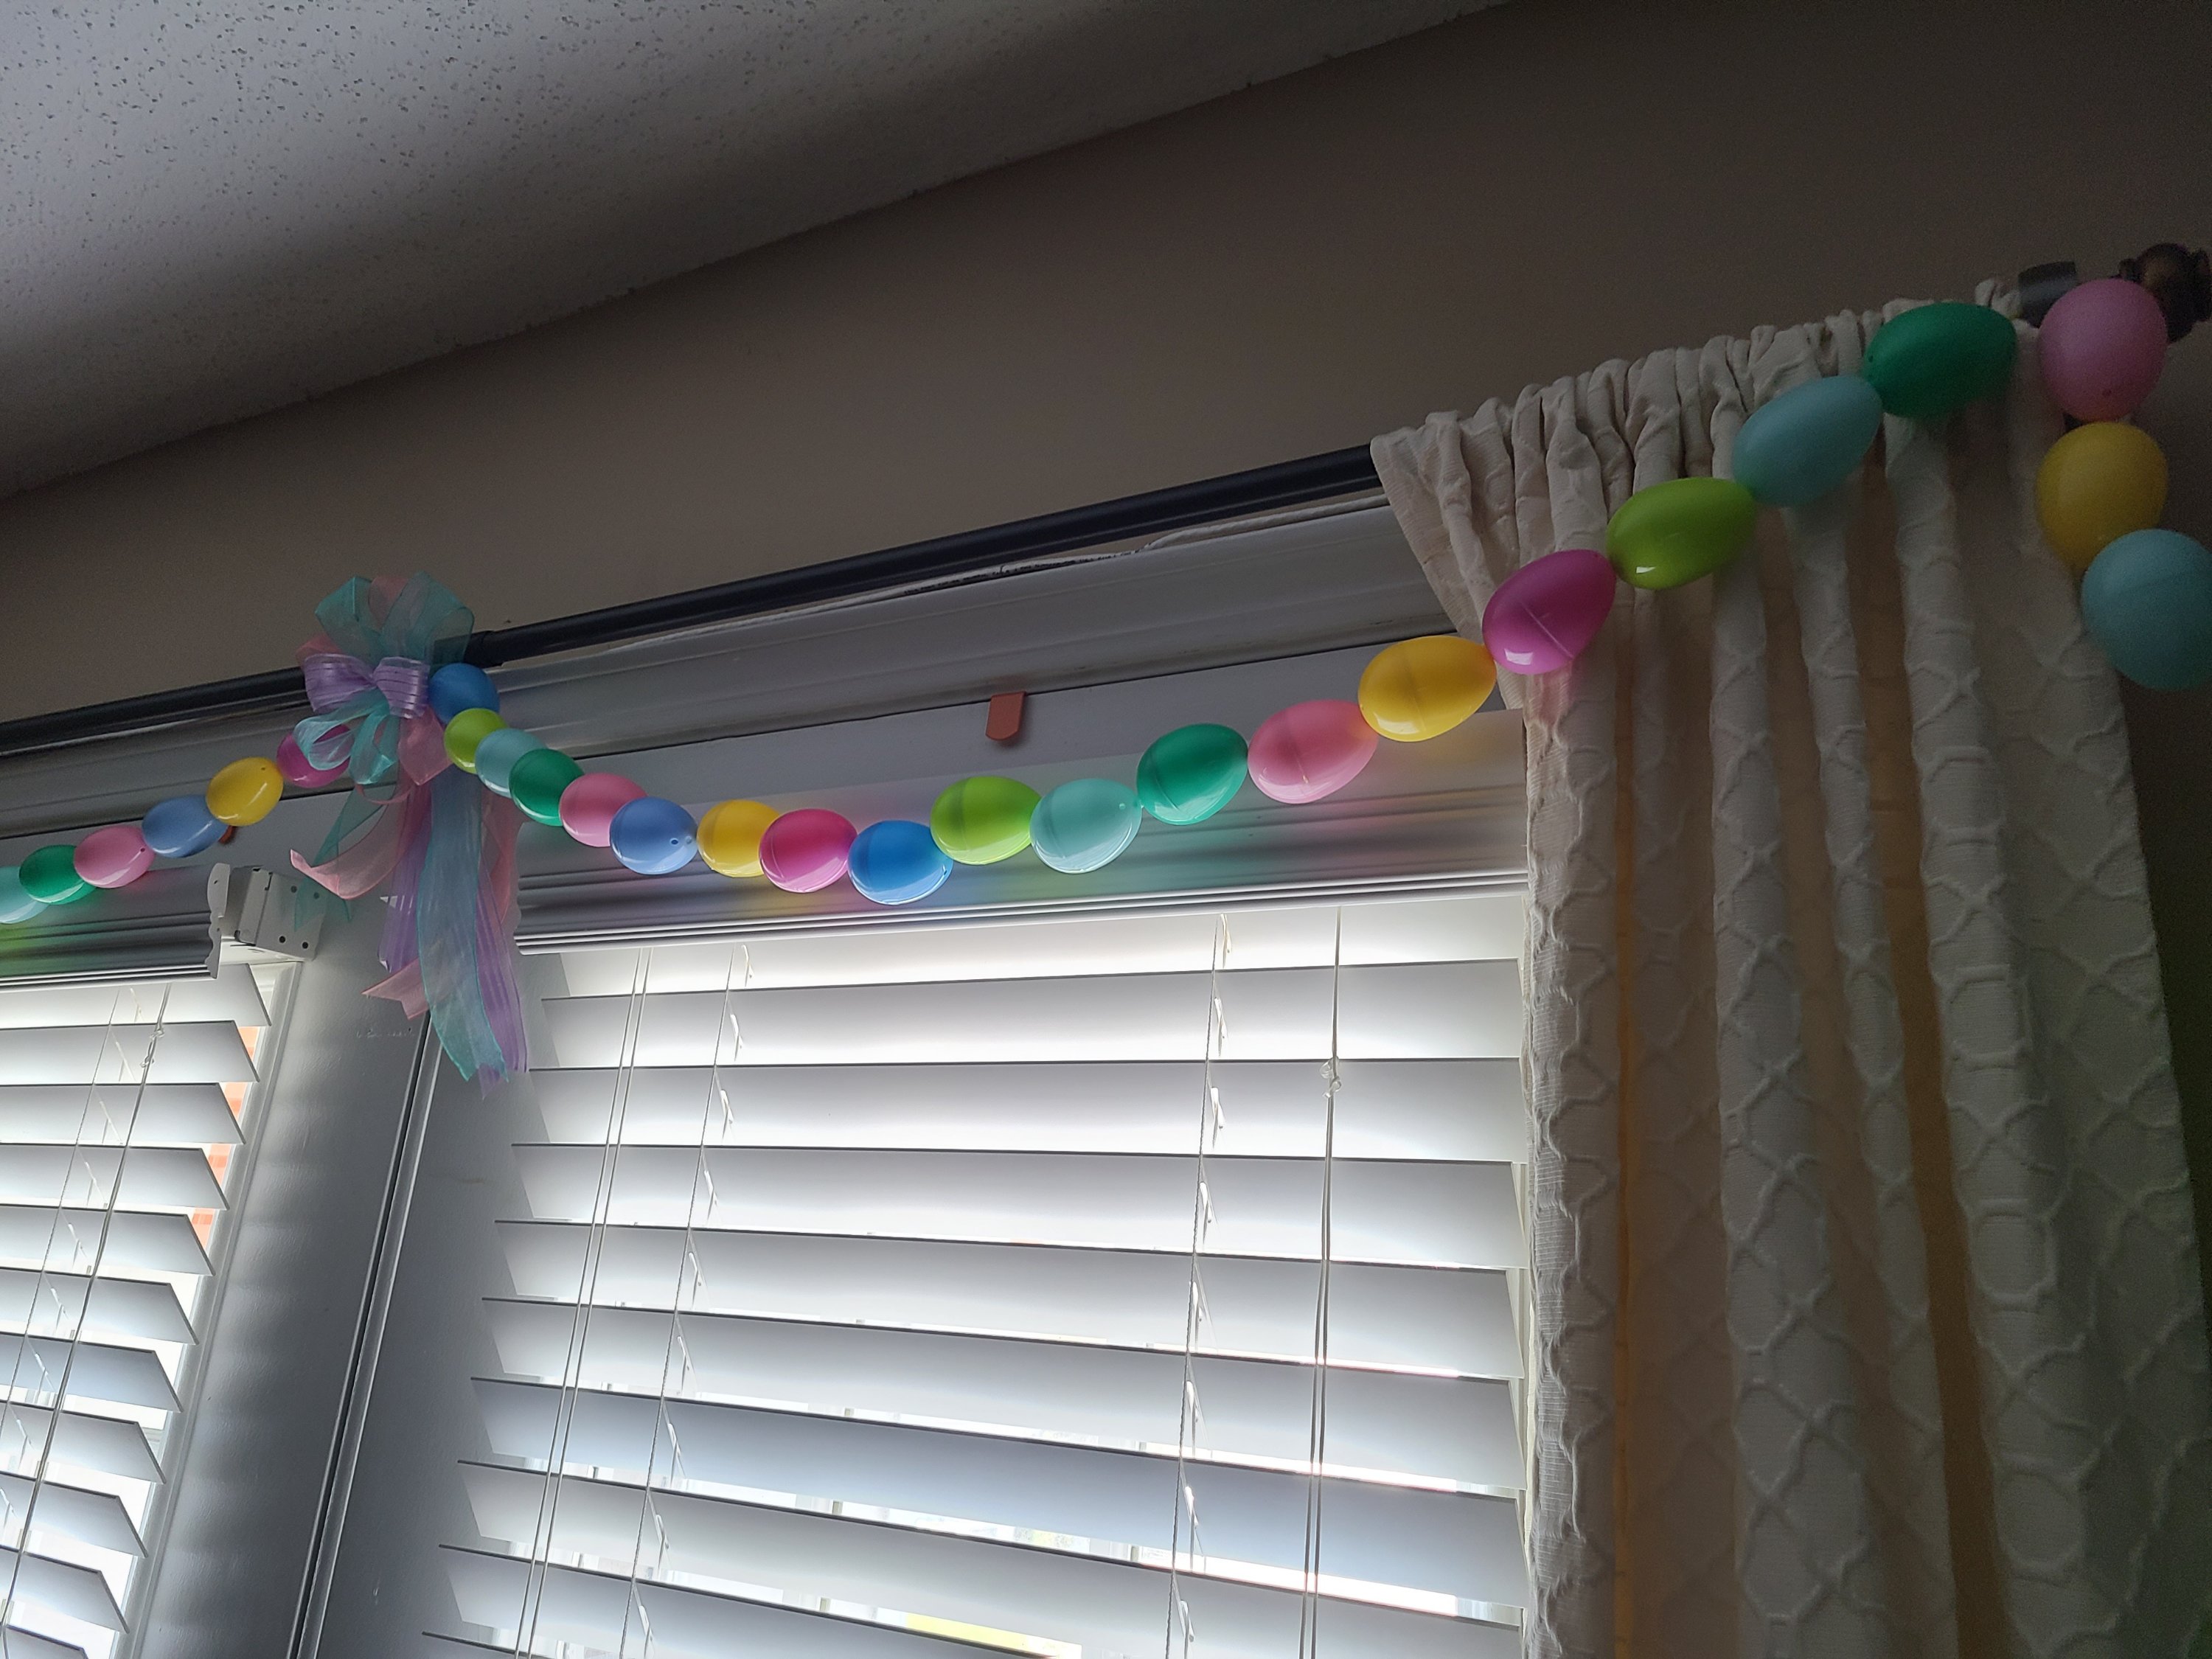
I love my Easter egg garland, and I hung it across our balcony French doors. The way it drapes across the curtain rod makes me happy. I do, however, want to add a few more eggs on each end. I have some now, but they don’t match perfectly, so I’m waiting on the right colors. I haven’t been able to take a perfect picture with the sun coming in or the overhead light shines the wrong way. So to fix that I’ve taken a lot of pictures for you. You’re welcome, wink.


I can’t wait to see all of your Easter egg garlands! Please share with your friends and family who would love to make one too. If you like this DIY, you might like this DIY two-tier tray with Easter decor pieces. Stay around the blog and find something else pretty you want to make.
Remember to pin the image below or share this post with the buttons on the left side of the page so you can find it when you’re ready to start your project! Also, follow me on Pinterest for new ideas added weekly! Be sure that you never miss a great tutorial for decor like wreaths, signs and other home decor, free printables, crafts, and other fun posts! Enter your email address below to be notified of new posts! Use the buttons below to follow me on social media for other great content.

Don’t go yet! There’s more to see!
There’s plenty more to see here on the blog! If you’re looking for something specific, use the search box in the sidebar to look it up. If not, you might enjoy these ideas. Don’t have time to read them all now? That’s ok, just click over to the posts using the pictures and pin them for later. You can also add Life as a LEO Wife to your favorites and check back for new ideas and free printables and SVGs every Wednesday, as well as link parties with tons of shared ideas on Sundays!


Cute garland. What a great idea! I can see how it can be time consuming but oh so worth it. Thank you for joining the challenge at Love To Craft Challenge Blog. Dorlene DT LTCCB
Thank you Dorlene!