
In Target’s Dollar Spot I found a 3-pack of grave headstones. They are chalkboards, too, that you could use for table numbers, Halloween menu items, etc. I saw a headstone at Michael’s with the words “Til Death Do Us Part,” and I thought it would be a great addition to our blush pink & black Halloween master bedroom decor. They were $16.99.
You can make your own for about $4 if you have basic crafting supplies like paint and felt. You’ll need:
- 3-pack chalkboard headstones from Target
- Gold paint, vinyl or stick on letters
- Foam board from Dollar Tree
- Felt in black & pink
- Pink paint & paint brush
- Scissors & wedding tools for the vinyl
- Hot glue and glue gun

Use masking or painters tape to line the front of the headstone to keep paint off the front. Paint the outer sides (the trim) of the headstone pink.


While that dries, cut your gold vinyl with your die cutting machine to say “Til Death Do Us Part.” I have the monthly subscription “Cricut Access” and I used the font Fraktur which looks very Halloween-y. It comes with the subscription, but if you don’t have it, you can download some great fonts on Dafont.com. I also cut a skull about an inch high (mine is 1.45″) & some embellishments to add to the bottom of the stone. My entire cutting project was 6.42″ tall. If you don’t have machine, you can buy letter stencils that you can use over & over. That’s what I did for years. Another option is to create a word document in your preferred program. *See the bottom of the post for further directions. Weed your vinyl & use transfer paper or contact paper to transfer your words to the headstone. I’ve used the same roll of contract paper for about 5 years. Measure your headstone first & make small marks to line up your words & make them centered then transfer it to the stone using a scraping tool or a credit card.
Now you can dry brush the pink paint randomly across the front. Make sure the paint on the edges is dry, then remove the masking tape. Dip your brush in the paint then brush most of the paint off by brushing it on a scrap piece of paper. Once there is only a little left on the brush, start brushing across the headstone. Keep doing that until you like what you have.
The next part is optional, but it helps keep the headstone standing and it looks cute. Use your foam board and a ruler to draw out a rectangle 4.5″x2.75″. Cut it out using an Exacto knife or a box cutter. Measure & cut two more, one 4.16″x2.75″ and the other 3.75″x3.25″. Glue them together, the largest on bottom, smallest on top. Make them as even as you can, with about the same amount of space on every side.


Once it’s together, you need to paint them. You can use any color you want, to match your Halloween decor. It should only take one coat.

As that is drying, you can make the felt rosettes. I used baby pink and black felt, but again, you can use any color you like. If you are using brighter fall colors like orange, white, and a light teal, you can make this pumpkin wreath, this doormat, and this fall picture frame (from a Dollar Tree upcyle) to match. I made three flowers total, two pink and one black. Cut your felt in a type of square with rounded edges, I like to call it a “squoval.” It should be about 2″x2″ for each flower. Start cutting a spiral on the edge, then end in a tiny circle in the center. Roll the rosette up from the outside to the inside circle and glue the circle on the bottom to keep the flower together. Repeat that for as many flowers as you would like. Place them wherever you like them best and hot glue them on. I have 2 at the base of the headstone and another at the top as a type of hat/bow for the skull.


This is your final step! Hot glue the headstone onto the foam board base you created. Glue it in the center of the top piece of foam board so that there is an even amount of space all around the edges. Hold it down for about 30 seconds while it dries to make sure it stays on firmly.

Now you can set out your beautiful Halloween piece! I know that will be a tough decision. Mine is on a blush pink tray next to our bed. It goes great with our blush and black decor for Halloween.


We would love to see your creation. Leave a picture or thoughts in the comments section. Please like and share with everyone. Follow us on Facebook, Pinterest, Instagram, and Twitter!
*To create your desin without a die cutting machine, you can use your computer’s word program. Open a new document and type out the wording you’d like to use. Add a skull and any embellishments you want to use using clip art. If you want a more Halloween-looking font than you have on your system, you can find and download one from dafont.com. Arrange the wording and the clip art exactly like you want them and make sure it’s the same size that you want to use on the headstone. You can leave it on the regular size paper, or cut it out, but don’t cut it too close. Rub the back side with a pencil (remember doing word rubbings in elementary school?). Place the document on the headstone with the charcoal side facing down. Trace the outline of the words and pictures several times, pressing down hard, and it will leave the outline on the stone. Then you can paint within the lines that are left from the pencil charcoal rubbing. You can do this with all kind of decor.

Happiness is Homemade #528
Join us for Happiness is Homemade Link Party where you can share & be inspired by blog posts from bloggers around the world. You’ll find recipes, DIYs, crafts, home decor, fashion, gardening, & so much more!
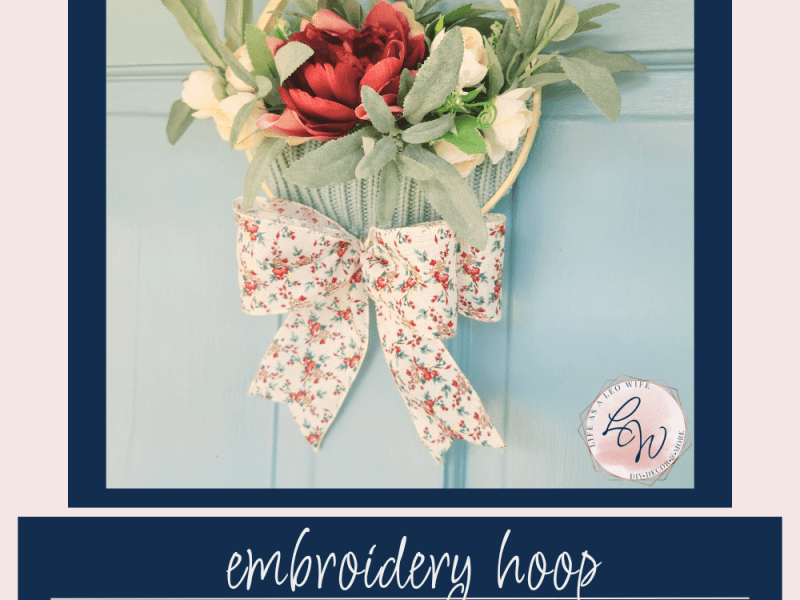
Embroidery Hoop Pocket Wreath Tutorial
Hello friends! I’m so glad to be back blogging and creating this week after surgery last week. Boy, am I glad that’s over because I’ve missed y’all (and being able to eat, ha!). With spring in full swing and Easter past, I felt like it’s time to create a new wreath. I have lots of…

Happiness is Homemade #527
Join us for Happiness is Homemade Link Party where you can share & be inspired by blog posts from bloggers around the world. You’ll find recipes, DIYs, crafts, home decor, fashion, gardening, & so much more!

5 thoughts on “DIY Cheap and Easy Halloween Decor Headstone from Dollar Store Items”