It’s now officially September, the month that marks the beginning of fall. It’ll be quite a while before we get any relief from the over 90° temps down here on the Gulf Coast. Still just having a little fall decor inside gives me that “fall” feeling. I picked up some things from Dollar Tree last week, and a farmhouse welcome sign was one of them. Their decor pieces leave a lot to be desired, so I rarely put them out as-is. Let me show you how you can upcycle a Dollar Tree fall sign in about 15 or 20 minutes.

Disclosure: I am a participant in the Amazon Services LLC Associates Program and the Dollar Tree Affiliate Program, affiliate programs that allow me to link to the products that you can use to make this project quickly and easily. If you purchase any of these products I may receive a very small commission at no cost to you! That commission helps me continue to bring these great decor DIYs, free printables, and all of the other goodies on this site to you. Thanks so much for your support!
Dollar Tree Fall Sign Upcycle Supplies:
- Dollar Tree welcome sign
- acrylic paint to match your decor
- paint brushes
- half wood beads
- wired ribbon- I used 2.5″ wired ribbon because it matched my fall decor.
- hot glue gun & glue
- scissors
- floral wire or pipe cleaner for securing the bow

Prep the Dollar Tree Sign
Remove the thin rope that the sign hangs from, unless you’d like to hang it. Mine is sitting on my stove, so I didn’t need a hanger. Carefully remove the buffalo check bow. It will still probably leave a little mark, but that’s ok. We’re going to cover it up.


Paint the Farmhouse Truck
I started painting my truck but ended up continuing to get paint on the metal piece at the bottom. Keep that from happening by removing it carefully. Mine was very easy to remove. Usually all of the 3-D pieces on Dollar Tree signs are easy to take off.
Paint the body of the truck in your main color. I used mustard yellow because my early fall color scheme this year is mustard yellow, plum (with a hint of pink), and mint green. I attempted to just paint the red part, but that went out the door with a quickness. Just paint the whole thing along with the center of the tires. It took me about eight or nine coats to cover it all!
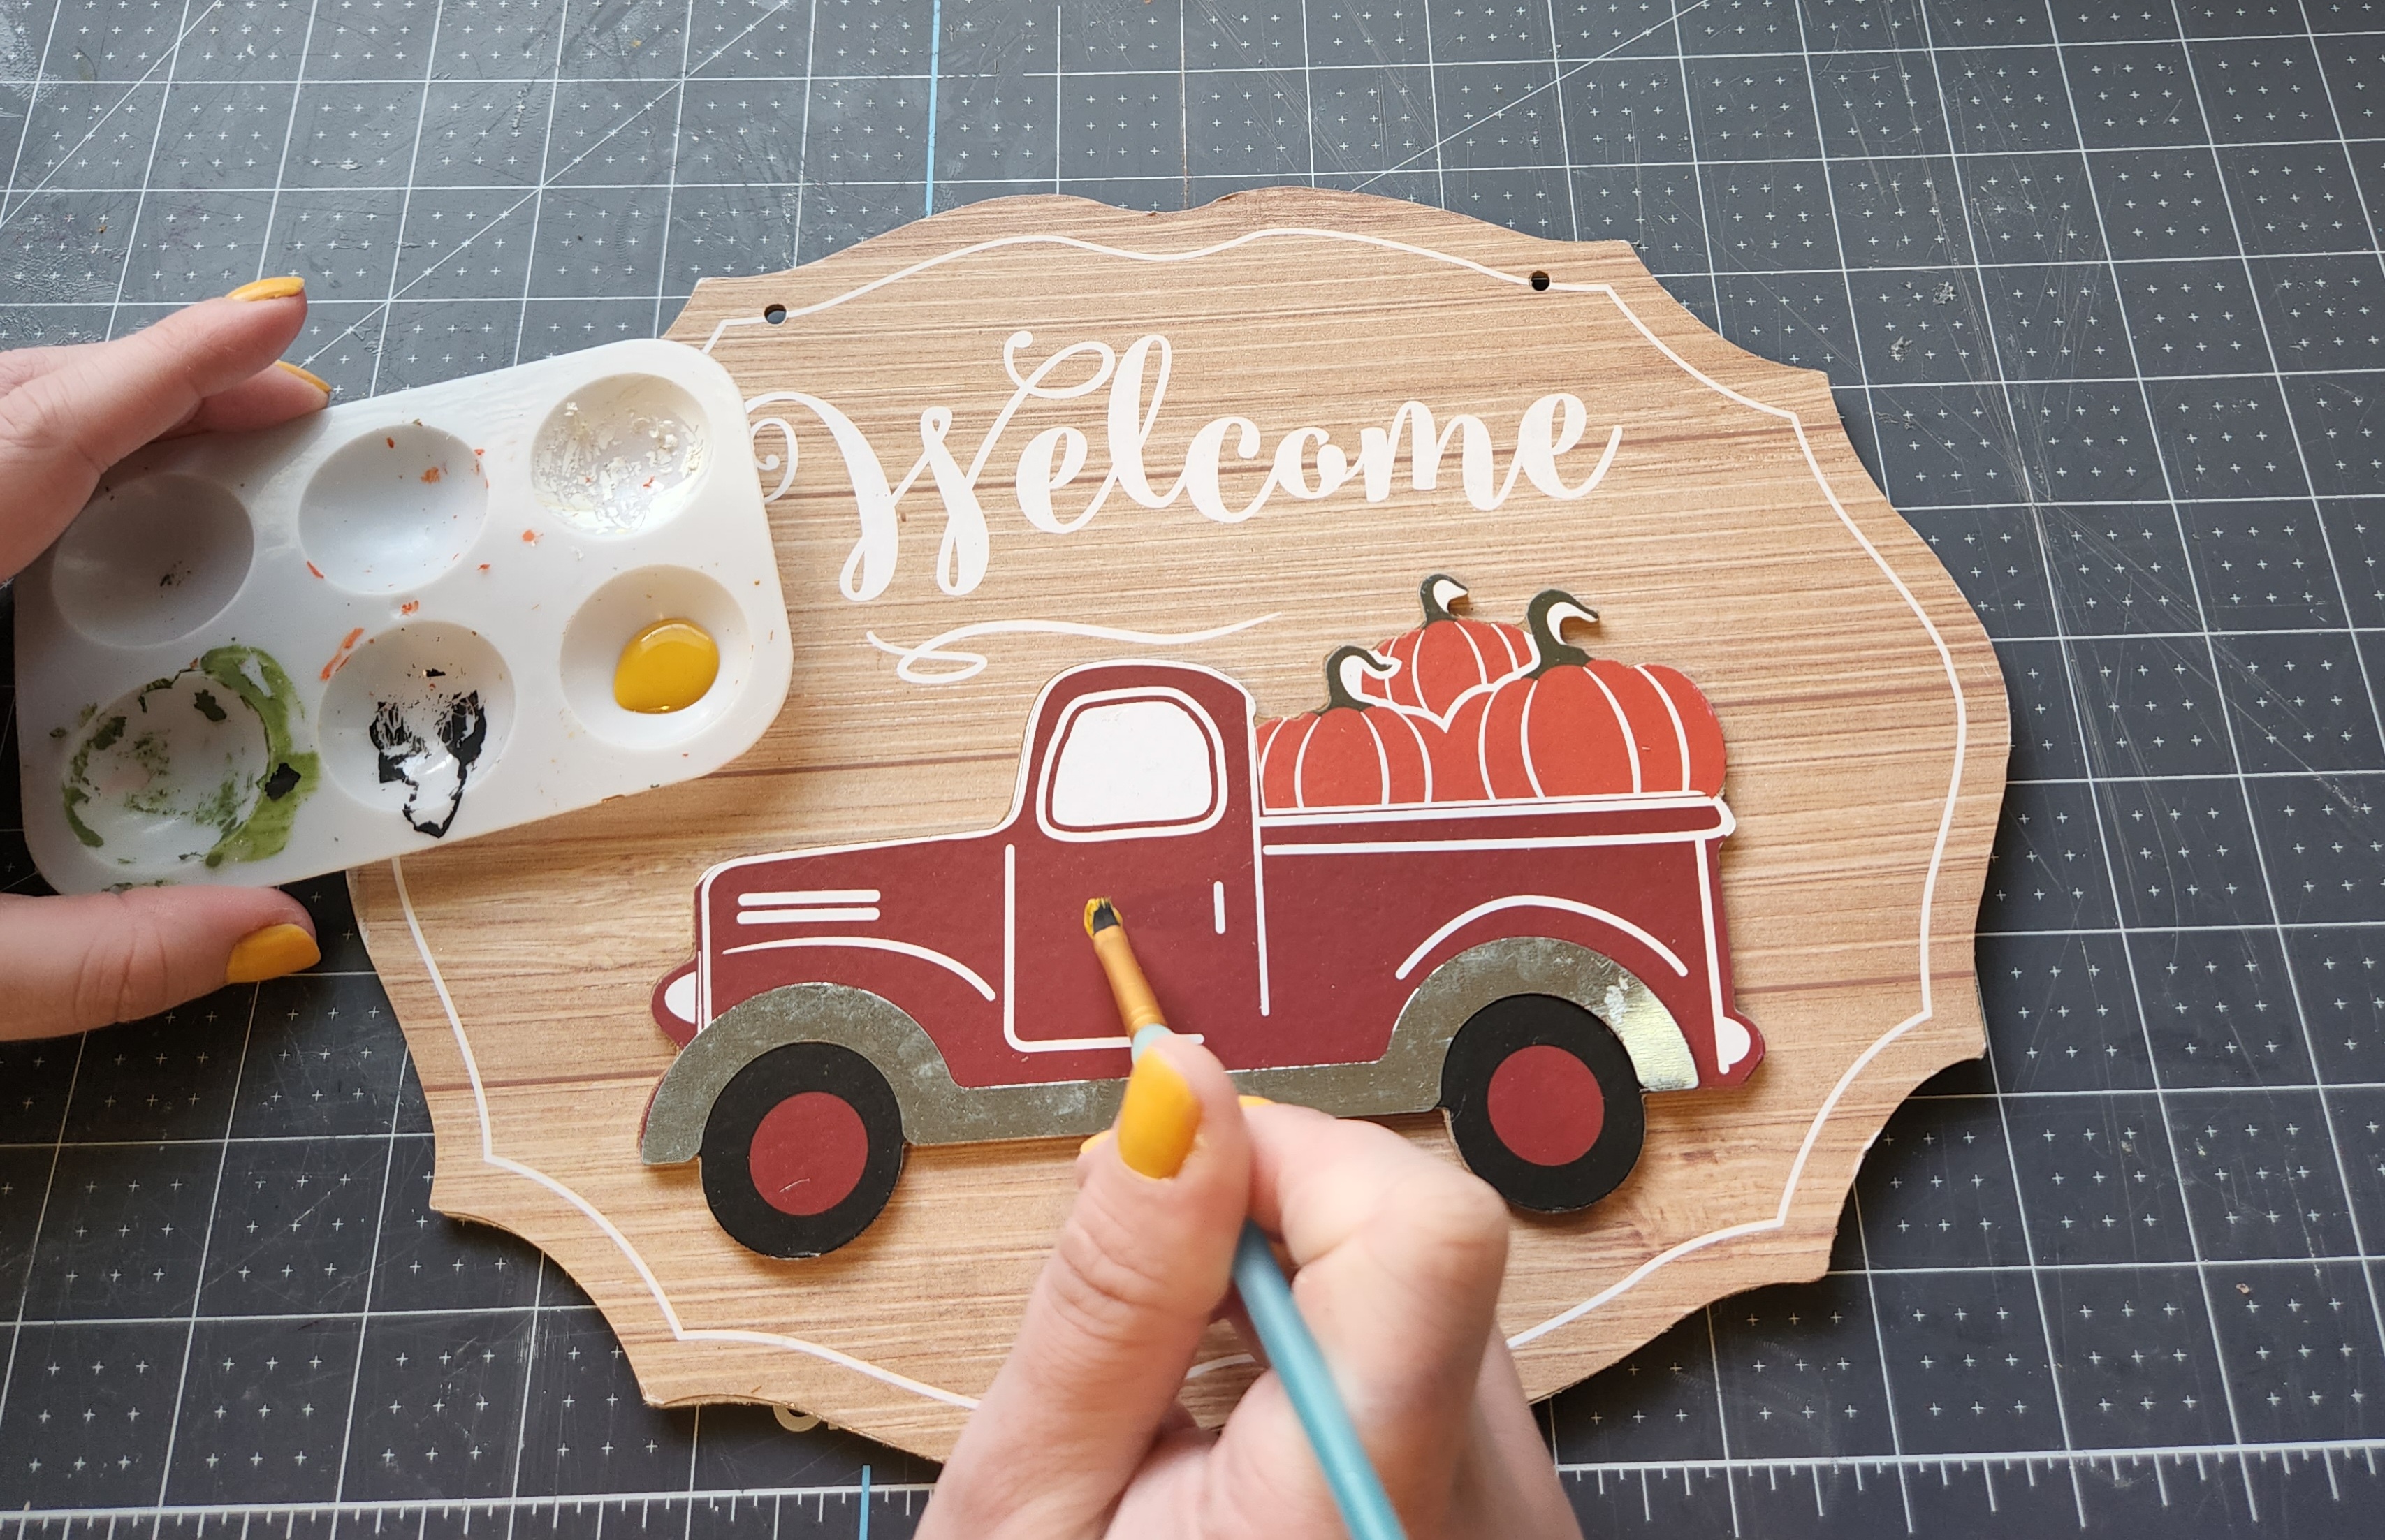
Now use white paint to add the window and windshield back. I’m not an artist, so I went for a little whimsy. Also paint the headlight and taillight. I did add white stripes for the door handle, door, and some lines on the hood for dimension.

I also painted over my pumpkins a bit so that the entire truck would look painted and not half painted, half printed.

To “distress” the sign a bit, and to add a little of my mint-ish color, I brushed some mint paint on the edges of the Dollar Tree sign.
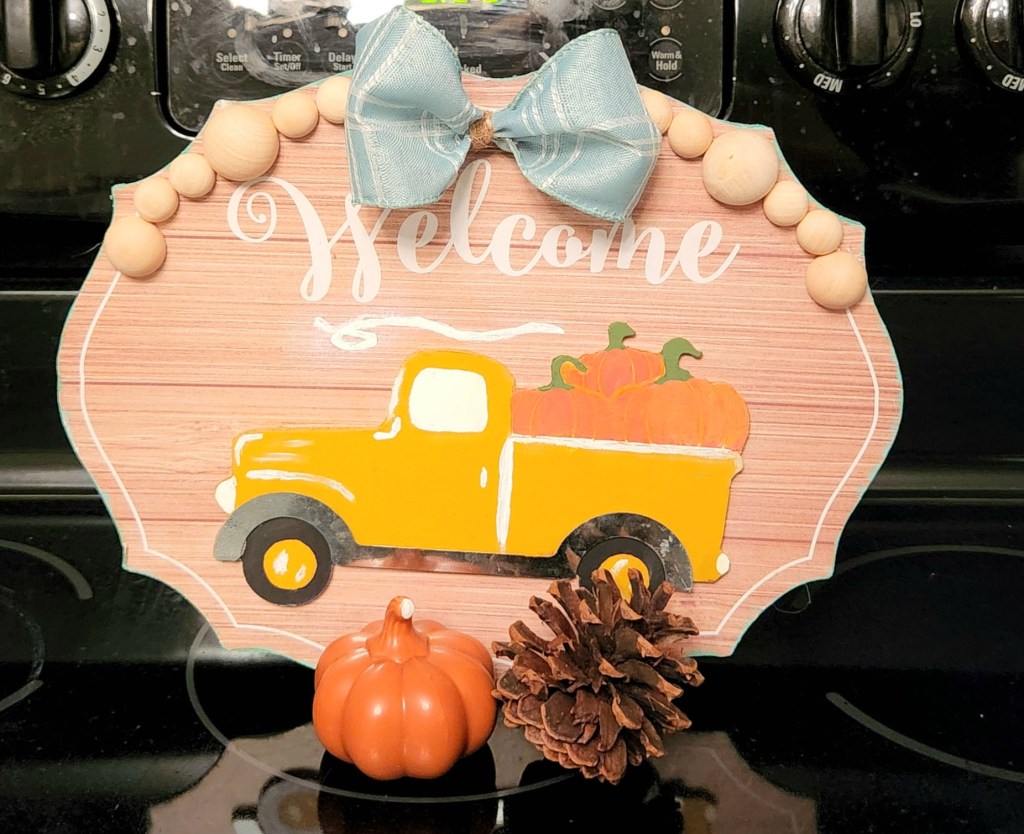
Add Wood Beads to the Fall Sign
I thought I’d be slick and add two bows to cover the holes in my Dollar Tree fall sign where the rope was. Oh, heavens no. With a thick ribbon like I had, it was not good! You can’t quite see the other bow and how truly bad it was in this picture, but you get it. I didn’t take another one due to the shame.

Well, when I pulled off the bows, of course the paper covering the Dollar Tree sign came up with them. Yay. Not to worry, by happy accident, the fix looks great.
Add hot glue to the back of your first wood bead. I used two different sized beads, the largest went over the holes/ripped paper.


Next, I added beads until I was happy with the look. Leave a space in the middle that will accommodate the size of your bow. I did add one more bead to each side of the fall sign upcycle after I glued my bow on.


Add a Bow
I had already made two bows due to my incredibly unfortunate earlier taste mistake, so I used one in the middle of my Dollar Tree sign. I would’ve liked to make it just a little bit bigger, but I didn’t want to waste more ribbon. I’m not sure if Michael’s has the same ribbon this year, so I don’t want to run out prematurely!
Make a bow, either a two loop or a small four loop one. Secure it with a piece of wire or pipe cleaner, then use the rope that you removed from the fall sign to cover it.
Glue it to the top center of the sign.

That’s it! How easy was this fall Dollar Tree sign upcycle?!
The entire project, start to finish, took me about 20 minutes of active time. I did have to wait for the paint to dry. Well, actually I dried the paint with a blow dryer because I was impatient. All in all, dry time included, it was about 45 minutes. How cute is this little sign?!
Here’s a video of the area that I have the sign in at the moment. The fall styled tray is a $59 Pottery Barn dupe that I made Thursday, and the basket full of “donut” pumpkins on the right were made with old socks! Both projects were so easy to make, so head over and pin them so you can make your own this fall!
Remember to pin the image below or share this post with the buttons on the left side of the page so you can find it when you’re ready to start your project! Also, follow me on Pinterest for new ideas added weekly! Be sure that you never miss a great tutorial for decor like wreaths, signs and other home decor, free printables, crafts, and other fun posts! Enter your email address below to be notified of new posts! Use the buttons below to follow me on social media for other great content.


Niki,
I love what you did to make this cute sign yours!! You know I do this a lot with Dollar tree signs so I really enjoyed seeing what you did in this post!! Thanks too for always stopping by and for taking the time to do so!!
Hugs,
Deb
Thanks Debbie!