Today I will give you for tutorials for you to make your own DIY Christmas decorations for your home.
I’ve already posted how my Christmas bathroom decor came out, and some have asked how they can recreate the DIYs in it. I’ve posted a how to on the snowflake and bow garland, so here I’ll show you how to make four decorations you saw in my reveal, for your home; snowflake ribbon covers for extra toilet paper a ball ornament vase, “presents” to go under a tiny tree, and a yarn wreath.
Christmas Toilet Paper Wrap Decorations
First up, for the toilet paper snowflake wraps you need:
- full rolls of toilet paper- as many as you want to decorate
- 2.5″ wired ribbon- Mine is silver to match the theme of the room.
- clear plastic snowflakes- Dollar Tree. These are the same ones I used on the garland.
- hot glue gun and glue
Take your ribbon and wrap it around the toilet paper. Cut the ribbon about 1.5″ longer than you need. Wrap the ribbon around the middle of the toilet paper and put a strip of hot glue along the end. Wrap the other end around and press it down on the glue.
Turn the toilet paper around so that the glued part is at the back. Put a dot of glue on the center of the plastic snowflake and put it in the middle of the ribbon on the front side.
Now you’re all done! This is a very easy project and takes no more than three to five minutes. It’s a simple way to bring DIY Christmas decorations into your bathroom.

DIY Christmas Ornament Vase
To make this second of four of my DIY Christmas decorations, you need (all of these items can be bought at Dollar Tree; only the silver ribbon was purchased at Michael’s, but I have seen silver ones at Dollar Tree this season):
- tall skinny vase
- two different color ornament balls- I used small blue and glitter silver.
- 2.5″ ribbon- I used the same silver ribbon for the toilet paper decoration.
- silver glittery reindeer
- scissors
- hot glue gun and glue

This project is almost identical to the toilet paper ribbon. For this, wrap the ribbon around the vase, overlapping just a little. My ribbon was cut to 10″, but this may vary depending on the size of your vase. Since it can be seen all the way around, I hid the “seam” of the ribbon under the bow and reindeer.

Make sure you don’t get glue all over the vase. I completed my ribbon and bow before I put it on the vase. That makes the vase versatile. I slip the ribbon off to put others on all through the year.
Make Your Bow
While the glue is drying, you’ll make the bow. Use the blue ribbon, and make a simple loop bow like you would do when putting a ribbon in your hair. Pinch the ribbon about an inch from the beginning and create a loop of about 2.” bring it back to the pinched ribbon where you started, then make a loop the same size as the first and pinch it off in the middle, leaving about an inch so that the bow doesn’t come apart when you tie it off.
Wrap a pipe cleaner or other ribbon around the middle. Now you can either cover the pipe cleaner by wrapping a 5/8″ ribbon around it to cover like in this post or fold your blue ribbon into a 1/4″ piece and wrap it around the bow. I did the latter in this bow. You can use this bow on so many of your DIY Christmas decorations.


Piecing the completed parts together
Glue your reindeer in the middle of your complete bow, then glue the bow over the seam of the silver ribbon. If you finished your ribbon and bow off of the vase like I did, slide the ribbon down the vase to the middle. It will fit right on easily because you measured it to fit exactly. If you messed up, you can carefully pull the seam apart to re-glue in the correct place.

Now put your ornaments in to the vase. You can use all ornaments of the same color, or a pattern of colors in the vase. I was low on silver ornaments, so I put three blue at the bottom and then one silver glitter ball at the top.


Now you are all done! You have competed two cute and budget friendly pieces to add to your Christmas decor.
Miniature Presents to Put Under a Dollar Store Christmas Tree
You need:
- blue cardstock paper (or color of you choice)
- tape
- scissors
- 1/8″ ribbon
- 1.5″ ribbon
I used small votive candles in tiny square jars, but you can use anything small and square. You can even make your own with foam board from Dollar Tree. Place the square on the paper and determine how much paper you’ll need.
Wrap your boxes
Cut the paper to size, then take two sides of your paper to the bottom of the box and glue the two sides together. Next press down one of the untaped sides which will make half a V. Do the same to the other side, then push the first taped side in toward the box, then bring the other V down. Tape all of the Vs together in the middle of that side of the bow. Repeat this process with the other untaped sides. Then repeat the entire process with all of the boxes you want wrapped.
Make the bows
When the boxes are all wrapped, you will need to make you bows. Use you 1.5″ ribbon to wrap around the box and cut it at the appropriate spot. Tape the ribbon together on to the box. Now with the 1/8″ ribbon tie a bow like you would tie your shoe. Glue it on top of the 1.5″ ribbon and box. Repeat this with all of the boxes.
Now you have adorable presents to place under your tree!

Christmas Yarn Wreath
Assemble these items for your wreath (all from Dollar Tree except for the yarn):
- 8″ styrofoam wreath form
- white yarn or a color of your choice (Walmart, Hobby Lobby, Michael’s, etc.)
- 1.5″ blue wire ribbon
- silver faux poinsettias
- silver glitter reindeer like you used for your ornament vase
Wrap the form
Glue the end of the of the yarn on the back of the wreath. Wrap the yarn around the form until you reach the place you started, cut the yarn off, and glue it to the back of the form. For a more in depth tutorial for a yarn wreath, see this post.
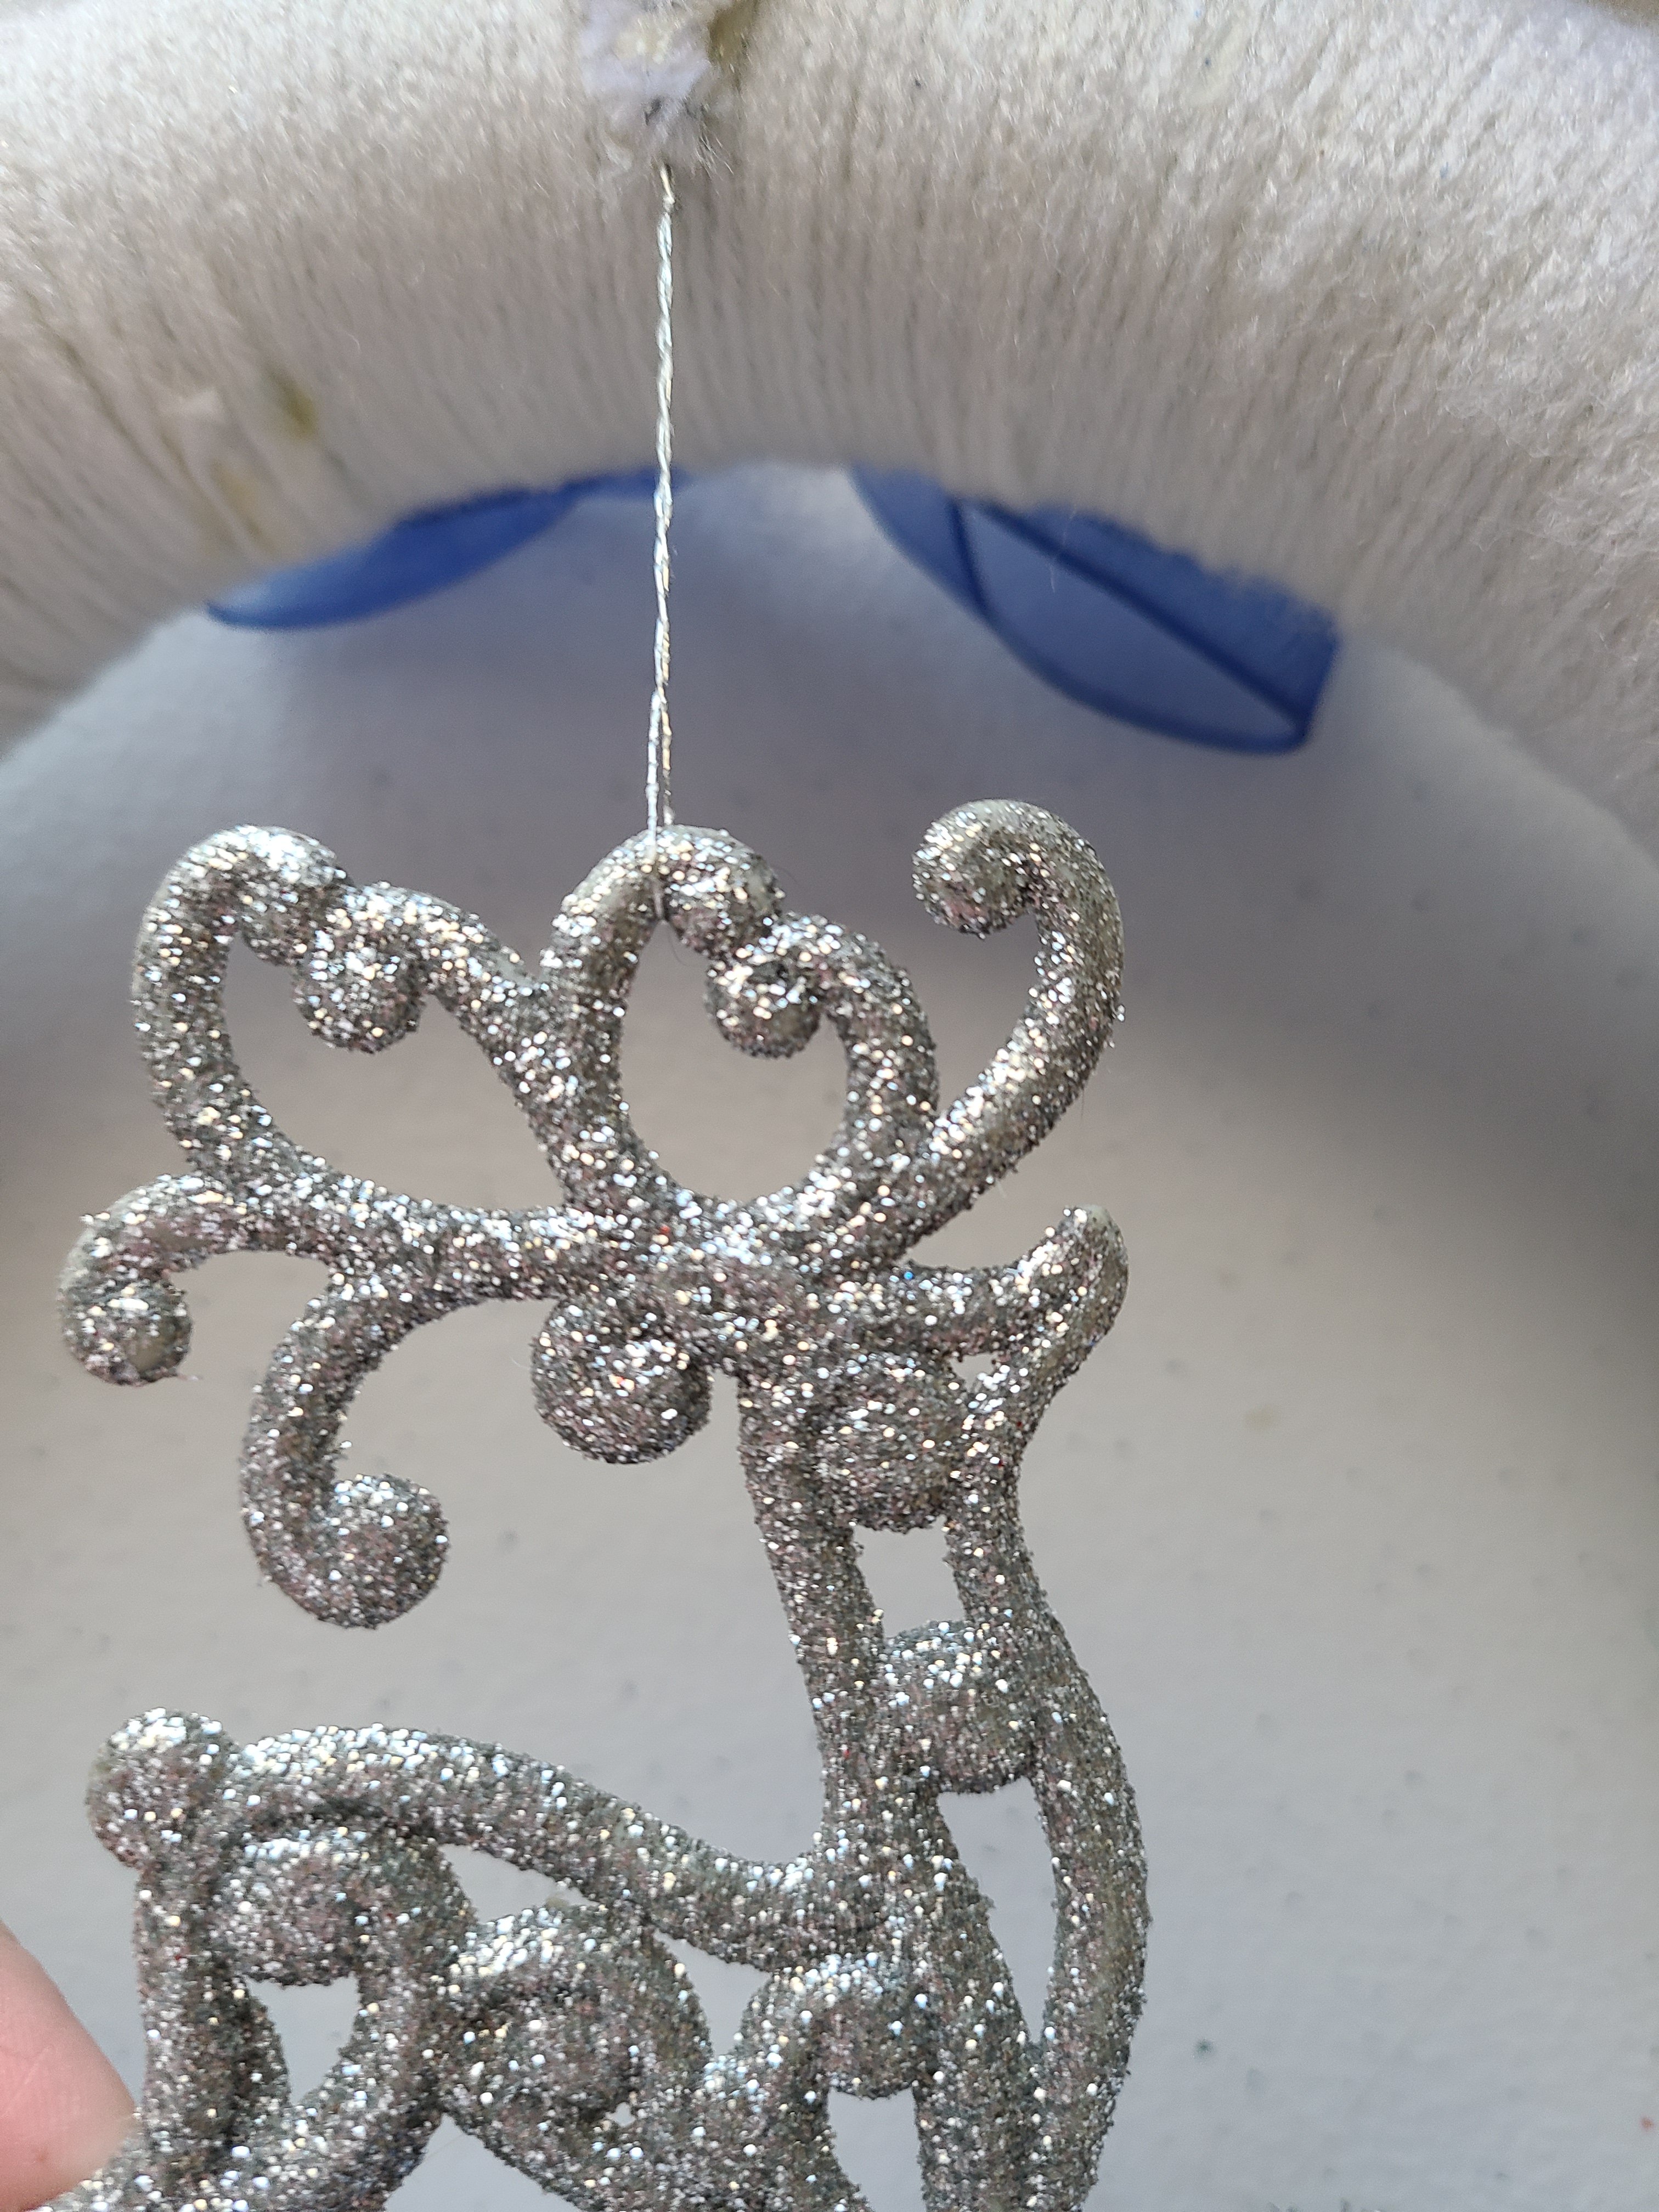
Hang the reindeer
Now you add your decorations to it. The glitter reindeer comes with a silver string for it to hang from. Glue the thin string to the back of the wreath, at the center of the top, so that the reindeer will hang in the center of the open space in the middle of the wreath. I just held it up in the back and moved it around until it looked centered, then glued.
Create your bow
Use the ribbon to make a simple bow, like tying your shoe or putting a bow in your hair. Hot glue the bow at the top in the middle. The center of the bow will be aligned with the string holding the reindeer on.

Remove two poinsettias from their stems and decide where you want to glue them onto your wreath form. I glued mine at the bottom, slightly left of the center. Overlap them slightly.
Make ribbon loops for embellishments
Next, make five loops just like you would for a bow, but only one loop, not two. Glue two above the top flower, one a little to the left of the top flower and one a bit to the right.

Lift up the flowers where they are overlapping slightly and put a dot of glue under them. You will glue one loop in the middle on the left and one on the right side.

This shows the top flower, the one you glued on first, and underneath it is the second loop on this left side. Lift the flowers where they overlap and put a dot of glue under it, then press the loop in to the glue. The bottom loop here is the one glued underneath the overlapping flowers on the right
side.


Lift the bottom flower a bit and add another dot of glue. Glue the final loop on the lower right side. Then create tails like you would on a normal flower. Cut them at the bottom into a half “V.” Glue them under the bottom flower where they will hang off the wreath a little.


You have completed your yarn wreath!

Four new DIY Christmas decorations!
You have four brand new items to add to your Christmas decor. Display them proudly because you did an amazing job! Please share this post and comment below. If you make any of these pieces, post your pictures in the comment section, I’d love to see them!
Follow Life as a LEO Wife on FB, Pinterest, Parler, Twitter, and MeWe.
If you liked this post you will definitely like these DIY Christmas decorations: Christmas wreaths for cabinets, this candy cane wreath tutorial, a Christmas light up wreath, my kitchen Christmas decor reveal, “Merry & Bright” wall art, and Christmas bathroom decor.
I hope you stop by soon as I will be posting Christmas content every day until Christmas!

Happiness is Homemade #547
Join us for Happiness is Homemade Link Party where you can share & be inspired by blog posts from bloggers around the world. You’ll find recipes, DIYs, crafts, home decor, fashion, gardening, & so much more!
Happiness is Homemade #546
Join us for Happiness is Homemade Link Party where you can share & be inspired by blog posts from bloggers around the world. You’ll find recipes, DIYs, crafts, home decor, fashion, gardening, & so much more!

8Happiness is Homemade #545
Join us for Happiness is Homemade Link Party where you can share & be inspired by blog posts from bloggers around the world. You’ll find recipes, DIYs, crafts, home decor, fashion, gardening, & so much more!

Happiness is Homemade #540
Join us for Happiness is Homemade Link Party where you can share & be inspired by blog posts from bloggers around the world. You’ll find recipes, DIYs, crafts, home decor, fashion, gardening, & so much more!
Happiness is Homemade #535
Join us for Happiness is Homemade Link Party where you can share & be inspired by blog posts from bloggers around the world. You’ll find recipes, DIYs, crafts, home decor, fashion, gardening, & so much more!

Happiness is Homemade #534
Join us for Happiness is Homemade Link Party where you can share & be inspired by blog posts from bloggers around the world. You’ll find recipes, DIYs, crafts, home decor, fashion, gardening, & so much more!
Happiness is Homemade #533
Join us for Happiness is Homemade Link Party where you can share & be inspired by blog posts from bloggers around the world. You’ll find recipes, DIYs, crafts, home decor, fashion, gardening, & so much more!
