
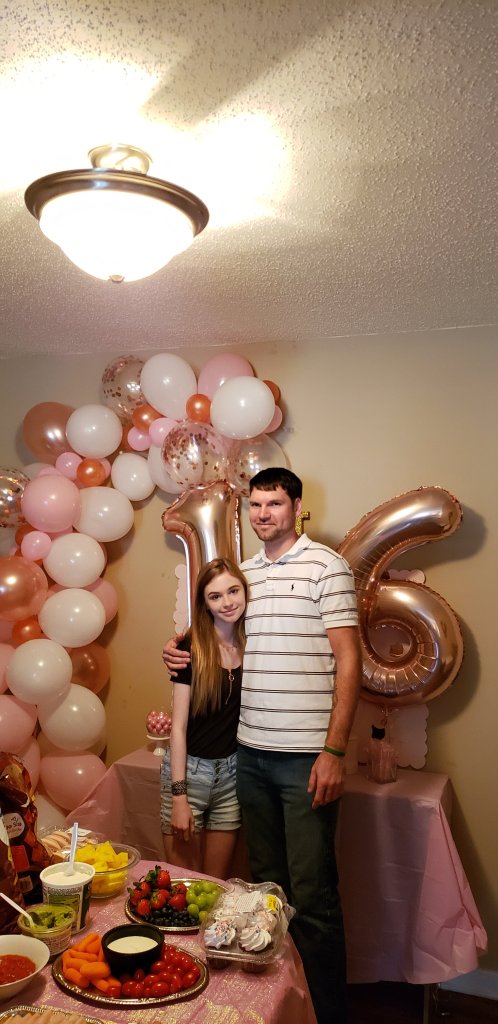
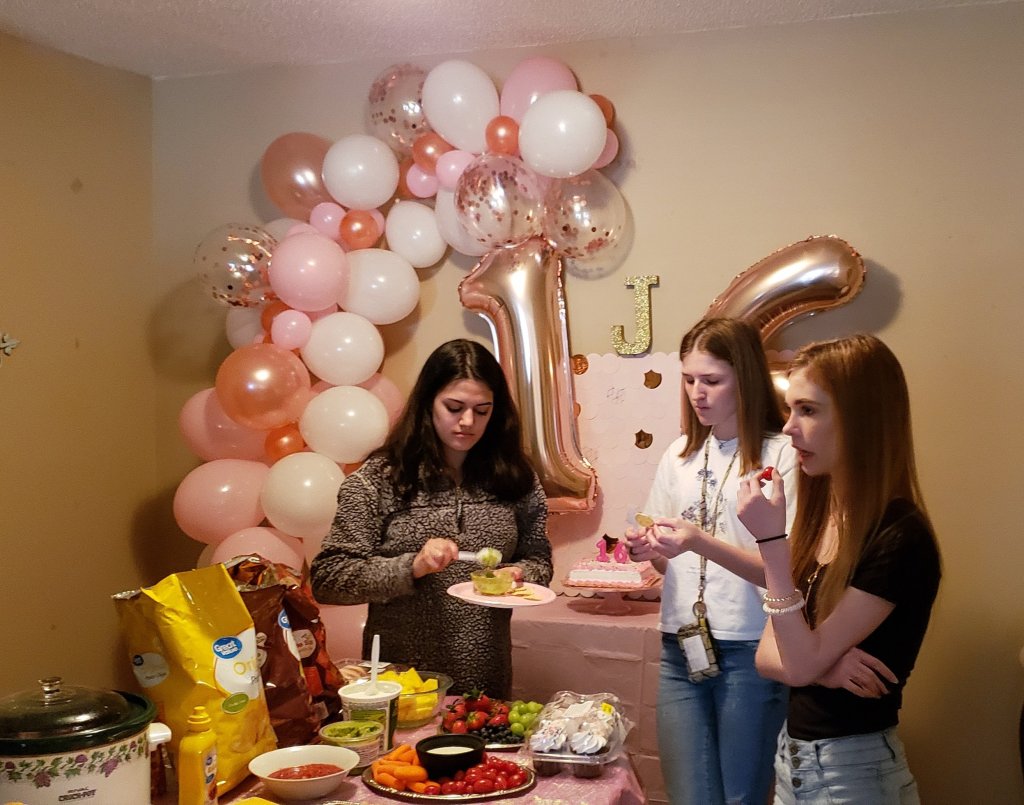
I made this scallop, or fish scale as some call it, wall art for my daughter’s sweet 16th birthday party. Since then I have used it as a headboard for my step-daughter’s bed. It’s pretty easy to do, just block off a few hours to make it and watch your new binge-worthy show.
For your scallop wall art you need:
- tri-fold cardboard project board (what you’d use in a science or reading fair)
- 2″ circle cutter (You can use a pair of scissors, but this device will shave hours off of your time.)
- glue stick (like Elmer’s)
- cardstock paper in your choice of colors- one pack of 8.5×11″ blush colors 100ct and 12×12″ patterned cardstock bought individually at a craft store or a Recollections 12×12 pack cardstock with a few sheets of your choice pattern (I used different shades of pink blush from a pack of Recollections 65lb 100ct. and one patterned pink with rose gold from a 12×12 along with a few pages of metallic rose gold. There were 3 sheets of the patterned and 3 sheets of the rose gold in the pack.)
- 12″ ruler (or longer)
- pencil

Begin to measure
The first step in making your scallop wall art is to measure lines that the bottom of the 2″ circle will sit. Align your ruler with the top of the board while it’s sitting flush with the left side of the board. Measure from the top of your board down and make a small line at the 1.75″ mark. Since the board is a lot wider than your ruler you will need to make the marks about every 8″ or so.
Once that is done across the entire width of the board you will go back to the start and line your ruler up starting on the first mark, then have the ruler horizontally aligned right on the marks. Connect the individual marks with a pencil running along the top of the ruler. Move the ruler to the next group of lines and connect those until you have a solid lined 1.75″ from the top of the board from the left side to the right.
Now you will work on the next line. Repeat the process above, but instead of making your 1.75″ marks from the top of the board, you will use your first line, making marks 1.75″ from it. Once all of the marks are made you will connect those by drawing your solid line with the ruler. It’s important to keep your marks and lines perfectly 1.75″ from the the row above. This is how you will keep your circles even across the board. The 2″ circles will slightly overlap the row above them.
Continue this every 1.75″ from the row above until you have completed the entire board with lines.


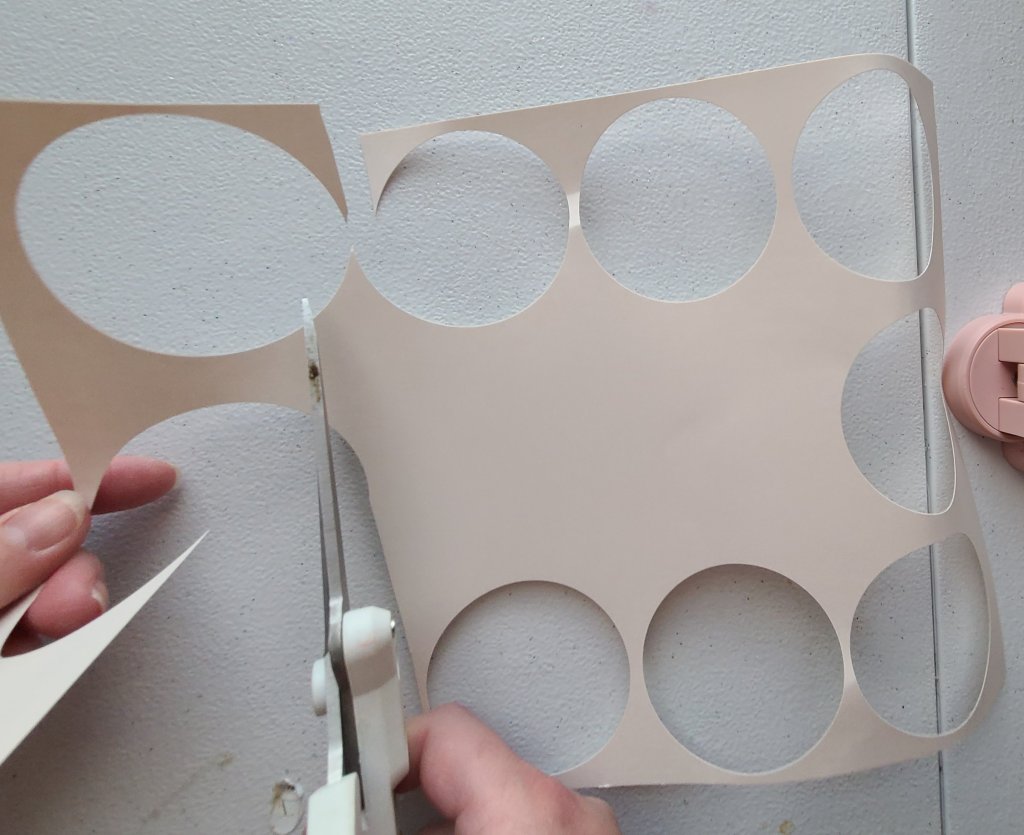
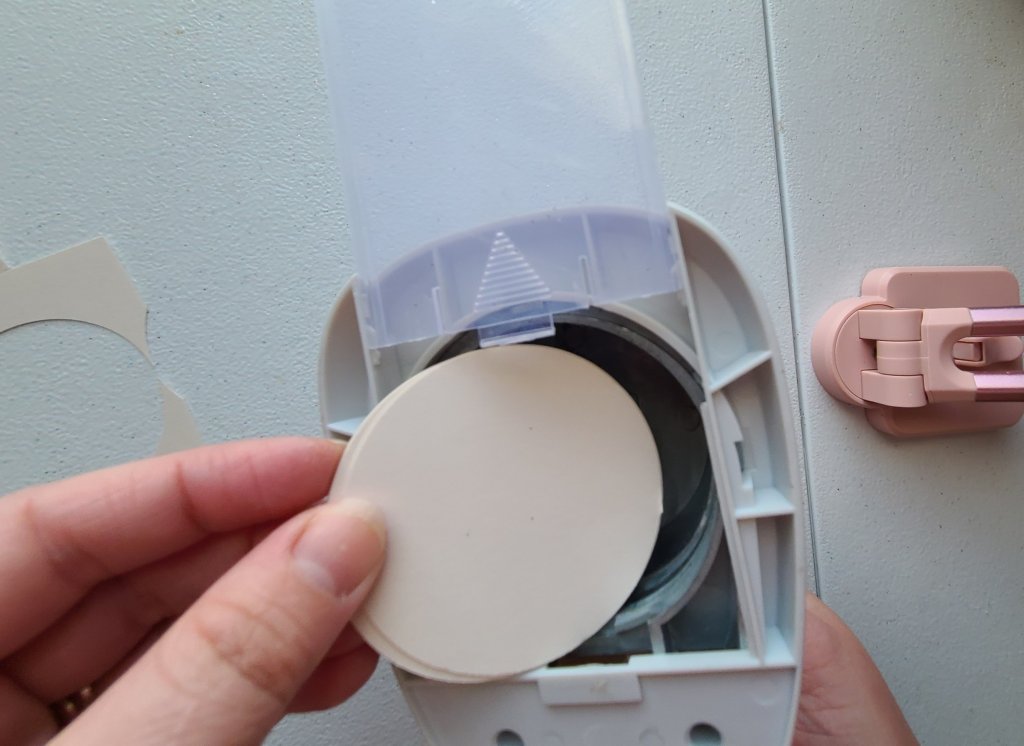
Using a manual circle cutter
Having the circle cutter is so, so much easier than trying to find something round that’s the appropriate size, then tracing around with a pencil, then cutting circle after circle with scissors. There’s no way really that you could cut every one perfectly either. However you can definitely try it if you can’t get one. I bought mine at Michael’s when they were half off and I paid $7.50 for it. Worth the investment! You could use a die cutting machine too. Using the manual cutter was quicker for me than using my Cricut.
Begin cutting circles for the scallop wall art
I could cleanly cut my circles using two pieces of paper stacked together. More than that stacked together really didn’t look good. Stack your two papers and slide them into the space for them. To get more circles from less paper, you need to make sure that your paper doesn’t show completely on one of the sides. Let about an eighth of an inch of the cutter show beyond your paper. (See what I mean in the pics below.)
Once the first circle is cut slide more of the paper through the slot, again leaving that quarter of an inch. You should get four circles from each side (like the left and right lengthwise), then one from the top between the two length-wise columns, and one on the bottom between them. If you cut the excess paper from the sides and top, you can get one from the middle. You just have to decide if that’s worth your time.
You will cut and cut, and think you have enough, then cut some more. When I had a good stack of them I began placing them on the board. When I ran out of my circles doing that, I cut more. You will probably have to do that too.


Glue your circles to the board to create the scallop wall art
Rub some Elmer’s glue from a glue stick on to the back of your first circle. Line the bottom circle up to the top pencil line. Let about an eighth of an inch of the circle hang off the left side of the board, then press it down to adhere it. Notice that a bit of the circle passes the top of the board. That’s ok, it’s what we want.
Put glue on your second circle and again line it up with the pencil line. Press it onto the board with a bit of the second circle overlapping the first like in the photo below.
Then continue across the first line.
Go ahead and share this to your social media so that you can come back to it when you are ready to make your own scallop wall art.

From the second line on to the rest of your scallop wall art
On the second line you will begin like the first line, but this time the first circle will only hang off the side by about a sixth of an inch (I wasn’t actually measuring with the ruler, but you get the drift). Make sure the bottom sits on your pencil line. The first line should be hanging off a little more than this second line. Glue your next circle with it overlapping the first as before. You need to make sure that the placement of your circles is precise. When you see that it covers the space between the circles on the line above, glue it right there. Boom- as soon as you cover it, not much extra. (No extra if you can help it!)
Move to the third line, which will line up with the circles on the first row. On the fourth line, it will line up more with the second. And on you go until you have your board completely filled. Seriously, find an amazing show to watch. I like to watch or listen to Perry Stone, an evangelical preacher. His teachings open my eyes to things I hadn’t realized when reading scripture. This is his YouTube channel.


Finito
Now look at your hard work. You have created a beautiful piece of scallop wall art! Be sure to store this flat. You worked too hard to crease it up.
Here are a few pictures of my daughter’s sweet 16 for your viewing pleasure. I hope this sparks your creative talents!

I hope you have enjoyed this tutorial and you make your own scallop wall art piece! Please like and comment below. We would love to see a picture of your own wall art in the comment section. Like and share lovely readers! Sharing is caring, cheesy right?
If you like this, you will probably enjoy my tutorial on matching hubby and wife initial wall art, or this lamp upcycle I did for my son. The first link after Twitter below is for Parler and the second is MeWe. WordPress doesn’t have logos for them yet. But your should definitely get an account on these social media sites. I like them.

A lot of thanks for sharing this article !!
Merry Christmas & Happy New Year
Thank you! Hope 2021 is great for you!