
Fall is rapidly approaching, and I’m so excited because I love fall! It’s not my favorite season because of any kind of coffee flavor. I’d rather thirst to death than drink coffee, ha. I love the smell and feel of fall, and of course, fall fashions! While I was deciding how to decorate our balcony for the season, I decided to make matching wreaths for each French door. So I went to the Dollar Tree to find some items that felt like fall. The wreaths ended up being not only super cute, but also easy to make! I made two easy DIY fall wreaths using Dollar Tree items for about $6.
To make easy DIY fall wreaths you need (from Dollar Tree unless noted*):
- 2 green styrofoam wreath forms
- 2.5″ fall theme wire ribbon (or you can use the pre-made bows like the one in the pic below)
- white yarn (or your choice of color)
- hot glue gun* and glue sticks
- scissors
- 10 pack styrofoam orange pumpkins
- pack of felt (I used green and yellow)
- pack of 3 metal words: thankful, welcome, & harvest

I ended up making bows for the wreaths instead of using the pumpkin prefabbed bows.


Wrap the Form with Yarn
To begin I wrapped the yarn around my hand. I was trying to make it easier to go around & through the wreath a million times with the big yarn skein. Later I realized it was much easier to wrap the yarn around something that I could easily pass back and forth through the middle, because once I pulled the yarn off my fingers, it became very easily tangled. I’ve wrapped them around lots of things in the past, but I’m pretty sure I’ve picked the perfect item this time. I used our Amazon Fire Stick TV remote. Just pull more yarn as you wrap it around an item that’s about 2.5″ across & 3/4″ thick. You can cut a piece of study cardboard which will work well.


Glue the start of your yarn onto the form. Pick one side of the form to be the back and do your gluing on that side. The Amazon remote was super handy since I was using it to binge-watch a show to pass the time while wrapping. That’s the longest part of the process. It’s not hard, just time consuming. If at any point you run out of yarn, just hot glue that end to the same side of the wreath you glued the yarn on in the beginning. Continue wrapping until the wreath is covered. Straighten any yarn on the front if it shifted while you worked.

Make & Add a Bow
You can use the bows shown in the picture of the supplies, but the ones I picked up kind of blended in with the white yarn. So I used a 2.5″ wired ribbon to make my own bow. The store had about three choices of ribbon for fall. For my wreaths I chose an orange organza type ribbon with orange glitter pumpkins & gold edging. That helped to break up the white. Find the place where you want your bow. I used mine to hide a little area where the yarn overlapped itself. Place hot glue on the back & press it down on your wreath

Add Your Metal Word
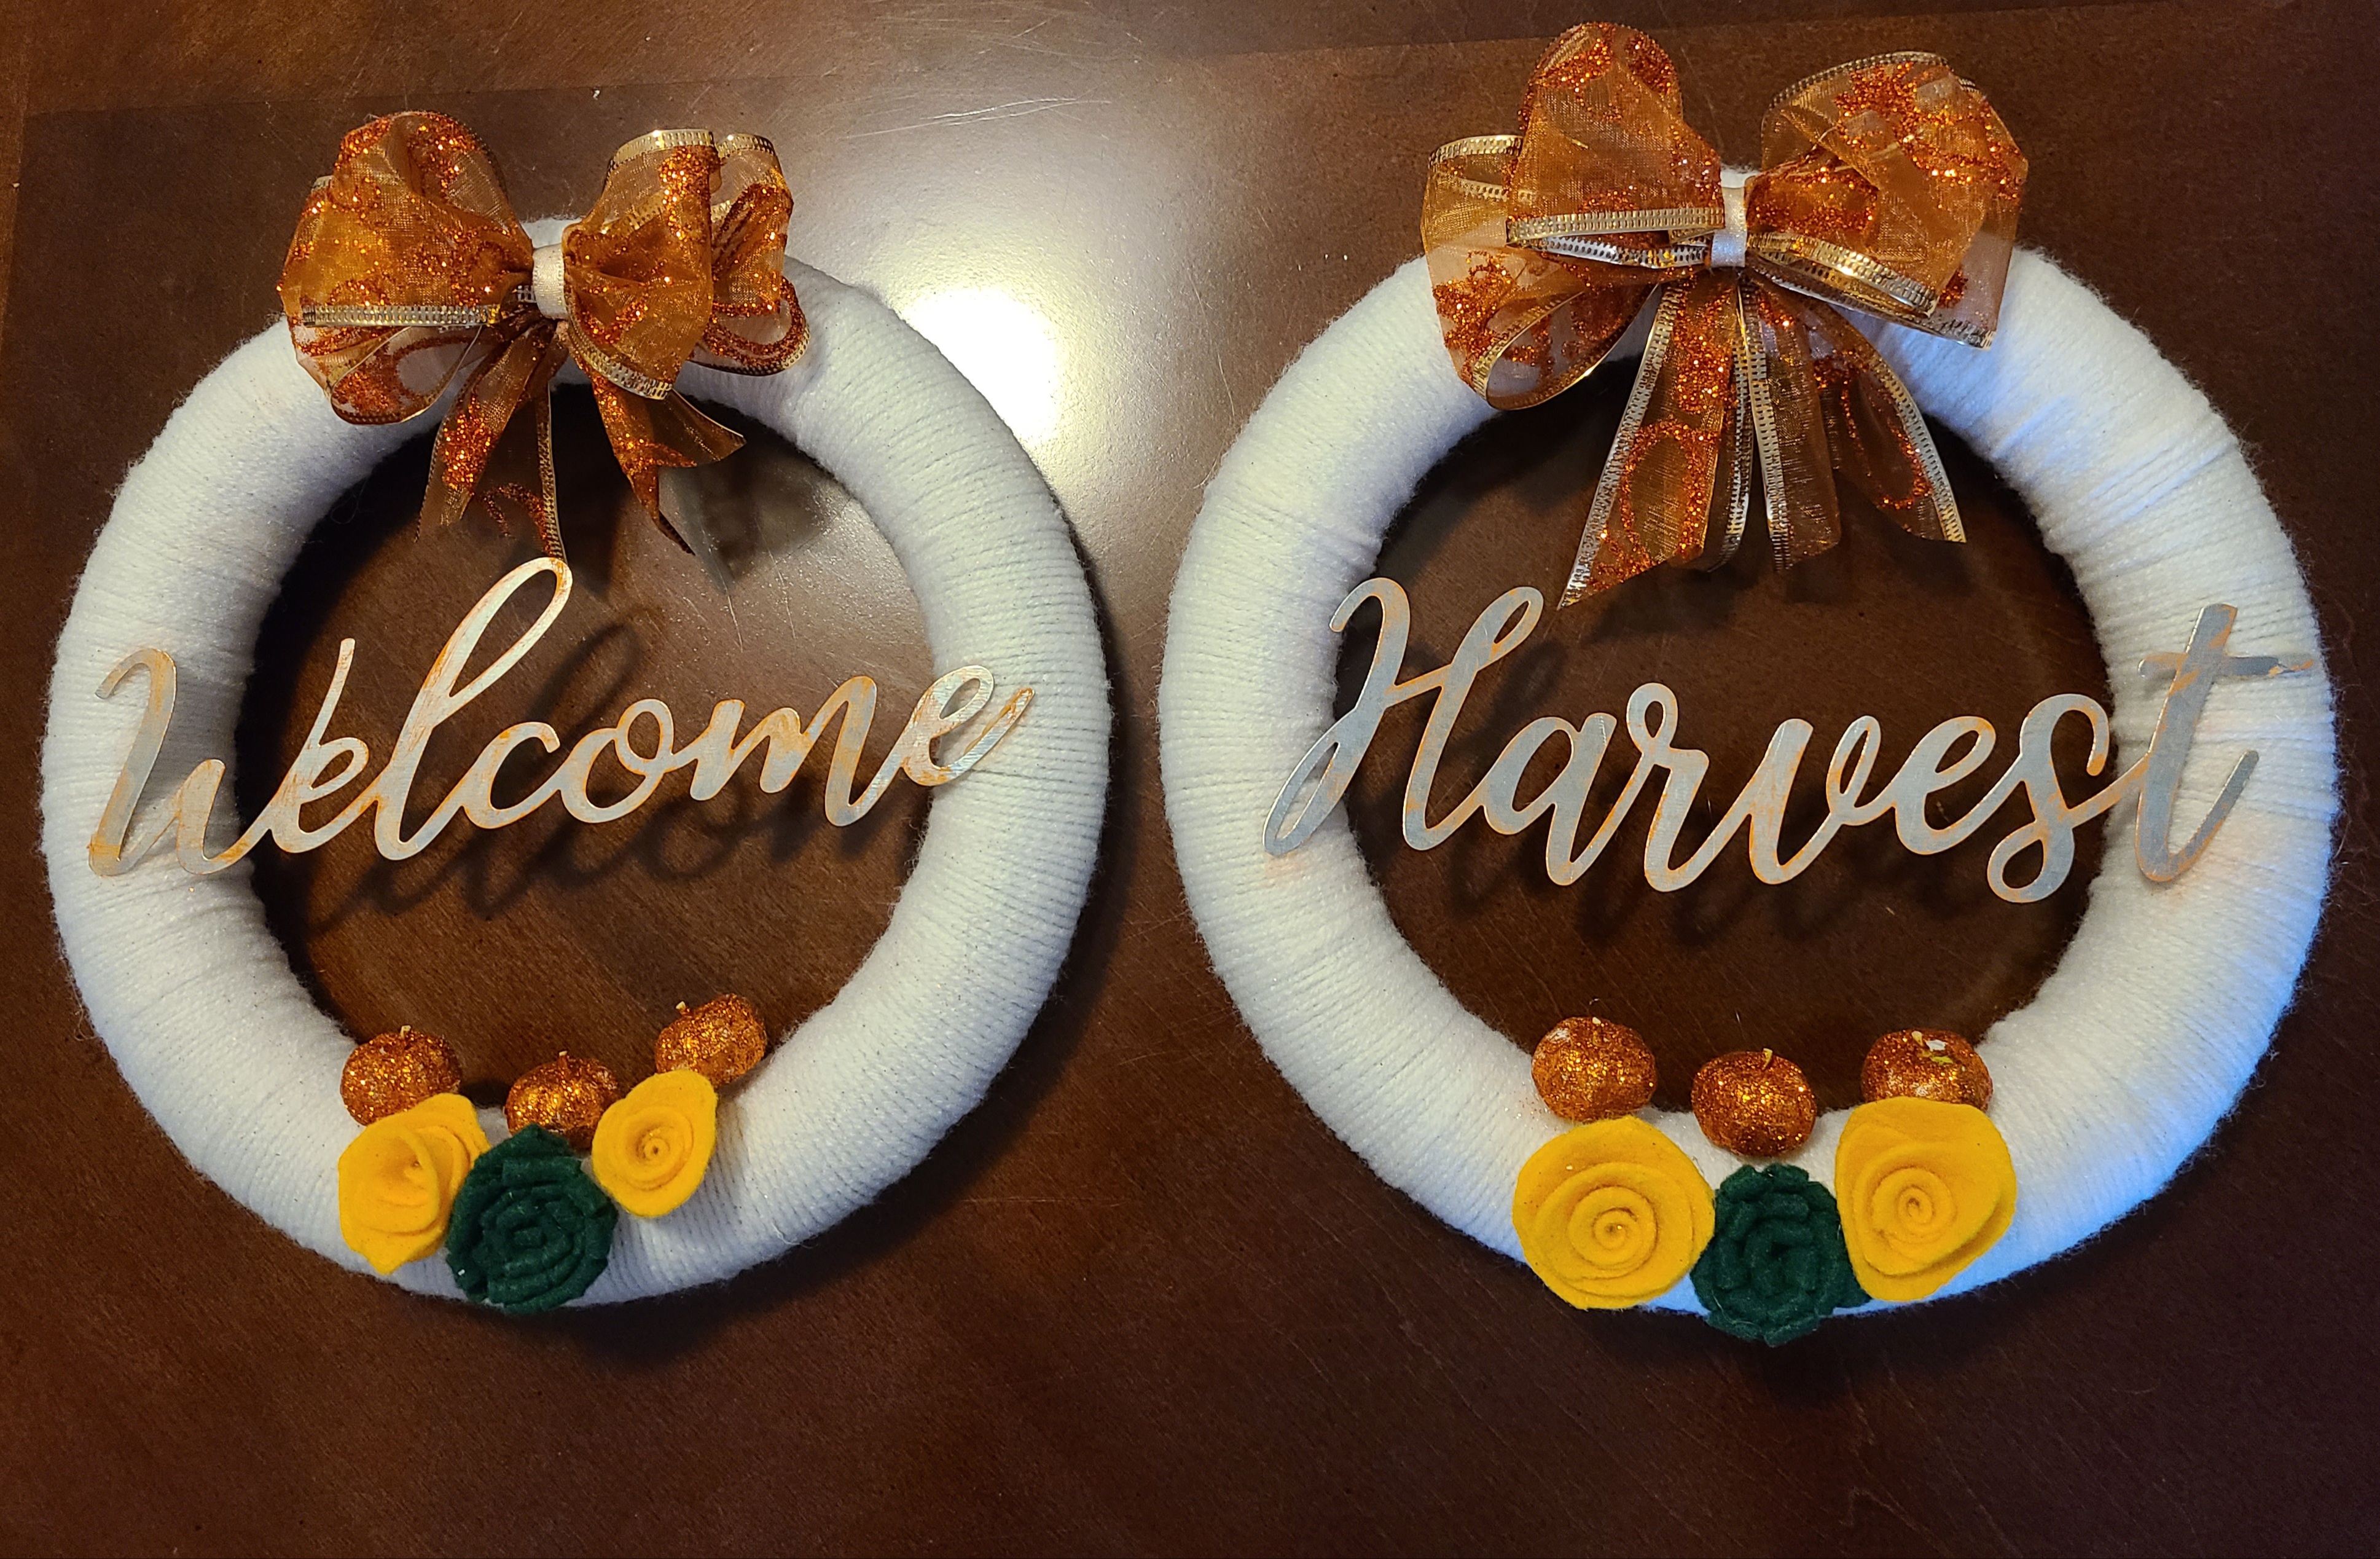
Next pick which metal word you’d like to add to your wreath. The pack came with the words, “Thankful,” “Welcome,” & “Harvest.” Since they were going outside, I decided to use welcome & harvest. Play around with where you’d like it placed. The bottom of the words on my wreaths are just below the middle, about 3.25″ from the bottom of the form. (Note- decide whether or not to paint them before gluing, read through the next few paragraphs.)

I was happy with them at that point in the process, but the galvanized silver of the metal kinda just blended in with the white yarn. So I decided to paint them bit. You should do this before you hot glue the words on your easy DIY fall wreaths. Lesson learned for me! I was going to paint them gold to match the edge of the ribbon, but I found the perfect orange (Spiced Carrots) going through my paint bins. I just dry brushed them a little & I really like it more than if they were painted solid. To do this, add a tiny amount of paint on a brush and brush most of it off on a piece of paper or towel. Then lightly run the brush over the word until you’re happy with it.

Add Embellishments
You can choose whatever you’d like to decorate your wreaths. Pinecones, buttons, leaves, etc. I chose to make felt flowers in fall tones. I made simple roses & zinnias. They’re so easy to make (you can see this post where I show you where to get a simple tutorial for these flowers). I used forest green felt to make the two zinnias & a mustard yellow for the roses. You should play around with their position before you glue them on. I probably moved mine fifty times before gluing them.
I found the cute little glittered pumpkins, & I got them because I knew I could find something to use them on. They’re actually floral picks, but I just cut the stick at the bottom of the pumpkin & trimmed down the “stem” on the top. They were ridiculously long! There were ten in the pack, and I used three for each wreath. Again, play around with where you want to put them.

If you are making matching wreaths, repeat the entire process with your second wreath. You can make them exactly the same just with different word, make them with felt flowers in different but coordinating colors, make one with white yarn and yellow flowers just like this and the other yellow with white flowers, etc. There are many ways they can coordinate. Use your imagination! I would love to see what you come up with so make sure you tag me on social media when you make one!
Your easy DIY fall wreaths are complete!

Finally make a hanger for them on the back. Cut about an inch of a chenille stem (pipe cleaner) for each wreath. Twist the two ends together at the bottom, leaving a small loop in the middle. Hot glue them onto the top backs, right where the middle of the bows are on the fronts.
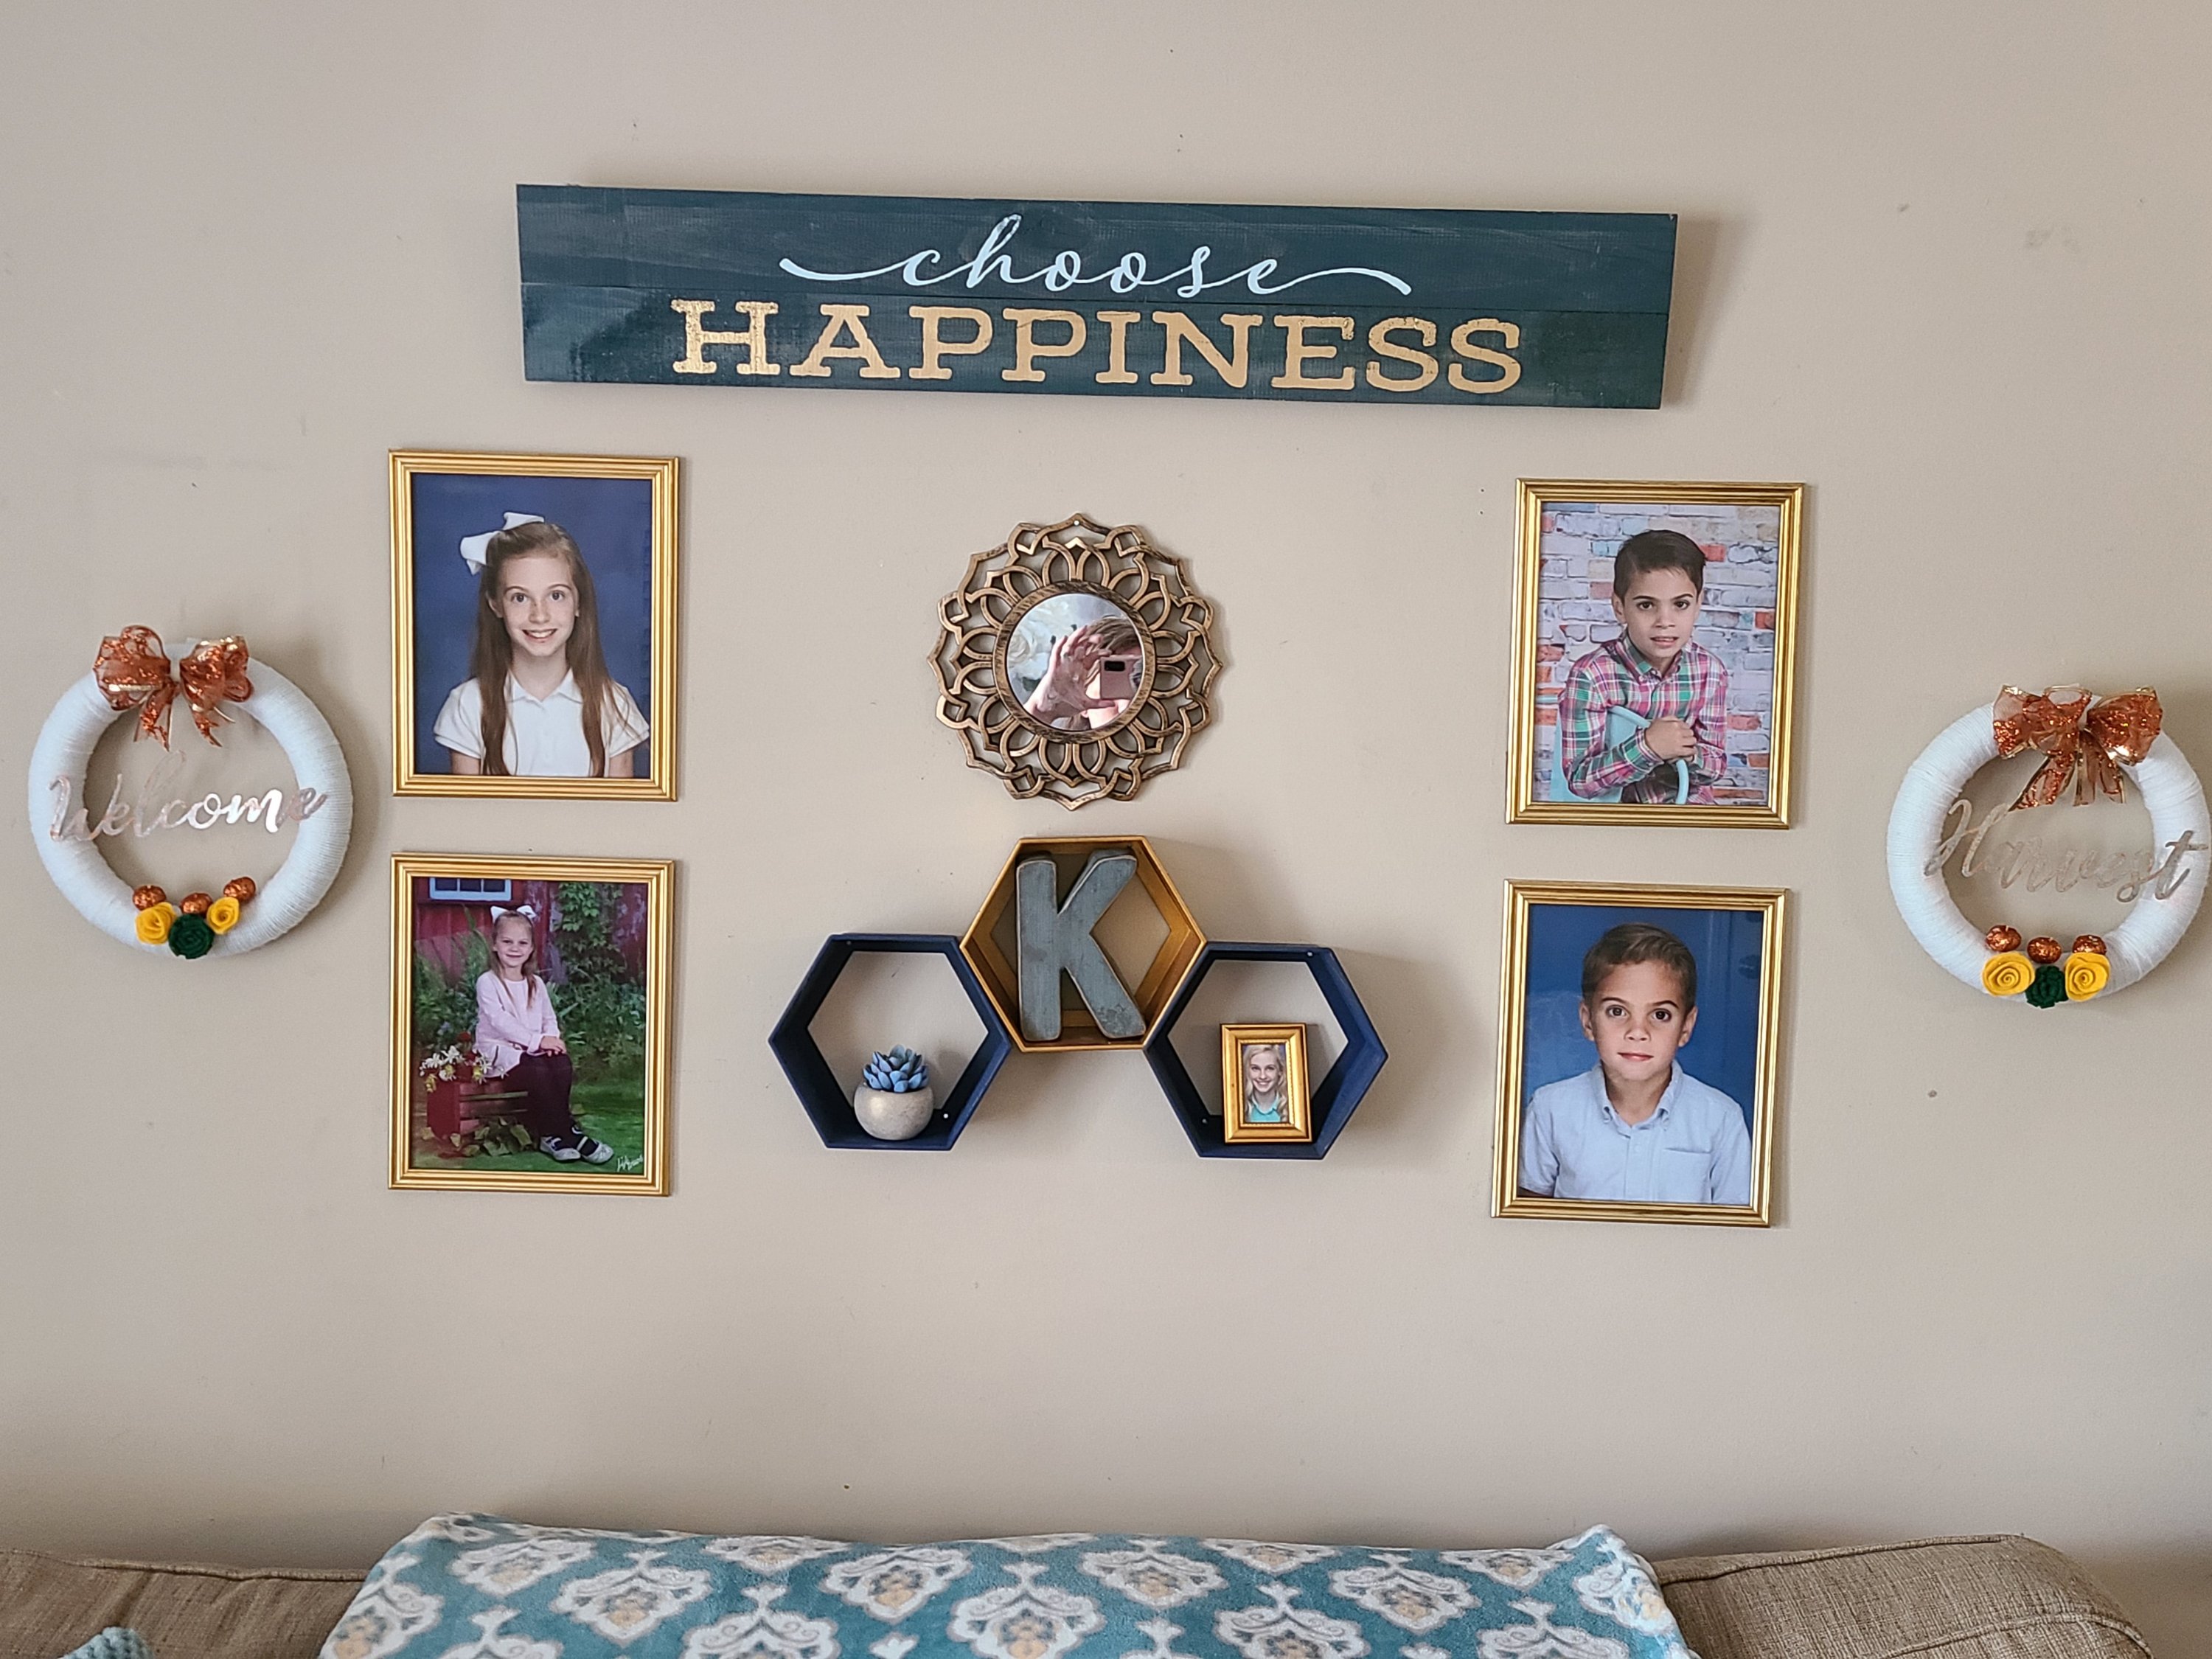
Congratulations friends! You have made two very beautiful wreaths to adorn your home during the fall. Don’t limit yourself by only placing them on doors. I have different wreaths (& different types of wreaths) in just about every room of our house.
Fall Decor & More
If you are decorating your home for fall, you will probably enjoy these posts & tutorials: these adorable reversible pumpkins that you can make to use for fall then Halloween or fall then Thanksgiving, these super cute reversible faux books to use for fall then Halloween or fall then Thanksgiving, and this super cute DIY fall farmhouse style centerpiece. You can make all of these fall decor pieces to match. Make sure to pin this post along with these listed here so that you can make them when you’re ready to!


I would love for you to follow me on social media using the buttons on the sidebar. Use the bottons at the bottom of this post to share this great tutorial with your friends and fam! I’m finally trying to grow my social media accounts and use them more now that I’ve got the technical side of blogging down a little better. Let me know in the comments or on social media if you follow, and I’ll give you a follow back! Tell your friends about me too so they can get all of these wonderful tutorials! Make sure you don’t miss anything by entering your email below. You’ll get an email each time a new post is added. You’ll never get any spam!
Don’t miss out on great tutorials, free printables, & other amazing posts!
Let me know in the comments if you have any questions & if you have any requests for tutorials or ideas for things you’ve found at Dollar Tree that you’d like to make into something! I love hearing from you!


I really enjoy your posts. Thanks for sharing!